After a construction project, your new space may look beautiful, but the floors often tell a different story. Dust, paint splatters, grout haze, and debris hide the true finish of your flooring. If you skip proper cleaning, these residues can damage surfaces, cause scratches, or make the floor look dull. Whether you are handling a home remodel or a new office build, knowing how to clean floors after construction is key to achieving a spotless, lasting result.
Many people underestimate post-construction cleaning. It’s not just about sweeping up dust. Each type of flooring—wood, tile, vinyl, or carpet—needs a different approach. Using the wrong method can actually ruin your floors. That’s why this guide covers everything you need: detailed cleaning steps for every floor type, smart tools, safe cleaning products, and expert tips for removing tough stains. You’ll also find solutions for common mistakes, plus advice on keeping your new floors in top shape.
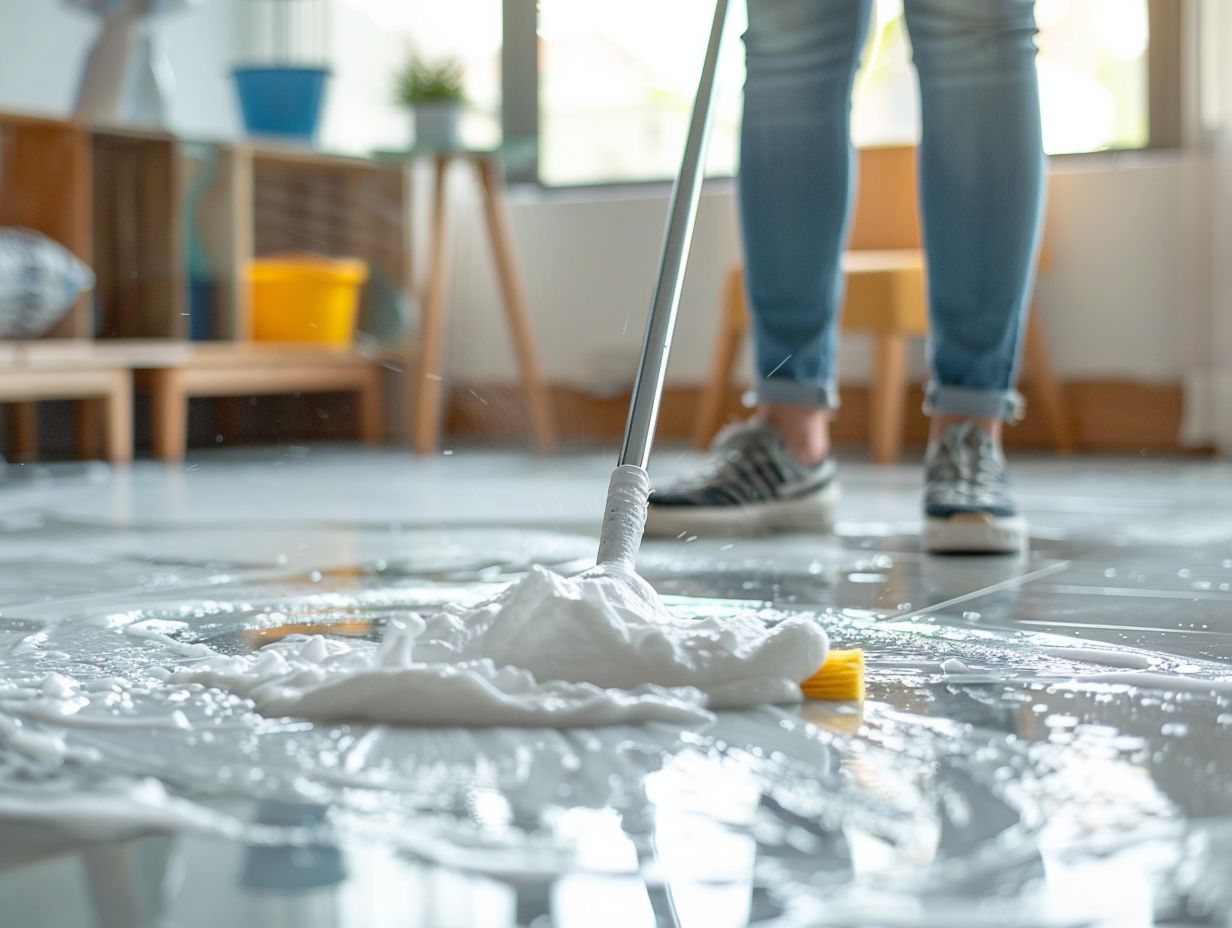
Let’s walk through the process step by step, so you can enjoy your new space with floors that look as perfect as the rest of your project.
Why Post-construction Floor Cleaning Is Essential
Construction dust and debris are more than just unsightly. Fine particles from drywall, cement, or sawdust can scratch surfaces, clog air vents, and even impact your indoor air quality. Grout haze can harden on tiles. Paint or adhesive drops, if left, can bond permanently. Without proper cleaning, your new floors may wear out faster, lose their shine, or harbor allergens.
A thorough post-construction cleaning:
- Protects your investment in new flooring
- Reduces health risks from dust and chemicals
- Prevents long-term damage and costly repairs
- Reveals the true beauty of your floors
Professional cleaners charge anywhere from $0. 20 to $0. 50 per square foot for post-construction cleaning. Doing it yourself can save hundreds, but only if you use the right methods.
Preparing For Post-construction Floor Cleaning
Before you start, plan your cleaning to avoid spreading dirt or damaging surfaces. Preparation is as important as the cleaning itself.
Gather The Right Tools And Supplies
You will need:
- HEPA vacuum (captures fine dust)
- Soft-bristle broom and dustpan
- Microfiber mops and cloths
- Buckets
- PH-neutral floor cleaner
- Plastic scrapers or putty knives
- Spray bottles
- Rubber gloves and protective eyewear
- Shoe covers (optional, to avoid tracking dirt)
For some floors, you may need specialty products like grout haze remover or adhesive solvent. Always check the floor manufacturer’s recommendations.
Safety Precautions
Construction dust can irritate your lungs and eyes. Wear:
- A dust mask or respirator
- Safety goggles
- Gloves
Ventilate the area by opening windows and running fans, if possible.
Clear The Area
Remove all tools, leftover materials, and large debris before you begin. Check for nails, screws, or sharp objects that can damage your vacuum or scratch the floor.

Credit: www.blockrenovation.com
Step-by-step Cleaning Process For All Floor Types
Every floor needs a basic cleaning before special treatment. Start with these universal steps:
1. Dry Cleaning
Use a HEPA vacuum to remove loose dust and particles. Go slowly to pick up fine debris, especially around baseboards and corners. For larger pieces, use a broom and dustpan, but vacuum afterward to catch what the broom misses.
2. Damp Wipe Down
Damp-mop the floor with a microfiber mop and water or a pH-neutral cleaner. Avoid soaking the floor—too much water can damage wood or vinyl. Change the mop water frequently to avoid spreading dirt.
3. Spot Treatment
Inspect the floor for stubborn spots: paint drips, glue, grout haze, or sticky residue. Tackle these with the right product and a non-abrasive pad. Test any cleaner on a small area first.
These steps remove up to 90% of post-construction debris. Now, target the special needs of your floor material.
Cleaning Different Floor Types After Construction
Each flooring material reacts differently to dust, moisture, and chemicals. Using the wrong method can cause permanent damage. Below, you’ll find a deep dive into the best practices for wood, tile, vinyl, laminate, and carpet.
Hardwood Floors
Hardwood is elegant but sensitive. Construction grit can scratch or dull the finish.
Cleaning Steps
- Vacuum with a soft brush attachment to avoid scratching.
- Use a microfiber dust mop to pick up fine dust.
- Clean sticky spots with a damp (not wet) microfiber cloth and a pH-neutral wood cleaner.
- Dry the floor immediately with a clean towel.
Pro Tips
- Never use steam mops or wet mops—they can warp wood.
- If paint drips are present, gently lift with a plastic scraper. For stubborn spots, a small amount of rubbing alcohol on a cloth can help, but test in an inconspicuous area.
- Apply a wood floor polish only after the surface is completely clean and dry.
Common Mistakes
- Using ammonia or harsh chemicals (these damage finish)
- Skipping the dry clean step (grit scratches the surface)
Tile And Stone Floors
Tiles are durable but grout haze, mortar, and dust can hide their shine.
Cleaning Steps
- Sweep or vacuum thoroughly.
- Mop with warm water and a pH-neutral tile cleaner.
- For grout haze, use a specialty remover or a solution of vinegar and water (for ceramic tile only, not natural stone).
- Scrub grout lines with a soft brush.
Removing Grout Haze
If you see a cloudy film, let the floor dry, then buff with a dry microfiber towel. For stubborn haze, use a grout haze remover as directed.
Pro Tips
- Never use acidic cleaners on natural stone—they can etch the surface.
- Seal grout after cleaning to protect from stains.
Common Mistakes
- Using metal scrapers (they scratch tile)
- Letting grout haze sit too long (it hardens)
Vinyl And Laminate Floors
Vinyl and laminate are popular because they’re affordable and easy to maintain, but both are sensitive to too much water.
Cleaning Steps
- Vacuum or dust mop the floor.
- Use a damp microfiber mop with a mild, pH-neutral cleaner.
- Dry the floor with a clean, dry towel.
Paint Or Adhesive Removal
Use a plastic scraper for dried paint. For sticky adhesive, apply a little rubbing alcohol to a cloth and gently rub. Never soak these floors.
Pro Tips
- Avoid steam cleaners—they can cause swelling.
- Use furniture pads before moving items back in.
Common Mistakes
- Using “all-purpose” cleaners with wax or oil (they leave residue)
- Over-wetting the floor
Carpeted Floors
Carpets trap dust and debris deep in the fibers. Construction dust is often fine and may not be visible, but it can trigger allergies.
Cleaning Steps
- Vacuum slowly with a HEPA vacuum, making several passes.
- For small debris (like nails), pick up by hand before vacuuming.
- Spot clean paint or glue with a carpet-safe remover.
- For heavy dust, consider a professional steam cleaning.
Pro Tips
- Change the vacuum bag or filter often—construction dust can clog them quickly.
- Avoid wet cleaning if there is still dust in the air; wait until the rest of the space is clean.
Common Mistakes
- Using water on glue-based carpet tiles (they can lift)
- Rubbing stains aggressively (spreads them)
Credit: www.constructionlawtoday.com
Removing Tough Construction Stains
Some messes need extra attention. Here’s how to handle the most common tough spots.
Paint Splatter
- On hard floors: Allow paint to dry, then gently lift with a plastic scraper. For latex paint, dampen with warm water and wipe. For oil-based paint, use a small amount of mineral spirits on a cloth, but test first.
- On carpet: Blot fresh spills with a dry cloth. For dried paint, use a carpet stain remover or seek professional advice.
Adhesive And Glue
- On hard floors: Freeze small spots with ice, then pry up with a plastic scraper. For larger areas, use an adhesive remover recommended for your floor type.
- On carpet: Avoid solvents—they may damage fibers. Instead, try blotting with warm soapy water.
Grout Haze
- On tile: Use a damp sponge and grout haze remover, following the product instructions. For mild haze, a mix of water and vinegar works for ceramic tile.
Caulk And Silicone
- Gently scrape with a plastic tool. For residue, use a silicone remover or a little rubbing alcohol.
How To Choose The Best Cleaning Products For Post-construction Floors
Not all cleaning products are safe after construction. Many commercial cleaners are too harsh and can strip floor finishes or discolor grout.
What Matters Most
- PH-neutral cleaners: Safe for most surfaces
- Non-abrasive formulas: Won’t scratch or dull
- Low-residue: Leaves floors shiny and streak-free
If you are unsure, check the floor manufacturer’s website for approved products.
Product Comparison
Here’s a quick comparison of common cleaning products for post-construction cleanup:
| Product Type | Best For | Surface Safety | Residue Level |
|---|---|---|---|
| pH-neutral floor cleaner | All floor types | Very high | Low |
| Vinegar solution | Ceramic tile | Medium (avoid stone) | Low |
| Grout haze remover | Tile/grout | High (if tile-safe) | Very low |
| Ammonia-based cleaner | None recommended | Low (damages finish) | Medium |
Pro Insight: Even “green” cleaners can contain oils or acids. Always test on a small, hidden spot first.

Credit: maggymaid.com
Cleaning Frequency And Maintenance After Construction
Once the initial cleaning is done, maintaining the floors is easier. For the first month after construction, dust can still settle. Plan to clean more often until all dust is gone.
Recommended Schedule
| Floor Type | First Week | Weeks 2-4 | Ongoing |
|---|---|---|---|
| Hardwood | Vacuum daily, damp mop twice | Vacuum 2-3 times/week | Weekly vacuum, monthly polish |
| Tile/Stone | Sweep daily, mop twice | Sweep 2-3 times/week | Weekly sweep/mop, seal grout as needed |
| Vinyl/Laminate | Dust mop daily | Dust mop 2x/week | Weekly dust mop |
| Carpet | Vacuum daily | Vacuum 2x/week | Weekly vacuum, annual steam clean |
Non-obvious tip: Construction dust can hide in HVAC vents. Replace air filters after cleaning and run your system to pull out hidden particles.
When To Call A Professional
Some situations are best left to experts:
- Large areas with heavy construction dust
- Floors with specialty finishes (e.g., oiled wood, terrazzo)
- Hazardous debris (e.g., lead dust, asbestos)
- Deep-set stains or odors in carpet
Professionals have industrial vacuums, specialty chemicals, and experience. They also know how to avoid damaging new floors. If your project was big, or you have allergies, consider hiring a post-construction cleaning service.
Common Mistakes To Avoid
Even experienced cleaners make errors after construction. Here are the biggest pitfalls:
- Using too much water on wood, laminate, or vinyl floors.
- Skipping the HEPA vacuum—regular vacuums can blow fine dust back into the air.
- Not changing mop water often—dirty water spreads grime.
- Using harsh chemicals like bleach or ammonia—they strip finish and discolor grout.
- Scrubbing with metal tools—they scratch most surfaces.
- Forgetting to clean corners and edges where dust collects.
- Rushing the process—thorough cleaning takes time.
Expert Tips For Lasting Clean Floors
A few advanced strategies can keep your floors looking new:
- Use entry mats at all doors to trap dust and grit.
- Place felt pads under furniture legs to prevent scratches.
- Control humidity with a dehumidifier in humid climates—this protects wood and reduces dust.
- Do a final dusting 1-2 weeks after cleaning; dust settles for days after construction.
Pro insight: Construction dust can act like fine sandpaper. Even after cleaning, avoid shoes indoors for the first few weeks.
Sustainable And Safe Cleaning Options
Many commercial cleaners contain strong chemicals. If you want a safer or greener approach:
- Use microfiber mops—they lift dust with less water or cleaner.
- Try a solution of water and a few drops of mild dish soap for most floors.
- For grout haze on ceramic tile, water and baking soda paste is effective.
- Open windows for ventilation instead of using chemical sprays.
Always dispose of dirty water and cleaning cloths safely. Construction dust may contain small amounts of hazardous materials.
How To Protect Your Floors After Cleaning
Preserving your clean floors is easier than cleaning them again. Here’s how:
- Wait at least 24 hours before placing rugs or furniture back on freshly cleaned floors.
- Check furniture for sharp edges; use pads or coasters.
- Avoid rolling heavy equipment across the floor.
- If painting or doing more work, cover floors with breathable drop cloths (never plastic, which traps moisture).
Real-life Example: Post-construction Cleaning Success
After a kitchen remodel, a homeowner found their wood floor covered with dust, paint drips, and adhesive. They used a regular vacuum and all-purpose cleaner, but the floor stayed sticky and dull. After learning the right method, they switched to a HEPA vacuum, a damp microfiber mop, and a wood-safe cleaner.
Paint and glue spots came off with gentle scraping. The floor regained its shine, and no damage occurred. The key was using the right tools, cleaners, and a patient, step-by-step approach.
Frequently Asked Questions
How Long Should I Wait To Clean Floors After Construction?
Wait until all major construction is finished and the area is clear of tools and workers. Dust continues to settle for a few days, so clean once, wait 24–48 hours, then clean again for best results.
What Is The Best Way To Remove Fine Dust From Floors?
A HEPA vacuum is the most effective for fine dust. Follow with a damp microfiber mop and a pH-neutral cleaner to pick up any remaining particles.
Can I Use A Steam Mop On New Floors?
Avoid steam mops on hardwood, laminate, or vinyl floors—they can cause warping or swelling. Steam mops are generally safe on tile and stone, but always check with your floor manufacturer first.
How Do I Get Rid Of Construction Adhesive Or Glue On Floors?
For hard floors, freeze small spots with ice and use a plastic scraper. For larger areas, use an adhesive remover made for your floor type. Avoid strong solvents on carpet or delicate surfaces.
Where Can I Learn More About Safe Cleaning Practices?
You can find more detailed guidelines and safety tips on the official EPA Indoor Air Quality page.
A clean, dust-free floor is the finishing touch your construction project deserves. By following these steps and using the right products, you’ll protect your investment and enjoy your new space to the fullest. Take your time—careful cleaning now means fewer problems later.