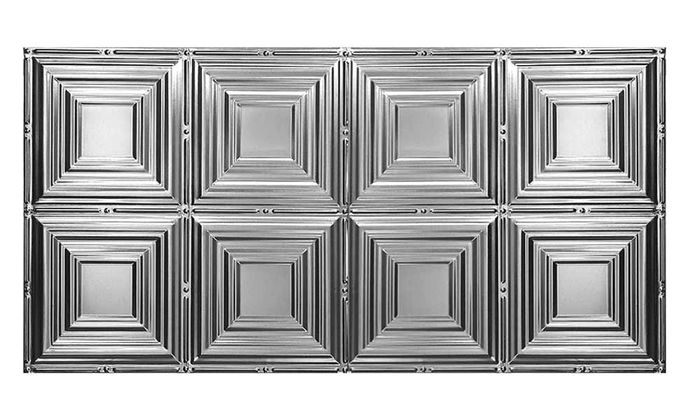
If you walk into a room with a tin ceiling, you immediately notice the unique patterns and the warm reflection of light. These ceilings are more than just decoration—they are a piece of history and craftsmanship. But to make tin ceiling tiles look their best and last for years, finishing them properly is essential.
Finishing is not just about beauty; it’s about protecting the metal, stopping rust, and making the surface easy to clean. Many people think finishing tin tiles is too hard or only for professionals. In reality, with some knowledge and the right steps, you can finish tin ceiling tiles and transform any room.
This guide will show you how to finish tin ceiling tiles from start to finish. You’ll learn about preparation, materials, painting, clear coating, and common mistakes. Along the way, you’ll discover tips even experienced DIYers sometimes miss. Whether you want a classic silver look, a bold color, or an aged patina, you’ll find everything here to create a ceiling that impresses.
Why Finish Tin Ceiling Tiles?
Finishing tin ceiling tiles is not just about looks. The right finish creates a barrier between the metal and the environment. This helps prevent rust, stains, and discoloration. Tin is a soft metal, and while it does not rust as quickly as iron, most tin ceiling tiles are made from tin-plated steel. That means they can rust if not protected.
A proper finish makes cleaning easier and keeps dust and grime from sticking. If you want to paint your tiles, the finish lets you add color and personality to your space. If you want a natural metallic look, a clear coat can bring out the shine and details.
Most important, finishing adds years to the life of your ceiling.
Types Of Finishes For Tin Ceiling Tiles
Choosing the right finish depends on your style, the room’s use, and your maintenance needs. Here are the main options:
1. Clear Coat
A clear coat protects the tin while letting the metal’s natural color and shine show through. It’s ideal if you love the classic tin look.
- Best for: Kitchens, bathrooms, or any space where moisture is a risk.
- Common products: Water-based polyurethane, lacquer, or acrylic sealers.
2. Painted Finish
Painting tin tiles opens up endless design options. You can match the ceiling to your walls or use a bold color as a feature.
- Best for: Living rooms, bedrooms, and feature ceilings.
- Paint types: Oil-based, water-based, or spray paints designed for metal.
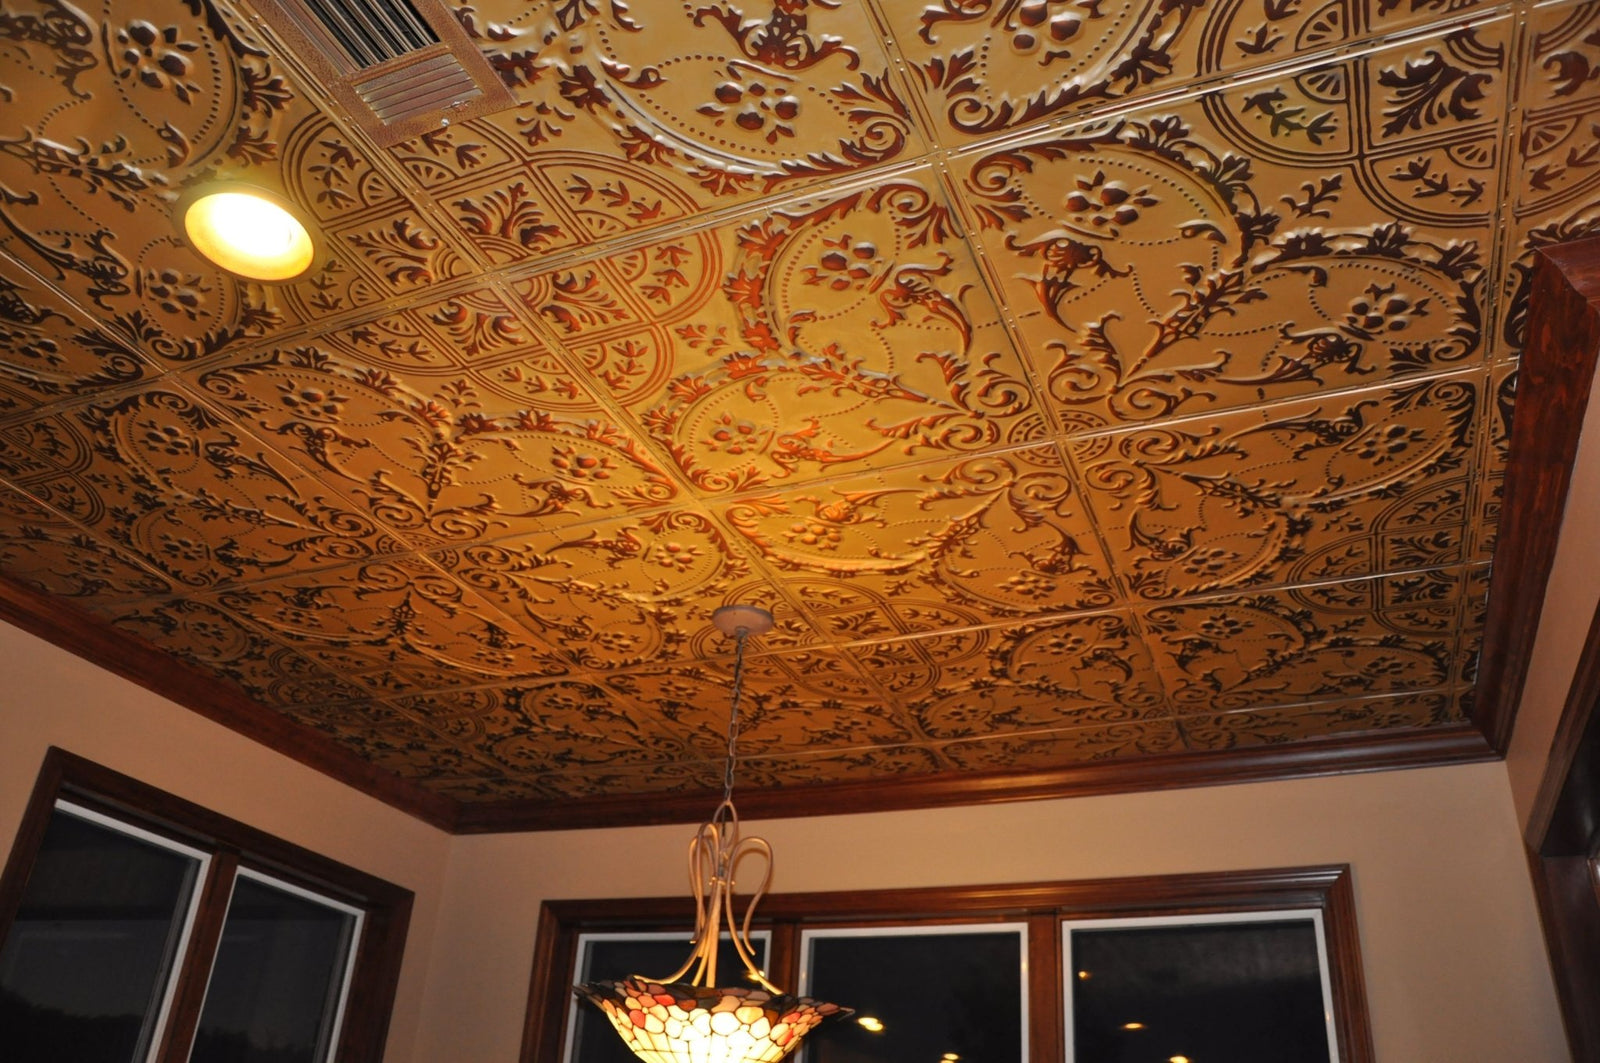
3. Aged/antique Patina
Some people prefer an old-world look, with darkened edges or soft highlights. A patina finish makes new tin tiles look vintage.
- Best for: Historic homes, restaurants, and anyone who loves a traditional style.
- Techniques: Chemical patinas, glazing, or faux finishing with paint.
4. Powder Coating (professional Only)
Powder coating gives a smooth, ultra-durable finish. It’s done in a workshop with special equipment. This is not a DIY method, but it’s used in commercial projects.
- Best for: High-traffic areas or where maximum durability is needed.
Tools And Materials You’ll Need
Before you start, gather all tools and materials. Having everything ready saves time and prevents mistakes.
Basic Tools
- Soft-bristled brush or vacuum with brush attachment
- Microfiber cloths
- Painter’s tape
- Drop cloths or plastic sheeting
- Small paintbrushes (angled and detail)
- Foam brushes or paint rollers (for large areas)
- Spray gun (optional, for even paint application)
Materials
- Mild detergent or degreaser
- Vinegar (for removing light rust)
- Fine steel wool (#0000 grade) or fine-grit sandpaper (320–400 grit)
- Metal primer (if painting)
- Paint (oil-based or water-based for metal)
- Clear coat (polyurethane, lacquer, or acrylic)
- Gloves and safety glasses
Pro Tip: Always use products labeled for metal surfaces. Some house paints or clear coats can peel or react with tin.
Preparing Tin Ceiling Tiles For Finishing
Preparation is the most important step. Poor prep leads to peeling paint, uneven finishes, or rust forming later.
Cleaning
- Dust the Tiles: Use a soft brush or vacuum to remove dust and cobwebs.
- Wash the Surface: Mix a mild detergent with warm water. Wipe each tile with a damp cloth to remove grease and dirt.
- Rinse and Dry: Use a clean, damp cloth to remove soap. Dry the tiles completely to avoid water spots.
If your tiles are new, they may have a thin layer of oil or factory coating. Wipe with a little vinegar or mineral spirits to remove it.
Rust Removal
Even small rust spots can grow if not removed. Here’s how:
- Light Rust: Rub gently with fine steel wool or fine sandpaper.
- Stubborn Rust: Apply vinegar with a cloth, let it sit for 10 minutes, then scrub and dry.
- Wipe Clean: Always remove dust after sanding.
Insight: Even invisible grease or fingerprints can stop paint and clear coat from sticking. Take cleaning seriously.
Repairing Dents And Scratches
Tin tiles can get small dents or scratches during handling.
- Small dents: Place a soft cloth behind the dent and press gently with your thumb.
- Deep scratches: Fill with a metal filler, sand smooth, and clean again.
Credit: www.proceilingtiles.com
Priming: Why And How
Priming is not always needed, but it can make your finish last longer. It helps paint stick and blocks stains.
When To Use Primer
- If you plan to paint
- If the tiles are bare steel (not pre-finished tin)
- If you want a uniform color
Choosing The Right Primer
Use a metal primer designed for non-ferrous metals (tin, aluminum, etc.). Oil-based primers are durable but have strong fumes; water-based are easier to use but may not be as tough.
How To Apply Primer
- Stir the primer well.
- Use a small brush for corners and designs.
- Roll or spray thin, even coats.
- Let each coat dry as directed (usually 2–4 hours).
Common Mistake: Skipping primer to save time. This often leads to peeling and rust later.
Painting Tin Ceiling Tiles
Painting is the most popular way to finish tin ceiling tiles. It gives you creative control and protects the metal.
Choosing Paint
Look for enamel paints or paints labeled for metal. Oil-based paints are durable and have a classic shine. Water-based paints are low-odor and easier to clean up but may need a topcoat for durability.
Spray paint is another option for a super-smooth finish.
Painting Steps
- Tape Off Edges: Use painter’s tape to protect walls and trim.
- First Coat: Apply a thin, even coat using a brush, roller, or spray gun.
- Detail Work: Use small brushes for intricate patterns.
- Second Coat: Wait for the first coat to dry fully before applying the next.
- Inspect: Look for drips or missed spots.
Insight: Always paint in thin layers. Thick paint fills details and causes drips.
Drying And Curing
Paint may feel dry to the touch in an hour, but it can take up to 7 days to cure fully. Avoid cleaning or touching the tiles during this time.
Achieving An Aged Or Patina Finish
Some people want their tin ceiling tiles to look old, not new. Here’s how to create that effect.
Chemical Patinas
Patina solutions react with the metal to create blues, greens, or browns. Follow the manufacturer’s directions and wear gloves.
Faux Painting
- Base Color: Paint the tiles with your main color and let dry.
- Highlighting: Use a contrasting color (like metallic gold) and lightly brush raised areas.
- Glazing: Mix paint with clear glaze, brush on, then wipe off quickly. This leaves color in the details.
- Sealing: Always finish with a clear topcoat to lock in the effect.
Example: For a classic aged look, try a dark brown glaze over silver paint, then rub off the high spots.
Non-Obvious Tip: Practice your patina technique on a spare tile before doing the whole ceiling.
Applying A Clear Coat
A clear coat is like a shield for your tin ceiling tiles. It can be glossy, satin, or matte.
Types Of Clear Coats
- Polyurethane: Very durable, available in water- or oil-based formulas.
- Acrylic: Low odor, easy to clean up, good for most rooms.
- Lacquer: Gives a high-gloss finish but can yellow over time.
Data Comparison:
| Finish Type | Durability | Gloss Level | Ease of Application |
|---|---|---|---|
| Polyurethane | High | Glossy/Satin | Moderate |
| Acrylic | Medium | Matte/Glossy | Easy |
| Lacquer | High | Very Glossy | Advanced |
Application Steps
- Stir the clear coat gently (do not shake).
- Use a foam brush or roller for large areas.
- Apply thin, even coats.
- Allow to dry as directed (usually 2–4 hours between coats).
- Apply at least two coats for best protection.
Pro Insight: Always test the clear coat on a small area. Some clear coats can darken or change the color of metallic paints.
Credit: metalceilingexpress.com
Installing Finished Tin Ceiling Tiles
Many people finish their tiles before installing. This keeps the work area clean and prevents drips on walls or floors.
Pre-finishing Vs. Post-installation Finishing
Pre-finishing (finishing before installation) is often easier for small projects. You can lay tiles flat and work in a well-ventilated area.
Post-installation finishing is needed if you want to hide seams or if tiles are already in place.
Comparison Table:
| Method | Pros | Cons |
|---|---|---|
| Pre-Finishing | Easy access, less mess, better control | Tiles can be scratched during installation |
| Post-Installation | Seamless look, touch-ups possible | Harder to reach, risk of drips on walls/floor |
Tip: If you pre-finish, handle tiles with gloves to avoid fingerprints.
Maintenance After Finishing
A well-finished tin ceiling is low-maintenance, but some care is still required.
Cleaning
- Dust regularly with a soft brush or microfiber cloth.
- For stains, use a damp cloth with mild soap. Avoid harsh chemicals.
- Never use abrasive pads or powders.
Touch-ups
If you see a scratch or chip:
- Clean the area well.
- Use a small brush to add paint or clear coat.
- Let dry completely.
Long-term Care
- Inspect for rust once a year, especially in kitchens and bathrooms.
- Re-coat clear finish every 5–10 years for best protection.
Non-Obvious Insight: Ceiling tiles above stoves or showers need extra care. Steam and grease can break down finishes faster.
Common Mistakes And How To Avoid Them
Even careful DIYers can run into problems with tin ceiling tiles. Knowing what to watch for can save you time and money.
1. Skipping Prep
Many people rush to paint or clear coat without cleaning properly. This leads to peeling and uneven surfaces later.
2. Using The Wrong Paint
House paints not made for metal can peel or react with tin. Always read the label.
3. Applying Thick Coats
Thick paint or clear coat fills in fine details and causes drips. Thin layers are always better.
4. Ignoring Drying Times
Handling tiles before they are fully cured can leave fingerprints, smudges, or cause the finish to fail.
5. Not Testing On A Spare Tile
Every product and method can look different. Testing on a spare tile prevents surprises.
Summary Table:
| Mistake | Problem Caused | How to Avoid |
|---|---|---|
| Skipping Prep | Poor adhesion, peeling | Clean and sand every tile |
| Wrong Paint | Cracking, peeling | Use paint for metal |
| Thick Coats | Loss of detail, drips | Apply thin layers |
| Short Dry Time | Marks, ruined finish | Wait for full curing |
| No Test Tile | Unexpected results | Always test first |
Advanced Tips For A Professional Finish
If you want your ceiling to stand out, consider these advanced tricks:
- Use multiple colors: Highlight patterns by brushing gold or copper paint on raised areas.
- Try a matte clear coat for a more modern look, or high-gloss for a dramatic effect.
- Add LED lighting to bring out the texture and shine.
- For large projects, use a spray gun for an even, factory-like finish.
Environmental And Safety Considerations
Finishing tin tiles involves chemicals and dust. Protect your health and the environment.
- Always work in a well-ventilated area.
- Wear gloves and safety glasses.
- Dispose of paint and cleaners as recommended—never pour down the drain.
- If using spray paint or clear coat, consider a respirator mask.
For more safety and environmental info, check the EPA Safer Choice program.
Frequently Asked Questions
How Long Do Tin Ceiling Tiles Last After Finishing?
When finished and maintained properly, tin ceiling tiles can last 50 years or more. Regular cleaning and recoating every 5–10 years will keep them looking great.
Can I Install And Finish Tin Ceiling Tiles In A Bathroom Or Kitchen?
Yes, but extra care is needed. Use a moisture-resistant primer, paint, and clear coat. Check for rust regularly and clean often to prevent damage from steam and grease.
What’s The Best Way To Fix Scratches Or Chips In The Finish?
Clean the area, let it dry, then touch up with matching paint or clear coat using a small brush. For deeper scratches, use a metal filler before painting.
Can I Use Water-based Products On Tin Ceiling Tiles?
Water-based primers and paints can be used if labeled for metal, but always seal with a clear coat. Oil-based products are more durable for high-moisture areas.
Is It Better To Finish Tin Tiles Before Or After Installation?
Pre-finishing is usually easier and provides better coverage. However, if you need to hide seams or the tiles are already installed, you can finish them in place. Protect walls and floors from drips during this process.
Finishing tin ceiling tiles takes time and care, but the results are worth it. With the right tools, materials, and steps, you can protect your investment and create a ceiling that draws attention for all the right reasons. Whether you love the shine of bare metal, the drama of color, or the charm of aged patina, a well-finished tin ceiling is an upgrade that lasts for decades.

Credit: www.americantinceilings.com