Cutting Lifeproof flooring can seem like a big challenge, especially if you have never worked with vinyl plank flooring before. Many homeowners and DIYers worry about making mistakes, ruining planks, or ending up with rough edges. But with the right tools, techniques, and preparation, you can make clean, accurate cuts that fit perfectly in your space.
Whether you are installing Lifeproof flooring in your living room, kitchen, basement, or bathroom, understanding how to cut it properly will make the entire installation smoother and more professional-looking.
This guide covers everything you need to know about cutting Lifeproof flooring. You will learn about the types of tools you can use, how to measure and mark planks, and step-by-step instructions for straight, curved, and tricky cuts. We will also look at common mistakes, safety tips, and advanced tricks that can save you time and money.
If you want your floors to look seamless and last for years, the way you cut each plank truly matters.
Understanding Lifeproof Flooring
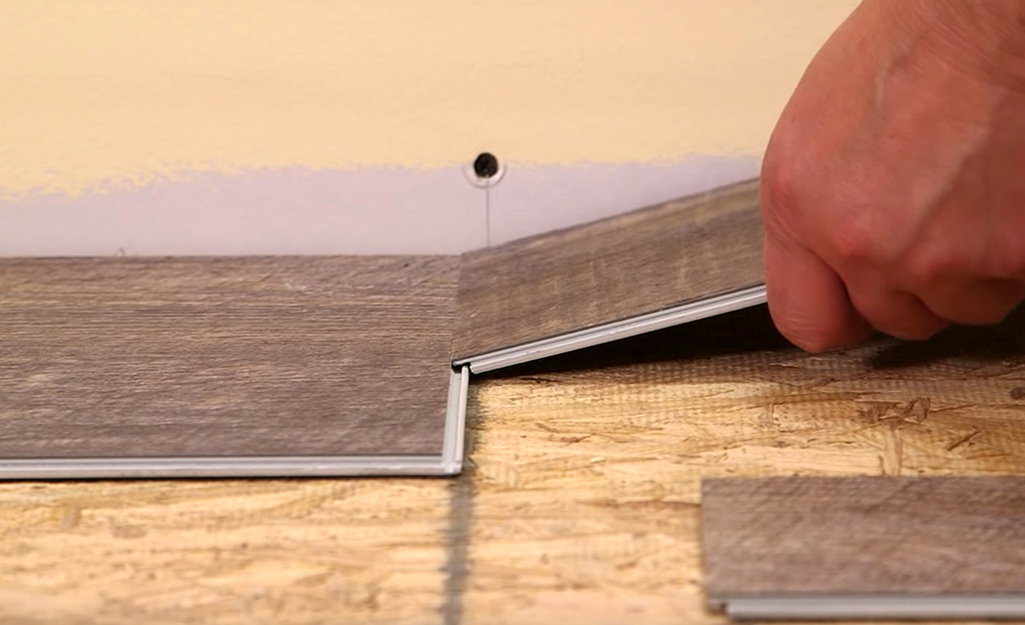
Lifeproof flooring is a type of luxury vinyl plank (LVP) that is designed to be waterproof, durable, and easy to install. It is popular for both DIY and professional installations because it clicks together without glue or nails, making it a “floating floor” system. The planks have a rigid core, often called ISOCORE, which gives them extra strength and makes them feel solid underfoot.
Key Features Of Lifeproof Flooring
- Waterproof: Ideal for kitchens, bathrooms, and basements.
- Scratch-resistant: Good for homes with pets or children.
- Easy to clean: Needs only regular sweeping and occasional mopping.
- Thick wear layer: Provides durability for high-traffic areas.
- Click-lock system: Makes installation faster and easier.
Lifeproof planks come in different sizes, thicknesses, and wood-look designs. The rigid core makes them tougher than flexible vinyl tiles, but also means you need the right tools to cut them without chipping or cracking.
Tools Needed For Cutting Lifeproof Flooring
Choosing the right tool is the first important step. The best tool depends on the type of cut, your experience, and what you have available. Here’s a summary of the most common tools, with their pros and cons:
| Tool | Best For | Pros | Cons |
|---|---|---|---|
| Utility Knife | Straight cuts | Cheap, quiet, safe for beginners | Harder for thick planks or curves |
| Laminate Cutter | Quick, straight cuts | No dust, fast, no electricity needed | Costs more, cannot do curves |
| Jigsaw | Curves and notches | Versatile, handles shapes | Noisy, creates dust, needs practice |
| Miter Saw | Angle cuts | Accurate, fast | Bulky, expensive, not for curves |
| Circular Saw | Multiple straight cuts | Fast, good for big jobs | Loud, more dangerous |
| Oscillating Multi-Tool | Small notches/trims | Precise, good for detail work | Slow for big cuts |
Must-have Tools And Supplies
- Tape measure: For accurate measurements.
- Pencil or chalk: For marking cut lines.
- Straightedge or square: Helps guide your cuts.
- Safety glasses and gloves: Protect your eyes and hands.
- Dust mask: When using saws indoors.
Even if you use just a utility knife, you will need a way to measure, mark, and protect yourself. The right setup prevents accidents and wasted material.

Credit: www.youtube.com
Planning And Measuring Before You Cut
Many beginners rush into cutting and end up wasting planks because of simple mistakes. Careful planning saves time and money—and gives a better-looking floor.
How To Measure Accurately
- Measure twice, cut once: Always double-check your measurement before cutting.
- Account for expansion gaps: Lifeproof flooring needs a 1/4-inch gap around walls and fixed objects. This prevents buckling as the floor expands and contracts.
- Mark from the correct side: Mark your cut line on the side of the plank that will be visible after installation, so you know exactly where the cut will show.
Marking Your Cut
Use a sharp pencil or fine-tip marker for clear lines. For straight cuts, lay a speed square or carpenter’s square across the plank to guide your mark. For curved cuts (around door frames or pipes), create a paper template first to trace the shape accurately.
Pro Tip
Always lay out a full row of planks before cutting any. Sometimes, small adjustments are needed to balance plank widths at the walls. Cutting all the short pieces first can lead to uneven or awkward-looking rows.
How To Cut Lifeproof Flooring: Step-by-step
Let’s break down the main types of cuts you’ll need during your Lifeproof flooring installation, along with the best methods for each.
Straight Cuts With A Utility Knife
This is the most common cut, especially for fitting planks at the ends of rows or against walls.
- Place the plank on a flat surface.
- Measure and mark your cut line using a tape measure and square.
- Score the top surface along the line with a sharp utility knife. You do not need to cut all the way through.
- Snap the plank: Lift the plank and bend it over your knee or the edge of a workbench. It will snap cleanly along the scored line.
- Cut the backing: If the plank does not break fully, run the knife through the bottom layer to finish.
This method works best for straight, full-width cuts. Always use a fresh blade for clean results.
Using A Laminate Flooring Cutter
A laminate cutter works like a big paper cutter. You place the plank, align the cut line, and pull the handle down. It slices through the plank with little effort and no mess. This is a favorite tool for big jobs or if you want to avoid sawdust.
Laminate cutters are available for rent at many home centers. They are especially useful if you have a lot of planks to cut, but they cannot handle curves or notches.
Curved And Notched Cuts With A Jigsaw
You will often need to cut curves—for example, to fit around door frames, vents, or pipes.
- Trace the shape onto the plank using a template or by holding the plank in place and marking the outline.
- Clamp the plank to a sturdy table for safety.
- Use a fine-tooth blade in your jigsaw. Blades for laminate or metal work best.
- Cut slowly along the line, letting the saw do the work. Rushing can cause chipping.
- Sand edges if needed for a smoother fit.
A jigsaw is the tool of choice for tricky shapes. If you do not have a jigsaw, an oscillating multi-tool can also handle small notches.
Angle Cuts With A Miter Saw
Some rooms or installations require angled cuts, such as for diagonal layouts or fitting planks at staircases.
- Set the desired angle on your miter saw.
- Hold the plank firmly and cut through in a single smooth motion.
- Clean up any burrs with fine sandpaper.
A miter saw makes angle cuts fast and accurate, but always keep your fingers clear of the blade and wear safety glasses.
Multiple Straight Cuts With A Circular Saw
When cutting many planks to the same length, a circular saw with a fine-tooth blade can speed up the process.
- Set up a straightedge guide to keep cuts straight.
- Clamp planks together to cut several at once if possible.
- Cut with the decorative side up to reduce chipping.
Circular saws are powerful but create lots of dust, so work outdoors or in a well-ventilated area.
Small Notches With An Oscillating Multi-tool
For small detail work—like trimming a corner or cutting under a door jamb—an oscillating tool is precise.
- Mark the area to remove.
- Hold the tool steady and let the blade do the cutting.
- Test fit the plank after trimming and make small adjustments as needed.
This tool is not for big cuts but is perfect for final fitting and adjustments.
Credit: www.homedepot.com
Advanced Cutting Techniques
Even experienced installers sometimes face tricky situations. Here are some advanced tips to handle special cases with Lifeproof flooring.
Cutting Around Door Frames
Instead of trying to make a perfect curve, you can undercut the door frame using a hand saw or oscillating tool. Slide the plank underneath for a clean look.
- Lay a scrap piece of flooring next to the frame.
- Place a hand saw or oscillating tool flat on top of the flooring and cut the bottom of the frame.
- Remove the cut piece and slide your plank underneath.
This method gives a professional finish and is much easier than cutting perfect curves.
Dealing With Irregular Walls
Older homes sometimes have walls that are not straight. To fit planks against these walls:
- Trace the wall shape onto a plank using a scribing tool or compass.
- Cut along the line with a jigsaw for a custom fit.
This extra effort pays off with a tight, seamless look.
Making Rip Cuts (lengthwise Cuts)
Most Lifeproof planks are cut widthwise, but sometimes you need to trim lengthwise for the last row.
- Use a straightedge and utility knife to score the plank.
- Snap and finish with the knife or a jigsaw.
Rip cuts are harder to snap, so go slow and use extra pressure.
Cutting For Vents And Pipes
- Measure carefully to find the center of the vent or pipe.
- Drill a starter hole if needed, then use a jigsaw to cut out the opening.
- Test fit and trim as needed.
For a tight fit, cut the plank into two pieces at the pipe location, then rejoin around the pipe and cover the gap with a trim ring.
Common Mistakes And How To Avoid Them
Making mistakes while cutting Lifeproof flooring is easy, especially if you are new to flooring projects. Here are the most common errors and how to avoid them.
Not Measuring Correctly
Cutting planks too short means wasted material and visible gaps. Always double-check measurements before cutting and allow for the expansion gap.
Using The Wrong Tool
Trying to cut thick Lifeproof planks with dull blades or the wrong saw can cause chipping, ragged edges, or even injury. Invest in the right tools or rent them for the project.
Skipping Safety Gear
Plastic and vinyl dust can irritate your eyes and lungs. Always wear safety glasses and a dust mask when cutting with power tools.
Cutting All Planks Before Laying Them Out
Each wall or space may need slightly different cuts, especially in older houses. Lay out planks in place before making final cuts to avoid gaps or misaligned patterns.
Ignoring Expansion Gaps
Lifeproof floors expand and contract with temperature changes. Failing to leave a 1/4-inch gap can lead to buckling, squeaking, or damage over time.
Not Supporting Planks Properly
Cutting planks while they are unsupported can cause them to crack or split. Always work on a solid surface or clamp them down.
Practical Tips For A Professional Result
If you want your floor to look like it was installed by a pro, these practical tips will help you get there.
Use Scrap Pieces For Practice
Before making cuts on your real planks, use leftover pieces to test your tools and cutting technique. This helps you get a feel for how much pressure to use and prevents costly mistakes.
Keep Blades Sharp
Dull blades tear vinyl instead of cutting it cleanly. Replace utility knife blades often and use fine-tooth blades for saws.
Mark Cuts On The Back
If you are worried about visible marks, draw your lines on the back of the plank. Just be sure you are not reversing the direction by mistake.
Clean Up Edges
After making cuts, use fine sandpaper or a utility knife to smooth out any rough spots. This helps planks fit together tightly and prevents sharp edges.
Plan Your Layout
Start with the longest wall and lay planks in the same direction as the main light source. This makes rooms look bigger and hides seams.
Stagger Plank Joints
Never line up end joints in adjacent rows. Stagger them by at least 8 inches for strength and better appearance.
Double-check Before Installing
Dry-fit each cut plank in its place before locking it down. This lets you make adjustments early and avoid surprises later.
Safety Precautions When Cutting Lifeproof Flooring
Cutting vinyl plank flooring is generally safe, but there are important safety steps to follow:
- Wear eye protection: Even hand tools can send small chips flying.
- Use gloves: Sharp edges and tools can cut skin.
- Work in a ventilated area: Dust from power tools can be harmful if inhaled.
- Keep fingers clear: Always keep hands away from blades and cutting edges.
- Unplug power tools when changing blades: Prevents accidental starts.
If you are working in a busy home, keep children and pets away from your workspace.
Lifeproof Flooring Cutting: Real-world Examples
Understanding how others have solved common problems can help you with your project. Here are a few real-life scenarios and how to handle them:
Example 1: Fitting Around A Kitchen Island
A homeowner needed to cut Lifeproof planks to fit around a kitchen island with rounded corners. Instead of trying to cut a perfect curve, they:
- Created a paper template of the island base.
- Traced the template onto the plank.
- Used a jigsaw for the rounded cut.
This resulted in a tight, custom fit, with the seam hidden under the island’s trim.
Example 2: Installing In A Basement With Uneven Walls
Old basements often have walls that are not perfectly straight. One installer used a scribing tool to trace the wall’s shape onto each plank, then cut with a jigsaw. The result was a floor with no visible gaps, even against wavy walls.
Example 3: Cutting Multiple Planks To The Same Length
For a large living room, a DIYer needed to cut 20 planks to the same length. Instead of measuring each one, they set up a stop block on their miter saw. Every plank was cut to exactly the same size, speeding up the job and ensuring a straight edge along the wall.
Cost And Time Considerations
Cutting Lifeproof flooring can affect your project’s cost and timeline. Here are some factors to keep in mind:
| Factor | Impact | Notes |
|---|---|---|
| Tool Rental | $10–$40/day | Laminate cutters and saws can be rented for short-term use. |
| Blade Replacement | $5–$15 | Fresh blades mean cleaner cuts and less waste. |
| Wasted Planks | Varies | Plan for 10% extra material for mistakes and cutoffs. |
| Time Investment | 4–8 hours per room | Experienced DIYers work faster; beginners should allow extra time. |
Planning ahead helps you avoid last-minute trips to the store or project delays.

Credit: www.youtube.com
Environmental And Health Considerations
Vinyl flooring like Lifeproof is considered a safe product for homes, but cutting can release small amounts of dust and particles. Follow these guidelines for a safe environment:
- Dispose of scraps properly: Do not burn vinyl, as it releases toxic fumes.
- Recycle when possible: Some centers accept clean vinyl flooring cutoffs.
- Ventilate your workspace: Open windows or use a fan when cutting indoors.
If you are sensitive to dust, wear a mask and clean up with a damp cloth, not a dry broom.
For more on the safety and environmental impact of vinyl flooring, the EPA Safer Choice program has useful resources.
Frequently Asked Questions
What Is The Easiest Tool To Use For Cutting Lifeproof Flooring?
For most DIYers, a utility knife is the easiest tool for straight cuts. It is safe, inexpensive, and does not require electricity. For curves or tricky shapes, a jigsaw is best.
Can I Use A Tile Cutter For Lifeproof Flooring?
No, tile cutters are designed for ceramic or porcelain tiles and will not cut Lifeproof vinyl planks properly. Use a utility knife, laminate cutter, or saw instead.
How Do I Avoid Chipping The Edges When Cutting?
To prevent chipping:
- Use sharp blades.
- Cut slowly and steadily.
- Support the plank fully during cutting.
- For saws, cut with the finished side up.
Do I Need To Let Lifeproof Planks Adjust To Room Temperature Before Cutting?
Yes, let planks acclimate in the room for at least 48 hours before cutting or installing. This helps prevent expansion or contraction after installation.
What Should I Do With Leftover Scraps And Pieces?
Save larger pieces for fitting around obstacles or as future repairs. Small scraps can be recycled or disposed of according to your local waste rules.
Cutting Lifeproof flooring may seem intimidating at first, but with careful planning, the right tools, and a bit of patience, you will achieve professional results. Each cut brings you one step closer to a beautiful, durable floor that will last for years.