What Temperature Is Simmer On An Electric Stove?
The kitchen is full of words that sound simple, but often leave us guessing. One of the most common is “simmer. ” Every cook—beginner or experienced—has seen recipes that say, “Reduce heat and simmer,” or “Let it simmer for 30 minutes.
” But what does simmer really mean? And more importantly, what temperature is simmer on an electric stove?
If you’ve ever stared at your stove’s dial, unsure where to set it for a perfect simmer, you’re not alone. Many people struggle to find the right setting. Simmering is more than just “cooking on low. ” There’s a range of heat, a specific visual sign, and some science behind it.
Understanding simmer can make your soups, sauces, and stews taste much better. It can also help you avoid burning food or ruining a meal.
Let’s explore what simmering means, the exact temperatures to look for, how to achieve and maintain it on an electric stove, and why it matters. This guide will answer your questions and give you the confidence to simmer perfectly every time.
What Does Simmer Mean In Cooking?
Simmering is a gentle cooking method. It happens at a temperature just below boiling, where liquid forms small, gentle bubbles. Unlike boiling—which is rapid and vigorous—simmering is slow and controlled. It’s used for cooking foods that need time to soften, develop flavor, or become tender without breaking apart.
When you simmer, you allow flavors to blend and ingredients to cook evenly. This process is essential for soups, stews, braises, and sauces. Simmering helps tough cuts of meat become soft, prevents dairy from curdling, and avoids overcooking delicate vegetables.
The visual cue for simmering is small bubbles rising slowly to the surface, often with steam but not the rolling action of a boil. If you see large, fast bubbles, you’re boiling. No bubbles at all means the liquid is not hot enough.
The Science Of Simmering: Temperatures Explained
Let’s break down the science. Water boils at 212°F (100°C) at sea level. Simmering happens below this point—usually between 185°F and 205°F (85°C to 96°C). The exact temperature can vary depending on the recipe and the type of food you’re cooking.
To understand why this range matters, remember that different cooking reactions happen at different temperatures. Proteins in meat and eggs change at lower temperatures, while starches thicken and dissolve better when heated slowly. Simmering lets these processes happen without breaking food apart.
Here’s a simple comparison:
| Cooking Method | Temperature (°F) | Visual Signs |
|---|---|---|
| Poaching | 160–180 | No bubbles, just steam |
| Simmering | 185–205 | Small bubbles, gentle movement |
| Boiling | 212 | Large, rapid bubbles |
Notice how simmering is in the middle. Too hot, and you’re boiling. Too low, and you’re poaching.
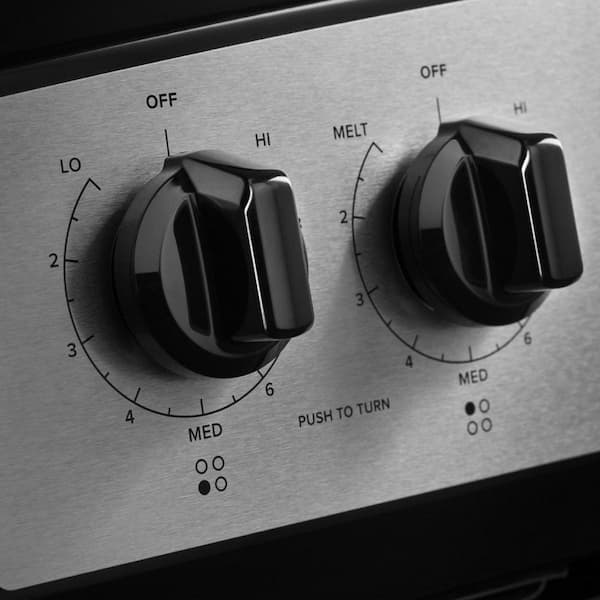
What Temperature Is Simmer On An Electric Stove?
Electric stoves don’t show exact temperatures. Instead, they have dial settings like “Low,” “Medium,” and “High,” sometimes with numbers (e. g. , 1 to 10). So, where does simmer fit in?
The simmer temperature is usually between 185°F and 205°F (85°C to 96°C). On most electric stoves, this falls between the “Low” and “Medium-Low” settings. But every stove is different. The coil or glass top heats up slowly and holds heat longer, which means you need to adjust carefully.
Here’s a rough guide to electric stove settings:
| Stove Dial Setting | Approx. Temperature (°F) | Cooking Use |
|---|---|---|
| Low (1-2) | 140–170 | Keep warm, melt butter |
| Medium-Low (2-4) | 180–200 | Simmer |
| Medium (4-6) | 210–250 | Gentle boil, sauté |
| Medium-High (6-8) | 250–320 | Braise, shallow fry |
| High (8-10) | 350–450 | Boil, deep fry |
Important insight: These temperatures are not exact. The actual heat depends on your stove’s model, the pan material, and how much food is in the pot. Always use visual cues (bubbles) along with the dial.
How To Simmer On An Electric Stove: Step-by-step
Many cooks make mistakes when simmering on electric stoves. The coil or glass top doesn’t cool down quickly, and the heat is less precise than gas. Here’s how to find and keep a simmer:
1. Bring To Boil First
Start by heating your liquid over medium or medium-high until you see a full boil (large, rapid bubbles).
2. Reduce The Heat
Once boiling, turn the dial down to medium-low or low. Wait 1–2 minutes for the change to happen. Electric stoves take time to adjust.
3. Look For Small Bubbles
Watch the liquid. Simmering shows small bubbles gently rising to the surface, not a rolling boil.
4. Adjust As Needed
If the bubbles stop, turn the heat up a little. If boiling starts, turn it down. On some stoves, you may need to move the pot off the burner for a few seconds.
5. Use A Lid (optional)
Covering the pot can keep the temperature steady, but it also traps more heat. This can push the liquid into a boil, so watch carefully.
Non-obvious tip: On electric stoves, the burner stays hot even after you lower the dial. If your simmer turns into a boil, lift the pot off the burner for 30 seconds, then return it.
Simmer Vs. Boil: Why It Matters
Simmering and boiling look similar, but the results can be very different. Boiling is rough and fast. It can break apart delicate foods, overcook meat, and cause sauces to separate. Simmering is gentle and controlled. It keeps flavors rich and textures pleasant.
Example:
- If you boil a stew, the meat may become tough and the vegetables mushy.
- If you simmer, the meat becomes tender and the flavors develop slowly.
Common Foods That Need Simmering
Simmering is used for many dishes, each with its own reason:
1. Soups And Broths:
Simmering extracts flavor from bones and vegetables without making the liquid cloudy.
2. Stews And Braises:
Tough cuts of meat soften during a long simmer.
3. Sauces (tomato, Cream, Gravy):
Simmering thickens and blends flavors without burning or curdling.
4. Rice And Grains:
Simmering helps grains absorb water evenly.
5. Eggs (poached):
Simmering prevents eggs from breaking up.
6. Legumes (beans, Lentils):
Beans cook slowly and evenly at a simmer, preventing splitting.
Practical insight: Many beginners try to speed up cooking by boiling. This often ruins texture and flavor. Simmering may take longer, but the results are always better.
How To Check Simmer Temperature Without A Thermometer
You don’t need a thermometer to find a simmer. Here are some easy ways to check:
- Visual Bubbles: Small bubbles rise gently, not violently.
- Sound: You’ll hear a soft, gentle bubbling—not a loud boil.
- Steam: Steady, light steam comes from the surface.
- Movement: The liquid moves slightly, not churning.
If you want to be sure, you can use a kitchen thermometer. Dip it into the liquid, and look for 185–205°F. But with practice, your eyes and ears work just as well.
Electric Stove Simmer Settings: Dial Numbers Explained
Most electric stoves use numbers from 1 to 10. Simmer is usually between 2 and 4. But it’s not always the same for every brand or model. Here’s a quick way to figure it out:
- Start at 4 (medium-low).
- Once the liquid simmers, lower to 3 or 2. Watch the bubbles.
- If the simmer stops, go back up a little.
Non-obvious tip: Some stoves have a special “Simmer” setting. Try it, but still check visually—the real simmer depends on the pot and liquid.
Glass Top Vs. Coil Electric Stoves: Simmering Differences
Electric stoves come in two main types: glass top and coil. Both can simmer, but they behave differently.
- Glass Top: Heats evenly, but changes temperature slowly. Great for steady simmer, but can overheat if you reduce the dial too late.
- Coil: Heats and cools faster, but can have hot spots. You may need to move the pot around or use a diffuser.
Some cooks prefer glass tops for simmering because of even heat. Others like coils for quick adjustments.
Simmering On Electric: Pots, Pans, And Their Effects
The type of pot or pan you use changes how well you can simmer. Material and thickness matter.
- Stainless Steel: Good for even heating, but can scorch if too thin.
- Nonstick: Heats quickly, easy to clean. Watch for overheating.
- Cast Iron or Enameled: Holds heat well, great for long simmers.
- Aluminum: Heats fast, but may react with acidic foods (like tomato sauce).
Practical tip: Use a heavy-bottomed pot for simmering. It spreads heat evenly and prevents burning. Thin pots can create hot spots and ruin your dish.
How To Maintain A Simmer For Hours
Some recipes need you to simmer for a long time—sometimes 2–3 hours. Here’s how to keep a steady simmer on an electric stove:
- Find Your Setting: Use the visual cues mentioned earlier.
- Stir Occasionally: Prevent sticking or burning.
- Adjust the Lid: Cover the pot to keep heat, but vent it slightly to avoid boiling.
- Check Every 30 Minutes: Electric stoves can shift in temperature.
- Use a Heat Diffuser: This tool spreads heat evenly and prevents hot spots.
Insight: Don’t leave a simmering pot unattended for long. Electric stoves can spike or drop in temperature without warning.
Common Simmering Mistakes On Electric Stoves
Many cooks make errors when using electric stoves for simmering. Avoid these pitfalls:
- Setting the Heat Too High: Leads to boiling, tough meat, and burnt flavors.
- Not Adjusting for Pot Size: Smaller pots heat faster and may overboil.
- Ignoring the Lid: Fully covered pots trap too much heat; partially covering is better.
- Not Stirring: Food can stick and burn, especially with thick sauces.
- Rushing the Process: Simmering is slow by design. Patience gives better results.
Simmering At High Altitude: Does Temperature Change?
At high altitude, the boiling point of water drops below 212°F (100°C). This means simmering also happens at a lower temperature. You may need to cook longer to get the same results.
For example, at 5,000 feet above sea level, water boils at about 203°F (95°C). Simmering happens between 180°F and 195°F. Always check the food for doneness, not just time.
Simmer Vs. Other Cooking Methods
To help you understand where simmer fits among other methods, here’s a direct comparison:
| Method | Heat Level | Uses |
|---|---|---|
| Simmer | Medium-low | Soups, stews, sauces |
| Boil | High | Pasta, potatoes |
| Poach | Low | Eggs, fish |
| Braise | Start high, then simmer | Tough meats, root vegetables |
| Blanch | High (short time) | Vegetables, fruit skins |
This shows how simmering is unique: not as hot as boiling, but hotter than poaching.
Credit: www.homedepot.com
Simmering And Food Safety
Simmering is not just about flavor. It also helps keep food safe. Cooking at 185–205°F for a long time kills most bacteria and parasites in food, making it safe to eat. However, it’s important to reach the right temperature, especially when cooking meat or poultry.
Tip: Use a food thermometer to check meat doneness if you’re unsure. For example, chicken should reach at least 165°F (74°C) inside.
Simmering For Thickening And Reducing
Many recipes say “simmer until reduced by half” or “simmer until thick. ” What does this mean?
- Reducing: Simmering evaporates water, concentrating flavors and thickening the sauce.
- Thickening: Slow simmering helps starches (like flour or cornstarch) activate and thicken the liquid.
How to check: Dip a spoon into the sauce. Run your finger across the back. If the line stays, it’s thickened.
Simmering And Recipe Timing
The simmering time in recipes is a guide, not a rule. The actual time depends on your stove, pot, and altitude. Always check the food for texture and flavor before stopping. If it’s still tough or watery, keep simmering.
Pro tip: Write down the setting and timing that works best with your own stove. That way, you’ll get consistent results every time.
How To Simmer On An Electric Stove Without A Simmer Setting
If your electric stove doesn’t have a “Simmer” button or setting, don’t worry. Here’s what you can do:
- Use the “Low” or “2–3” setting.
- Watch the bubbles closely.
- Move the pot halfway off the burner if it gets too hot.
- Try a heat diffuser for better control.
Simmering Large Quantities Vs. Small Quantities
Larger pots of food hold heat longer and may take more time to reach a simmer. Small pots heat faster and are more likely to overboil. Adjust your stove setting based on the amount:
- For big pots: Start higher, then reduce to low.
- For small pots: Use the lowest setting and watch closely.
Insight: The more food in the pot, the longer it takes to change temperature.
Electric Stove Simmering: Real-life Example
Let’s say you want to make chicken soup. Here’s how you would do it on an electric stove:
- Put all ingredients in a heavy pot with water or broth.
- Turn the dial to medium-high to bring to a boil.
- As soon as you see big bubbles, turn the dial down to 3.
- Watch for small, gentle bubbles.
- Adjust up or down as needed.
- Simmer uncovered (or with a tilted lid) for 1–2 hours.
- Stir every 20 minutes.
Result: The chicken becomes tender, the vegetables soft, and the broth clear and flavorful.

Credit: fromrebel.com
Simmering And Energy Use
Simmering uses less energy than boiling. Once you reach a simmer, you can turn the dial down and keep the heat low. This saves electricity and prevents your kitchen from becoming too hot. On some stoves, you can even turn the burner off for a few minutes, and the heat will continue to simmer the food.
Simmering On Different Electric Stove Brands
Some electric stoves are more precise than others. Popular brands like GE, Whirlpool, and Frigidaire may have slightly different dial settings. Always check your manual for guidance, and do a “water test” to learn your stove’s simmer spot:
- Fill a pot with water.
- Bring to a boil.
- Reduce the setting little by little until you see a gentle simmer.
- Note the dial position for future use.
Simmering And Lid Control
Using a lid changes how your food simmers. Covered pots trap heat and moisture, making it easier to keep a simmer but also increasing the risk of boiling. Uncovered pots lose more water and can slow simmering.
- Covered: Faster simmer, less evaporation, risk of overboiling.
- Uncovered: Slower simmer, more evaporation, easier to control.
Try a partially covered pot (lid tilted) for the best of both worlds.
Simmering For Healthier Cooking
Simmering lets you cook with less fat and oil. Stews and soups become rich and tasty without frying or deep-frying. You can add more vegetables and whole grains, making your meals healthier.
Statistic: According to the USDA, simmered dishes often retain more nutrients than foods cooked at high heat or boiled rapidly.
How To Avoid Burnt Food While Simmering
Burning happens when food sticks to the bottom of the pot, usually from high heat or not enough liquid. To avoid burning:
- Use enough liquid.
- Stir often, especially with thick or starchy foods.
- Use a heavy-bottomed pot.
- Keep the heat low and steady.
If you see dark spots or smell burning, lower the heat and add more liquid right away.
How Simmering Affects Flavor
Simmering slowly releases flavors from ingredients. Spices, herbs, and aromatics blend with the liquid. Over time, simmering builds rich, complex taste. Boiling, on the other hand, can make food taste flat or bitter.

Credit: www.amazon.com
Simmering For Beginners: Key Takeaways
- Simmering happens at 185–205°F (85–96°C).
- On an electric stove, use “Low” to “Medium-Low” (dial 2–4).
- Look for small, gentle bubbles.
- Adjust the dial as needed, and use a heavy pot.
- Don’t rush—simpering takes time but gives better results.
For more on the science of simmering, visit Wikipedia’s Simmering page.
Frequently Asked Questions
What Is The Simmer Temperature In Celsius?
Simmering happens between 85°C and 96°C. This is just below boiling (100°C). Look for small bubbles and gentle movement in the liquid.
How Do I Keep A Steady Simmer On An Electric Stove?
Start by bringing the liquid to a boil, then reduce the heat to “Low” or “Medium-Low” (dial 2–4). Watch for gentle bubbles. Adjust the dial if the simmer stops or turns into a boil. Use a heavy pot and stir occasionally.
Can I Use The Same Simmer Setting For All Types Of Food?
No. Foods with more liquid (like soups) may need a slightly higher setting, while thick sauces or small pots may need lower. Always watch the bubbles and adjust as needed for each recipe.
Why Does My Food Burn Even When Simmering?
Burning happens if the heat is too high, the pot is too thin, or there’s not enough liquid. Use a heavy-bottomed pot, keep the heat low, and stir often to prevent sticking.
Is Simmering Better Than Boiling For Soups And Stews?
Yes. Simmering keeps meat tender, vegetables intact, and flavors rich. Boiling is too harsh and can make food tough or mushy.
Simmering is a simple skill that makes a big difference in your cooking. With the right temperature, a good pot, and a little practice, you’ll master it on any electric stove. Next time a recipe says “simmer,” you’ll know exactly what to do.