Staining wood floors darker can completely transform a room. It adds richness, depth, and a sense of warmth that lighter floors often cannot match. Many homeowners choose dark stains for their classic look, but also because they help hide imperfections and give a more dramatic style.
However, getting that smooth, even, deep color is not easy. It takes careful planning, the right materials, and a clear understanding of each step.
If you want to stain your wood floors darker, this guide will show you exactly how. You’ll learn not just the standard process, but also insider tips to avoid streaks, blotchiness, and other mistakes that frustrate beginners. You’ll also see how to pick the right products for your wood, prepare your space, and finish the project so that your new floor lasts for years.
With patience and the right method, you can turn an old or light-colored floor into a stunning centerpiece for your home.
Why Stain Wood Floors Darker?
Many people ask why dark wood floors are so popular. The answer is more than just style. Dark stains can make a big difference in both appearance and function. Here are some reasons homeowners choose a darker look:
- Classic Elegance: Dark floors add a timeless, elegant look to any space. They work well with modern, traditional, or rustic styles.
- Hide Flaws: Scratches, dents, and patches are less visible on dark-stained wood, especially compared to light finishes.
- Contrast: Dark floors make light walls and furniture stand out, creating a strong visual impact.
- Versatility: Many types of wood can be stained darker, including oak, maple, and pine.
- Value Boost: Homes with well-finished dark floors often appear more high-end, which can help with resale value.
However, dark stains can also show dust and pet hair more easily. They also require careful prep and even application for the best look.
Understanding Your Wood Floor
Before you begin, it’s important to know what kind of wood you have. Not all woods take stain the same way, and some require special care.
Common Wood Types
- Oak: Takes stain well; grain shows through nicely. Red oak and white oak are both popular for staining.
- Maple: Hard to stain evenly due to tight grain. Needs pre-stain conditioner.
- Pine: Soft, can blotch easily. Always use a conditioner.
- Cherry: Absorbs stain quickly and deeply.
- Walnut: Already dark; may not need much staining.
Solid Vs. Engineered Wood
Solid hardwood floors can be sanded and stained multiple times. Engineered wood floors have a thin wood layer on top, which limits sanding. If your engineered floors have less than 3mm of real wood, staining is risky. Always check the thickness before starting.
Existing Finish
To stain wood floors darker, you must remove any existing finish. Polyurethane, wax, or old stain will prevent new stain from soaking in. If your floor has deep scratches, water damage, or warped boards, address these issues first. Staining will not hide major surface problems.
Tools And Materials Needed
Having the right tools and materials makes the project smoother and safer. Here’s what you’ll need for a typical floor staining job:
Tools
- Floor sander (drum or orbital)
- Edge sander or hand sander
- Sandpaper (36, 60, 80, 100, 120 grits)
- Shop vacuum
- Tack cloths or microfiber cloths
- Paintbrushes (2–4 inches, high quality)
- Staining pads or lint-free rags
- Foam applicators (optional)
- Respirator mask and safety goggles
- Knee pads
- Work gloves
Materials
- Wood stain (oil-based or water-based, in your chosen dark color)
- Wood filler (if needed for gaps or holes)
- Pre-stain wood conditioner (especially for maple or pine)
- Wood floor finish (polyurethane, oil-based or water-based)
- Painter’s tape
- Plastic sheeting or drop cloths
Choosing Your Stain
Dark stains range from ebony and espresso to dark walnut or jacobean. Test your color on a hidden area or sample board. Remember that the same stain can look different on various woods.
| Stain Color | Best For Woods | Notes |
|---|---|---|
| Ebony | Oak, Walnut | Very dark, almost black |
| Dark Walnut | Oak, Cherry | Classic, deep brown |
| Espresso | Pine, Maple | Rich, warm, less red |
| Jacobean | Oak, Maple | Slightly lighter than ebony |
Preparing The Room
Preparation is often overlooked but can make or break your project. Dust, leftover finish, or poor lighting can ruin your results.
- Remove Furniture: Take out all furniture, rugs, and floor coverings.
- Protect Surfaces: Use painter’s tape on baseboards and plastic sheeting to cover doors, vents, and any surfaces you don’t want dust on.
- Check Humidity: Wood absorbs stain differently in high humidity. The best range is 40–60% relative humidity. Too much moisture can cause uneven stain and longer drying times.
- Ventilation: Open windows and use fans if possible, especially with oil-based products. Avoid open flames—stain fumes can be flammable.
- Safety First: Wear a respirator mask and goggles, especially when sanding or using strong chemicals.
Sanding The Floor
Sanding is the most important step. It removes old finish, smooths out scratches, and opens up the wood so the stain can soak in evenly. Skipping or rushing this step leads to uneven color and a rough feel underfoot.
Step-by-step Sanding
- Start with Coarse Grit: Begin with 36- or 40-grit sandpaper to remove old finish. Move with the grain, not against it.
- Edge Sanding: Use an edge sander or hand sander for corners and along walls.
- Vacuum Thoroughly: After each sanding pass, vacuum to remove all dust.
- Progress to Finer Grits: Sand again with 60-, 80-, 100-, and finally 120-grit. Each pass makes the wood smoother.
- Inspect the Floor: Look for scratches, swirls, or missed spots. Fill gaps or holes with wood filler and sand smooth.
- Final Cleaning: Vacuum and wipe with tack cloths or microfiber cloths to remove every trace of dust.
Pro Tips
- Change sandpaper often; dull paper can burn the wood.
- Overlap your passes slightly for even sanding.
- Sanding against the grain creates scratches that will show through the stain.
Applying Wood Conditioner
Pre-stain wood conditioner helps soft or blotchy woods (like pine or maple) absorb stain more evenly. Even with hardwood, it can improve results.
- Apply conditioner with a brush or cloth following the grain.
- Let it soak in for the time recommended by the manufacturer (usually 15–30 minutes).
- Wipe off excess and stain the floor while the conditioner is still “active”—usually within 2 hours.
Skipping conditioner can cause dark and light patches, especially on softwoods.
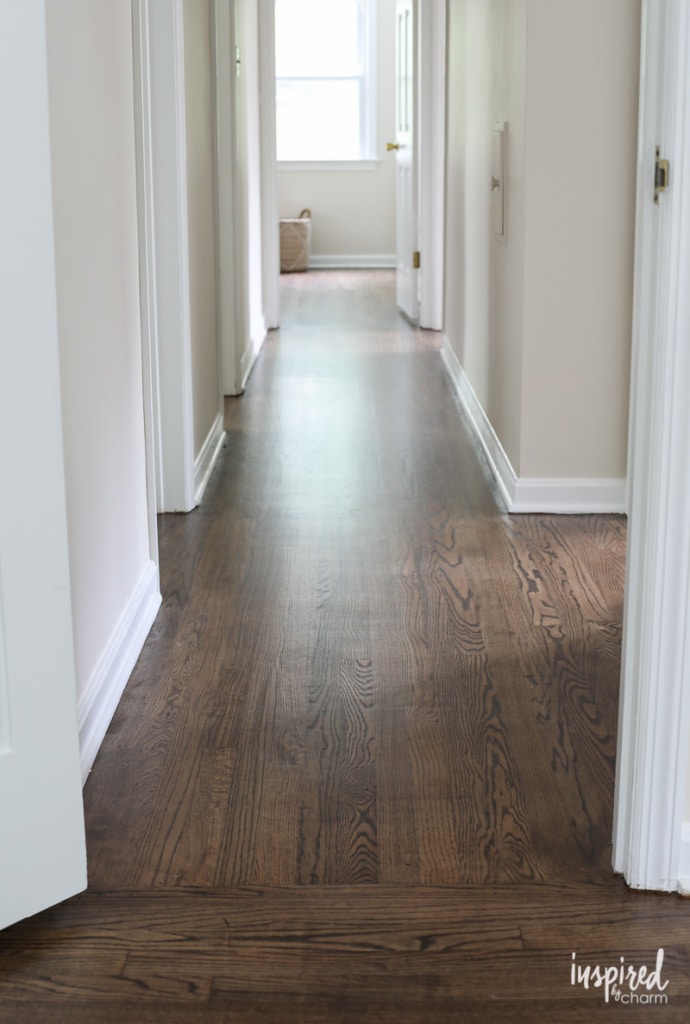
Credit: inspiredbycharm.com
Staining The Floor
Now comes the most rewarding part. Apply your chosen dark wood stain carefully and patiently for the best look.
Application Methods
- Rag Application: Gives the most control and even coverage. Wipe stain on with a lint-free cloth, then wipe off excess with a clean rag.
- Brush Application: Good for small areas or edges. Apply with the grain.
- Pad Application: Fast for large areas but can leave marks if not careful.
Step-by-step Staining
- Stir the Stain Well: Never shake stain—it creates bubbles. Stir often during use to keep color even.
- Test in a Small Area: Try the stain in a closet or corner to check color and absorption.
- Work in Small Sections: Apply stain in 2–4 foot wide strips. Don’t let the edge dry—work quickly to keep a “wet edge.”
- Wipe Excess Promptly: After 5–15 minutes (depending on darkness desired), wipe off extra stain with a clean rag.
- Let Dry Completely: Allow 8–24 hours for oil-based stains, or 2–4 hours for water-based, before applying finish.
Application Comparison
Below is a comparison of common stain application methods:
| Method | Control | Speed | Best For |
|---|---|---|---|
| Rag | High | Medium | Beginners, small rooms |
| Brush | High | Slow | Edges, corners |
| Pad | Medium | Fast | Large, open areas |
Key Mistakes To Avoid
- Letting stain pool or sit too long—this creates sticky spots.
- Working in poor lighting. Use bright lights to spot missed areas.
- Using dirty or oily rags. Always use lint-free, clean cloths.
Multiple Coats And Deeper Color
If you want a richer, darker finish, you can apply more than one coat of stain. However, there are some important rules:
- Let Each Coat Dry: Wait at least as long as the manufacturer recommends before adding another coat.
- Lightly Buff Between Coats: Use very fine sandpaper (220 grit) or a buffing pad to smooth the surface. Wipe off all dust.
- Don’t Overdo It: Too many layers can cause the stain to sit on top of the wood, not soak in. This leads to peeling or flaking later.
Example
On oak, two coats of dark walnut stain can give a nearly ebony look. On maple, even one coat might look very dark. Always test first.
Sealing The Floor: Applying Finish
Stain alone does not protect your floor. You need a clear finish for durability, water resistance, and shine.
Types Of Finish
- Oil-Based Polyurethane: Very durable, amber tone, slow drying.
- Water-Based Polyurethane: Fast drying, less odor, clear finish.
- Hardwax Oil: Natural look, easy to repair, less shiny.
Applying Finish
- Stir, Don’t Shake: Like stain, shaking can cause bubbles.
- Use a High-Quality Brush or Roller: Apply thin, even coats with the grain.
- Let Dry Fully: 4–8 hours for water-based, 8–24 hours for oil-based.
- Buff Between Coats: Use a buffing pad or fine sandpaper, then vacuum and wipe clean.
- Apply 2–3 Coats: Most floors need at least two coats for protection.
Finish Comparison
Here is a quick comparison of the most popular finishes:
| Finish Type | Dry Time | Durability | Gloss Level |
|---|---|---|---|
| Oil-Based Polyurethane | 8–24 hrs | High | Glossy, Semi-gloss, Satin |
| Water-Based Polyurethane | 4–8 hrs | Medium–High | Clear, less yellowing |
| Hardwax Oil | 6–12 hrs | Medium | Matte, Satin |
Pro Tips For Finishing
- Keep dust out of the room while finish dries.
- Don’t walk on the floor until finish is fully cured (often 24–72 hours).
- For best results, use a “tack room” technique: Wet mop nearby floors to cut dust.
Cleaning Up And Curing
Your project isn’t finished the moment the last coat dries. Proper cleanup and curing make a big difference in the final look and durability.
- Clean Tools Safely: Dispose of oily rags in metal containers with water. Spontaneous combustion is a real risk with stain-soaked rags.
- Remove Tape and Plastic: Do this carefully so you don’t pull off finish or dust.
- Let Floor Cure: Avoid heavy traffic and rugs for at least 7 days. Furniture can return after 72 hours, but use felt pads to avoid scratches.
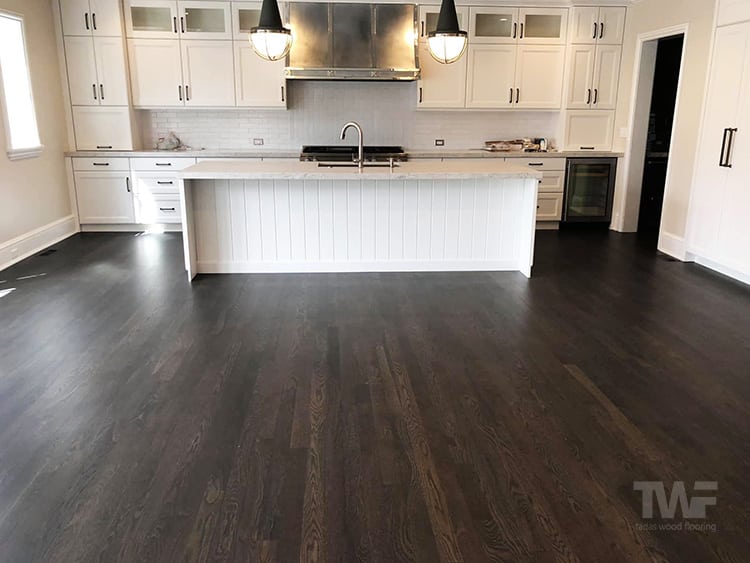
Credit: napervillehardwood.com
Maintenance And Care For Dark-stained Floors
Dark wood floors look rich and beautiful, but they need regular care to stay that way.
Daily And Weekly Care
- Sweep or vacuum often—dust shows more on dark floors.
- Use a damp mop with a wood-safe cleaner.
- Avoid wet mopping or harsh chemicals.
Dealing With Scratches
- Use touch-up stain markers for small scratches.
- Deeper scratches may need light sanding and re-staining.
Preventing Damage
- Place rugs at entrances.
- Use felt pads under furniture.
- Trim pet nails to avoid scratches.
Long-term Tips
Refinish high-traffic areas every few years if needed. With good care, your dark-stained floor can last decades.
Common Mistakes And How To Avoid Them
Even careful DIYers make mistakes. Here are some pitfalls and how to prevent them:
- Rushing Sanding: Skipping grits or sanding unevenly leads to blotchy stain.
- Not Cleaning Dust: Even a little dust under finish creates roughness.
- Skipping Conditioner: Especially with softwoods, this leads to uneven absorption.
- Applying Too Much Stain: Thick layers don’t dry well and can peel.
- Ignoring Dry Time: Walking on the floor too soon ruins the finish.
- Poor Ventilation: Stain fumes are strong—ventilate to avoid headaches or worse.

Credit: diy.stackexchange.com
Real-world Example
Imagine you have a 300 sq. ft. living room with old, scratched oak floors. After removing all furniture and prepping the space, you sand the floor in three stages (coarse, medium, fine). You apply a pre-stain conditioner, then a deep walnut stain, wiping off excess after 10 minutes. Two coats give a rich color. Next, you seal the floor with two coats of water-based polyurethane. After a week of curing, the result is a floor that looks brand new—smooth, dark, and glossy, with the grain still showing through. Total cost: about $300–$400 for materials and tool rental (as of 2024). Total time: 2–3 days of work, plus drying and curing.
Environmental And Health Considerations
Staining floors can create fumes and dust that affect indoor air quality.
- Low-VOC Products: Choose water-based stains and finishes marked “low VOC” for fewer fumes.
- Proper Disposal: Never pour stain or finish down drains. Take leftovers to a hazardous waste site.
- Allergy Risk: Dust from sanding can trigger allergies—always wear a mask.
If you have children or pets, keep them out of the work area until all products are fully cured.
When To Hire A Professional
Some floors are challenging even for experienced DIYers. You might want to hire a pro if:
- Your floor has deep damage (cupped, warped, or loose boards).
- You have engineered wood with a thin top layer.
- You want a custom or multi-tone finish.
- The area is very large or has complex patterns.
Professionals have industrial sanders, dust control systems, and years of experience. While it costs more ($4–$8 per sq. Ft. on average in the US), the results can be worth it for high-value homes.
Additional Resources
For more details on wood floor finishing, consider reading the National Wood Flooring Association’s guide. It offers deeper technical advice and safety tips.
Frequently Asked Questions
How Long Does It Take To Stain Wood Floors Darker?
Most projects take 2–4 days, including sanding, staining, and finishing. Add extra time for drying and curing—especially with oil-based products.
Can I Stain Engineered Wood Floors Darker?
Only if the top layer is thick enough (at least 3mm of real wood). Thin layers can be damaged by sanding. Always check your floor’s specifications first.
What’s The Difference Between Oil-based And Water-based Stain?
Oil-based stains penetrate deeply and have a longer working time. Water-based stains dry faster, have less odor, and are more eco-friendly. The choice depends on your needs and the look you want.
Will A Dark Stain Hide All Imperfections?
Dark stains can hide some scratches and dents, but they also make dust, pet hair, and some surface flaws more visible. Deep gouges or water stains should be repaired before staining.
How Do I Keep My Dark-stained Floors Looking Clean?
Sweep or vacuum daily, use mats at entrances, and clean with a wood-safe cleaner. Avoid letting water sit on the floor, and use felt pads under furniture to prevent scratches.
Transforming your floors with a dark stain is a rewarding project. With the right steps and careful attention, you can achieve a stunning, long-lasting result that adds value and beauty to your home for years to come.