
A burnt saucepan can ruin your mood and your meal. The black, stubborn layer stuck to the bottom feels impossible to remove. Many people think they have to throw away the pan or scrub it for hours. But that’s not true.
With the right methods, you can clean a badly burnt saucepan and make it look almost new again. In this guide, you’ll learn step-by-step how to handle even the worst kitchen disasters, why certain tricks work, and how to avoid making things worse.
You’ll also discover some little-known tips and common mistakes that beginners often make.
Why Do Saucepans Get Burnt?
It’s easy to burn a saucepan, even if you’re careful. Cooking at high heat, leaving food unattended, or using too little liquid are common reasons. Sometimes, thin or cheap pans heat unevenly, causing hot spots that burn food faster. Sugary foods like sauces and caramel can stick and burn quickly.
Stainless steel, aluminum, and nonstick pans all react differently to heat and burning. Understanding why pans burn helps you choose the right cleaning method.
Assessing The Damage
Before you start cleaning, look at your saucepan. Is the burnt area light brown, or is it thick and black? Is it just food stuck to the bottom, or has the metal changed color? If the pan is warped or has deep scratches, cleaning might not solve the problem.
But if it’s just burnt food or stains, you can rescue it.
- Light burns: Usually a thin, brown layer. Easier to clean.
- Medium burns: Dark, sticky patches. Needs soaking and more effort.
- Severe burns: Thick, black, crusty layers. May need repeated treatments.
Sometimes, the pan also smells bad or has a white, chalky residue from minerals. Each situation needs a slightly different approach.
Essential Tools And Materials
You don’t need fancy products to clean a burnt saucepan. Most items are found at home or at a local store.
- Baking soda – For gentle abrasion and stain removal.
- Vinegar – Helps break down burnt food and removes odors.
- Dish soap – Lifts grease and softens burnt bits.
- Boiling water – Loosens stuck-on food.
- Wooden or silicone spatula – For safe scraping.
- Non-scratch scrubber – Like a sponge with a safe abrasive side.
- Steel wool or metal scrubber – For stainless steel only, not for nonstick pans.
- Cream of tartar – An alternative to baking soda.
- Lemon – Natural acid for cleaning.
- Salt – Mild abrasive.
- Hydrogen peroxide – For extreme burns (use with care).
- Old toothbrush – For edges and handles.
- Gloves – To protect your hands.
- Soft cloths or paper towels – For drying and buffing.
Having these tools ready makes the job smoother and safer.
Basic Cleaning Method: For Light Burns
If the burn is not too bad, start with the simplest method. This saves time and avoids damaging your pan.
- Fill the pan with water: Cover the burnt area by at least one inch.
- Add a few drops of dish soap.
- Heat the pan: Bring the water to a gentle boil. Let it simmer for 10-15 minutes.
- Cool slightly: Turn off the heat and let it cool for a few minutes (but not completely).
- Scrape gently: Use a wooden or silicone spatula to lift the loosened burnt food.
- Wash as usual: Use a non-scratch scrubber and more soap if needed.
This method often works for light burns and saves effort. If it doesn’t, move to stronger methods.
Baking Soda And Vinegar Method: The Classic Solution
This is one of the most popular ways to clean a badly burnt saucepan. Baking soda and vinegar react together, creating bubbles that lift burnt bits.
- Sprinkle baking soda: Cover the burnt area with a thick layer.
- Add vinegar: Pour white vinegar over the baking soda. It will fizz and bubble.
- Let it sit: Wait 10-20 minutes for the reaction to work.
- Add hot water: Pour enough boiling water to cover the bottom.
- Soak: Leave the pan for 30 minutes to several hours, depending on the burn.
- Scrub: Use a non-scratch pad to scrub the loosened debris.
Repeat if needed. This method is safe for most pans, including stainless steel and aluminum.
The Boiling Vinegar Method
When burnt food is very stubborn, boiling vinegar can help soften the mess.
- Pour vinegar into the pan: About one cup for a medium saucepan.
- Boil for 5-10 minutes: The acid helps dissolve burnt residue.
- Add baking soda (optional): After boiling, sprinkle baking soda for more fizz.
- Let cool: Allow it to cool until safe to handle.
- Scrub: Use a safe scrubber to finish cleaning.
Be careful with the strong vinegar smell. Open a window or turn on a fan.
Credit: www.reddit.com
Salt And Lemon Scrub
For people who want a more natural method, salt and lemon are a good choice.
- Cut a lemon in half.
- Sprinkle coarse salt on the burnt area.
- Rub with the lemon: Use the cut side, squeezing gently.
- Let it sit: Leave the mixture for 10-15 minutes.
- Scrub and rinse: Use a non-scratch pad if needed, then rinse well.
Salt acts as a gentle abrasive, while lemon’s acid helps break down burnt spots. This method is great for aluminum, copper, and enamel pans.
Dish Soap And Dryer Sheet Soak
This trick sounds strange but works surprisingly well for some types of burnt-on food.
- Fill the pan with warm water.
- Add a squirt of dish soap.
- Drop in a new, unused dryer sheet.
- Soak for 1-2 hours or overnight.
- Wipe and rinse: The dryer sheet helps lift burnt food.
The chemicals in dryer sheets can loosen stuck food, but rinse well to remove any residue.
Cream Of Tartar Paste
Cream of tartar, often used in baking, is a mild acid that helps clean burnt pans without scratching.
- Mix cream of tartar and water: Use 1 tablespoon cream of tartar with a few drops of water to make a paste.
- Spread on burnt area.
- Let sit for 30 minutes to an hour.
- Scrub gently: Use a non-scratch pad.
- Rinse well.
This method is safe for most surfaces, including stainless steel and enamel.
Hydrogen Peroxide For Extreme Burns
Hydrogen peroxide can tackle very tough burns, but use it with care. Only use on stainless steel or plain aluminum, never on nonstick, copper, or enamel.
- Pour enough hydrogen peroxide to cover the burnt area.
- Heat gently: Bring to a simmer (do not boil vigorously).
- Let simmer for 10 minutes.
- Add baking soda: Sprinkle in a few tablespoons for extra power.
- Cool and scrub: Use a non-scratch pad to finish.
Always rinse well. Never mix with other chemicals. Wear gloves and ventilate the area.
Commercial Cleaners: When Home Methods Fail
Sometimes, burnt pans need commercial products. Bar Keepers Friend, Bon Ami, and similar cleaners can remove stubborn stains. Always follow the manufacturer’s directions and check if the cleaner is safe for your pan’s material. Avoid using oven cleaner or harsh chemicals unless the pan is solid stainless steel, as these can damage coatings and color.
Nonstick Saucepans: Special Precautions
Nonstick pans need gentle care. Never use steel wool, harsh abrasives, or high heat.
- Soak first: Fill with warm, soapy water and soak for 1-2 hours.
- Use baking soda paste: Mix with water, spread on the burn, and let sit.
- Scrub with a soft sponge: Avoid anything rough.
- Avoid dishwasher: Hand wash only.
If the nonstick coating is peeling or deeply scratched, it’s safer to replace the pan.
Copper And Enamel Pans: Extra Care Needed
Copper and enamel pans look beautiful but are sensitive to harsh cleaning.
- Do not use steel wool or oven cleaner.
- Try lemon and salt first.
- Use a nylon scrubber for stuck spots.
- For enamel: Mix baking soda and water, apply as a paste, and let sit before scrubbing.
If the enamel is chipped or cracked, avoid further cleaning and consider retiring the pan.
Comparing Cleaning Methods For Burnt Saucepans
Here’s a look at the effectiveness, cost, and safety of common methods:
| Method | Effectiveness | Cost | Surface Safety |
|---|---|---|---|
| Baking Soda & Vinegar | High | Low | Safe for most |
| Salt & Lemon | Medium | Low | Safe for most |
| Hydrogen Peroxide | Very High | Medium | Only for stainless/aluminum |
| Commercial Cleaner | Very High | Medium/High | Check label |
| Dish Soap & Dryer Sheet | Medium | Low | Safe for most |
Step-by-step Guide: Deep Cleaning A Badly Burnt Saucepan
If your pan is badly burnt, follow this proven process:
- Remove Loose Debris
- Use a wooden spoon or spatula to scrape off loose burnt bits. Do not use metal tools on nonstick or enamel.
- Soak with Hot Water
- Fill with hot water and a squirt of dish soap. Let soak for at least 1 hour. This softens the burnt layer.
- Choose Your Cleaning Method
- For stainless steel or aluminum, use baking soda and vinegar or hydrogen peroxide if very burnt.
- For nonstick, stick to soapy water and baking soda paste.
- For copper/enamel, try lemon and salt.
- Apply the Cleaner
- Cover the burnt area with your chosen cleaner. Let it sit for the recommended time.
- Heat If Needed
- For very tough burns, heat the pan with the cleaner (like boiling vinegar or simmering hydrogen peroxide).
- Scrub Gently
- Use a non-scratch pad, sponge, or nylon brush. Repeat as needed.
- Rinse and Dry
- Wash with hot, soapy water. Rinse well and dry with a soft towel.
- Polish (Optional)
- For stainless steel, use a few drops of vinegar on a cloth to polish.
- For copper, use a special copper polish if you want extra shine.
Real-life Example: Cleaning A Burnt Saucepan
Imagine you were making caramel and forgot about the pan. Now you have a thick, black crust. Here’s what works:
- Step 1: Scrape off what you can with a wooden spatula.
- Step 2: Fill the pan with water, add baking soda, and bring to a boil.
- Step 3: Let it simmer for 15 minutes.
- Step 4: Pour out the water, sprinkle more baking soda, and add a little vinegar.
- Step 5: Wait 30 minutes.
- Step 6: Scrub with a non-scratch pad.
- Step 7: Repeat if needed.
Most of the burnt layer should lift after one or two tries. If not, try the hydrogen peroxide method.
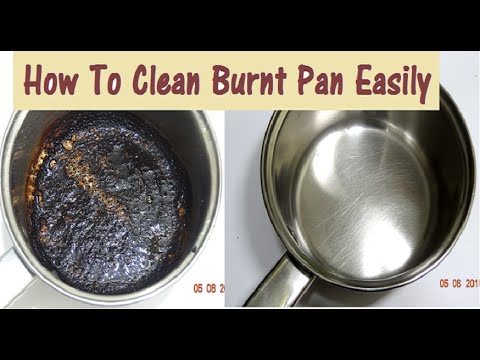
Credit: www.youtube.com
Common Mistakes To Avoid
Beginners often make cleaning harder or damage their pans by doing the following:
- Using metal tools on nonstick or enamel pans. This scratches and ruins the surface.
- Scrubbing before soaking. This makes you work harder and can scratch your pan.
- Mixing strong chemicals. Never mix bleach, ammonia, or other cleaners. This can create dangerous fumes.
- Heating empty pans. This warps the metal and can damage nonstick coatings.
- Using oven cleaner on coated pans. Oven cleaners are too harsh for anything but solid stainless steel.
Take your time and choose the right method for your pan’s material.
How To Prevent Burning In The Future
It’s easier to prevent burns than to fix them.
- Use the right pan size: Don’t overcrowd or underfill.
- Cook on medium heat: High heat causes most burns.
- Stir often: Especially for thick sauces and sweet foods.
- Add enough liquid: Dry pans burn faster.
- Stay in the kitchen: Don’t walk away when cooking.
- Use heavy-bottomed pans: These heat more evenly.
- Preheat properly: Let the pan heat slowly before adding food.
Non-obvious tip: Watch out for “hot spots” in cheaper pans—move food around to prevent sticking.
When To Replace A Burnt Saucepan
Not all pans can be saved. Sometimes, it’s better for your health and your kitchen to replace them.
- Nonstick pans: If the coating is peeling, flaking, or deeply scratched, it’s time for a new one. Eating flakes can be unhealthy.
- Enamel pans: If the enamel is chipped or cracked, stop using it. The metal underneath can rust or leach into food.
- Stainless steel/aluminum: If the pan is warped or has deep pitting, replace it. Warped pans cook unevenly and can burn food faster.
A good saucepan is worth keeping in top shape, but safety comes first.
Comparing Pan Materials: Cleaning Difficulty
Not all pans are equal when it comes to cleaning. Here’s a comparison:
| Pan Material | Cleaning Difficulty | Best Methods | What to Avoid |
|---|---|---|---|
| Stainless Steel | Medium | Baking soda, vinegar, hydrogen peroxide | Oven cleaner, steel wool (if polished finish matters) |
| Aluminum | Medium | Baking soda, cream of tartar | Harsh acids, steel wool |
| Nonstick | Easy | Soak, baking soda paste | Abrasives, dishwasher, high heat |
| Copper | Hard | Lemon & salt, special polish | Abrasives, vinegar, harsh cleaners |
| Enamel | Medium | Baking soda, lemon & salt | Metal tools, oven cleaner |
What To Do If Cleaning Doesn’t Work
If you’ve tried everything and the burnt layer won’t budge, here are some options:
- Repeat the process: Sometimes, several rounds are needed.
- Try a commercial cleaner: Products like Bar Keepers Friend can be very effective.
- Take the pan to a professional cleaner: Some cookware stores offer cleaning services.
- Use the pan for non-food purposes: Turn it into a plant pot or tool holder.
- Recycle it: Many metal pans can be recycled.
Sometimes, it’s not worth the time and effort to save a very burnt pan, especially if it’s old or low-quality.
Eco-friendly Cleaning Tips
Many people want to avoid harsh chemicals. Luckily, most effective cleaning methods use safe, eco-friendly ingredients.
- Baking soda, vinegar, salt, and lemon are all biodegradable and safe.
- Reuse old toothbrushes for scrubbing small parts.
- Dry pans with a towel instead of air drying to prevent water spots.
- Compost lemon peels after using them for cleaning.
Eco-friendly cleaning protects your home and the environment.
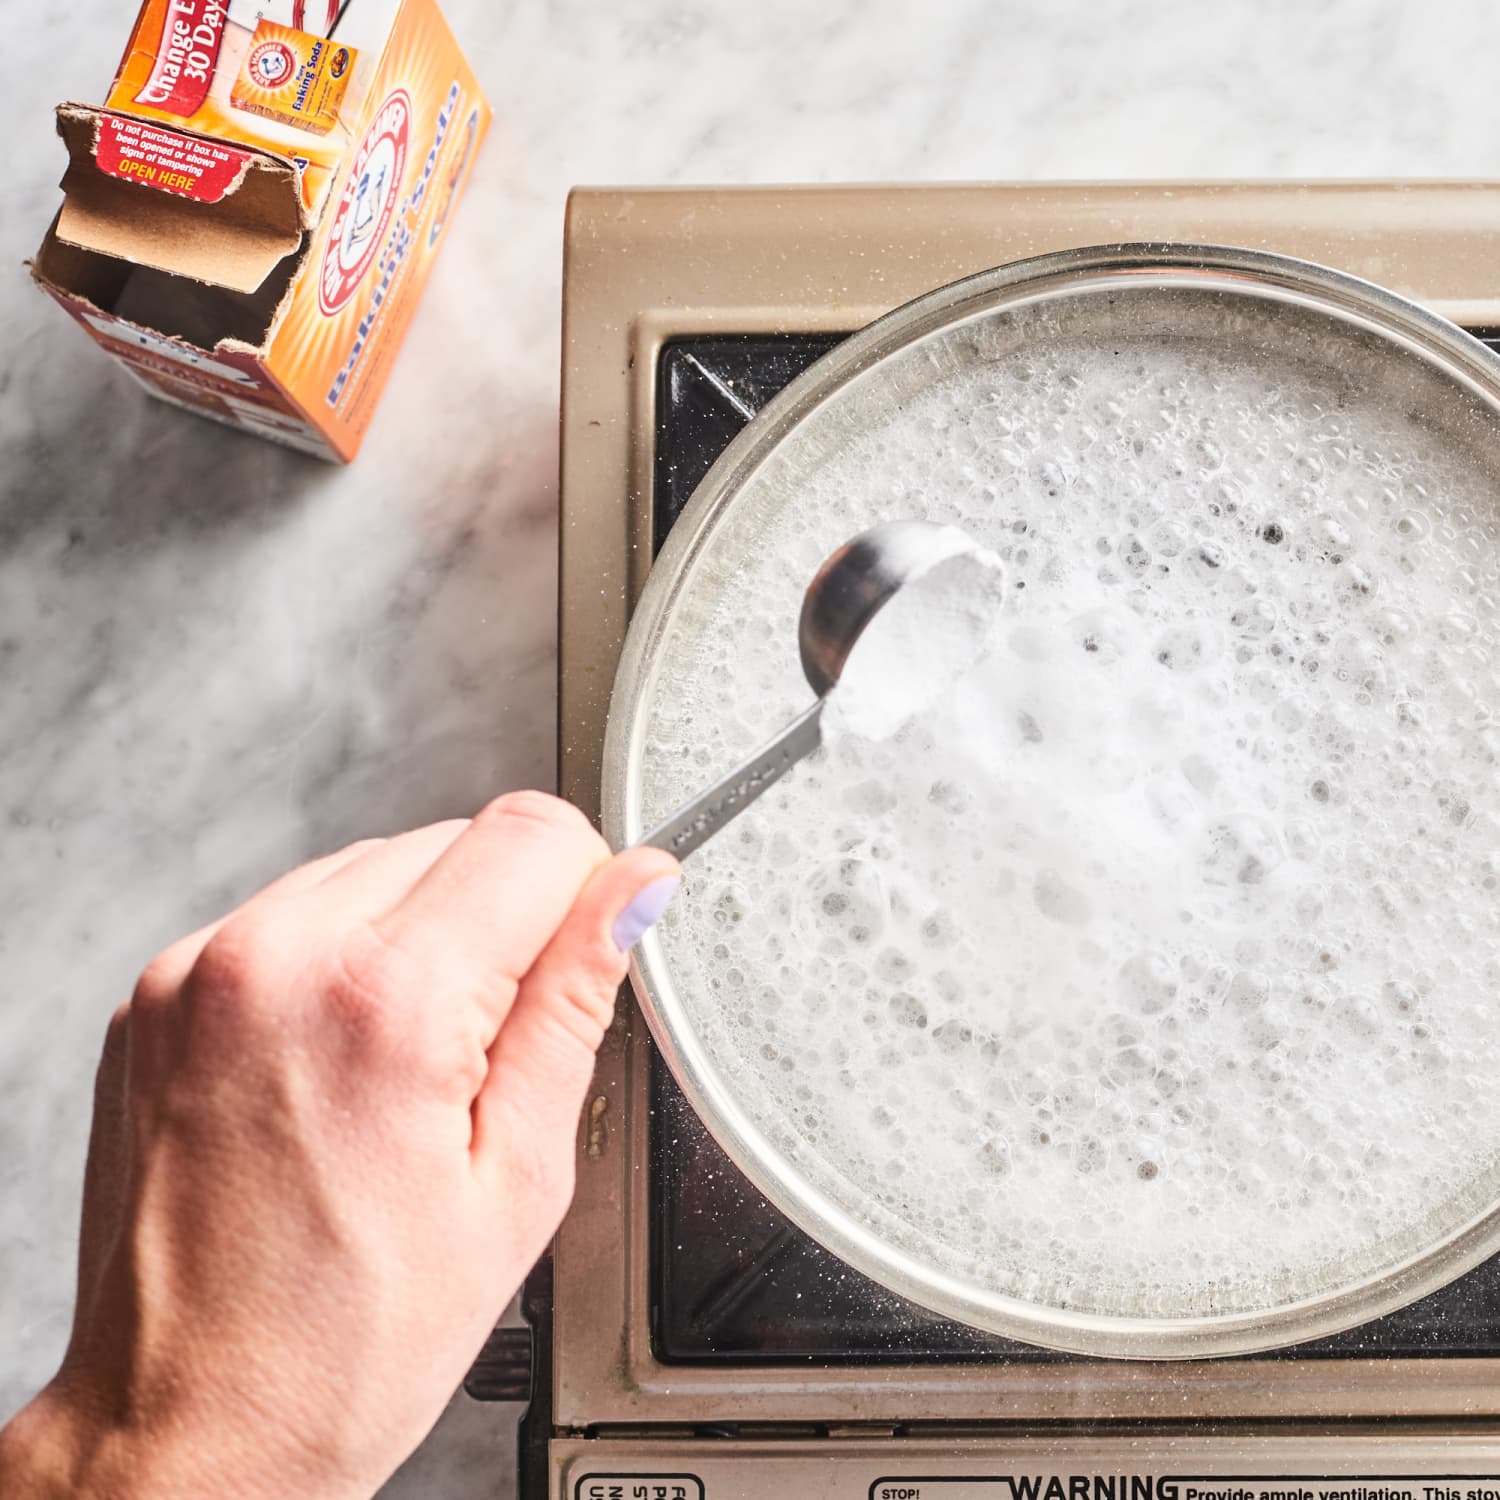
Credit: www.thekitchn.com
When To Seek Help Or Professional Cleaning
Some burns are just too stubborn. If you value your saucepan or it’s expensive, consider professional help. Cookware stores or cleaning services may have special equipment or cleaners that are safer and more effective. Always check the warranty—sometimes damage is covered or cleaning advice is available from the manufacturer.
For more details on pan materials and cleaning science, you can read this Wikipedia article on cookware and bakeware.
Frequently Asked Questions
How Do I Clean A Burnt Saucepan Without Baking Soda?
Try soaking the pan with hot, soapy water for several hours. For extra power, use lemon and salt or white vinegar. These natural acids help loosen burnt food. A commercial cleaner can also work if you avoid abrasives on delicate surfaces.
Can I Use Steel Wool On All Pans?
No. Steel wool is safe only on uncoated stainless steel or plain aluminum. Never use it on nonstick, enamel, or copper pans—it will scratch or destroy the coating. Always check your pan’s manual or manufacturer’s advice.
Is It Safe To Use A Pan With Burnt Stains?
If it’s just a stain and the surface is smooth, the pan is safe. But if the nonstick coating is peeling or the enamel is chipped, stop using it. Damaged pans can release unhealthy substances into food.
Why Does My Saucepan Keep Burning Food?
Common causes are cooking at too high heat, not adding enough liquid, or using a pan with hot spots. Try stirring more often, lowering the heat, and using a heavy-bottomed pan for better heat distribution.
Are Burnt Pans Still Good For Cooking?
Yes, if the pan is clean, not warped, and the cooking surface is undamaged. Minor stains won’t harm your food. But if the pan is deeply scratched, warped, or has broken coating, it’s better to replace it for safety and better cooking results.
Getting a badly burnt saucepan clean can take effort, but it’s usually possible with the right steps. The key is patience, choosing the right method for your pan, and knowing when to stop. With these tips and a little care, you’ll save your favorite pans and avoid kitchen disasters in the future.