
Smoothing a textured ceiling can transform a room, making it feel more modern, brighter, and easier to clean. Many older homes feature textures like popcorn, knockdown, or swirl patterns. While these styles once hid imperfections and absorbed sound, today’s homebuyers and owners often prefer a flat, clean look.
Whether you want to update your home’s style, repair damage, or prepare for painting, learning how to smooth a textured ceiling is a valuable skill.
The process involves important steps, from proper preparation to the final touch-ups. If you rush or skip key details, you may end up with a messy finish, damaged drywall, or hours of extra work. This guide covers every detail you need, including safety, tools, materials, technique, and aftercare.
You’ll learn what makes each type of texture unique, the best removal methods, common mistakes, and how to get a flawless result.
Why People Smooth Textured Ceilings
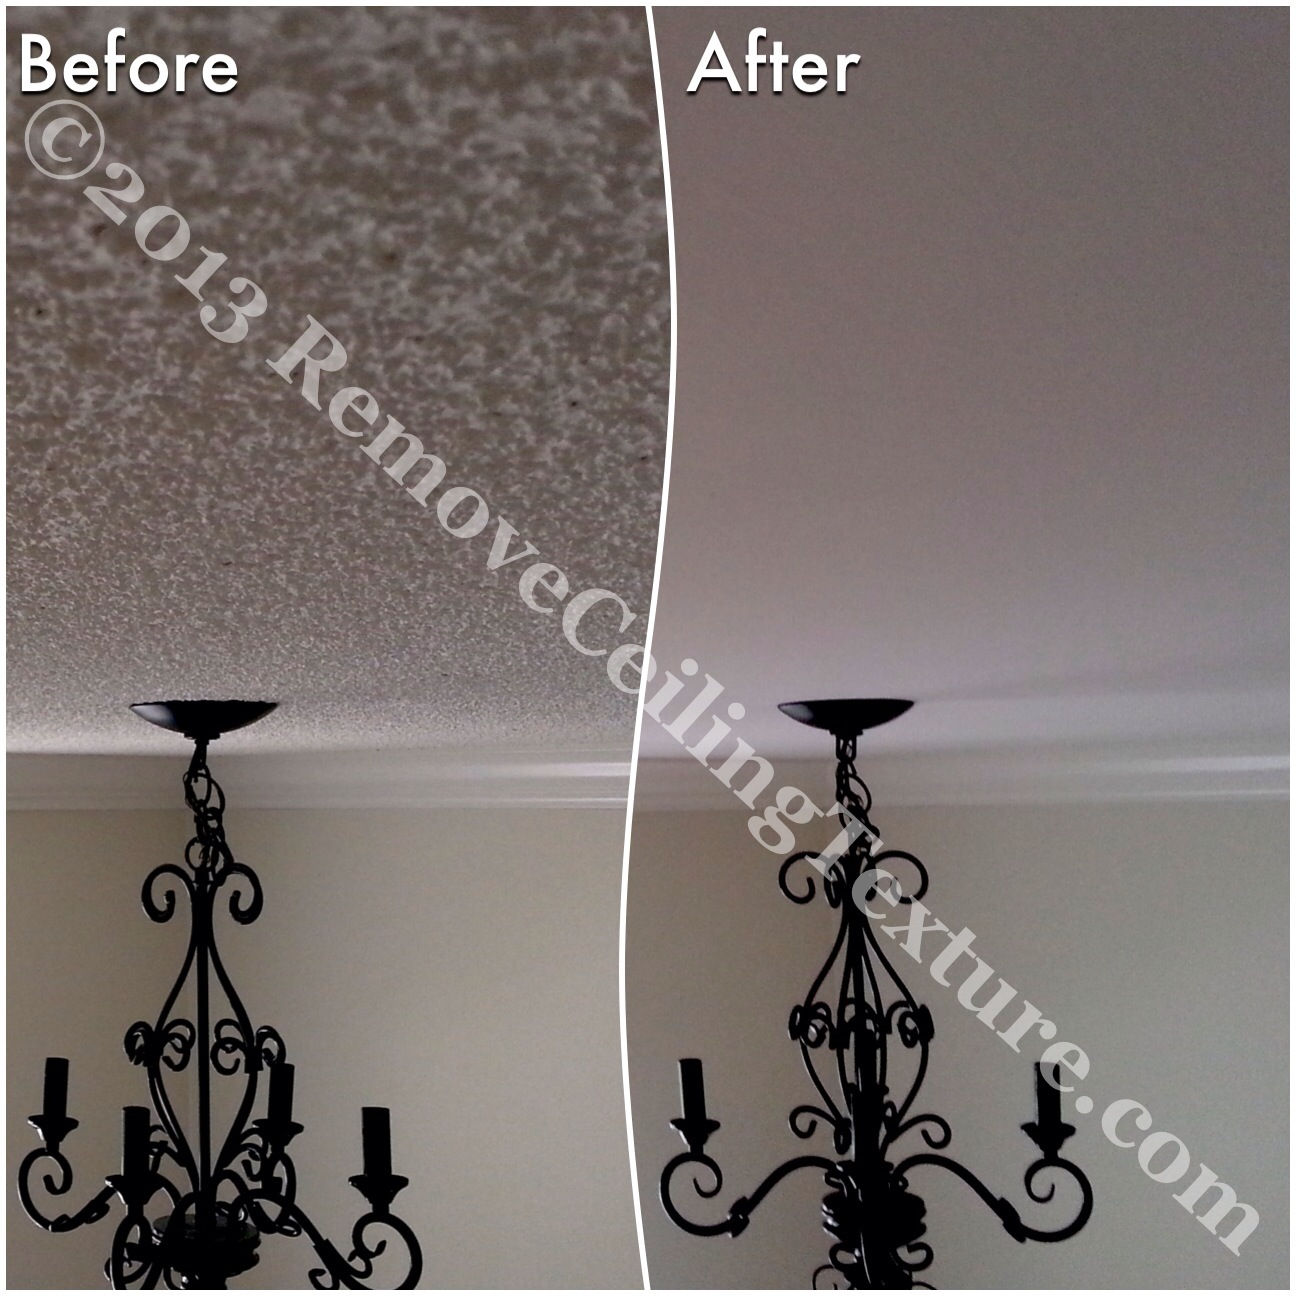
Textured ceilings, especially the infamous “popcorn” style, were popular from the 1950s to the 1980s. They were fast to apply and good at hiding flaws. However, there are several reasons why people now prefer smooth ceilings:
- Modern appearance – Smooth ceilings look brighter and more updated, often increasing a home’s value.
- Easier maintenance – Flat surfaces collect less dust and are easier to clean and repaint.
- Health concerns – Older textures may contain asbestos (especially before 1980), which is hazardous if disturbed.
- Better lighting – Flat ceilings reflect light evenly, making spaces feel larger and more welcoming.
- Repair simplicity – It’s easier to patch a smooth ceiling than match a texture.
Smooth ceilings also help with allergies. Textured surfaces trap more dust, pollen, and even cobwebs, which can be hard to remove. Over time, this buildup can affect indoor air quality. For families with allergies or asthma, a flat ceiling is much easier to keep clean and dust-free.
A less obvious benefit: flat ceilings make it easier to spot leaks or damage early. Textures often hide small stains or cracks. On a smooth surface, any problem is visible right away, so you can fix leaks or water issues before they become bigger problems.
Types Of Textured Ceilings
Understanding what you’re working with helps you choose the right smoothing method. Here are the most common ceiling textures:
| Texture Type | Key Features | Removal Difficulty |
|---|---|---|
| Popcorn (Acoustic) | Bumpy, cottage cheese appearance | Medium–High (asbestos risk) |
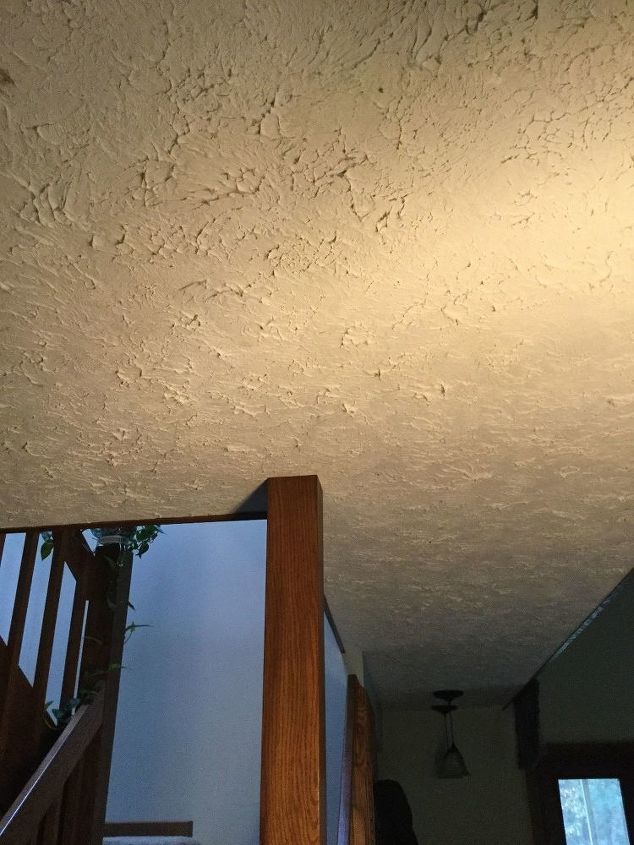
| Knockdown | Flat peaks, irregular patterns | Medium |
| Swirl | Curved designs, trowel marks | Medium |
| Orange Peel | Slightly rough, dimpled look | Low–Medium |
| Slap Brush | Fan-like, heavy texture | Medium |
Some ceilings combine multiple textures, especially in older remodels. For example, you might find popcorn over swirl, or knockdown applied on top of orange peel. These mixed textures are more difficult to remove and often need several layers of skim coat to become flat.
Non-obvious insight: Some textured ceilings have been painted multiple times, making removal much harder. Always test a small area before starting the full project.
Credit: removeceilingtexture.com
Safety First: The Asbestos Question
Before you start, you must check if your ceiling texture contains asbestos. Asbestos was used in many ceiling products before the 1980s. Disturbing it without proper protection can release dangerous fibers into the air. Here’s what you should do:
- Check your home’s age – Homes built before 1980 are most at risk.
- Test a sample – Hire a certified professional to collect and test a small piece. Never scrape or sand without knowing.
- If asbestos is present: Do not attempt removal yourself. Contact an asbestos abatement company.
- If no asbestos is found: You can proceed, but still wear a respirator, goggles, and gloves.
Besides popcorn ceilings, some swirl or knockdown patterns can also contain asbestos. Even if a ceiling looks newer, always check the history of the house. Sometimes, previous owners covered older asbestos texture with a new layer, so double-checking is wise.
Another point many homeowners miss: asbestos dust is not always visible. Just a tiny amount in the air can be dangerous. Even if you only plan to “patch a small spot,” always test first. And remember, normal dust masks do not protect against asbestos fibers. You need a proper respirator rated for fine particles.
Tools And Materials You’ll Need
Working with the right tools saves time and improves results. Here’s a breakdown:
Essential Tools
- 6-inch and 12-inch drywall taping knives
- Mud pan for joint compound
- Pole sander or sanding block (with 120–180 grit sandpaper)
- 5-gallon bucket
- Drill with paddle mixer (for mixing mud)
- Drop cloths or plastic sheeting
- Masking tape
- Step ladder or scaffolding
- Spray bottle (for water)
- Shop vacuum (with HEPA filter)
Materials
- Ready-mixed joint compound (all-purpose or lightweight)
- Water-based primer-sealer
- Interior ceiling paint (flat or eggshell)
- Water (for misting)
- Protective gear: Respirator, safety goggles, gloves, coveralls
Non-obvious insight: Lightweight joint compound sands much easier than all-purpose, creating less dust and reducing fatigue.
If you have a large area, consider renting a drywall sander with a vacuum attachment. This saves time and keeps dust levels lower. An extendable pole for rollers and sanders can also prevent neck and back strain when reaching overhead for long periods.
For ceilings with a lot of corners or obstacles (like beams or ductwork), you may need smaller putty knives and angle brushes for detailed work. Having a bright work light or headlamp will help you see imperfections before painting.
Step-by-step Guide: How To Smooth A Textured Ceiling
Smoothing a ceiling involves several clear stages. Rushing any step can lead to uneven results, visible lines, or costly repairs later. Here’s the complete process:
1. Prepare The Room
Proper preparation prevents mess and protects your home.
- Move all furniture out or cover it with plastic.
- Tape plastic sheeting to walls, covering windows and doors.
- Remove light fixtures, ceiling fans, and vents.
- Turn off the room’s power at the breaker box.
- Wear protective gear (especially a respirator).
Take time to seal doorways and vents with tape. Even a small gap lets dust escape into other rooms or your HVAC system. If you have carpet, double-layer your drop cloths for better protection—joint compound and water stains are hard to remove from soft flooring.
2. Test For Paint And Texture Thickness
Spray a small section (2 ft x 2 ft) with water and wait 10–15 minutes. Scrape gently with a putty knife. If the texture softens and comes off, it’s water-soluble (usually unpainted). If it does not budge, it’s been painted and requires more effort.
Practical tip: Painted texture may need chemical strippers or more aggressive scraping. Sometimes, skimming over is easier than trying to remove it.
If the ceiling absorbs water unevenly, you may be dealing with a mix of painted and unpainted patches. In that case, use the removal method that works for the toughest spot—usually skim coating. Trying to combine methods on the same ceiling often leads to an uneven finish.
3. Remove The Texture
There are two main methods:
Method 1: Wet Scraping
Best for unpainted popcorn or other water-soluble textures.
- Mist small areas with water, wait for it to soak in.
- Gently scrape with a wide drywall knife, keeping the blade at a low angle.
- Collect debris in a drop cloth for easy cleanup.
- Repeat in sections, working slowly to avoid gouging the drywall.
Take extra care near seams and corners. The drywall paper is thinner there and can tear if you scrape too hard. If you notice bubbling or sagging, stop and let the area dry before continuing.
Method 2: Skim Coating (for Painted Or Tough Textures)
If the texture does not come off with water, or you want to avoid dust, you can apply a skim coat instead.
- Lightly sand the surface to remove high points and improve adhesion.
- Apply a thin layer of joint compound with a wide knife, smoothing as evenly as possible.
- Let it dry completely (4–24 hours).
- Sand lightly, then repeat with a second coat if needed.
- For very heavy textures, a third skim coat may be required.
Mix your joint compound to a creamy, peanut butter consistency. If it’s too thick, it will be hard to spread smoothly. If too thin, it may sag or crack. Apply with steady pressure, feathering the edges to avoid ridges.
For ceilings with deep or sharp textures, consider a first coat using a wider trowel or even a drywall hawk. This covers more area faster and helps get the surface level before you switch to detail work with a knife.
4. Sand The Ceiling Smooth
Once the joint compound is dry, use a pole sander or sanding block to achieve a perfectly smooth surface.
- Start with 120-grit sandpaper, switching to 180-grit for final smoothing.
- Work gently to avoid over-sanding, which can expose the drywall paper.
- Shine a bright light across the ceiling to spot imperfections.
Common mistake: Skipping the sanding step or sanding too aggressively. Uneven sanding leads to visible ridges after painting.
If you find small bumps or missed spots after sanding, it’s better to apply a quick touch-up coat and re-sand than to try sanding everything flat. Patience during this step saves you from seeing flaws every time you look up after the job is done.
5. Prime The Ceiling
Joint compound is porous and will absorb paint unevenly. Apply a high-quality, water-based primer-sealer before painting.
- Use a roller with an extension pole for even coverage.
- Cut in edges with a brush.
- Allow primer to dry completely (usually 1–2 hours).
Priming also locks in any residual dust, preventing it from showing through your paint. For best results, use a dedicated “ceiling primer” formula, as it is designed to cover stains and provide a uniform base.
6. Paint The Ceiling
Choose a flat or eggshell finish for ceilings—gloss shows imperfections. Apply two coats for best coverage.
- Use a “ceiling paint” formula for extra brightness and drip resistance.
- Paint in long, overlapping strokes, working in small sections.
- Allow each coat to dry fully before applying the next.
If you’re painting in daylight, check your work from several angles to catch missed spots or roller marks. For rooms with tricky lighting (like recessed lights), use a paint sprayer for a flawless finish if you have experience, but be aware that spraying creates more fine overspray dust.
Special Considerations
What If Your Ceiling Has Cracks Or Damage?
If you see cracks, stains, or water damage, repair these before smoothing.
- Fill cracks with joint compound or a setting-type patch.
- Stain-kill any water marks with a shellac-based primer.
- Replace any sagging drywall panels before starting.
For hairline cracks, mesh drywall tape adds strength and prevents them from reopening later. If you notice soft spots or bulging, press gently—if the surface moves, the drywall may be water-damaged and should be replaced.
Can You Smooth Over Painted Textures Directly?
Yes, but adhesion is key. Always sand painted surfaces first and check that the joint compound sticks well. In some cases, a bonding primer may help.
A simple test: apply a small patch of joint compound, let it dry, and try to scrape it off. If it peels easily, the surface needs more sanding or priming. If it stays firmly attached, you’re ready to skim coat the rest.
When Should You Call A Pro?
- If you suspect asbestos
- If the ceiling is over 9 feet high or has complex shapes
- If you have allergies or breathing problems
- When the project feels overwhelming
Professional contractors have equipment for dust control, speed, and safety. If you decide to hire, always check references and licenses.
If you have vaulted or tray ceilings, pros can achieve a consistent finish that’s hard to match on your own. For homes with intricate moldings or built-in lighting, a professional can avoid damage to these features.
Cost Comparison: Diy Vs. Professional
Here’s a comparison of typical costs for smoothing a textured ceiling.
| Method | DIY Cost (per sq ft) | Pro Cost (per sq ft) | Notes |
|---|---|---|---|
| Wet Scraping | $0.50 – $1.00 | $2.00 – $4.00 | Cheapest, but messy |
| Skim Coating | $1.00 – $1.50 | $3.00 – $5.00 | Best for painted textures |
| Asbestos Abatement | Not DIY | $5.00 – $15.00 | Requires certified pro |
Pro tip: Many homeowners underestimate the time and mess involved in DIY, so factor in cleanup and your own labor.
Also, DIY costs increase if you need to buy or rent tools like ladders, sanders, or respirators. Professionals often include cleanup and debris removal, which can save you several hours of work.
Common Mistakes To Avoid
Even careful DIYers can make errors. Watch out for these pitfalls:
- Skipping asbestos testing – This is the most dangerous mistake. Never guess.
- Inadequate room prep – Dust travels everywhere; seal off all openings.
- Over-saturating the ceiling – Too much water can damage drywall and weaken seams.
- Using the wrong mud – Lightweight joint compound is easier for ceilings.
- Poor sanding technique – Heavy sanding creates gouges or exposes tape.
- Not priming before paint – Paint alone will highlight flaws and cause uneven color.
Another common mistake: not letting joint compound dry fully between coats. If you rush, the next layer won’t stick well and may peel or crack later. Use a fan or dehumidifier to speed up drying if needed, but never skip the drying time.

Credit: roomfortuesday.com
How Long Will It Take?
Smoothing a standard 10′ x 12′ room ceiling can take:
- Preparation: 1–2 hours
- Texture removal: 2–4 hours (wet scraping), or 2–3 hours per skim coat
- Drying time: 4–24 hours per coat
- Sanding and priming: 2 hours
- Painting: 2–3 hours (including dry time between coats)
Total time: 2–4 days, including drying between steps.
For larger rooms or ceilings with heavy texture, add extra time for each coat and more cleanup. If you’re working alone, allow for breaks—overhead work is tiring and going too fast increases mistakes.
Dust And Cleanup Tips
Ceiling smoothing is messy, especially when sanding. Here’s how to control dust and debris:
- Use a shop vacuum with a HEPA filter.
- Sand with a pole sander attached to a vacuum, if possible.
- Wipe surfaces with a damp sponge after sanding.
- Change HVAC filters after the project.
Non-obvious insight: Always check for dust inside light fixtures and vents after the job—fine dust travels further than you expect.
For homes with forced air systems, block off vents and leave them closed until all sanding is finished. When you remove the plastic sheeting, roll it inward to trap dust and avoid spreading it around your house. After finishing, run an air purifier or open windows to clear any remaining airborne dust.
Credit: www.hometalk.com
Alternatives To Full Smoothing
If you want a smoother look but less mess, consider these options:
- Install new drywall over the old ceiling – Fast, but lowers ceiling height slightly.
- Apply ceiling planks or tiles – Decorative and covers flaws.
- Texture blending – Use a lighter texture or “knockdown” for a more modern finish.
These options can save time and reduce risk, especially if the existing texture is thick or damaged.
A clever alternative: use beadboard or shiplap panels for a cottage or farmhouse style. These panels install directly over the old ceiling and create an entirely new look with much less prep. For rental properties or temporary fixes, removable ceiling tiles are another low-mess option.
Aftercare And Maintenance
Once your ceiling is smooth, keeping it looking good is simple:
- Use a microfiber mop or duster for regular cleaning.
- Avoid excessive moisture when cleaning.
- Touch up chips or cracks with a small amount of joint compound and paint.
If you ever need to repaint, always clean the ceiling first and use a high-quality, stain-blocking primer.
If you notice new cracks or stains, address them early. Small cracks often result from shifting or settling and can be filled and painted over easily. For water stains, always fix the source of the leak before repainting, or stains will return.
Is Smoothing A Textured Ceiling Worth It?
For most homeowners, the answer is yes. Smooth ceilings modernize your home, may increase resale value, and make future maintenance easier. The project is labor-intensive but saves thousands compared to hiring a pro. However, always consider health and safety risks.
If in doubt, get expert help.
A smooth ceiling also improves acoustics. While textured ceilings were once used to “deaden” sound, today’s homes benefit more from soft furnishings and rugs. A flat ceiling creates a crisp, echo-free space that feels more open and pleasant.
Frequently Asked Questions
How Can I Tell If My Ceiling Has Asbestos?
If your home was built before 1980 and the ceiling has a popcorn or other sprayed texture, there is a risk it contains asbestos. The only way to know for sure is to have a professional collect a sample and send it to a certified laboratory. Never sand, scrape, or disturb the texture until you know it is safe. For more details on asbestos, visit the EPA’s asbestos resources.
What Is The Easiest Way To Smooth A Painted Textured Ceiling?
For painted textures, the easiest method is usually skim coating. Lightly sand the texture, then apply a thin layer of joint compound with a wide knife. Let it dry, sand smooth, and repeat as needed. This covers the texture without the mess of scraping. Always prime before painting.
Do I Need To Remove The Old Texture, Or Can I Just Cover It?
If the texture is in good condition (no peeling or loose sections), you can skim coat directly over it after light sanding. If the texture is damaged, loose, or coming off, it is better to remove it before skimming. Covering over old texture saves time but may require more joint compound for a flat finish.
Can I Smooth A Textured Ceiling By Myself, Or Do I Need A Professional?
Many homeowners successfully smooth their own ceilings. The project requires patience, protective equipment, and the right tools. If the ceiling is very high, contains asbestos, or you have health concerns, hiring a professional is safer. For large spaces or complex shapes, a pro may finish faster and with less mess.
Will Smoothing My Ceiling Increase My Home’s Value?
Smooth ceilings are more appealing to most buyers and can increase a home’s value. Some appraisers estimate that removing popcorn ceilings can add $1,000–$2,500 to a home’s value, depending on the market. A modern, flat ceiling also makes rooms look larger and more updated.
Transforming a textured ceiling takes effort, but the results are worth it. By following every step carefully and using the right materials, you can achieve a smooth, modern finish that lasts for years. If you want further details on ceiling finishes, visit the Wikipedia article on popcorn ceilings.