
Many homeowners love the look of matte floor tiles for their soft, modern appearance. But sometimes, you may want those tiles to shine and reflect light—maybe to brighten a room, make it feel larger, or simply to change your home’s style. Making matte floor tile glossy is not as simple as mopping or waxing. It requires the right products, techniques, and a clear understanding of your tile type. If you’re thinking about giving your matte tiles a glossy makeover, this guide will walk you through every step, from preparation to maintenance. You’ll also learn the mistakes people make, what finishes actually last, and which products are worth your money.
Why Make Matte Floor Tiles Glossy?
Matte tiles are popular for their slip resistance and understated beauty. However, there are good reasons to want a glossy finish:
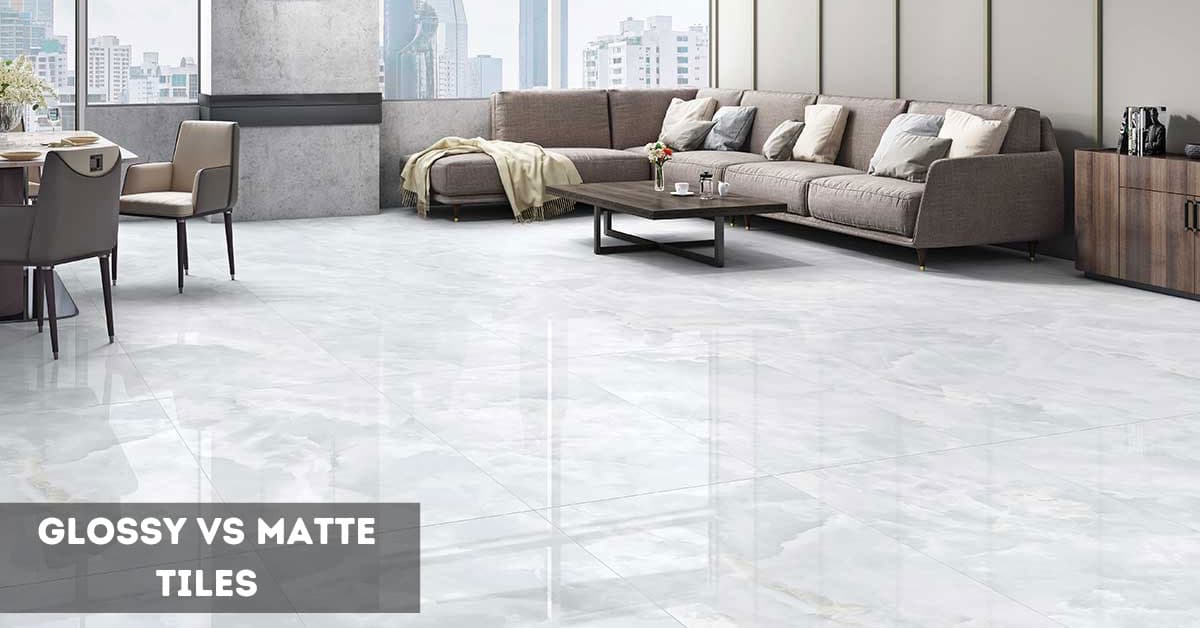
- Glossy tiles reflect more light, making rooms appear larger and brighter.
- They are easier to clean because dirt and grime can’t grip as easily.
- A glossy surface can modernize older flooring without a full remodel.
- Shiny floors often look more luxurious and expensive.
It’s important to know that not all tiles or rooms are suitable for a high-gloss finish. For example, in bathrooms or kitchens, extra shine could mean more slipperiness. Before you start, consider if your space needs a glossy look, and if it’s safe for your household.
What You Need To Know Before You Start
Changing a matte tile to a glossy finish is different from cleaning or polishing. Matte tiles are designed to absorb light, while glossy ones have a sealed, reflective surface. Here are the basics you must consider:
- Tile Material: The method you use depends on the tile’s material—ceramic, porcelain, natural stone, or other. For example, natural stone may react differently than porcelain.
- Tile Condition: Tiles that are cracked or heavily stained may not look good even after glossing.
- Permanent vs. Temporary: Some gloss methods are permanent (like special sealants), while others wear off and need re-application.
- Slip Hazard: Glossy tiles are more slippery, especially when wet.
Always test products in a small area first to avoid damage or unwanted results.
Credit: constructionhow.com
Types Of Floor Tiles And Their Gloss Potential
Not every tile responds the same way to glossing products. Here’s a comparison of how common tile types react to gloss treatments:
| Tile Type | Gloss Potential | Best Method | Notes |
|---|---|---|---|
| Ceramic | High | Liquid gloss sealer | Easy to apply and durable |
| Porcelain | Medium-High | High-gloss tile sealer | Choose a product for porcelain |
| Natural Stone (e.g., marble, granite) | Medium | Stone polish + sealer | Requires special care |
| Terracotta | Low-Medium | Wax-based polish | Needs regular re-application |
| Vinyl or Laminate | Low | Surface polish only | Gloss is often temporary |
Methods To Make Matte Floor Tile Glossy
There are several ways to achieve a glossy tile finish. The right choice depends on your tile type, budget, and how long you want the shine to last.
1. Deep Cleaning And Preparation
No matter which glossing method you choose, a thorough cleaning is essential. If tiles are dirty, the gloss won’t stick or will look uneven.
Steps:
- Sweep or vacuum the floor to remove dust and debris.
- Use a tile-safe cleaner (avoid harsh chemicals) and mop thoroughly.
- For stubborn stains, use a soft brush and mild detergent.
- Rinse with clean water and let dry completely.
Tip: Check grout lines. Dirty or stained grout will look worse after glossing. Clean grout with a baking soda paste or specialized grout cleaner.
2. Using A Tile Gloss Sealer
One of the most popular ways to add gloss is with a tile gloss sealer. These products are designed to bond with the tile’s surface and create a shiny, protective layer.
Steps:
- Pick a water-based gloss sealer for easier application and safer indoor use.
- Apply using a clean microfiber mop or applicator pad.
- Work in small sections to avoid streaks.
- Allow to dry (usually 1-2 hours) before applying a second coat, if needed.
- Avoid walking on the floor until fully cured (typically 24 hours).
Non-obvious insight: Some sealers contain UV protection, which prevents yellowing over time. Check the product label for this feature if your tiles are in sunny rooms.
3. Applying Floor Polish Or Wax
Floor polishes and waxes give an instant shine but are more temporary. They’re best for ceramic or terracotta tiles.
Steps:
- After cleaning, pour a small amount of polish onto the tile.
- Spread evenly with a soft mop.
- Let dry (usually 30-60 minutes).
- Buff with a clean, dry cloth for extra shine.
Drawback: Wax builds up over time. Every few months, you’ll need to strip the old wax and reapply.
4. Professional Polishing And Buffing
For natural stone tiles, mechanical polishing may be the best way to achieve a high-gloss finish. This process uses specialized machines and abrasives.
- Professionals use diamond polishing pads to grind and buff the tile surface.
- This method is long-lasting and brings out the stone’s natural shine.
- It’s more expensive but the results are dramatic and durable.
Practical tip: Don’t try DIY machine polishing unless you are experienced. You can easily damage the tile surface.
5. Epoxy Coatings
Epoxy coatings create a glass-like finish and are very durable. However, they are harder to apply and may change the tile’s look permanently.
Steps:
- Mix the epoxy resin and hardener as directed.
- Pour onto clean, dry tiles and spread with a roller.
- Let cure for at least 24-48 hours.
Warning: Epoxy can yellow in sunlight and is slippery when wet. Only use in low-traffic or decorative areas.
6. Using High-gloss Tile Paint
Some brands make special high-gloss tile paints. These are mostly used for walls but can work on floors that see little wear.
- Clean and dry the tiles.
- Lightly sand the surface for better paint adhesion.
- Apply the paint with a roller or brush.
- Allow to dry completely before walking on the tiles.
Insight: Painted gloss finishes can chip or peel if used in busy areas.
7. Steam Cleaning For Shine
While steam cleaning doesn’t add gloss, it can enhance the natural shine of tiles by removing deep dirt and grease.
- Use a tile-safe steam mop.
- Avoid using on unsealed natural stone, as steam can damage it.
- Let the floor dry fully before applying any gloss products.
Steam cleaning works best as a preparation step, not a substitute for glossing products.
Credit: www.simpolo.com
How To Choose The Best Gloss Method For Your Tiles
Selecting the right method is critical for success. Here’s a quick comparison to help you decide:
| Method | Durability | Best For | Maintenance |
|---|---|---|---|
| Gloss Sealer | 1-3 years | Ceramic, Porcelain | Reapply every 1-2 years |
| Floor Polish/Wax | 1-3 months | Ceramic, Terracotta | Regular stripping and reapplication |
| Professional Polishing | 5+ years | Natural Stone | Minimal—just cleaning |
| Epoxy Coating | 5-10 years | Ceramic, Porcelain | Occasional cleaning |
| High-Gloss Paint | 6-12 months | Low-traffic floors | Touch-ups needed |
Non-obvious insight: If you have underfloor heating, avoid wax-based products. They can melt or become sticky.
Step-by-step Guide: Making Matte Floor Tile Glossy
Let’s go through a practical process, using a water-based gloss sealer—the most popular and safest method for most homeowners.
Step 1: Gather Materials
You’ll need:
- Tile-safe floor cleaner
- Mop and bucket
- Microfiber applicator pad
- Water-based gloss sealer
- Soft cloths
- Gloves
Step 2: Clean The Tiles
Remove all loose dirt with a broom or vacuum. Mop the floor with tile cleaner, making sure to get into corners and grout lines. Allow the floor to dry completely—gloss sealers won’t stick to damp tiles.
Step 3: Test The Sealer
Pick a small, hidden area (like behind a door) and apply a little sealer. Let it dry and check the finish. If it looks good, proceed.
Step 4: Apply The First Coat
Pour a small amount of gloss sealer onto the applicator pad. Work in 3×3 foot sections, moving in one direction. Use light, even pressure to avoid streaks or bubbles.
Step 5: Let It Dry
Give the floor at least 1-2 hours to dry. Keep pets and children away during this time.
Step 6: Apply A Second Coat
For more shine, add a second coat. Make sure the first is fully dry before starting.
Step 7: Cure And Maintain
Wait 24 hours before replacing furniture or walking heavily on the floor. Maintain the finish by sweeping and using a pH-neutral cleaner. Avoid abrasive scrubbing pads.
Example: After using a gloss sealer, one homeowner in Florida noticed their kitchen looked twice as bright, and they spent less time cleaning sticky spills.
Common Mistakes To Avoid
Making matte tiles glossy is not difficult, but errors can ruin the results or damage your floor.
- Skipping the cleaning: Any dirt left behind will be sealed under the gloss, creating a hazy look.
- Using the wrong product: Not all sealers or polishes are safe for every tile type. Always check the label.
- Applying too thickly: Thick layers dry unevenly and can peel.
- Not allowing enough drying time: Walking on wet sealer causes smudges and footprints.
- Using outdoor products indoors: Some outdoor sealers contain strong chemicals and fumes.
Tip: Always keep the room well-ventilated when applying sealers or polishes.
Maintenance Tips For Glossy Tile Floors
A shiny tile floor looks great, but it needs proper care to keep its luster.
- Sweep or vacuum often to remove grit that can scratch the gloss.
- Mop with a pH-neutral cleaner; avoid acidic or ammonia-based products.
- Wipe up spills quickly to prevent staining.
- Reapply the gloss product as recommended—usually every 1-2 years for sealers, every few months for waxes.
- Place mats at entrances to reduce dirt tracked in from outside.
Practical tip: Use felt pads under furniture legs to avoid scratching the surface.
When To Call A Professional
Some situations call for expert help:
- You have expensive natural stone tiles and want a flawless, mirror-like finish.
- Previous DIY attempts left streaks, haze, or peeling.
- The floor has deep scratches or damage that need repair before glossing.
- You want a permanent solution, like epoxy coating.
Professionals have the right machines, products, and experience for the job. The cost is higher, but so are the results.
Eco-friendly And Health Considerations
Not all gloss products are created equal. Some contain harsh solvents or strong odors. If you have allergies, children, or pets, look for:
- Low-VOC (volatile organic compound) sealers for better air quality.
- Water-based products instead of solvent-based ones.
- Natural alternatives for stone floors, like beeswax-based polishes.
Non-obvious insight: Some glossing methods can make floors so slippery that they become a hazard, especially for elderly family members or small children. Consider adding non-slip mats or using a gloss product with anti-slip additives.
Cost Comparison: Diy Vs. Professional
Here’s a quick look at the typical costs involved:
| Method | DIY Cost (per 100 sq ft) | Pro Cost (per 100 sq ft) |
|---|---|---|
| Gloss Sealer | $30–$50 | $150–$300 |
| Floor Polish/Wax | $20–$40 | $120–$250 |
| Professional Polishing | Not recommended | $400–$800 |
| Epoxy Coating | $100–$200 | $500–$1,000 |
DIY is much cheaper, but professionals can deliver a perfect, long-lasting finish.
Mistakes Beginners Often Make (and How To Avoid Them)
Many first-time DIYers believe that any shiny product will work on their tile. In reality, tile type and product compatibility are crucial. For example, using a stone polish on ceramic tiles can leave a greasy film that never dries properly. Another common mistake is trying to apply too many coats at once, thinking it will increase shine. In fact, thick layers often trap moisture and create bubbles.
It’s also easy to forget about proper ventilation. Many gloss products have strong smells. Always open windows and use fans if possible. And finally, many overlook the importance of letting each layer dry completely—patience is key to a smooth, glossy finish.
Long-term Effects: What To Expect
After glossing, most tiles will keep their shine for a year or more, depending on traffic and cleaning habits. However, in high-traffic areas or homes with pets, you may notice dull spots after several months. This is normal—just reapply the gloss product as needed.
Be aware that after several years of repeated treatments, buildup may occur. If this happens, use a tile-safe stripping product to remove old layers before applying new gloss.
When Not To Make Matte Tiles Glossy
Some tiles are best left matte:
- Outdoor tiles: Glossy finishes can become dangerously slippery in rain.
- Shower floors: Safety is more important than shine.
- Historic or hand-painted tiles: Glossing may damage or change their appearance.
Always prioritize safety and tile integrity over style.
Alternative Ways To Add Shine Without Glossing
If you want a brighter floor without changing your tile’s surface, try these tricks:
- Use brighter, cooler-toned light bulbs to enhance reflectivity.
- Place mirrors or glass decor to bounce light around the room.
- Clean tiles regularly to keep their natural sheen.
Sometimes, a deep clean and better lighting can make a big difference.
Frequently Asked Questions
How Long Does A Glossy Finish Last On Floor Tiles?
Gloss finishes last from a few months to several years, depending on the method and foot traffic. Sealers can last 1-3 years, while waxes may need reapplying every few months. Professional polishing or epoxy coatings offer the longest-lasting results.
Is It Safe To Use Gloss Products On Bathroom Or Kitchen Tiles?
You can use gloss products in bathrooms and kitchens, but be careful. Glossy floors are more slippery, especially when wet. Always check if the product is water- and slip-resistant, and consider adding non-slip mats.
Will Making My Tiles Glossy Change Their Color?
Some gloss products may slightly darken the tile’s color or enhance the pattern. Always test in a small area first to see the final look before treating the entire floor.
Can I Remove The Glossy Finish If I Change My Mind?
Most gloss finishes can be removed with a tile-safe stripper, but epoxy coatings and some paints are more permanent. For natural stone, professional polishing is reversible, but it may alter the surface slightly.
Where Can I Learn More About Floor Tile Finishes And Care?
For more in-depth guides and product recommendations, you can visit trusted resources like the Home Depot Floor Tile Guide.
Bringing a glossy shine to matte floor tiles is a rewarding way to refresh your home’s look. With careful preparation, the right products, and a little patience, you’ll enjoy a bright, easy-to-clean floor that impresses every guest who walks in.
Remember, the best results come from matching the method to your tile type and lifestyle. A glossy finish can lift your room’s mood—just make sure it’s a change you truly want and maintain it well for lasting beauty.

Credit: www.youtube.com