Cane webbing, with its delicate pattern and natural look, adds a unique touch to furniture, cabinetry, and decor. But sometimes, the pale color of new cane doesn’t fit your style or project needs. Staining cane webbing can completely transform its appearance, making it richer, warmer, or more dramatic.
Yet, many people worry about damaging the fibers or getting uneven results.
Staining cane is not difficult, but it does require care, patience, and the right approach. This guide will walk you through every step, from choosing materials to applying the finish. Whether you’re restoring a vintage chair or updating a cabinet door, you’ll find clear instructions, practical tips, and solutions to common problems.
You’ll also discover some insights that can help you achieve professional-looking results on your first try—even if you’re a beginner.
What Is Cane Webbing?
Cane webbing is a woven sheet made from the outer bark of the rattan vine. It’s most often seen on chair seats, backs, cabinet doors, and sometimes wall panels. The open, hexagonal pattern is not just beautiful; it also allows air to flow, which is perfect for seats and doors.
There are different types of cane webbing, like open mesh, closed cane, and radio weave. Each has its own look and feel, but all cane webbing is naturally light beige or pale yellow. Over time, it can darken a little, but if you want a deeper or different color, staining is the answer.
Why Stain Cane Webbing?
Many people choose to stain cane webbing for these reasons:
- Match existing furniture: Sometimes, you want your cane to blend with wood tones or other materials.
- Add warmth or contrast: Stain brings out the pattern and can make the webbing a feature.
- Protect the cane: Some stains and finishes add a layer of protection against moisture or wear.
- Refresh old pieces: A new color can make old furniture look modern.
However, cane is not like wood. It’s more delicate, and its surface doesn’t absorb stain in the same way. This makes the process a bit different—and why it’s important to follow the right steps.
Essential Materials And Tools
Before you begin, gather everything you need. Using the right products makes a big difference.
Materials
- Cane webbing (new or already installed)
- Stain (oil-based, water-based, or gel stain)
- Wood conditioner (optional, for even absorption)
- Clear finish (polyurethane, lacquer, or shellac)
- Fine-grit sandpaper (320–400 grit)
- Painter’s tape (to protect areas you don’t want stained)
- Drop cloth or plastic sheeting (to protect your workspace)
- Clean rags (lint-free)
- Foam brushes or natural bristle brushes
- Disposable gloves
- Bucket of water (for cleaning)
- Small artist’s brush (for corners or touch-ups)
Optional Items
- Spray bottle (for misting water)
- Wood bleach (if you need to lighten old, dark cane)
- Tack cloth (for removing dust)
- Mask (for fumes, especially with oil-based products)
Choosing The Right Stain For Cane Webbing
The right stain can make or break your project. Not all stains work well on cane, and some can cause uneven color or sticky residue.
Comparing Stain Types
Here’s a quick comparison of the most common stains for cane webbing:
| Type of Stain | Pros | Cons | Best For |
|---|---|---|---|
| Oil-based | Deep color, longer working time | Strong odor, longer drying time | Experienced users, indoor furniture |
| Water-based | Low odor, quick drying, easy cleanup | Can raise cane fibers, absorbs fast | Beginners, quick projects |
| Gel stain | Thicker, less drippy, good control | Can be hard to apply evenly on woven cane | Vertical surfaces, touch-ups |
Water-based stains are safest for beginners and those sensitive to fumes. Oil-based stains give richer colors but need more care and ventilation. Gel stains are good for vertical cane, like cabinet doors, because they don’t run as much.
Color Selection
Cane webbing is naturally light, so even a medium stain will look much darker than on wood. Test your stain on a scrap piece or a hidden spot first. Popular stain colors for cane include:
- Golden oak (for warmth)
- Walnut (for a classic look)
- Espresso (for dramatic contrast)
- Gray or driftwood (for a modern twist)
Avoid stains with strong red or purple undertones, as they can look unnatural on cane.
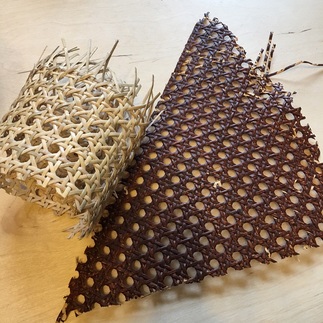
Credit: www.emzaschaircaning.com
Preparing Cane Webbing For Staining
Proper prep is key to a smooth, even finish. Skipping these steps can cause blotchy color or poor adhesion.
Clean The Surface
If your cane is new, wipe it with a damp cloth to remove dust. For old or dirty cane:
- Mix mild soap with water.
- Dip a soft cloth, wring it out, and gently wipe the webbing.
- Use a toothbrush for stubborn spots.
- Let the cane dry completely—at least 24 hours.
Sand Lightly
Cane webbing can have small splinters or rough areas. Use fine-grit sandpaper (320–400 grit) to lightly sand the surface. Don’t press hard; you just want to smooth it. Wipe away dust with a tack cloth.
Mask And Protect Surroundings
Use painter’s tape to cover any wood frames, upholstery, or areas you don’t want stained. Lay down a drop cloth or plastic to catch drips.
Test For Absorption
Dampen a small section with water. If the water beads up, your cane may have a finish that needs removal. If it soaks in, it’s ready for stain.
Non-obvious insight: Old cane can develop an oily residue that blocks stain. If you see uneven absorption, wipe the cane with a little rubbing alcohol and let it dry.
How To Stain Cane Webbing: Step-by-step Instructions
Once you’ve prepped your work area and materials, you’re ready to stain.
Step 1: Wet The Cane (optional But Recommended)
Mist the cane lightly with water using a spray bottle. This opens the pores and helps the stain absorb evenly. Don’t soak—just a light mist.
Pro tip: If the cane is very dry, it can absorb stain too fast, causing blotches. Pre-wetting balances this out.
Step 2: Apply Wood Conditioner (optional)
A wood conditioner isn’t always needed, but if you want the most even color, especially on new cane, it can help. Brush on according to the label, wait the recommended time (usually 15–30 minutes), and wipe off any excess.
Step 3: Apply The Stain
- Wear gloves to protect your hands.
- Dip a foam brush or soft cloth into the stain.
- Work in small sections.
- Gently brush or wipe the stain onto the cane, moving with the grain.
- For open-weave cane, be careful not to flood the holes with stain. Less is more.
- Use a small artist’s brush for corners or tight spots.
Let the stain sit for 3–5 minutes, then use a clean rag to wipe off the excess. The longer you leave the stain, the darker the color.
Step 4: Blend And Even Out
After wiping, check for missed spots or uneven patches. Lightly reapply stain to lighter areas and blend with a clean cloth.
Non-obvious insight: Cane absorbs more stain on the edges of the strips than on the flat surfaces. Don’t panic if the weave edges look darker—this is normal and adds depth.
Step 5: Let It Dry
Allow the cane to dry completely. Drying time depends on the stain type:
- Water-based: 1–2 hours
- Oil-based: 4–8 hours
Don’t rush to the next step; sticky or tacky cane means it’s not fully dry.
Step 6: Apply A Second Coat (if Needed)
If you want a deeper color, repeat the staining process. Cane will get darker with each coat, but don’t overdo it—too many coats can make the webbing stiff.
Step 7: Finish With A Clear Topcoat
Once you’re happy with the color and it’s dry, protect your work with a clear finish:
- For a natural look, use a spray polyurethane or shellac.
- For durability, especially on chairs, use a wipe-on polyurethane.
- Apply thin, even coats.
- Let each coat dry, then lightly sand with very fine sandpaper.
- Apply 1–2 more coats for best protection.
A topcoat keeps the cane from drying out, resists stains, and makes cleaning easier.
Common Problems And Solutions
Even with care, you might run into issues. Here’s how to handle them:
Uneven Color
- Caused by uneven sanding, old finish, or missed spots.
- Solution: Lightly sand the area, wipe clean, and restain.
Sticky Or Tacky Surface
- Usually from too much stain or not enough drying time.
- Solution: Wipe with a clean rag, let dry longer, and avoid thick coats.
Overly Dark Or Muddy Color
- Cane absorbs stain quickly; too many coats can look heavy.
- Solution: Wipe with a cloth dampened with mineral spirits (for oil-based) or water (for water-based) to lift some color.
Stiff Webbing
- Cane should remain flexible. Too much stain or finish can make it brittle.
- Solution: Use thinner coats and allow more drying time between layers.
Flaking Or Peeling
- Happens if stain or finish is applied to a dirty or oily surface.
- Solution: Clean and sand the area, then reapply stain and finish.
Comparing Cane Staining To Wood Staining
Many first-timers assume staining cane is just like wood. But there are important differences.
| Aspect | Cane Webbing | Wood |
|---|---|---|
| Absorption | Faster, more uneven | Slower, more predictable |
| Prep | Gentle sanding, careful cleaning | Heavier sanding possible |
| Best Stains | Water-based, light oil | Any type |
| Topcoat Needs | Essential for flexibility | Optional |
The bottom line: treat cane gently, use thin coats, and don’t skip the topcoat.

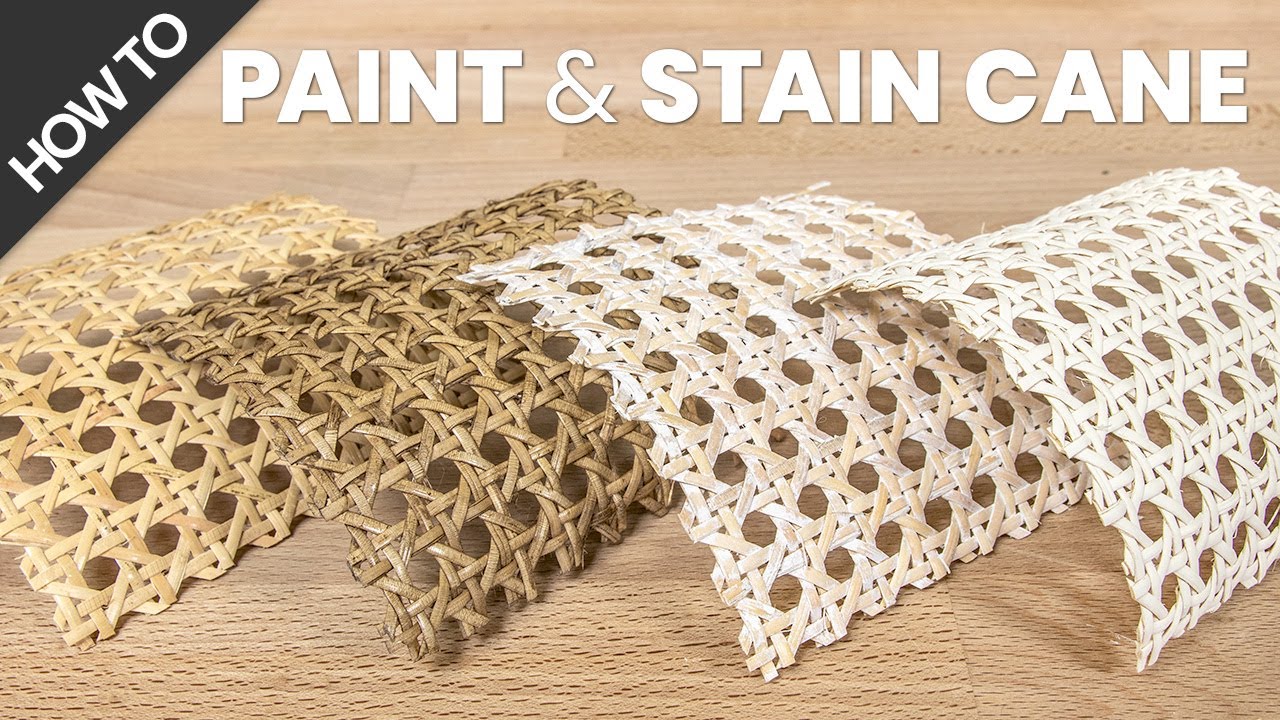
Credit: www.youtube.com
Tips For Staining Different Types Of Cane Webbing
Cane webbing comes in several patterns. Each type has a few special considerations.
Open Mesh (hexagonal)
This is the classic pattern found on chairs. Because of the holes, use less stain and avoid drips. Foam brushes work best.
Close Weave
Looks more like fabric, with smaller holes. Stain can pool, so use a soft cloth to wipe quickly. This type absorbs stain more evenly.
Radio Weave
A modern look with wider strips. Apply stain with a brush, then wipe with the grain for clean lines.
Practical tip: Always test your stain on a scrap of the same cane type. Results can vary even between batches.
Caring For Stained Cane Webbing
After staining, you want your work to last. Here’s how to keep cane webbing looking great:
- Avoid excess moisture: Cane likes humidity but not soaking. Wipe spills quickly.
- Clean gently: Use a soft, damp cloth. Avoid harsh cleaners.
- Protect from sun: Prolonged sunlight can fade stain and dry out cane.
- Recoat as needed: Every 2–3 years, add a fresh topcoat if the finish looks worn.
Non-obvious insight: Placing felt pads under furniture with cane seats helps prevent stress and cracking, especially on hard floors.
Advanced Techniques And Creative Finishes
If you want to go beyond basic brown stains, you can try these ideas:
Tinted Oils
Mix a small amount of oil-based stain with linseed or tung oil. Wipe on for a subtle, glowing color.
Layered Stains
Apply a light color first, let dry, then add a darker shade to the edges for depth. This is called “toning. ”
Whitewashing
Dilute white paint with water and brush lightly for a beachy, driftwood effect.
Colored Dyes
Special wood dyes can give bold colors like blue, green, or red. These are more challenging but can look stunning.
Expert tip: Always seal creative finishes with a clear topcoat to prevent color rub-off.
Mistakes Beginners Often Make (and How To Avoid Them)
Many first-time cane stainers run into avoidable problems. Here’s what to watch out for:
- Not testing the stain: Always try your stain on a scrap or hidden area first.
- Over-applying product: Thin, even coats prevent drips and stiffness.
- Skipping the topcoat: Unsealed stain can rub off and attracts dirt.
- Using harsh sandpaper: Coarse grit can damage cane’s delicate surface.
- Rushing the process: Patience gives better, longer-lasting results.
Credit: www.youtube.com
When To Replace Versus Stain Cane Webbing
Sometimes, staining isn’t enough—especially if the cane is brittle, cracked, or sagging.
Signs You Need Replacement
- Large cracks or holes
- Loose or sagging webbing
- Severe discoloration that won’t bleach out
If the cane is still strong and flexible, staining is a good option. If not, consider replacing the webbing before staining for the best result.
Safety Tips For Staining Cane Webbing
Working with stains and finishes means you need to protect yourself and your space.
- Ventilate: Always work in a well-ventilated area, especially with oil-based stains.
- Wear gloves: Stains can be hard to remove from skin.
- Protect your eyes: If using sprays, wear goggles.
- Dispose of rags safely: Oil-soaked rags can ignite—lay flat to dry before discarding.
For more information on stain safety, see the OSHA Chemical Database.
Frequently Asked Questions
How Long Does It Take To Stain Cane Webbing?
It depends on the stain type and number of coats. Most projects take 1–2 hours for prep and application, plus drying time (2–8 hours per coat). Add extra time for topcoats.
Can I Stain Cane Webbing While It’s Installed On Furniture?
Yes, but protect surrounding areas with painter’s tape and drop cloths. It’s easier to control stain on flat, horizontal surfaces, so consider removing the webbing if possible.
What’s The Best Way To Get An Even Color On Cane?
Prep the cane by cleaning and lightly sanding. Pre-wet with water and use thin, even coats of stain. Wipe off excess and blend with a clean cloth.
Will Staining Cane Webbing Make It Less Flexible?
If you use too much stain or finish, yes. Stick to thin coats and avoid flooding the webbing. Always finish with a flexible topcoat to keep cane supple.
Can I Paint Cane Webbing Instead Of Staining It?
Yes, you can paint cane webbing. Use a spray paint or thin brush-on paint for best results. However, paint will cover the natural pattern and may reduce flexibility more than stain.
Staining cane webbing is a rewarding way to update, restore, or personalize your furniture. With the right tools and techniques, you can achieve beautiful, durable results that highlight the natural beauty of cane. Take your time, follow each step, and don’t be afraid to experiment.
The character and warmth of stained cane webbing can transform any space—making your piece uniquely yours.