Painting rocks has become a popular creative hobby for many people of all ages. It’s a relaxing way to express yourself, add color to your garden, or even spread kindness by hiding painted rocks in public places. But after you finish your artwork, you want it to last. Exposure to rain, sunlight, and even just handling can damage your painted rocks. That’s why learning how to seal rocks after painting is essential if you want your art to stay beautiful for years.
Sealing rocks may sound simple, but there are important steps and choices that make a big difference. Picking the right sealer, knowing how to apply it, and understanding what not to do can help you avoid common problems like sticky surfaces, color fading, or peeling.
In this guide, you’ll discover everything you need to know to seal your painted rocks the right way. Whether you’re a beginner or looking to improve your technique, you’ll find practical tips, clear steps, and solutions to the most frequent mistakes.
By the end, you’ll feel confident and ready to protect your rock art for the long term.
Why Seal Painted Rocks?
If you’ve ever seen a painted rock lose its color or become damaged, you know how disappointing it can be. Sealing painted rocks is about more than just making them shiny. Sealing protects your artwork from the elements, keeps colors bright, and makes your rocks easier to clean.
Painted rocks that are not sealed can quickly fade, especially if left outside. Rain can wash away paint, and sunlight can make colors look dull. Even handling your rocks can wear off the artwork over time. A good sealer acts like a shield, locking in the color and creating a surface that resists water, dirt, and scratches.
Some people think they can skip sealing if they use strong paint, but even the best paints are not made for outdoor weather or heavy use. For example, acrylic paint is popular for rock painting, but it’s not waterproof by itself. Without a sealer, the paint can peel, chip, or fade.
Sealing also gives you more options for how your rocks look. Some sealers make rocks glossy and smooth, while others leave a natural matte finish. You can choose the look you prefer and even use sealers that add extra effects, like glitter or texture.
Types Of Sealers For Painted Rocks
Choosing the right sealer is one of the most important steps for protecting your painted rocks. There are several types of sealers, and each has its own strengths and weaknesses. Here’s a detailed look at the main options you’ll find:
1. Spray Sealers
Spray sealers are very popular because they are easy to use and cover the rock evenly. These come in aerosol cans and can be found in most craft or hardware stores.
- Pros: Quick to apply, smooth finish, covers details well
- Cons: Fumes can be strong (use outdoors), harder to control in windy areas, not always suitable for children
There are spray sealers with different finishes, such as gloss, matte, and satin. Most sprays are acrylic or polyurethane based. Some popular brands include Krylon and Rust-Oleum.
2. Brush-on Sealers
Brush-on sealers are liquid coatings that you apply with a paintbrush. They are sometimes called varnishes, lacquers, or polyurethane.
- Pros: Good control for small details, less waste, easy to use indoors
- Cons: Can leave brush marks, takes longer to dry, thicker layers may show drips
Brush-on sealers are a good choice if you want to avoid spray fumes or need more control over the coverage.
3. Epoxy Resin
Epoxy resin gives a thick, glass-like finish. It is often used when you want a super glossy, durable surface.
- Pros: High shine, very strong, waterproof
- Cons: Expensive, mixing required, longer cure time, difficult for beginners
Epoxy is excellent for special projects, but for everyday rock painting, it may be more than you need.
4. Mod Podge
Mod Podge is a popular craft glue and sealer. It’s water-based, easy to use, and comes in different finishes.
- Pros: Safe for kids, easy clean-up, can be used for decoupage
- Cons: Not as durable outdoors, can feel tacky in humid weather
If you’re sealing rocks for indoor use or as gifts, Mod Podge works well. For outdoor rocks, look for the “Outdoor” or “Dishwasher Safe” versions.
5. Polyurethane And Polycrylic
These wood sealers also work for rocks. Polyurethane is oil-based, while polycrylic is water-based.
- Pros: Strong protection, various finishes available
- Cons: Polyurethane yellows over time, strong odor, needs careful application
Polycrylic is less likely to yellow and has a milder smell, making it better for indoor rocks.
Comparing Sealers: What’s Best For Your Project?
It’s not always easy to decide which sealer to use. Here’s a quick comparison to help:
| Sealer Type | Best For | Finish Options | Durability | Indoor/Outdoor |
|---|---|---|---|---|
| Spray Sealer | General use, detailed designs | Gloss, Matte, Satin | High | Both |
| Brush-On | Small projects, control | Gloss, Matte, Satin | Medium-High | Both |
| Epoxy Resin | High shine, extra protection | Gloss | Very High | Mainly Indoor |
| Mod Podge | Kids, crafts, easy sealing | Gloss, Matte | Low-Medium | Mainly Indoor |
| Polycrylic | Furniture look, non-yellowing | Gloss, Matte | High | Both |
For most rock painters, a spray sealer or a brush-on acrylic sealer gives the best mix of protection, look, and ease of use.
Credit: www.lifeofcolourproducts.com
Preparing Your Rocks For Sealing
Before you seal, you need to make sure your painted rocks are clean and dry. Skipping this step is a common mistake that can cause the sealer to bubble, peel, or trap dirt under the finish.
Here’s what to do:
- Let the paint dry completely. Acrylic paint may feel dry in 30 minutes, but it’s better to wait at least 24 hours. If you used thick paint or several layers, give it even more time.
- Check for dust or dirt. Wipe the rock gently with a soft, dry cloth. Do not use water, as it can affect some paints.
- Inspect for touch-ups. Now is the time to fix any missed spots or add extra details. Small mistakes are easier to fix before sealing.
- Move to a dust-free area. Even small bits of dust or pet hair can get stuck in wet sealer. If possible, seal your rocks in a clean, indoor space.
Step-by-step: How To Seal Rocks After Painting
Sealing rocks is not just about spraying or brushing something on top. Doing it well involves careful steps, patience, and attention to detail. Here’s a complete step-by-step guide:
Step 1: Choose Your Sealer
Pick the sealer that matches your project (see the comparison table above). For beginners, a clear acrylic spray sealer is usually easiest.
Step 2: Prepare Your Workspace
- Cover your work area with newspaper or a drop cloth.
- If using a spray, work outdoors or in a well-ventilated area.
- Wear gloves to avoid getting sticky fingers.
Step 3: Test The Sealer
Before using the sealer on your finished rock, try it on a small test rock or a hidden area. Some sealers can react with certain paints, causing colors to run or change.
Step 4: Apply The Sealer
For Spray Sealers:
- Shake the can well, as directed.
- Hold the can about 6-10 inches from the rock.
- Spray lightly and evenly, moving back and forth.
- Apply a thin first coat—don’t try to cover everything at once.
- Let the first coat dry (usually 15-30 minutes).
- Apply a second coat for better protection. Two to three light coats are better than one heavy coat.
For Brush-on Sealers:
- Stir the sealer gently (don’t shake—bubbles can form).
- Use a clean, soft brush.
- Dip the brush and wipe off excess on the edge of the container.
- Brush the sealer over the rock in even strokes.
- Avoid over-brushing. Too many strokes can lift the paint or create bubbles.
- Let each coat dry fully before adding another (check the label for drying times).
For Epoxy Resin:
- Mix the resin and hardener as directed.
- Pour a small amount over the rock and spread with a stick or brush.
- Epoxy will self-level, but check for drips.
- Let cure undisturbed for at least 24 hours.
Step 5: Let It Dry
Drying time depends on the sealer type, temperature, and humidity. Don’t touch or move the rock until it’s fully dry. For most sealers, 24 hours is safe.
Step 6: Inspect And Repeat If Needed
Look at your rock under good light. If you see thin spots, missed areas, or want more shine, add another coat. Two to three coats are usually enough for outdoor rocks.
Step 7: Finishing Touches
If you used a gloss sealer and want less shine, you can lightly sand with fine sandpaper and add a matte coat on top. If the rock will be handled a lot, make sure edges and bottoms are sealed too.
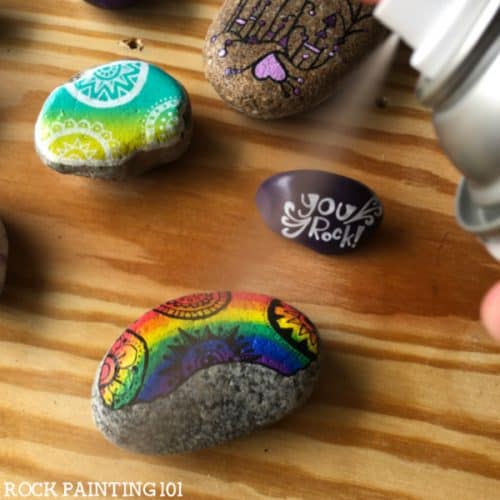
Credit: rockpainting101.com
Common Sealing Problems And How To Fix Them
Even experienced crafters sometimes have trouble when sealing rocks. Here are some of the most common issues and how to avoid or fix them:
1. Cloudy Or Milky Finish
Why it happens: Sealer was applied too thick, in high humidity, or before the paint was fully dry.
How to fix: Let the rock dry in a warm, dry place. If the cloudiness stays, sand lightly and reapply a thin coat.
2. Sticky Or Tacky Surface
Why it happens: Not enough drying time, or using Mod Podge in a humid area.
How to fix: Place the rock in a low-humidity, warm space and wait longer. For Mod Podge, sprinkle a little cornstarch on top after it’s dry to remove stickiness.
3. Bubbles
Why it happens: Shaking the sealer or brushing too much.
How to fix: Use light, even strokes and avoid shaking liquid sealers. Bubbles can sometimes be sanded away and resealed.
4. Colors Smearing Or Running
Why it happens: Paint not dry, or using a sealer that reacts with the paint.
How to fix: Always test the sealer on a small painted area first. Wait longer for paint to dry. Use acrylic-based sealers with acrylic paints.
5. Yellowing Over Time
Why it happens: Using oil-based polyurethane or cheap sealers.
How to fix: Use polycrylic or high-quality acrylic sealers. Keep rocks out of direct sunlight if possible.
How Many Coats Of Sealer Do You Need?
More is not always better. The right number of coats depends on how your rocks will be used:
- Indoor decorative rocks: 1-2 coats are usually enough.
- Outdoor garden rocks: 2-3 coats give better weather resistance.
- Rocks to be handled often: 2-3 coats protect against scratches.
Let each coat dry completely before adding the next. Rushing can cause sticky or uneven finishes.

Credit: www.lifeofcolourproducts.com
Matte, Gloss, Or Satin: Picking Your Finish
Finish is about more than looks—it can also affect how your painted rock feels and holds up.
| Finish Type | Look | Best For | Notes |
|---|---|---|---|
| Gloss | Shiny, bright colors | Outdoor, bold designs | Shows fingerprints easily |
| Matte | Soft, natural look | Nature themes, indoor | Hides small flaws |
| Satin | Mild sheen, not too shiny | Most designs | Good all-around choice |
If you’re not sure, try a satin finish—it gives a nice balance between shine and a natural look.
Sealing Painted Rocks For Outdoor Use
If you want your painted rocks to last outside, sealing is even more important. Outdoor rocks face rain, sun, heat, cold, and even mold.
Key tips for outdoor sealing:
- Use a weatherproof sealer (check the label for “exterior” or “outdoor” use).
- Apply at least two coats, letting each dry fully.
- Seal all sides, including the bottom, to keep water out.
- Place rocks where water can drain away (don’t let them sit in puddles).
- Re-seal every year for best results.
Acrylic spray sealers and outdoor polycrylic are good choices for outdoor rocks. Avoid Mod Podge unless it’s the “Outdoor” version.
Sealing Painted Rocks For Hiding Or Gifting
Many people paint rocks to hide them in parks or give as gifts. In these cases, you want your rocks to be both durable and safe.
For rocks to be hidden in public places:
- Use non-toxic paints and sealers.
- Avoid strong-smelling sealers that might bother people or animals.
- Include a note or sticker on the back if you want people to share when they find your rock.
For rocks as gifts:
- Use at least two coats of sealer for a professional look.
- Let the rock dry for several days before wrapping.
How To Seal Rocks With Stickers, Decoupage, Or Markers
Not all painted rocks are made with just paint. Some people add stickers, decoupage (paper glued on), or use markers like Sharpies.
- For stickers or decoupage, use Mod Podge or a brush-on acrylic sealer. Make sure everything is dry before sealing.
- For markers, let the ink dry for 24 hours. Spray sealers work best, as brush-on sealers can smudge the ink.
- Test a small area if you’re not sure. Some marker colors can bleed with certain sealers.
Extra Tips For A Perfect Finish
- Temperature matters. Sealers dry best between 60°F and 80°F (16°C–27°C). Too cold or too hot can cause problems.
- Don’t rush. Allow plenty of time for each coat to dry. Patience gives the best results.
- Store sealed rocks carefully. Even after drying, rocks can stick together if stacked. Place a piece of wax paper between them.
- Check for allergies. If giving rocks to children, make sure your sealer is non-toxic.
- Label your rocks. Write your name or a message on the back before sealing, if you want.
What Not To Do When Sealing Painted Rocks
Avoid these common mistakes:
- Don’t spray or brush heavy, thick coats. Thin, even layers are better.
- Don’t seal in high humidity or rain—moisture can ruin the finish.
- Don’t use cheap hairspray as a sealer. It doesn’t last and can make rocks sticky.
- Don’t skip the test step. Always try your sealer on a test rock first.
When To Re-seal Your Painted Rocks
No sealer lasts forever, especially outdoors. Check your painted rocks every few months. If you see fading, peeling, or dullness, wash the rock, let it dry, and add a fresh coat of sealer.
Some people re-seal outdoor rocks once a year, usually in the spring. This keeps colors bright and protects your art from weather damage.
Eco-friendly And Safe Sealing Choices
If you’re concerned about the environment or want safe options for kids, look for water-based, non-toxic sealers. Polycrylic and some Mod Podge versions are safer for families.
Disposal tip: Don’t pour leftover sealer down the drain. Check your local rules for disposing of chemicals. Spray cans should be recycled if empty.
For more on the safety of craft supplies, check the Consumer Product Safety Commission for guidelines.
Real-life Examples: Success And Mistakes
Example 1: A garden club used acrylic spray sealer for their painted river rocks. With two coats and yearly re-sealing, their colors stayed bright for over three years, even in rain and sun.
Example 2: A beginner used Mod Podge for rocks hidden in a park. After two weeks of rain, the stickers peeled off. Switching to an outdoor spray sealer solved the problem.
Example 3: A crafter used oil-based polyurethane, and after six months, their white paint turned yellow. Next time, they used polycrylic and the color stayed true.
These stories show that the right sealer and technique make a big difference in how your painted rocks turn out.
Frequently Asked Questions
How Long Should I Wait Before Sealing Painted Rocks?
It’s best to wait at least 24 hours after painting. If you used thick paint or multiple layers, wait 48 hours to be safe. Sealing too soon can cause paint to smear or lift.
Can I Use Hairspray To Seal Painted Rocks?
Hairspray is not a good sealer for rocks. It’s not waterproof, can turn sticky, and doesn’t protect against sun or rain. Use a proper acrylic or polyurethane sealer instead.
What Is The Best Sealer For Rocks Left Outdoors?
Acrylic spray sealers or outdoor polycrylic are best for outdoor rocks. Look for products labeled as “weatherproof” or “exterior. ” Apply at least two coats for the best protection.
Will Sealing Rocks Make The Colors Brighter?
Gloss and satin sealers can make colors look richer and more vibrant. Matte sealers keep a natural look but may soften colors slightly. The finish you choose affects how the colors appear.
Do I Need To Seal Both Sides Of The Rock?
Yes, for full protection, especially for outdoor rocks. Seal all sides, including the bottom. This prevents water from getting under the paint and causing peeling.
Sealing your painted rocks well is worth the extra effort. With the right steps, your creative work will last, shine, and bring joy for years—whether it’s in your garden, home, or hidden for someone else to find. Happy rock painting!