As an Amazon Associate I earn from qualifying purchases.
Laminate flooring is loved for its beauty, durability, and low maintenance. But water is its greatest enemy. A spilled drink, a leaking appliance, or a burst pipe can turn your perfect floor into a nightmare. The good news? Many cases of water damage on laminate floors can be repaired without replacing the whole floor.
Acting quickly and using the right methods can save you time, money, and stress.
This guide will show you, step by step, how to repair water damage on laminate flooring. You’ll learn how to spot damage early, what tools to use, and how to prevent future problems. Even if you’re not a DIY expert, you’ll find practical advice and tips that anyone can follow.
Laminate floors are not all the same, and water damage can look different in each home. This article covers the main causes, levels of damage, and repair techniques, from simple fixes to board replacement. You’ll also find answers to common questions and expert tips that most beginners miss.
Understanding Water Damage On Laminate Flooring
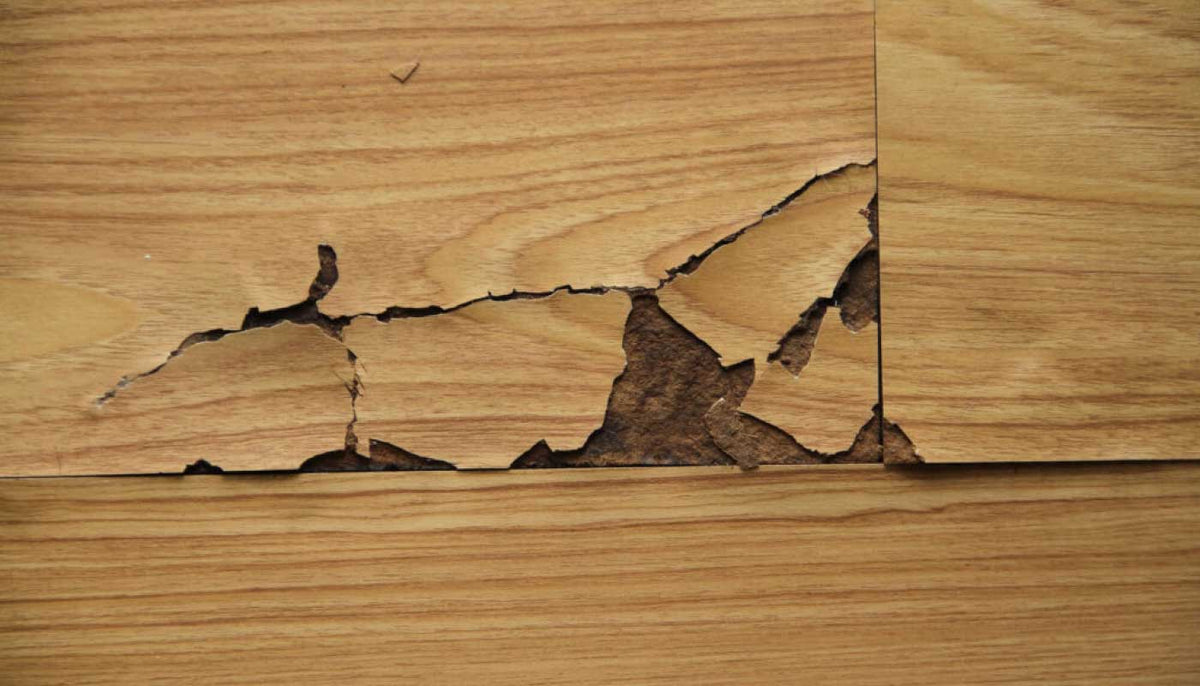
Before you start any repair, it’s important to know what water damage looks like and how it affects laminate. Laminate flooring is made from several layers. The top layer is a protective coating, under that is a decorative layer that gives the wood look, and beneath that is a fiberboard core. This core is very sensitive to water.
Signs Of Water Damage
Water can cause different problems depending on how long it stays and how much gets under the floor. Look for these signs:
- Swelling or bubbling: The boards look raised or uneven.
- Cupping or warping: Edges curl up or down, making the floor wavy.
- Discoloration: Stains or faded spots appear.
- Mold or mildew: Musty smell or black/green spots.
- Soft spots: The floor feels weak or spongy when you step on it.
- Seam separation: Gaps form between the boards.
Recognizing these signs early can make repair easier and cheaper.
Why Laminate Flooring Is Vulnerable
Laminate’s core is made from high-density fiberboard (HDF) or medium-density fiberboard (MDF). These materials absorb water quickly. When wet, they expand and lose strength. Even with a waterproof top layer, water can seep into the seams or under the boards. Unlike real hardwood, laminate cannot be sanded or refinished if damaged. That’s why fast action is key.
Immediate Steps After Water Exposure
If you see water on your laminate floor, act fast. The first 24-48 hours are critical to prevent permanent damage.
- Stop the water source. Turn off leaks, move plants, or clean up spills.
- Remove standing water. Use towels, a mop, or a wet/dry vacuum.
- Move furniture and rugs. Get everything off the wet area to help the floor dry.
- Increase airflow. Open windows and doors, run fans, or use a dehumidifier.
- Check for hidden water. Look under baseboards, floor vents, and appliances.
These steps limit how much water the boards absorb. The faster you react, the better your chances of repair.
Credit: www.builddirect.com
Assessing The Level Of Damage
Not all water damage is the same. Some can be fixed easily, others need more work or replacement.
Three Levels Of Laminate Water Damage
| Damage Level | Visible Signs | Repair Needed |
|---|---|---|
| Light | Minor swelling, no discoloration, no soft spots | Drying and cosmetic repair |
| Moderate | Bubbling, slight warping, small stains | Board replacement or deep cleaning |
| Severe | Major swelling, mold, large gaps, softness | Replace multiple boards or whole sections |
Light damage can often be fixed at home. Moderate damage may need some new boards. Severe damage usually requires help from a professional or replacing large parts of your floor.
Hidden Risks
Some problems are not easy to see right away. Water can get under the floor and hurt the subfloor, not just the laminate. If you smell mold or notice the floor getting worse after drying, check underneath. Long-term moisture can lead to bigger issues, like mold growth or structural damage.
Tools And Materials You’ll Need
Having the right tools helps you work faster and safer. Here’s a list of what you may need, depending on the repair:
- Towels or absorbent cloths
- Wet/dry vacuum
- Box cutter or utility knife
- Pry bar
- Hammer and tapping block
- Replacement laminate boards
- Measuring tape
- Moisture meter (to check if floor is dry)
- Fans or dehumidifier
- Wood glue (for small fixes)
- Clamps (optional, for edge repair)
- Protective gloves and mask (for mold cleanup)
It’s smart to buy extra laminate boards when you install the floor, in case you need to replace some later. If your floor is old or the style is discontinued, take a sample board to a flooring store to find the closest match.
Drying Out Laminate Flooring
If the damage is light, fast drying can save the floor. Here’s how to do it right:
Step-by-step Drying Process
- Remove all water immediately. Use towels or a wet/dry vacuum.
- Lift the boards if possible. If the floor is floating (not glued), gently remove boards near the wet area to let air flow underneath.
- Increase ventilation. Point fans at the wet area and open windows.
- Use a dehumidifier. This pulls moisture from the air and speeds up drying.
- Check moisture levels. Use a moisture meter to make sure the boards and subfloor are dry. Laminate should be below 12% moisture before re-installing.
- Wait 24-72 hours. Don’t rush to put furniture back too soon.
Non-obvious tip: Drying under the boards is just as important as drying the top. Moisture trapped under the floor can cause mold and new damage even after the surface looks dry.
Repairing Minor Laminate Floor Damage
If the damage is only surface deep—like small bubbles, light swelling, or slight gaps—simple repairs can help.
Fixing Small Bubbles Or Raised Areas
- Apply weight. Place a heavy object (like books) over the raised spot for 24 hours. Sometimes, boards will flatten as they dry.
- Edge glue method. For lifted edges, apply a tiny amount of wood glue under the edge, press down, and hold with a clamp or heavy object until dry.
- Use a rolling pin. Gently roll over bubbles to press them flat.
Closing Small Gaps
- Use a tapping block and hammer. Tap the boards gently back into place.
- Apply a small bead of wood glue if the gap keeps opening.
Important: Never use nails or screws to hold boards down. Laminate floors must float to allow for expansion.
Cleaning And Treating Stains Or Mold
If the water left behind stains or smells, cleaning is key. Mold must be handled with care.
- Mix mild detergent with warm water. Use a soft cloth to clean the stain.
- For mold, mix one part vinegar with three parts water. Wipe the area, let it sit for 10 minutes, then dry fully.
- Avoid excess water during cleaning. Wipe with a dry towel after.
If mold covers more than a few inches, or keeps coming back, call a professional. Mold can be dangerous to your health.
Replacing Damaged Laminate Planks
Sometimes, drying and cleaning isn’t enough. Warped, swollen, or stained boards may need to be replaced. This is a common DIY project but takes patience.
How To Replace A Laminate Board
- Find the damaged plank. Note the direction the boards are installed.
- Remove baseboards or trim along the wall nearest the damaged board.
- Unlock the floor. Carefully lift and remove boards, starting from the wall and working towards the damaged plank.
- Take out the damaged board. Replace it with a matching new one.
- Reinstall the other boards. Work backwards, snapping each one into place.
- Replace baseboards and trim.
This method works best for floating floors that “click” together. If your floor is glued down, you may need to cut out the damaged board with a utility knife and fit a new piece.
Matching Replacement Boards
If you don’t have extra boards, try these options:
- Look in closets or under appliances for unused boards.
- Check with the manufacturer or flooring store for matching stock.
- If no match is possible, replace boards in less visible areas or use a transition strip to break up the pattern.
Non-obvious tip: Take a photo and a sample piece to the store. Laminate colors and patterns can change even within the same brand.
Repairing Subfloor Damage
Sometimes, water gets under the laminate and soaks the subfloor (the wood or concrete below your floor). This is more serious.
How To Check For Subfloor Damage
- Remove several boards to see if the subfloor is wet, soft, or moldy.
- Use a moisture meter to test.
- Press with a screwdriver. If it sinks in, the subfloor is weak.
Fixing The Subfloor
- Let it dry fully for several days.
- If it is moldy, clean with vinegar solution and let dry.
- For small areas of rot, cut out the bad spot and patch with new plywood.
- For concrete, use a concrete patch to repair cracks.
Never install laminate over a wet or damaged subfloor. It will ruin new boards and may cause health issues.
Comparing Repair Vs. Replacement
Sometimes, people wonder if they should repair or replace laminate floors after water damage. Here’s a quick comparison:
| Option | Cost | Time | When to Choose |
|---|---|---|---|
| Repair | $50–$300 (DIY) | 1–3 days | Light to moderate damage, matching boards available |
| Replacement | $1,000–$3,000 (pro) | 2–7 days | Severe, widespread damage, mold, old or discontinued style |
Repair is cheaper and faster, but only works if the damage is limited. Replacement is best for large areas, major mold, or if you want to update your flooring style.
Preventing Future Water Damage
Once you fix the current problem, it’s smart to prevent it from happening again.
- Wipe up spills right away. Don’t let water sit.
- Use mats by sinks, doors, and appliances. These catch drips before they get to the floor.
- Fix leaks and plumbing quickly. Even a slow drip can cause big problems over time.
- Keep humidity low. Use a dehumidifier if your home is damp.
- Seal seams in water-prone areas. Special sealants can help protect edges.
- Install waterproof underlayment. This adds a barrier between the subfloor and laminate.
Non-obvious insight: Avoid steam mops on laminate. The steam can force water into seams and under the boards, even if the top looks dry.
When To Call A Professional
DIY repair is good for small jobs, but some cases need expert help:
- Mold covers more than 10 square feet
- The subfloor is soft or rotted
- You can’t find matching boards
- Insurance claims are involved
- You feel unsure about the repair
Professionals have tools to dry floors faster, spot hidden problems, and match flooring styles. They can save you money by preventing future issues.

Credit: www.rainbowrestoration.co.uk
Cost Breakdown Of Laminate Floor Water Damage Repair
Understanding costs helps you plan your repair and avoid surprises. Here’s a breakdown of typical expenses:
| Repair Step | DIY Cost Range | Pro Cost Range |
|---|---|---|
| Drying floor (fans, dehumidifier) | $20–$150 | $200–$600 |
| Replacing 1–2 boards | $10–$60 | $100–$300 |
| Cleaning mold (small area) | $10–$50 | $300–$1,000 |
| Subfloor patching | $50–$200 | $500–$2,000 |
| Full room replacement | $700–$2,000 | $1,500–$5,000 |
Prices depend on your floor size, location, and if you hire a pro. Always get several quotes if hiring help.
Common Mistakes To Avoid
Many people try to fix laminate water damage but make costly mistakes. Watch out for these:
- Waiting too long to start repairs. Water damage gets worse quickly.
- Not checking under the floor. Hidden moisture causes mold and more damage later.
- Using too much water when cleaning. This adds to the problem.
- Trying to glue down warped boards. They won’t lay flat and will look worse.
- Skipping the moisture test before reinstalling. Boards must be dry, or they’ll warp again.
- Mixing old and new boards without checking color/pattern. The repair will look patchy.
Taking time to do each step right saves money and makes your floor last longer.
Expert Tips For Laminate Floor Care
To keep your floor looking new after repair:
- Sweep or vacuum regularly to remove dirt and grit.
- Clean with a slightly damp mop and laminate-safe cleaner.
- Place felt pads under furniture to prevent scratches.
- Avoid dragging heavy objects across the floor.
- Keep indoor humidity between 35–60%.
Regular care prevents small problems from becoming big ones.
Frequently Asked Questions
How Do I Know If My Laminate Floor Is Too Damaged To Repair?
If you see large swollen areas, soft spots, or mold covering more than a few boards, repair may not be enough. Also, if the floor stays damp for more than 48 hours or smells musty, replacement is often safer.
Can I Use A Hair Dryer Or Heat Gun To Dry My Laminate Floor?
You can use a hair dryer on a low setting to help dry small areas, but avoid high heat or heat guns. Too much heat can warp boards and make the damage worse. Fans and dehumidifiers work better for larger areas.
Is There A Waterproof Laminate Flooring Option?
Some manufacturers now offer water-resistant or waterproof laminate, but no laminate is 100% waterproof. Water can still get into seams or under the boards. For kitchens or bathrooms, consider vinyl plank flooring for better water resistance. Learn more at Wikipedia.
What If I Can’t Find The Exact Same Board For Replacement?
If you can’t find a match, use boards from less visible areas (like closets) and put the new style where it’s less noticeable. You can also use a transition strip to separate different patterns.
Will Insurance Cover Water Damage On Laminate Flooring?
Home insurance may cover sudden water damage, like from a burst pipe, but usually not from long-term leaks or poor maintenance. Check your policy or ask your agent for details.
Laminate floor water damage is a headache, but you don’t have to panic. Most problems can be fixed if you act quickly and follow the right steps. From drying and small repairs to replacing boards, you have options. Keep your floor dry, repair damage the right way, and your laminate can look great for years to come.
-(1).webp)
Credit: rainbowrestores.com
