Matching wood flooring may sound simple, but in reality, it’s a blend of art, science, and a bit of detective work. Whether you want to extend your current floors, fix a patch, or blend different rooms, getting the match right makes your home feel united and beautiful.
Get it wrong, and the difference stands out, sometimes ruining the entire look.
Many homeowners and even professionals find matching wood floors tricky. There are dozens of wood species, endless stain colors, and unique grain patterns. Sometimes, the age of the floor changes its look, and sunlight or cleaning products affect color over time.
Even new boards from the same species can look different due to natural wood variation.
In this guide, you’ll discover how to match wood flooring step by step. You’ll learn what matters most, common mistakes to avoid, and smart tips to achieve a seamless look. From identifying your existing floor to choosing new boards and finishing, every stage is covered in detail.
By the end, you’ll feel confident tackling any wood floor matching project—whether for a small repair or a full-room extension.
Why Matching Wood Flooring Matters
It’s easy to overlook the details, but matched wood floors offer more than just good looks. They:
- Increase your home’s resale value by giving a finished, professional appearance.
- Make spaces feel larger and more connected, especially in open-plan homes.
- Prevent the “patchwork” effect caused by obvious mismatched areas.
- Reduce future costs by avoiding expensive do-overs or corrections.
A carefully matched wood floor can add thousands of dollars in value and prevent headaches later.
Understanding Your Existing Wood Floor
Before you can match anything, you must know exactly what you have. This is the step most people rush, but it’s crucial.
Identify The Wood Species
Not all wood is created equal. Popular types include oak, maple, walnut, hickory, and cherry. Each species has unique color tones, grain patterns, and hardness.
- Oak is the most common in the US, known for its visible grain and medium brown tones.
- Maple is lighter, smoother, and less grainy.
- Walnut is darker with rich brown hues.
- Hickory shows strong contrast in grain and color.
- Cherry darkens with age and has a reddish tint.
If you’re unsure, take a small sample or a clear photo to a flooring store or expert. Many stores can help identify the species for you.
Check The Board Size And Type
Floors differ in width, length, and thickness. The most common are:
- Strip flooring (narrow, usually 2.25” wide)
- Plank flooring (wider, 3” to 8”+)
- Parquet (small pieces arranged in patterns)
Measure your existing boards carefully. Even a small difference (like 2. 25” vs 2. 5” wide) will be obvious after installation.
Examine The Finish
Is the floor shiny, matte, or satin? Is it oil-based or water-based polyurethane, or perhaps a wax or natural oil? The finish affects both color and feel.
Older floors may have yellowed with age due to oil-based finishes. Modern water-based finishes are clearer and keep the wood’s original color.
Note The Stain Color And Age
Stain can make one species look like another. Floors also change color as they age, especially in sunlight. A 10-year-old floor will look different from a new one, even if they started the same.
If possible, look at an area that’s hidden (like under a rug or furniture). This shows the original color and helps you match new wood more closely.
Take Samples For Reference
If you’re replacing a section, save a piece. If not, take clear, well-lit photos from multiple angles. Bring these with you when shopping for new wood.
Choosing The Right Wood For Matching
Once you know your existing floor’s details, it’s time to choose new wood. Here’s what to consider:
Match The Species
If possible, use the same wood species. Different species have different grain and hardness, making mismatches obvious.
If the same species isn’t available, choose a close look-alike. For example, red oak and white oak can sometimes work together, but be careful—red oak has a pinkish tone, while white oak is more golden.
Get The Right Grade
Wood is sorted by “grade.” Common grades are:
- Select: Few knots, uniform color
- #1 Common: More variation, some knots
- #2 Common: Rustic, lots of knots and color difference
Match the grade to your existing floor for a consistent look.
Board Dimensions
Even a small change in width or thickness is noticeable. Measure your existing boards to the nearest 1/16 inch. Some old floors use non-standard sizes, so you may need to have boards specially milled.
Consider Engineered Vs. Solid Wood
Solid wood is one piece throughout. Engineered wood has a hardwood top layer and layers of plywood below.
Solid wood is easier to sand and refinish, while engineered is more stable with changes in humidity. If your floor is solid, try to match with solid. If it’s engineered, match with engineered.
Pre-finished Or Site-finished?
- Pre-finished wood comes with stain and finish applied at the factory.
- Site-finished wood is installed raw, then sanded and stained on-site.
Site-finished wood is easier to blend seamlessly, as you can adjust color and finish on location.
Sourcing Reclaimed Wood
If your floor is old, new wood may never look exactly the same. Reclaimed wood (salvaged from old buildings) can be a great match. It’s already aged and weathered, so it blends well with older floors.
Many specialty suppliers offer reclaimed boards in various species and sizes.
Color Matching: Stain And Finish
Even if you match the wood species and grade, color is where most matching attempts fail. Here’s how to get it right:
Understand Stain Vs. Natural Color
Some floors are left natural (no stain, just finish). Others are stained to change the wood’s color. Identifying which you have is key.
Stains come in many shades—golden oak, walnut, cherry, etc. —and can be custom-mixed.
Test Stain Samples
Never trust the stain can or a color chart. Always test stains on scrap boards of the same wood species and grade as your existing floor.
Apply 2-3 options and let them dry. Compare to your floor in both natural and artificial light.
Consider “aging” And Sun Exposure
Newly stained wood often looks brighter or lighter than older floors. Over time, sunlight, cleaning, and air cause wood to darken or yellow. Some pros use special techniques (like “water popping” or pre-aging stains) to speed up this process, but patience is often required.
Match The Finish Type
A stain may look perfect, but the wrong finish (shiny vs. matte) will stand out. Use the same finish product and sheen as the rest of your floor.
Blend Edges For Seamless Transition
When joining new boards to old, feather the stain slightly into the old wood for a soft transition. This avoids a sharp line between old and new.
Credit: www.svbwoodfloors.com
Installation: Best Practices For Seamless Matching
Matching isn’t just about color and species. Installation details matter just as much.
Lay Boards In The Same Direction
Always lay new boards in the same direction as the existing floor. Changing direction creates a visual break.
Stagger Joints
Don’t line up the ends of new boards with the old ones. Staggering joints makes the floor look natural and helps hide the transition.
Use The Same Fastening Method
Older floors may be nailed, stapled, or even glued. Use the same method for new boards to prevent movement or squeaks.
Level The Subfloor
If your home has settled or you’ve removed carpet, the subfloor may be uneven. Level it before installing new wood to avoid height differences.
Acclimate The Wood
Wood expands and contracts with humidity. Let new boards sit in your home for at least 3–5 days before installation. This prevents gaps or buckling later.
Sand And Finish Across The Transition
For the best match, sand both new and old boards together after installation (site-finished floors only). This evens out small height differences and ensures a smooth surface.
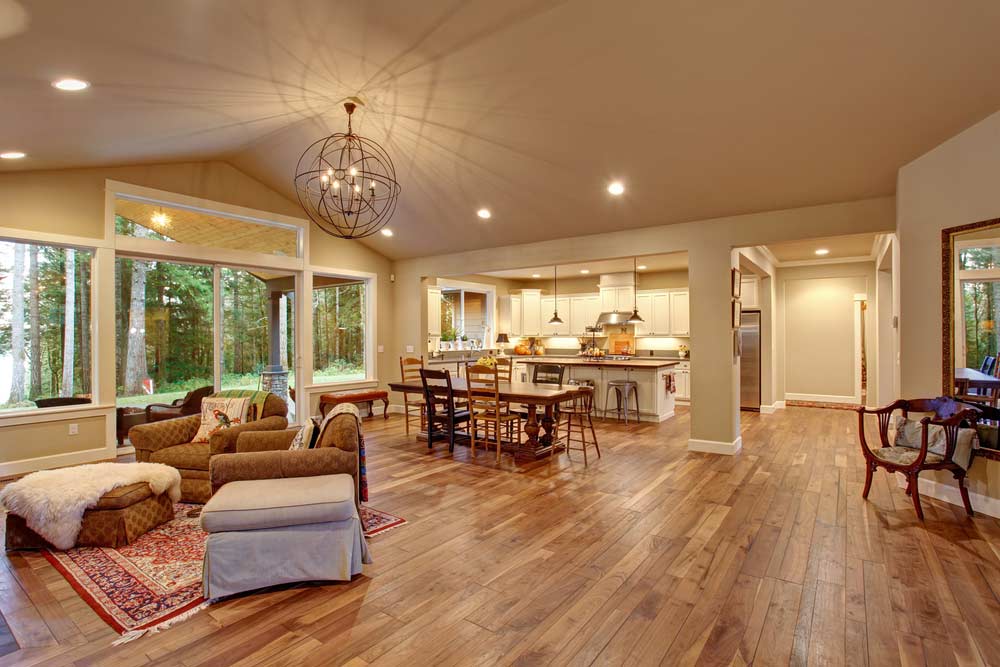
Matching Wood Floors Between Rooms
Many homes have different floors in each room. If you want to create a unified look, you have options:
Continue The Same Wood
The simplest solution is to use the same species, color, and board size throughout connected rooms. This makes spaces feel larger and more luxurious.
Use Transition Strips
If matching is impossible, use a transition strip (also called a threshold or reducer) at doorways. Choose a strip that complements both floors.
Create A Border Or Inlay
For a decorative touch, install a border or inlay where two floors meet. Use contrasting wood or a special pattern to make the transition intentional.
Blend Similar Colors
If you can’t match exactly, choose floors with similar undertones (warm or cool) and intensity. For example, pair medium brown oak with walnut for a rich, consistent feel.
Matching Old And New Wood Floors
Older floors can be tricky to match due to age, wear, and discontinued products. Here’s how to get closer:
Use Reclaimed Or Salvaged Boards
Look for reclaimed wood that matches your old floor’s species and age. Many suppliers keep stock of old-growth wood from demolished buildings.
Distress New Boards
Lightly distress new boards with tools or brushes to mimic the wear of old floors. This helps them blend in visually.
Adjust Stain And Finish
Custom-mix stains to match the aged color. Sometimes, a hint of gray or amber in the finish helps mimic years of sun exposure.
Consider A Full Sand And Refinish
If the old floor is in good shape, sand and refinish both old and new areas at once. This brings the color closer together and hides differences.
Common Mistakes When Matching Wood Flooring
Matching wood flooring is challenging. Here are mistakes beginners often make:
- Ignoring wood species. Even similar species (like red and white oak) look different.
- Skipping stain tests. Never pick a color from a chart—always test on actual wood.
- Overlooking board width or thickness. A tiny size difference is very visible after installation.
- Not acclimating new wood. This leads to gaps, buckling, or warping later.
- Mismatching finish sheen. Matte vs. glossy finishes look very different.
- Poor joint alignment. Lining up board ends creates obvious seams.
- Neglecting aging effects. New boards will darken over time, so consider how the match will change.

Credit: www.floorsave.co.uk
Advanced Matching Techniques
For tough projects or perfectionists, consider these advanced methods:
Custom Milling
If your old boards are a unique size, some mills can create custom boards to match exactly. This is more expensive but offers perfect alignment.
Water Popping
Before staining, lightly wet new boards. This opens the wood grain and helps stains absorb more deeply, creating a closer color match.
Tinting The Finish
Add a small amount of colorant or dye to the final finish coat. This can help “tune” the overall color and blend old and new areas.
Using Wood Filler
For very old floors with gaps, use wood filler colored to match the boards. This hides transitions and fills small imperfections.
Real-world Example: Matching Oak Floors In A 1920s Home
Imagine you buy a 1920s house with beautiful red oak floors in the living room, but the hallway was carpeted for years. You want the new hallway wood to match the old living room.
- Identify the wood: Confirm it’s red oak, measure width (2.25”), and note the aged golden-brown color.
- Source matching boards: Look for reclaimed red oak in the same width and grade. If not available, buy new red oak and plan to distress and stain it.
- Test stains: Try 3-4 stain mixes on scrap boards, adjusting until you find a close match to the living room’s color (check under a rug for the original tone).
- Install with care: Acclimate new boards, stagger joints, and nail down using the same technique.
- Sand and finish both areas together: Sand the new and old floors so they’re perfectly level. Apply stain and finish across both areas.
- Result: After a few months, the new wood darkens slightly and blends almost perfectly with the original 100-year-old floor.
Comparison Of Wood Species For Matching
Choosing the right wood species is essential for a seamless look. Here is a quick comparison of popular flooring woods:
| Wood Species | Color Range | Grain Pattern | Hardness (Janka) | Common Uses |
|---|---|---|---|---|
| Red Oak | Pinkish to reddish-brown | Strong, open | 1290 | Traditional homes |
| White Oak | Golden to brown | More subtle than red oak | 1360 | Modern & rustic designs |
| Maple | Creamy white to light brown | Smooth, fine | 1450 | Contemporary spaces |
| Hickory | Pale to dark brown | Dramatic, varied | 1820 | Country & farmhouse |
| Walnut | Chocolate brown | Wavy, rich | 1010 | Luxury interiors |
Matching Engineered Vs. Solid Wood Floors
Some homes have a mix of engineered and solid wood. Here’s how they compare:
| Feature | Solid Wood | Engineered Wood |
|---|---|---|
| Construction | Single piece of hardwood | Hardwood layer over plywood |
| Refinishing | Multiple times | Limited (1-2 times) |
| Stability | Can expand/contract | More stable in humidity |
| Matching | Best for older homes | Works for modern homes |
Cost Factors In Matching Wood Floors
Matching is often more expensive than installing all new floors. Here’s what to expect:
| Factor | Typical Cost Range | Details |
|---|---|---|
| New wood boards | $5–$15 per sq. ft. | Depends on species, grade, and finish |
| Reclaimed wood | $8–$20 per sq. ft. | Harder to source, premium price |
| Installation | $4–$8 per sq. ft. | Complex matching may add cost |
| Sanding/finishing | $2–$5 per sq. ft. | Needed for blending old and new |
| Custom stains or milling | Varies | Can increase total cost by 10–20% |
Expert Tips For A Perfect Wood Floor Match
- Take your time. Rushing leads to mistakes you’ll see for years.
- Bring samples home. Lighting in stores is different from your home.
- Hire a pro for tough jobs. Some matches require expert skills and tools.
- Think about the future. New boards will change color over time, so err on the side of a slightly lighter match.
- Maintain your floors. Regular cleaning and proper care help keep old and new boards looking their best.

Credit: www.reddit.com
When To Call A Professional
Some matching projects are simple DIY jobs. Others require a professional. Call an expert if:
- Your floor is very old or rare.
- You’re matching a large area or multiple rooms.
- Custom milling or complex stains are needed.
- The transition area is highly visible.
A good flooring pro has the tools and experience to blend floors so well, even experts struggle to find the seam.
For more technical details on wood flooring, see this Wikipedia article.
Frequently Asked Questions
How Can I Tell What Type Of Wood My Floor Is?
Look at the grain, color, and hardness. Oak has strong, open grain; maple is smoother and lighter. If you’re unsure, take a sample to a flooring store or consult an expert.
What If I Can’t Find The Exact Same Wood As My Existing Floor?
Use the closest match in species, grade, and size. Consider staining and distressing to blend the new wood with the old. Reclaimed wood is a good option for older floors.
Can I Match Pre-finished Floors To Site-finished Ones?
It’s difficult, but not impossible. Site-finished wood offers more flexibility for color matching. If you must use pre-finished, bring samples home and compare in your space.
Will The New Wood Look Exactly The Same As The Old Floor Over Time?
Not at first. New wood will darken or change color with age and sunlight. The match should get closer over time, but exact matches are rare.
Is It Cheaper To Match Or Replace All My Wood Flooring?
Matching can be more expensive per square foot, but it’s usually less disruptive and saves money compared to replacing everything. The choice depends on your budget and how much of the floor needs changing.
Matching wood flooring takes patience, attention to detail, and sometimes a little creativity. But with the right approach, you can create a seamless, beautiful result that will last for years.