A sagging floor is not just annoying—it can be a sign of deeper problems in your home. When you walk across a room and feel a dip or bounce, the issue often lies with the floor joists. These long, horizontal beams support the weight of everything above, from furniture to people. Over time, they can weaken, bend, or even crack. Left unfixed, sagging floor joists can lead to uneven floors, cracked tiles, stuck doors, and, in extreme cases, serious structural failure.
If you’re a homeowner, learning how to fix sagging floor joists is crucial for safety and comfort. Many people think this is a job only for professionals, but with the right knowledge, tools, and careful planning, you can address the problem yourself or know exactly what to discuss with a contractor. This guide will walk you through every step, from diagnosing the cause to making effective, lasting repairs. You’ll also learn about common mistakes, how to choose materials, what costs to expect, and when to call in expert help.
Understanding Floor Joists And Sagging
Before you start any repair, it’s important to understand what floor joists do and why they sag. Floor joists are usually made of wood or engineered lumber, running parallel under your floor. They transfer the load from the floor above to the foundation or supporting walls.
What Causes Joists To Sag?
Several factors can lead to sagging:
- Moisture damage: Water leaks, high humidity, or poor ventilation can weaken wood over time.
- Overloading: Placing heavy objects or extra walls above joists not designed for that weight.
- Termite or pest damage: Insects can eat away at the wood, reducing its strength.
- Poor design or installation: Using undersized joists, or placing them too far apart.
- Natural aging: Wood dries, shrinks, and can bow as it gets older.
It’s rarely just one cause—often, several issues combine to make joists sag. For example, a small water leak can soften wood, and then the weight of a piano above that area finishes the job.
Signs Of Sagging Floor Joists
You don’t always need to crawl under the house to spot a problem. Some signs include:
- Floors that dip or feel bouncy
- Cracks in walls or ceilings above the affected area
- Doors that stick or won’t close properly
- Gaps between the floor and baseboards
If you notice these, it’s time to check your joists.
Diagnosing The Problem
Proper diagnosis is key to a good repair. Many people make the mistake of fixing the floor surface (like adding more plywood or leveling compound) without addressing the sagging joists beneath.
Step 1: Inspect From Below
If you have a basement or crawlspace, go underneath and look at the joists. Take a bright flashlight and check for:
- Cracks or splits in the wood
- Water stains or mold
- Joists out of level (use a long level or string line)
- Missing or damaged supports (such as posts, beams, or blocking)
- Evidence of insect damage (small holes, sawdust, or tunnels)
Step 2: Measure The Sag
Use a long straightedge or laser level above the floor to measure how much it sags. A sag of 1/2 inch or more over a short distance is a red flag.
Step 3: Identify The Cause
Try to figure out what’s causing the sag. Is there a nearby bathroom (possible leaks)? Heavy appliances or a grand piano? Water pipes running above? Each cause may require a different repair.
Non-obvious Insight: Many beginners forget to check for foundation settling. If the foundation has shifted, it can make floors above sag even if the joists are fine. Always check for cracks in foundation walls or uneven basement floors.
Choosing The Right Repair Method
There are several ways to fix sagging floor joists. The best method depends on how badly the joists are damaged, how accessible they are, and what caused the problem.
Common Repair Methods
- Sistering joists: Adding a new board alongside the old, weak one.
- Installing additional supports: Placing posts and beams under the sagging area.
- Replacing damaged sections: Cutting out and replacing badly damaged wood.
- Using adjustable columns (jacks): Lifting and supporting the joists.
- Adding blocking or bridging: Improving support between joists.
Here’s a comparison of these methods:
| Repair Method | Best For | DIY Level | Estimated Cost |
|---|---|---|---|
| Sistering Joists | Moderate damage, accessible joists | Intermediate | $150-$600 per area |
| New Supports | Wide sags, weak beams | Beginner to Intermediate | $200-$1,000 per support |
| Replacement | Severe rot or pest damage | Advanced/Pro | $500-$2,000 per joist |
| Adjustable Jacks | Temporary or adjustable support | Beginner | $50-$150 each |
| Blocking/Bridging | Minor sag, improve stiffness | Beginner | $50-$250 total |
Non-obvious Insight: Sistering is often better than replacing, because it’s less invasive and keeps the original joist as part of the structure, spreading the load.
Tools And Materials Needed
To fix sagging floor joists, you’ll need some basic and specialized tools. Don’t skip on safety gear—working under a house can expose you to dust, mold, and sharp objects.
Essential Tools
- Hammer and pry bar
- Circular saw or reciprocating saw
- Cordless drill/driver
- Level (4 ft. or longer) or laser level
- Measuring tape
- Adjustable wrench
- Floor jack (if lifting joists)
- Screw clamps or C-clamps
- Safety glasses, gloves, dust mask
Common Materials
- Dimensional lumber (usually 2×8, 2×10, or 2×12, depending on your joist size)
- Construction adhesive
- Lag bolts or heavy-duty screws (3-6 inches)
- Joist hangers or metal straps (for extra support)
- Concrete footings or pads (if adding posts)
- Metal adjustable columns (if needed)
- Treated lumber (if in contact with concrete)
Tip: Always match the new lumber to the size and species of the original joist for best results. For example, if your joists are 2×10 Douglas fir, use the same.
Step-by-step Guide: Sistering Floor Joists
Sistering is the most common way to repair sagging joists. Here’s how to do it right.
Step 1: Prepare The Area
Clear out any insulation, wires, or pipes in the way. If there’s mold or rot, treat it first with a mold killer and let the wood dry. If you find termites or pests, call a pest control expert before proceeding.
Step 2: Cut The Sister Joist
Measure the length you need. Ideally, the sister board should extend at least 3 feet past the sag on both sides, or run the full length of the original joist if possible. Cut it to size.
Step 3: Lift The Sagging Joist
Use a floor jack and a post (with a concrete pad underneath for stability) to gently lift the sagging joist back to level. Go slowly—raise it no more than 1/8 inch per day to avoid cracking plaster or drywall above.
Common Mistake: Lifting too quickly can cause more damage to floors and walls. Patience is critical.
Step 4: Apply Adhesive
Run a bead of construction adhesive along the top edge of the sister joist. This helps transfer loads and prevents squeaks.
Step 5: Attach The Sister Joist
Clamp the new board tightly against the old joist. Then, drill pilot holes and drive lag bolts or screws every 16–24 inches along the length. If wiring or pipes are in the way, notch the sister joist only as much as necessary, and reinforce the notched area with metal plates.
Step 6: Secure The Ends
If possible, use joist hangers or metal straps at both ends for extra strength. Make sure the new joist bears on the foundation, beam, or wall.
Step 7: Remove The Jack
Once everything is fastened, you can slowly lower and remove the jack. The floor should now feel solid and level.
Adding New Supports (beams And Posts)
If your floor sags across a wide area, or the main beam is weak, adding a new support beam and columns underneath is a smart solution.
Planning Support Placement
- Place the new beam directly under the sagging joists.
- Posts should be spaced every 4–6 feet for best support.
- Use concrete pads under posts to prevent sinking.
Installing The Beam
- Measure and cut the beam to length. Use double or triple 2x10s or stronger, glued and bolted together.
- Lift the beam into place under the joists.
- Use adjustable columns or solid posts to support the beam.
- Attach each joist to the beam using joist hangers or metal straps.
Pro Tip: For extra strength, use a steel I-beam instead of wood if the span is long or the load is heavy.
Cost Comparison: Wood Vs Steel Beam
| Beam Type | Strength | Cost (per foot) | Ease of Installation |
|---|---|---|---|
| Wood (Double 2×10) | Medium | $8-$15 | Easy |
| Steel I-beam | High | $20-$50 | Medium/Hard |
Replacing Severely Damaged Joists
Sometimes, joists are too far gone to repair—especially after years of rot or termite damage. In these cases, full replacement is needed.
Removing The Old Joist
- Support the floor above with temporary beams and jacks.
- Cut out the damaged section with a reciprocating saw.
- Remove any nails or fasteners.
Installing The New Joist
- Slide the new joist into place, making sure it rests on the same supports as the original.
- Attach with joist hangers and lag bolts.
- Remove temporary supports only after the new joist is secure.
Safety Note: This is a big job. If you’re not confident, hire a professional.
Using Adjustable Floor Jacks
Adjustable steel columns, sometimes called lally columns or screw jacks, are a quick way to support sagging joists. They are not always a permanent fix, but can be useful for temporary support or in crawlspaces.
How To Install
- Place a concrete pad under the jack for stability.
- Position the jack under the sagging joist.
- Turn the screw to lift the joist slowly.
- Check level as you go. Stop if you hear cracking above.
- Lock the jack in place.
Tip: For a long-term fix, replace the jack with a permanent post or beam.
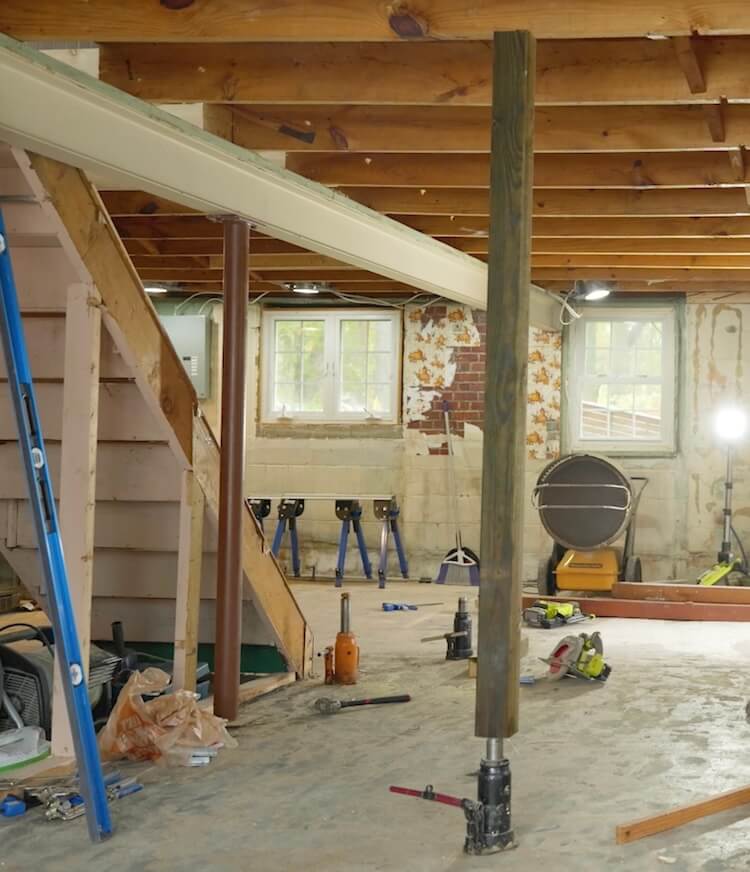
Credit: rogueengineer.com
Adding Blocking And Bridging
Blocking or bridging is the process of adding short pieces of wood between joists to spread loads and prevent twisting.
When To Use
- If joists are spaced more than 16 inches apart
- If you feel bounce or vibration, but no major sag
How To Install
- Cut blocks to fit tightly between joists.
- Install every 4–6 feet along the span.
- Nail or screw blocks in place.
Benefit: This method doesn’t raise the floor, but it can make a big difference in stiffness.
Preventing Future Problems
Once you’ve fixed your joists, it’s smart to prevent future sagging.
Moisture Control
- Fix all plumbing leaks right away.
- Use a vapor barrier on crawlspace floors.
- Make sure gutters and grading keep water away from the foundation.
- Run a dehumidifier in damp basements.
Proper Ventilation
- Make sure crawlspaces and basements have vents.
- Keep them clear of debris and check for blockages twice a year.
Don’t Overload Floors
- Avoid putting heavy items (like waterbeds, large fish tanks, or safes) above areas with known weak joists.
- Spread loads evenly—don’t stack all heavy furniture in one corner.
Non-obvious Insight: Regularly check for new cracks in walls or floors above repaired areas. Early warning signs can save you major repairs later.
Common Mistakes To Avoid
Many homeowners and even some contractors make mistakes when fixing sagging floor joists. Avoid these to save time, money, and frustration.
- Ignoring the cause: If you fix the joist but not the leak or pest issue, the problem will return.
- Not lifting slowly: Raising the floor too quickly can crack walls and ceilings.
- Using undersized lumber: Always match or exceed the original joist size.
- Skipping building permits: Many cities require a permit for structural repairs.
- Not securing ends: New joists should always rest on a solid support, not just hang in mid-air.
When To Call A Professional
While many repairs are DIY-friendly, some situations require a pro:
- If you see major foundation cracks or movement
- When you need to replace main beams or many joists
- If there’s extensive mold or termite damage
- When electrical, plumbing, or HVAC lines run through the repair area
A structural engineer can also provide a plan if you’re unsure about the best fix.

Credit: www.youtube.com
Costs And Budgeting
Repairing sagging floor joists isn’t cheap, but it’s much less expensive than fixing a collapsed floor. Here’s what to expect:
- Sistering joists: $300–$1,000 for a typical room
- New beams and posts: $1,000–$4,000 depending on size
- Full replacement: $2,000–$10,000 if many joists are bad
- DIY savings: Doing the work yourself can cut costs by 50–70%, but don’t skimp on safety.
Tip: Always get quotes from at least two contractors if you hire out the work.
Diy Or Hire Out?
Many homeowners can handle minor sagging and sistering joists, especially if you’re handy and comfortable using tools. For major repairs, especially those involving the main structure, hiring a professional is the safer option.
Experience-Based Tip: Even if you DIY, consider paying a pro for an hour of consultation. They can spot hidden problems and give you peace of mind.

Credit: oldhousecrazy.com
Permits, Codes, And Safety
Structural work is covered by building codes for a reason—it’s about safety. Always check with your local building department before starting. In most places, you’ll need a permit for:
- Adding or moving beams or posts
- Replacing joists
- Work that changes the structure of the home
Ignoring codes can lead to insurance problems or even force you to undo the work later.
Real-life Example
Let’s say you buy a 1950s house. The living room floor dips 1 inch in the middle and feels bouncy. You check the crawlspace and see old 2×8 joists, a water stain from a past leak, and a few soft spots.
After fixing the plumbing leak, you sister new 2x8s to the weak joists, add a new support beam with concrete pads, and block between the joists for extra stiffness. The floor is now level, solid, and ready for new flooring.
Useful Resources
For more details about floor joist repair and building codes, the HomeAdvisor Floor Joist Repair Guide is a trustworthy resource.
Frequently Asked Questions
How Do I Know If My Floor Joists Are Sagging?
Look for uneven floors, bouncy spots, cracks in the walls or ceiling, or doors that stick. You can also check underneath for sagging joists, water damage, or mold.
Can I Fix Sagging Floor Joists Myself?
If the damage is minor and you have basic carpentry skills, you can often fix it yourself by sistering joists or adding supports. For major structural issues, it’s best to hire a professional.
How Much Does It Cost To Repair Sagging Floor Joists?
Costs vary by damage. Simple repairs may cost a few hundred dollars in materials. Full replacements or professional jobs can run from $2,000 to $10,000 or more.
What Is The Best Material For Repairing Floor Joists?
Use the same size and type of lumber as your original joists. For extra strength, engineered lumber or steel beams can be used, but they cost more and may require special installation.
How Long Does It Take To Fix Sagging Floor Joists?
A simple sistering job on one or two joists can be done in a weekend. Larger projects with new beams or posts may take several days or longer, especially if you need to lift the floor gradually.
Fixing sagging floor joists is a project that pays off for years to come. By understanding the causes, choosing the right repair, and working carefully, you can restore your floors’ strength and safety—often without rebuilding your whole house. Regular checks and fast action at the first sign of trouble will help you avoid bigger, costlier repairs down the road.