Painting linoleum floors can transform an old, tired space into something fresh and modern. Many homeowners believe that changing a floor means replacing it, but sometimes, a coat of paint is all you need for a dramatic upgrade. If you’re on a budget or just want to personalize your home, learning how to paint linoleum floors is a skill worth having.
This guide will walk you through every step, from preparation to choosing materials, painting techniques, and long-term care. Along the way, you’ll get insider tips and practical advice to avoid common mistakes and get professional-looking results, even as a beginner.
Understanding Linoleum And Why Paint It
Many people confuse linoleum with vinyl, but these are different materials. Linoleum is made from natural products like linseed oil, cork dust, and wood flour, making it both eco-friendly and durable. Still, after years of use, linoleum can become faded, stained, or simply out of style. Replacing it can be expensive and time-consuming. Painting, on the other hand, is a cost-effective solution that lets you customize your floor’s look.
You might choose to paint linoleum to:
- Refresh a worn surface
- Update the style without replacing the floor
- Create unique patterns or designs
- Seal small imperfections
But painting linoleum is not like painting walls. The floor takes heavy traffic, cleaning, and sometimes water spills. The paint must stick well and last through daily wear, so proper preparation and product choice are critical.
Planning Your Painted Floor Project
A successful project starts with careful planning. Consider the following before you begin:
- Room Function: Is it a kitchen, bathroom, hallway, or laundry area? High-traffic spaces need extra-tough finishes.
- Time: The process can take 2-4 days, including drying time. Plan when you won’t need the room.
- Design: Decide if you want a solid color, stripes, checkerboard, or stencils. Some designs need extra steps and patience.
- Budget: Painting is cheaper than new flooring, but you’ll still need quality supplies. Skimping on materials can lead to peeling paint.
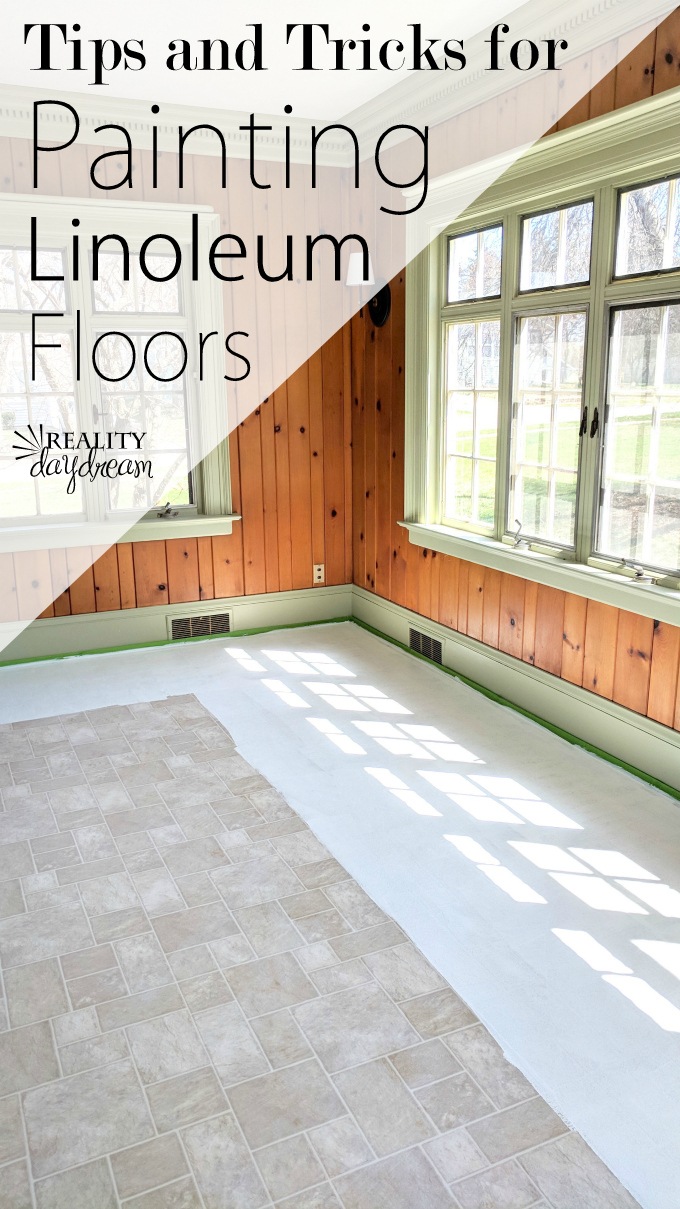
Measure your floor to estimate how much paint and primer you’ll need. Take note of any furniture that must be moved and think about ventilation—paint fumes can be strong.

Credit: realitydaydream.com
Gathering The Right Tools And Materials
Getting the right supplies is half the battle. Here’s what you’ll need for a typical linoleum floor painting project:
- Degreaser/cleaner (ammonia-free)
- Scrubbing brush or sponge
- Sanding block (120–180 grit) or orbital sander
- Vacuum and mop
- Painter’s tape
- Drop cloths or plastic sheeting
- High-quality primer (bonding/adhesion primer)
- Porch and floor paint or epoxy paint (water-based is best for indoors)
- Paint tray and liners
- Angled brush (2–2.5 inch)
- Microfiber roller (1/4” nap)
- Protective finish (water-based polyurethane or clear floor sealer)
- Gloves and mask
- Knee pads (optional but helpful)
Not all paints work for floors. Look for products labeled for “porch and floor,” “concrete,” or “garage” use. These paints resist scuffs and moisture better than wall paint. If you want to use a pattern or stencil, add painter’s tape and stencil brushes.
Pro tip: Always check the paint and primer labels to ensure compatibility with linoleum or non-porous surfaces.
How To Prepare Linoleum Floors For Painting
Preparation is the most important step. Skipping it can ruin your results, even with the best paint.
1. Clear And Clean The Area
Move all furniture and rugs out of the room. Sweep and vacuum to remove dust, dirt, and debris. Next, wash the floor with a degreaser or ammonia-free cleaner. Linoleum often has wax or polish that can stop paint from sticking.
Scrub well, especially in corners and high-traffic spots.
2. Remove Old Wax And Shine
If your floor is glossy or has old wax, strip it using a commercial wax remover or a mix of hot water and a little dish soap. Rinse with clean water and let dry completely.
3. Sand The Surface
Lightly sand the entire floor with a sanding block or orbital sander using 120–180 grit sandpaper. This step is key to roughen the surface so the primer can grip. Don’t skip edges or corners—use hand sanding if needed.
Vacuum the dust and wipe with a damp cloth. Let the floor dry.
4. Tape Off Edges
Apply painter’s tape along baseboards, cabinets, and anywhere you don’t want paint. Lay drop cloths to protect walls and adjacent floors.
Non-obvious insight: Some floors have tiny cracks or dents. Fill these with a latex floor patch before priming, then sand smooth. This makes the painted floor look newer and prevents paint from settling in holes.
Choosing The Best Primer And Paint For Linoleum
The right products can make or break your project. Linoleum is non-porous and flexible, so you need products that can stick and bend without cracking.
Primer
Use a bonding primer or “adhesion primer” designed for slick surfaces. Popular brands include Zinsser Bulls Eye 1-2-3, INSL-X Stix, and Kilz Adhesion. These primers create a strong base that helps paint stick to linoleum.
Paint
Choose a porch and floor paint or epoxy paint (water-based for indoor use). These are made to resist scuffs, moisture, and cleaning chemicals. Avoid regular wall paint—it will chip and peel.
For bathrooms, laundry rooms, or kitchens, use a paint labeled “moisture resistant” or “for high traffic. ”
Topcoat
A clear polyurethane sealer adds extra protection. Water-based polyurethanes are best indoors—they dry fast, don’t yellow, and have low odor.
Non-obvious insight: If you want a high-gloss look, check that your topcoat is compatible with your paint. Some finishes can react with paint and cause cloudiness or peeling.
Step-by-step: How To Paint Linoleum Floors
Ready to get started? Here’s a clear, step-by-step guide for a flawless painted floor.
1. Prime The Floor
- Stir your primer well.
- Pour into a tray and use an angled brush to cut in around edges and corners.
- Roll the primer onto the main area using a microfiber roller. Work in small sections to keep a wet edge and avoid lap marks.
- Let the primer dry as directed (usually 4–6 hours).
Check the surface—if you see spots where the primer didn’t stick, lightly sand and add a second coat.
2. Paint The Base Coat
- Stir your floor paint thoroughly.
- Use the brush for edges and corners first.
- Roll the paint onto the floor in thin, even coats. Don’t overload the roller—thin coats dry harder and last longer.
- Allow the first coat to dry (usually 6–8 hours).
Apply a second coat for even coverage. For bold or dark colors, a third coat may be needed. Let each layer dry fully.
3. Add Patterns Or Designs (optional)
If you want stripes, checkerboards, or stencils, wait until the base coat is fully dry. Use painter’s tape to mark lines or place stencils, then gently press down edges to prevent paint bleed.
Use a small brush or foam roller to apply the pattern color. Remove tape before the paint dries to get crisp lines.
Pro tip: If you’re new to stenciling, practice on cardboard first to perfect your technique.
4. Seal With Clear Topcoat
Once the paint is fully dry (wait at least 24 hours), apply 2–3 thin coats of water-based polyurethane using a clean roller or brush. Let each coat dry as directed, usually 2–4 hours.
The topcoat adds durability and makes cleaning easier. Don’t skip this step, especially in kitchens and bathrooms.
5. Curing And Moving Back In
The floor will be dry to the touch in a few hours but needs up to 7 days to cure fully. Avoid replacing heavy furniture or rugs until the paint is completely hard. Light foot traffic is okay after 1–2 days.
Credit: realitydaydream.com
Design Ideas: Making Your Painted Floor Unique
Painting linoleum isn’t just about covering up old colors. It’s a chance to get creative. Here are some ideas:
- Solid color: Clean and simple, ideal for modern spaces.
- Checkerboard: Use two colors for a classic look.
- Stripes: Wide or narrow, running parallel or at an angle.
- Stenciled patterns: Imitate tiles, mosaics, or geometric shapes.
- Borders: Paint a contrasting border around the room.
- Custom insets: Create a “rug” effect in the center.
Before starting, sketch your design on paper. For complex patterns, mark out guidelines with a pencil and tape.
Non-obvious insight: You can use metallic or pearlescent floor paint for a unique shimmer. Just be sure to seal with a compatible topcoat.
Common Mistakes And How To Avoid Them
Even experienced DIYers make mistakes. Here’s how to avoid the most common ones:
- Skipping prep: Poor cleaning or sanding leads to peeling paint.
- Wrong products: Wall paint or basic primer won’t last on floors.
- Thick coats: Heavy coats dry slowly and may never harden fully.
- Not letting each layer dry: Rushing causes smudges and soft spots.
- Ignoring curing time: Moving furniture too soon can leave dents or marks.
- No topcoat: Unsealed paint is vulnerable to stains and scratches.
- Painting over wax: Wax or polish blocks paint from bonding.
Pro tip: Always check product labels for drying and curing times. Humidity and temperature affect how fast paint dries.
Comparing Painted Linoleum To Other Floor Options
Wondering if painting is the best choice? Here’s a quick comparison:
| Option | Cost | Durability | DIY Friendly | Style Flexibility |
|---|---|---|---|---|
| Painted Linoleum | Low | Medium | High | High |
| New Linoleum Sheet | Medium | High | Medium | Limited |
| Vinyl Plank | Medium-High | High | Medium | Medium |
| Tile | High | High | Low | Wide |
Painting is the fastest and most affordable way to change your floor’s appearance, especially if you’re comfortable with DIY projects.
How Long Will A Painted Linoleum Floor Last?
A well-painted linoleum floor can last 3–5 years in a high-traffic area, and even longer in low-traffic rooms. Durability depends on:
- How well you prepared the floor
- Quality of primer, paint, and sealer
- Type of room (kitchen vs. bedroom)
- How often you clean and maintain it
Heavy use, dragging furniture, or lots of water can wear down the finish faster. But with careful cleaning and occasional touch-ups, your painted floor can look good for years.
Cleaning And Caring For Painted Linoleum
Proper care extends the life of your painted floor. Here are some easy tips:
- Sweep or vacuum regularly to remove grit that can scratch.
- Mop with a damp cloth and mild cleaner—avoid harsh chemicals or soaking the floor.
- Wipe up spills quickly, especially liquids.
- Place felt pads under furniture legs to prevent scratches.
- Don’t drag heavy items across the floor.
Every 1–2 years, you can refresh the topcoat for extra protection.
Non-obvious insight: Avoid rubber-backed mats. The rubber can react with floor paint and cause discoloration or stickiness.
Troubleshooting: What To Do If Something Goes Wrong
Even with the best prep, issues can happen. Here’s how to fix common problems:
Peeling Or Flaking Paint
This usually means poor adhesion. Lightly sand the affected area, clean, re-prime, and repaint. Always feather the edges to blend with the surrounding floor.
Bubbles Or Blisters
Trapped moisture or painting over wax can cause this. Let the area dry, sand smooth, and repaint.
Scuff Marks
Clean gently with a damp sponge. For stubborn marks, use a magic eraser or touch up with leftover paint.
Dull Finish
If the floor loses shine, clean well and apply a fresh coat of clear sealer.
Credit: www.amandathevirtuouswife.com
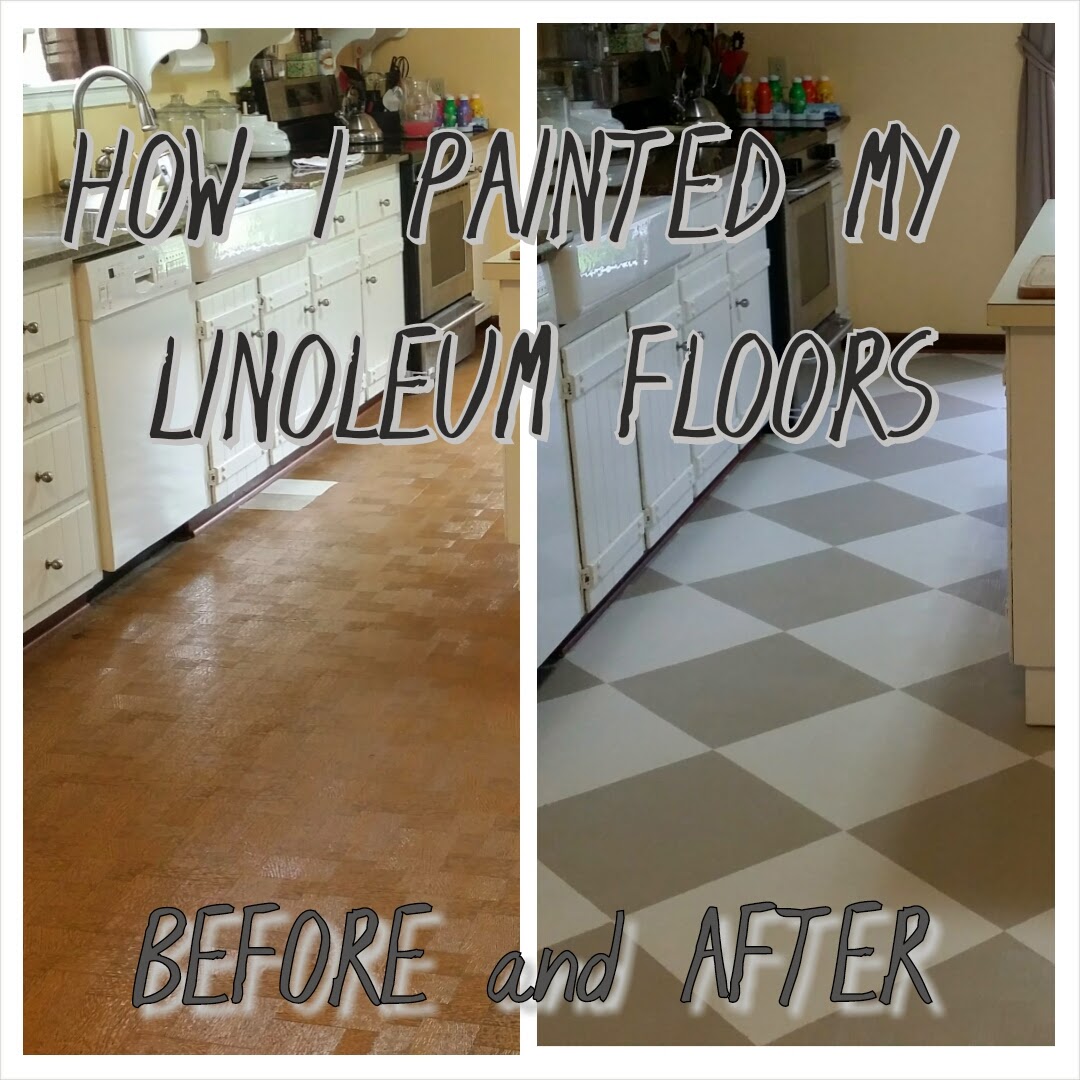
Real-life Example: Transforming A Kitchen Floor
Sarah had a 15-year-old linoleum kitchen floor. It was yellowed and stained but had no tears or big dents. Here’s how she transformed it:
- Cleaned and stripped old wax.
- Sanded the floor lightly.
- Used a bonding primer.
- Painted two coats of light gray porch and floor paint.
- Added a white stenciled border for style.
- Sealed with three coats of water-based polyurethane.
After a week of drying, the floor looked like new. The total cost was under $150—much less than new flooring. With regular cleaning, the finish has lasted over 3 years with only minor touch-ups.
Cost Breakdown For A 150 Sq Ft Room
Here’s an estimate for painting a medium-sized room:
| Item | Estimated Cost |
|---|---|
| Cleaner/Degreaser | $10 |
| Sanding Supplies | $15 |
| Bonding Primer (1 quart) | $18 |
| Porch & Floor Paint (1 gallon) | $35 |
| Polyurethane Sealer (1 quart) | $22 |
| Rollers, Brushes, Tape, Drop Cloths | $25 |
| Total | $125 |
Costs can be higher if you add special patterns, stencils, or need extra primer or paint for larger rooms.
Environmental And Safety Considerations
Linoleum is a green flooring material, so painting it can also be eco-friendly—especially compared to replacing with vinyl or tile, which creates landfill waste. Choose low-VOC (volatile organic compound) primers, paints, and sealers to reduce fumes and health risks.
Always ventilate the room well. Wear gloves and a mask during sanding, priming, and painting. Keep pets and children out of the area until the floor is fully cured.
For more on eco-friendly home improvements, check out the EPA’s Greener Products guide.
Frequently Asked Questions
Can I Paint Linoleum Floors In A Bathroom?
Yes, you can paint linoleum in a bathroom. Use a high-quality bonding primer, moisture-resistant floor paint, and finish with two or three coats of water-based polyurethane. Make sure the room is well ventilated during painting and drying.
How Long Does It Take For Painted Linoleum To Cure?
Painted linoleum is usually dry to the touch in 6–8 hours, but it takes up to 7 days to cure fully. Avoid heavy furniture, rugs, or wet cleaning until curing is complete. Light foot traffic is okay after 24–48 hours.
What If My Painted Floor Gets Scratched Or Chipped?
Small chips can be touched up with leftover paint. For bigger scratches, sand the damaged area lightly, clean, prime, and repaint. Always reseal with a clear topcoat after repairs.
Do I Need To Remove The Old Linoleum Before Painting?
No, you don’t need to remove it if the floor is flat, clean, and not lifting. Fill any cracks or holes before painting. If the linoleum is loose or badly damaged, it’s better to replace it.
Is Painting Linoleum Safe For Homes With Kids Or Pets?
Yes, once the paint and sealer are fully cured. Use low-VOC products and ventilate well during the project. After curing, the surface is safe and easy to clean. Always keep pets and children away during painting and drying.
Painting linoleum floors is a smart way to refresh your space without a big investment. With the right prep, materials, and care, you can achieve a durable, beautiful finish that stands up to daily life. Whether you want a simple color update or a bold new pattern, following these steps will help you get results you’re proud of.