Building your own pantry door is a project that adds both style and function to your kitchen or storage area. Whether your pantry is part of your main kitchen or in a separate space, a custom door can make the room look more organized and inviting.
Many people choose to build their own pantry door to fit a unique opening, save money, or create a personalized touch. Even if you are not a professional carpenter, with the right guidance and preparation, you can complete this rewarding project yourself.
This guide will take you through every stage of building a pantry door. You will learn how to measure, choose materials, cut and assemble the frame, install hardware, paint or stain, and finally hang your door. We will also discuss different styles, what mistakes to avoid, and how to add finishing touches that make your project look professional.
By the end, you will have all the knowledge and confidence to build a pantry door that suits your needs and tastes.
Understanding Your Pantry Door Needs
Before you pick up any tools, it’s important to decide what kind of pantry door you want. There are several types, and the best choice depends on your space, style, and budget.
Types Of Pantry Doors
- Swinging (Hinged) Door: The most common type. Opens in or out on hinges. Good for most pantries with enough room.
- Sliding (Barn) Door: Slides along a track above the door opening. Great for saving space and adding a rustic or modern look.
- Bi-Fold Door: Folds in the middle and is ideal for narrow spaces.
- Pocket Door: Slides into the wall and disappears when open. Requires more advanced carpentry skills.
- French Door: Double doors with glass panes. Adds elegance but needs more space.
Think about how much space you have in front of the pantry, how wide the opening is, and if you want the door to be a feature or just blend in. For most DIYers, a standard hinged door is the best place to start, but the instructions in this article can be adapted for other types.
Measuring The Door Opening
Accurate measurement is crucial. An ill-fitting door can stick, rattle, or leave gaps.
- Measure the height of the opening at three points: Left, middle, and right. Use the smallest number.
- Measure the width at the top, middle, and bottom. Again, use the smallest number.
- Measure the depth of the door jamb (the frame thickness).
Write down these numbers. Subtract 1/8 inch from the width and height for clearance. This ensures your door opens and closes smoothly.
Choosing Your Door Style
Your pantry door can be simple or decorative. Consider these options:
- Flat panel: Clean and modern, easy to build.
- Shaker style: Frame with a recessed panel, suits many homes.
- Paneled door: Multiple raised or recessed panels for a classic look.
- Glass insert: Adds light and lets you see inside (but you’ll need to keep your pantry tidy! ).
- Chalkboard: Paint a section with chalkboard paint for notes and lists.
Pick a style that matches your kitchen or house. If you’re new to woodworking, start with a flat or shaker-style door.
Gathering Materials And Tools
Having the right materials and tools ready makes your project go smoothly. Below is what you will need for a basic shaker-style or flat panel pantry door.
Materials
- Wood for stiles and rails (frame pieces): Usually 1×4 or 1×6 pine, poplar, or MDF. Quantity depends on your door size.
- Panel material: 1/4″ plywood, MDF, or solid wood.
- Wood glue
- Wood screws (1-1/4″ to 1-1/2″)
- Wood filler or putty
- Sandpaper (various grits: 120, 180, 220)
- Primer and paint or stain and sealer
- Hinges (usually 2 or 3 for a standard door)
- Door knob or pull
- Strike plate (if needed)
- Optional: Decorative molding, glass insert, chalkboard paint
Tools
- Measuring tape
- Pencil
- Square
- Circular saw or miter saw
- Table saw (for cutting panels, optional)
- Drill with bits and screwdriver tips
- Clamps
- Sander or sanding block
- Paintbrushes and/or roller
- Safety glasses and ear protection
Some tools, like a table saw, can be rented from hardware stores if you don’t own them.
Planning And Design
Don’t skip the planning stage. Drawing a simple diagram of your door, with all measurements, helps prevent mistakes.
Sketching Your Door
- Draw the frame outline.
- Mark the width of stiles (vertical pieces) and rails (horizontal pieces).
- Show the panel size inside the frame.
- Plan where the hinges and knob will go.
A clear sketch is especially important if you are adding details like a glass insert or decorative trim.
Choosing Materials Wisely
Here’s a comparison of common wood types for pantry doors:
| Material | Pros | Cons | Best For |
|---|---|---|---|
| Pine | Affordable, easy to find, easy to work with | Soft, dents easily | Painted or stained doors |
| Poplar | Stable, smooth, good for paint | More expensive than pine | Painted shaker-style doors |
| MDF | Very smooth, no wood grain, cheap | Heavy, not moisture-resistant | Flat panel, interior use |
| Oak | Strong, attractive grain | Harder to cut, expensive | Stained, traditional look |
Most beginners use pine or poplar. MDF is good for flat panels but avoid it in damp areas.
Cutting The Door Components
Now you are ready to cut your wood to size. Take your time—precision now makes installation easier later.
Cutting The Frame
- Cut two stiles (vertical pieces) to the full height of your door.
- Cut two rails (top and bottom horizontal pieces) to the door width minus the combined width of the stiles.
Example: For a 24″ wide door using 1×4 (actual width 3.5″) stiles:
24″ – (3.5″ X 2) = 17″
Your rails will be 17″ long.
If you are making a shaker-style door, you may also need a middle rail for extra strength or design.
Cutting The Panel
- Measure the opening inside your frame.
- Cut the panel (plywood, MDF) to this size, minus about 1/8″ each way for movement.
- For a solid wood panel, allow 1/4″ more for expansion.
If you want a glass panel, you will cut a slightly smaller opening and add stops to hold the glass.
Checking Fit
Lay all parts flat on the floor or a workbench. Make sure everything lines up and the panel fits in the frame. Adjust as needed.

Credit: farmhouseishblog.com
Assembling The Door
With pieces cut, it’s time to put them together.
Dry Fit First
Before you use glue or screws, do a dry fit. Clamp everything together to check that the frame is square and the panel fits well. Measure both diagonals; they should be the same.
Gluing And Clamping
- Apply wood glue to the ends of the rails and the edges of the panel.
- Insert the panel into the grooves (if making a shaker or paneled door).
- Clamp the frame tightly. Wipe away excess glue with a damp cloth.
Fastening The Frame
- For extra strength, drill pilot holes and use wood screws through the rails into the stiles.
- Countersink the screws so they can be filled and hidden.
- If you have a flat panel door, you can use pocket holes or dowels for a clean look.
Let the door dry for several hours, or overnight, before removing clamps.
Filling And Sanding
- Fill screw holes and gaps with wood filler.
- Let it dry, then sand the entire door smooth (start with 120 grit, finish with 220 grit).
- Pay extra attention to edges and corners.
A smooth surface is the key to a good paint or stain job.
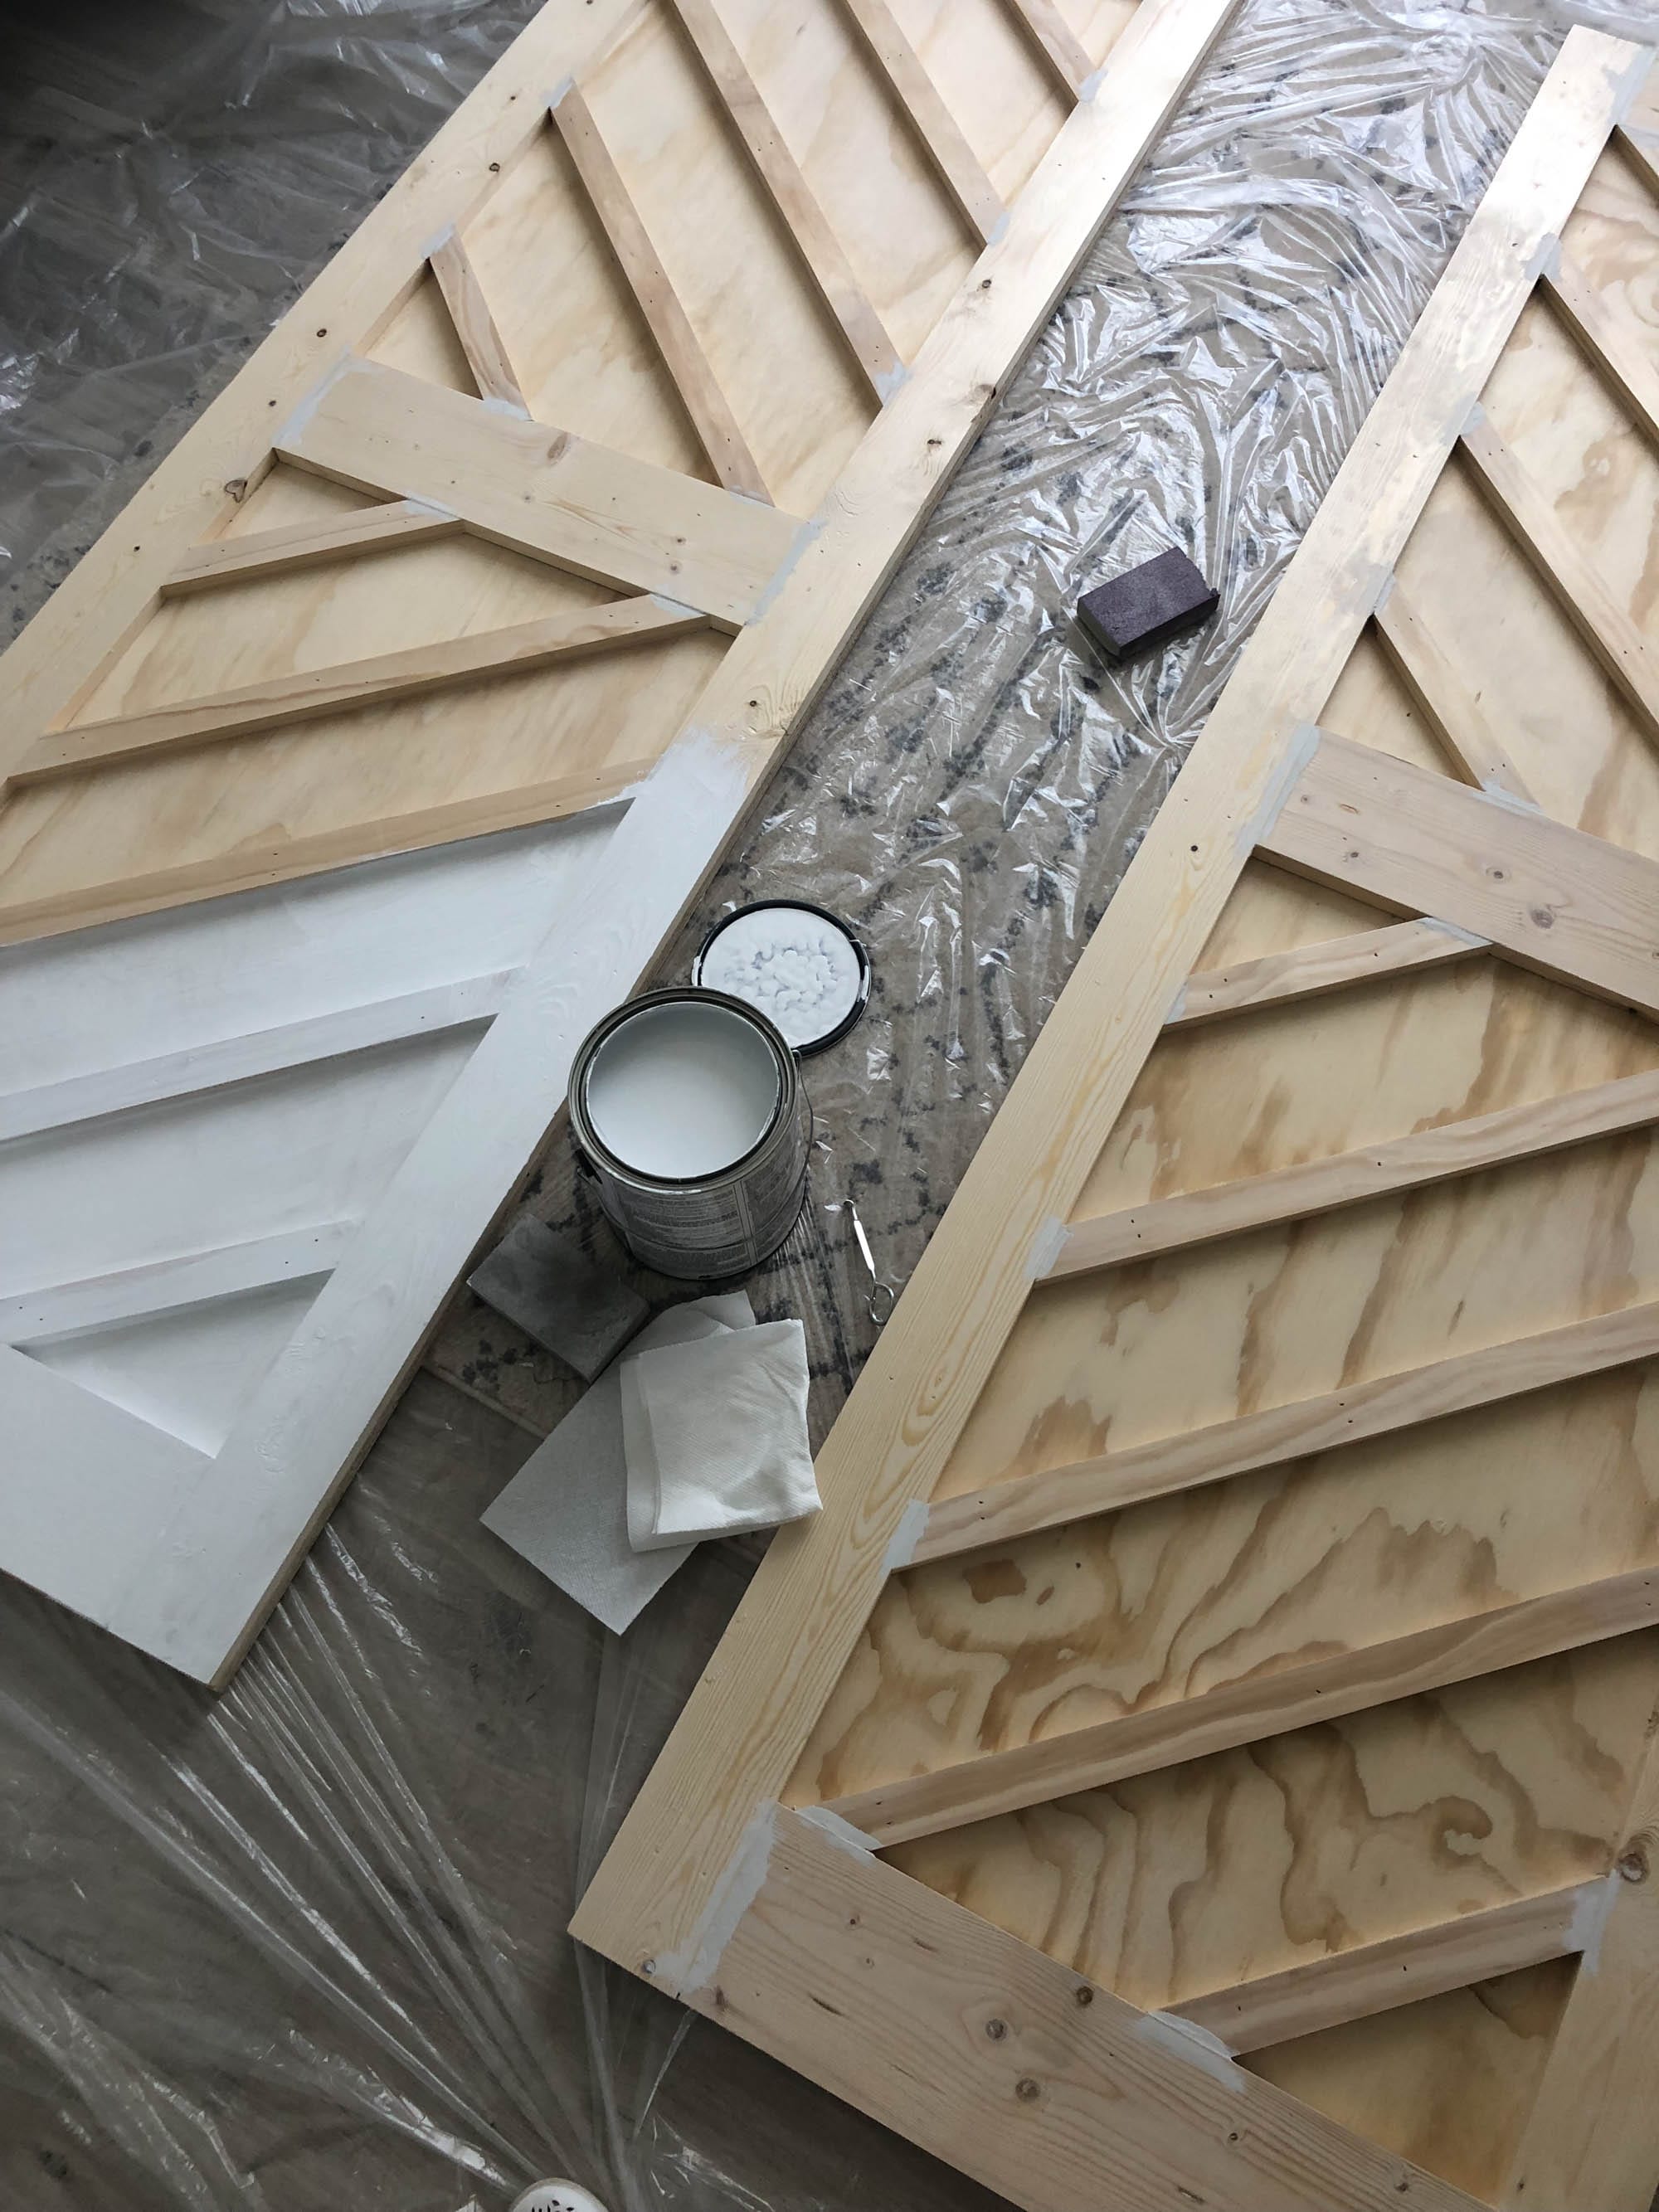
Painting Or Staining Your Pantry Door
Finishing the door protects the wood and adds style. Here’s how to get great results.
Preparing The Surface
- Remove dust with a tack cloth or damp rag.
- If you plan to paint, apply a primer first. For stain, use a wood conditioner if needed.
Painting
- Use high-quality interior paint for durability.
- Apply with a brush for corners and a roller for flat areas.
- Let dry, sand lightly between coats, and apply 2-3 coats.
Staining
- Choose a stain color that matches your kitchen.
- Apply with a rag or brush, following the wood grain.
- Wipe off excess and let dry.
- Finish with a clear sealer (polyurethane or similar).
Special Finishes
- For a chalkboard door, use chalkboard paint on a smooth panel.
- For a distressed look, sand edges lightly after painting.
- For a glass insert, paint or stain the frame separately.
Allow the door to cure fully (usually 24-48 hours) before handling.
Credit: prettyinthepines.com
Installing Hardware
Choosing and installing the right hardware helps your door work smoothly and look complete.
Hinges
- Most pantry doors use butt hinges (standard door hinges).
- Mark hinge positions on the door edge and the jamb—usually 7″ from the top, 11″ from the bottom, and one in the middle for heavy doors.
- Use a chisel to recess (mortise) the hinge leaves for a flush fit.
- Pre-drill screw holes to avoid splitting wood.
- Attach hinges to the door first, then to the jamb.
Handles And Knobs
- Measure and mark the spot for your handle or knob—usually 36″ from the bottom.
- Drill a hole for the screw, then attach the hardware.
Magnetic Catch Or Latch
If you want the door to stay closed, add a magnetic catch or a ball catch to the top or side.
Strike Plate
If using a traditional door latch, install a strike plate in the jamb where the latch hits.
Comparison Of Hardware Types
Here’s a quick comparison for choosing hardware:
| Hardware Type | Pros | Cons | Best Use |
|---|---|---|---|
| Butt Hinge | Strong, common, easy to install | Requires mortising | Standard doors |
| Surface Hinge | No mortise needed, decorative options | Visible hardware | Barn or decorative doors |
| Sliding Track | Saves space, modern look | Needs wall space, harder to install | Barn doors |
| Ball Catch | Easy to use, simple | May loosen over time | Light doors, no latch needed |
Hanging The Pantry Door
This step brings all your work together. You may need a helper—doors can be heavy and awkward.
Fitting The Door
- Place the door in the opening, supported on wood shims to leave a small gap at the bottom (usually 1/4″).
- Mark the hinge positions on the jamb if not done already.
- Attach the hinges to the jamb.
- Check that the door swings freely and clears the floor.
Adjusting For A Perfect Fit
- Check the gaps around the door—should be even on all sides (about 1/8″ to 3/16″).
- Plane or sand the edges if the fit is too tight.
- Tighten all screws and test the latch or magnetic catch.
Final Touches
- Add weatherstripping for a tight seal (optional).
- Attach door stops if needed.
Common Mistakes And How To Avoid Them
Even experienced DIYers make mistakes. Here are some to watch out for:
- Incorrect measurements: Always measure twice before cutting.
- Wrong door swing direction: Decide if the door should swing left or right, in or out, before installing hinges.
- Skipping primer or sealer: Unfinished wood can warp or stain. Always protect your door.
- Improper hinge placement: Hinges too close or far apart make the door sag or bind.
- Not allowing for wood movement: Wood expands and contracts. Leave small gaps in panels.
- Rushing the finish: Let paint or stain dry fully between coats.
- Using the wrong hardware: Heavy doors need strong hinges; light doors can use simpler hardware.
- Not checking for square: An unsquare frame causes endless problems.
- Forgetting hardware clearance: Make sure handles and knobs don’t hit walls or shelves.
- Ignoring jamb condition: Old or damaged jambs may need repair before hanging a new door.
Advanced Customizations
If you want to go beyond the basics, try these ideas:
- Decorative molding: Add trim or beadboard for a fancier look.
- Glass or acrylic panel: Use clear, frosted, or patterned glass.
- Sliding barn door hardware: For a modern farmhouse style.
- Custom paint: Match your kitchen or add a bold contrast.
- Integrated chalkboard or whiteboard: For notes and grocery lists.
- Soft-close hinges: Prevent slamming, great for families.
- Hidden storage: Build shallow shelves into the door for spices or small items.
Practical Tips For Success
Here are two tips many beginners miss:
- Let wood acclimate: Store your lumber in the kitchen for a few days before building. This helps prevent warping after installation.
- Test your paint or stain on scrap wood: Colors can look different on pine, poplar, or MDF. Test first to avoid surprises.
Safety Reminders
- Always wear safety glasses when cutting or drilling.
- Use ear protection with power tools.
- Clamp wood securely before cutting.
- Work in a well-ventilated area when painting or staining.
Cost And Time Estimate
Building your own pantry door is often cheaper than buying a custom door. Here’s what to expect:
- Material cost: $40–$120, depending on wood type and hardware.
- Tool rental: $10–$30 (if you need a saw or sander).
- Time required: 1–2 days for basic doors, 3–4 days for detailed work (includes drying time).
Building your first pantry door takes longer, but future projects will go faster.
When To Call A Professional
Some situations call for expert help:
- Odd-sized or non-square openings
- Load-bearing walls (for pocket doors)
- Installing glass panels
- Electrical or plumbing near the door
If you are unsure, consult a carpenter or contractor.
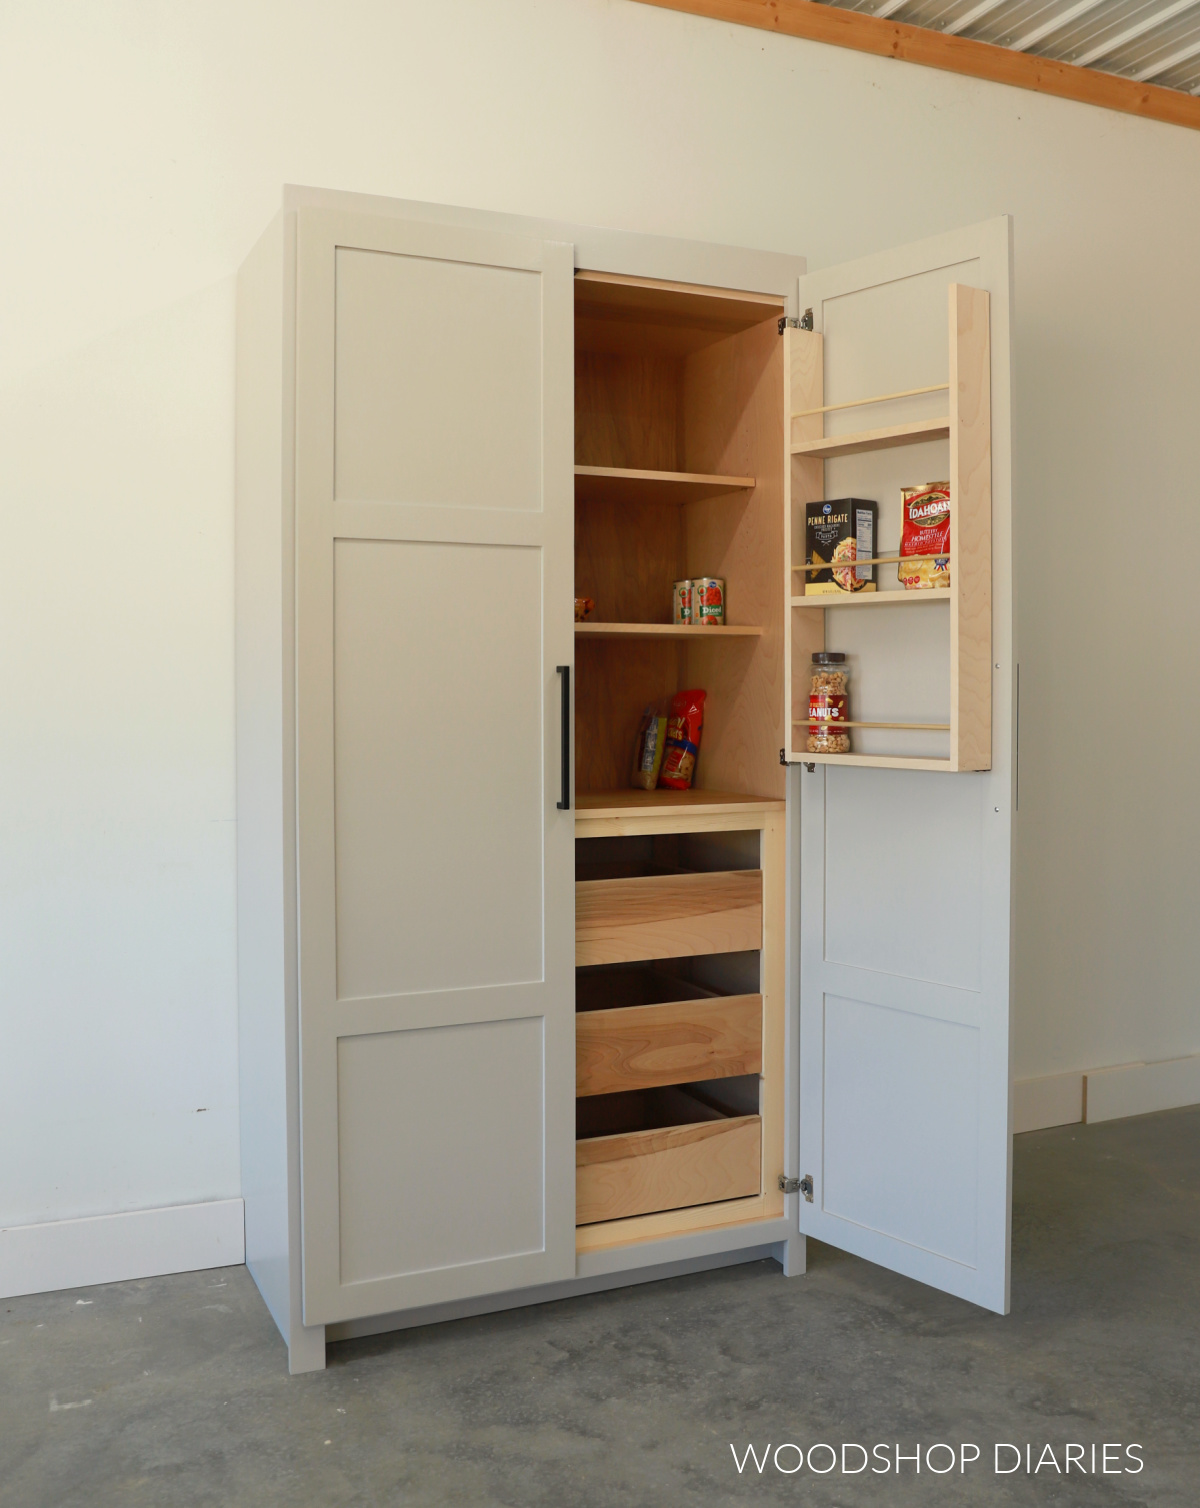
Credit: www.woodshopdiaries.com
Inspiration And Further Learning
Browse online galleries or home improvement sites for ideas. You’ll find thousands of pantry door designs, from farmhouse to ultra-modern. You can also watch detailed tutorials on platforms like YouTube, or refer to guides from sites like Family Handyman.
Frequently Asked Questions
What Is The Best Wood For Building A Pantry Door?
Pine and poplar are the most popular choices because they’re affordable, easy to work with, and take paint well. For a more traditional look, choose oak. Avoid MDF in areas with high humidity.
Can I Build A Pantry Door Without Power Tools?
Yes, but it’s much harder. You can use a hand saw and screwdriver, but cuts will take longer and may not be as straight. Renting a circular saw or drill saves time and gives better results.
How Do I Make Sure My Pantry Door Closes Tightly?
Use a magnetic catch or a ball catch at the top or side of the door. Add weatherstripping if you want an even tighter seal.
How Thick Should A Pantry Door Be?
Most interior doors are 1-3/8″ thick. For a pantry door, 3/4″ to 1-3/8″ is common. Thicker doors are stronger but heavier and need sturdier hinges.
Can I Add Glass To My Pantry Door Later?
Yes. You can cut an opening in the panel and add glass stops to hold a pane of glass or acrylic. Measure carefully, and consider safety glass for homes with children.
Building your own pantry door is a satisfying project that adds value and style to your home. With careful planning, the right materials, and attention to detail, you can create a door that works beautifully and looks great for years.
Take your time, enjoy the process, and don’t hesitate to customize your design—your perfect pantry door is just a weekend away.