Ceiling fans are a staple in many homes, offering a cool breeze and energy savings during hot months. But nothing ruins the comfort like an annoying noise coming from your ceiling fan. Whether it’s a faint hum, a clicking, or a rattling sound, these noises can disrupt your sleep, concentration, or relaxation.
The good news is, most ceiling fan noises can be fixed with some basic troubleshooting and maintenance. You don’t need to be an electrician or buy a new fan—just a bit of patience and the right steps.
This guide will show you how to get your ceiling fan to stop making noise, step by step. You’ll learn how to diagnose the real cause, apply practical solutions, and prevent future problems. We’ll also share some often-overlooked tips and insights many beginners miss.
By the end, you’ll have a quiet, smooth-running fan and a more peaceful home environment.
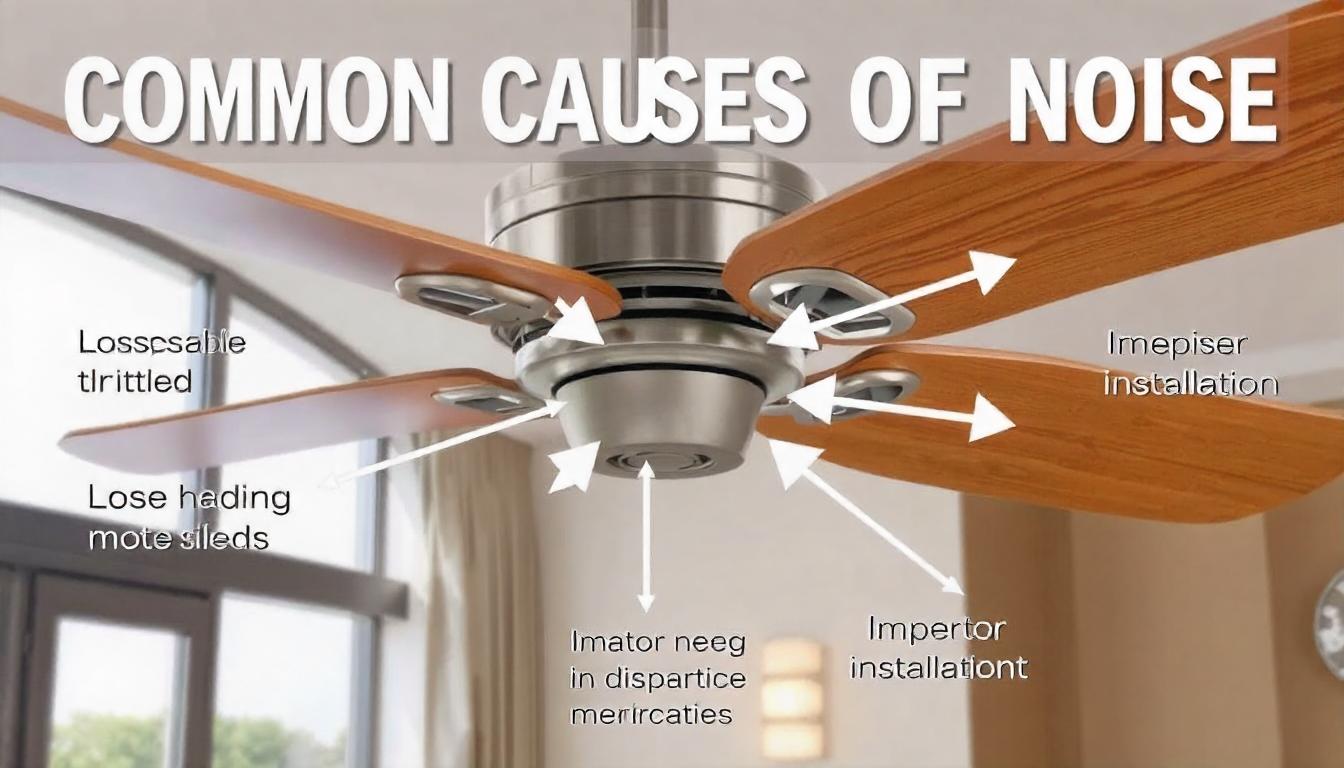
Understanding Ceiling Fan Noises
Not all noises are the same. To fix your fan, you must first recognize the type of sound you’re hearing. Here are some common noises and what they usually mean:
- Clicking: Often caused by loose parts or a misaligned blade. Sometimes, an object like a chain or pull cord is hitting the blades during rotation.
- Humming: Can be due to electrical issues or a noisy motor. Occasionally, a low hum comes from the fan’s internal capacitor or a switch that’s not suitable for ceiling fans.
- Rattling: Typically from loose screws, mounting problems, or a shaky fan box. If the fan is installed on an uneven ceiling, rattling can be worse.
- Squeaking/Squealing: Usually means the bearings need lubrication or the fan is unbalanced. In some cases, dry air can make the noise louder during certain seasons.
- Buzzing: Can be related to dimmer switches, poor wiring, or a faulty capacitor. Sometimes, a buzzing noise might start after a lightning storm or a power surge, which can harm internal electronics.
Identifying the noise helps you target the right solution. For example, a clicking noise is rarely caused by a lack of oil, while a hum could be more than just a loose screw. If you’re unsure, try to record the noise on your phone and play it back in a quiet room; sometimes, it’s easier to analyze away from distractions.
Safety First: Preparing To Work On Your Fan
Before you touch your ceiling fan, always think about safety. Here’s what to do:
- Turn off power: Use the wall switch and then cut power at the circuit breaker. This step is vital because even a switched-off fan can have live wires if the breaker isn’t off.
- Use a sturdy ladder: Never stand on a chair or unstable surface. Choose a ladder that allows you to reach the fan comfortably without stretching.
- Check for loose clothing: Avoid anything that can get caught in the blades. Remove jewelry like necklaces or bracelets to prevent accidents.
- Have a helper if possible: Ceiling fans can be heavy or awkward to handle alone. A second person can pass tools, hold the fan, or spot hazards you miss.
Working safely prevents injuries and accidental damage to your fan or ceiling. Never skip safety steps, even for small jobs. Ceiling fans are often installed in the center of a room, which means a fall could be more dangerous than you expect.
Credit: hykoont.com
Tools And Materials You Might Need
Depending on the problem, gather these basic tools and items:
- Screwdrivers (Phillips and flathead)
- Adjustable wrench
- Step ladder
- Cleaning cloths
- Lubricating oil (for ceiling fans)
- Balancing kit (often included with new fans)
- Small brush or duster
- Non-contact voltage tester
- Replacement screws or washers
A few additions can help even more: a flashlight for dark ceilings, a pen and notepad to record screw locations, and a small container to hold screws so nothing gets lost. Having these ready will save time and make repairs smoother. If your fan is older, consider having a voltage tester to check for old or faulty wiring before you touch any wires.
Step-by-step Solutions For Noisy Ceiling Fans
Let’s go through the key steps to silence your ceiling fan. Each step addresses a specific cause, but sometimes you’ll need to do several for a complete fix.
Step 1: Clean The Blades And Motor
Dust and dirt on the blades cause imbalance and extra noise. Even a small amount of grime can make a big difference over time.
- Turn off the fan and let the blades stop completely.
- Use a damp cloth to gently wipe each blade. Don’t use too much water, as moisture can warp wood or MDF blades.
- Clean the motor housing and any vents. Dust inside the vents can cause overheating and make the fan work harder (and noisier).
Tip: Dust can build up inside the motor over months. Use a vacuum with a brush attachment or a can of compressed air for deeper cleaning. Don’t forget to clean the top sides of the blades—this is where most dust collects, and it’s easy to miss if you’re only cleaning what you can see from the ground.
Step 2: Tighten All Screws And Connections
Loose screws are one of the most common reasons for clicking or rattling noises.
- Check blade screws (connecting the blades to the motor). Even a slight looseness can become noisy at high speeds.
- Inspect the screws at the base (where the fan attaches to the ceiling). Sometimes, screws hidden by decorative covers are the culprit.
- Tighten the light fixture or globe if your fan has one. Loose glass not only makes noise but can also crack if not secured.
Do not overtighten, as this can strip the threads or damage the fan. It’s best to use a hand screwdriver rather than a power drill so you feel the resistance.
Step 3: Check For Blade Alignment And Warping
Misaligned or warped blades cause the fan to wobble and make noise.
- Stand on a ladder and look at the blades from the side. Use a ruler or measuring tape to check the distance from the ceiling to each blade tip.
- Measure the distance from each blade tip to the ceiling. All should be equal. A difference of more than 1/8 inch can lead to wobbling.
- If a blade is higher or lower, gently bend it back into place. Do this slowly—forcing it can break the blade arm.
Insight: Sometimes, a blade arm (the metal piece holding the blade) is bent, not the blade itself. You can carefully adjust the arm using gentle pressure. Take your time, as bending it too quickly can snap the arm or strip the screws.
Step 4: Balance The Blades
Even a tiny imbalance can create noise. Here’s how to balance your fan:
- Attach a balancing clip (from your kit) to the middle of one blade.
- Run the fan at low speed and listen.
- Move the clip to each blade until the noise lessens.
- When you find the right blade, stick a balancing weight on top (usually adhesive).
If you lost your balancing kit, you can use a small coin and strong tape as a temporary fix. Try to place the weight exactly where the balancing clip worked best. Mark the spot with a pencil before removing the clip.
Extra tip: If balancing doesn’t help, check that all blades are the same weight and material. Sometimes, a replacement blade from a different set can throw off the balance.
Step 5: Inspect And Secure The Mounting Bracket
A loose mounting bracket or electrical box can create a loud rattle.
- Turn off all power.
- Remove the canopy cover to expose the bracket. Use a flashlight if necessary.
- Wiggle the fan gently. If it moves, tighten the mounting screws. If you see gaps between the bracket and the ceiling, add flat washers to tighten the fit.
- Check that the electrical box is rated for ceiling fans (not just lights).
Non-obvious insight: Many older homes have boxes made for lights, not fans. These can’t support fan weight and lead to constant movement and noise. If the box moves or feels weak, it’s best to replace it with a fan-rated box, even if this means calling a professional.
Step 6: Lubricate The Motor Bearings
If you hear squeaking or grinding, your fan’s bearings may need oil.
- Check the manual to see if your fan can be oiled. Some modern fans are sealed and don’t need this. For fans that do, the oil port is often hidden under a sticker or cap.
- Look for a small oil hole near the motor. Use a flashlight to find it.
- Add a few drops of fan oil (never use WD-40 or similar sprays).
Let the oil settle for an hour before turning the fan back on. If you add too much oil, wipe up any excess to prevent drips.
Example: If your fan is 10 years old and has never been oiled, the bearings are likely dry. Oiling can make an old fan run like new again, but only if the bearings aren’t worn out.
Step 7: Examine The Light Kit And Glass Fixtures
Loose or vibrating light fixtures can create buzzing or rattling.
- Check that all screws and glass covers are tight. If your fan has pull chains, make sure they’re not hitting the glass.
- Use small rubber washers between glass and metal to dampen vibration. Washers can be found at hardware stores, or you can cut small pieces from an old mouse pad as a DIY solution.
This is a simple fix that many people overlook. Vibrating glass can sometimes sound like a motor problem, so always check here first if your fan has lights.
Step 8: Check For Electrical Issues
A humming or buzzing noise sometimes points to electrical problems.
- If your fan is connected to a dimmer switch, replace it with a standard switch. Most fans are not compatible with dimmers and may hum or buzz.
- Listen for a hum when the fan is on low speed—it could mean a bad capacitor or switch. Capacitors are usually cheap to replace but require some wiring skill.
If you’re not comfortable with electrical work, call an electrician. Electricity is dangerous—never guess or cut corners. If you smell burning or see smoke, turn off power at the main breaker and seek help immediately.
Step 9: Replace Worn Or Damaged Parts
Over time, parts like blade arms, screws, or even the motor can wear out.
- Inspect all moving parts for signs of wear, cracks, or damage. If a blade is warped or cracked, it can’t be fixed—replacement is the only option.
- Order exact replacement parts from the fan’s manufacturer. Most brands have websites with diagrams to help you identify the correct part.
Pro tip: Always keep your fan’s model number handy for ordering parts. This saves time and ensures a perfect fit. Taking a photo of the fan’s label or manual is a good idea for future reference.
Step 10: Test After Each Fix
Don’t wait until you’ve tried everything—test the fan after each step.
- Turn on the fan at different speeds. Some problems only appear at high or low speeds.
- Listen for changes in the noise. If the noise changes, you’re on the right track.
- If the problem is fixed, no need to go further. If not, continue with the next step.
This saves time and helps you identify what worked. It also helps you learn which fixes are most effective for your fan.
Common Mistakes To Avoid
- Ignoring the fan’s age: An older fan may simply be at the end of its life. Sometimes, replacement is the best option.
- Using the wrong oil: Only use oil made for ceiling fans. Other oils can damage the motor.
- Forgetting to balance after cleaning: Removing dust can change blade weight—always check balance again.
- Overtightening screws: This can crack parts or make noise worse.
- Skipping electrical checks: Noise can sometimes signal a real safety issue.
- Not checking for blade damage: Small cracks or chips can grow over time, leading to bigger problems.
- Reassembling in the wrong order: Take photos during disassembly so you remember how everything fits back together.
When To Call A Professional
While many ceiling fan noises can be fixed at home, there are times to get expert help:
- The fan is still noisy after all basic fixes.
- You see sparks, smell burning, or notice flickering lights.
- The fan wobbles dangerously or shakes the ceiling.
- You’re not comfortable working with electricity.
- Your ceiling is very high or the fan is hard to reach.
A professional can diagnose deeper motor issues, wiring problems, or install a new, quiet fan if needed. They also have the tools and experience to work safely at height or with old wiring.
Preventing Future Ceiling Fan Noise
A little regular maintenance keeps your fan quiet for years. Here’s what you can do:
- Clean blades and motor every 2-3 months. Schedule it with other home chores so you don’t forget.
- Check and tighten screws twice a year. Mark your calendar for spring and fall.
- Balance blades after any cleaning or room change. Even moving furniture can change air flow and affect balance.
- Use the correct wall switch type. Never use a dimmer unless it’s rated for fans.
- Lubricate bearings once a year, if your fan allows. Label your oil bottle with the date so you know when it’s time to reapply.
Bonus insight: Installing a quality fan at the right height (at least 7 feet from the floor) reduces wear and lowers the chance of noise. Fans that are too close to the ceiling or walls can create wind noise, so follow manufacturer guidelines for installation distance.
Comparing Ceiling Fan Noise Levels
Not all ceiling fans are equally quiet. Some brands and models are designed for silent operation. Here’s a quick comparison of noise levels (in decibels) for typical ceiling fans:
| Fan Type | Noise Level (dB) | Typical Room Use |
|---|---|---|
| Standard 3-blade | 40-50 dB | Living room, bedroom |
| High-end silent motor | 30-40 dB | Bedroom, study |
| Old/Unbalanced fan | 50-60 dB | Garage, workshop |
For comparison, a quiet library is about 40 dB, while normal conversation is around 60 dB. If you’re sensitive to noise, choose a fan with a DC motor and check online reviews for “quiet” ratings before buying.

Credit: www.youtube.com
How Much Does It Cost To Fix A Noisy Ceiling Fan?
Costs can vary depending on what needs fixing. Here is a general guide for common repairs:
| Repair Task | DIY Cost | Professional Cost |
|---|---|---|
| Tightening screws/cleaning | Free – $10 | $50 – $80 |
| Balancing blades | $5 – $15 | $50 – $90 |
| Lubricating bearings | $6 – $15 | $60 – $100 |
| Replacing motor | $40 – $100+ | $150 – $300+ |
Doing basic fixes yourself saves money, but know your limits for safety. Sometimes, spending a little on a professional can prevent larger repair bills later.
Ceiling Fan Noise: Troubleshooting Flowchart
If you’re not sure where to start, follow this simple process:
| Noise Type | Possible Cause | Recommended Action |
|---|---|---|
| Clicking | Loose screws/blades | Tighten all fasteners |
| Humming | Dimmer switch/electric issue | Replace switch, check wiring |
| Rattling | Loose mounting box | Secure box, check ceiling |
| Squeaking | Dry bearings/unbalanced | Lubricate, balance blades |
| Buzzing | Loose glass/light kit | Tighten fixtures, add washers |
This approach helps you quickly narrow down and fix most fan noises. If your noise doesn’t match any type here, consider asking for help online—upload a recording to a home improvement forum for advice.
Upgrading To A Quieter Ceiling Fan
If your fan is old, worn out, or just never runs quietly, upgrading may be the best long-term solution. Look for these features in a new, quiet ceiling fan:
- DC motor: More efficient and quieter than AC motors.
- Balanced blades: Factory-balanced for silent operation.
- Quality bearings: Less maintenance, longer life.
- Integrated remote: Reduces mechanical switches that can buzz.
- Multiple speed settings: More options for airflow and noise control.
- Reversible function: Lets you use the fan all year, reducing wear and noise.
Installing a modern, silent fan can be a great investment for your home’s comfort and value. For more on fan technology and standards, visit the Wikipedia ceiling fan page.
Frequently Asked Questions
What Is The Most Common Cause Of A Noisy Ceiling Fan?
The most common cause is loose screws or blades. As fans spin, vibrations can loosen screws over time, which leads to clicking, rattling, or wobbling noises. Regular tightening and maintenance prevent most noise problems.
Can I Use Any Oil To Lubricate My Ceiling Fan?
No, you should only use oil designed for ceiling fans. Other oils can damage the bearings or gum up the motor. Check your fan’s manual for the recommended type and never use WD-40 or household oils.
Why Does My Ceiling Fan Make Noise Only At Certain Speeds?
Fans may make noise at certain speeds due to imbalanced blades, worn bearings, or electrical issues at a specific voltage. Test your fan on all speeds and pay attention to when the noise happens. This helps identify the root cause.
How Do I Know If My Ceiling Fan’s Electrical Box Is Safe?
Your ceiling fan’s electrical box should be marked for fan support (usually stamped inside the box). If you’re unsure, remove the cover and check for a label. Boxes made only for light fixtures are not strong enough and should be replaced.
Is It Better To Repair Or Replace A Noisy Ceiling Fan?
If your fan is newer and the fix is simple (like tightening screws or cleaning), repair is best. If the fan is old, out of balance, or still noisy after many fixes, replacement is safer and often more cost-effective in the long run.
Restoring a quiet ceiling fan isn’t just about comfort. It extends the life of your fan, saves energy, and protects your home from potential safety issues. With the steps and insights shared here, you can tackle almost any ceiling fan noise and enjoy a peaceful, breezy room once more.

Credit: www.youtube.com