Click lock flooring has become a favorite choice for many homeowners. It is easy to install, affordable, and looks stylish. But like all floors, it can get damaged over time. A split plank, a lifted seam, or a squeaky board can ruin the look and feel of your room. The good news? Most issues with click lock flooring can be fixed without professional help. With a bit of patience and the right instructions, you can restore your floor’s beauty and comfort.
This guide gives you everything you need to know about repairing click lock flooring—step by step. You’ll learn about common problems, tools you’ll need, practical solutions, and how to avoid mistakes. Whether you have laminate, vinyl, or engineered wood click lock floors, you’ll find clear advice here.
Even if you’re not a DIY pro, you can follow these instructions and get your floor looking great again.
Understanding Click Lock Flooring
Click lock flooring is made from planks or tiles that snap together. Each piece has a tongue and groove system that locks in place when pressed. There’s no need for glue or nails. This makes installation faster and repairs easier than with traditional floors.
Most click lock floors are floating floors. They do not attach to the subfloor. Instead, they “float” above it, held together by their own locking system and the weight of the floor.
Types of click lock flooring:
- Laminate: Looks like wood but made from high-density fiberboard and a photo layer.
- Luxury vinyl plank (LVP): Water-resistant, durable, and often looks like real wood.
- Engineered wood: Real wood top layer with plywood underneath for stability.
Each type may have slightly different repair needs, but the basic approach is the same.
Common Problems With Click Lock Flooring
Click lock floors are tough, but problems can happen. Knowing what to look for helps you fix them before they get worse.
1. Gaps Between Planks
Temperature and humidity changes can cause planks to shrink or expand, leaving visible gaps.
2. Damaged Or Chipped Planks
Heavy objects or sharp items can cause dents, chips, or cracks.
3. Peaking Or Lifting Seams
When planks push against each other, they can rise at the seam. This often happens if the floor cannot expand or contract properly.
4. Buckling
Water damage or poor installation can make planks lift off the subfloor.
5. Squeaks And Noises
Movement under the floor can create annoying sounds.
6. Scratches And Surface Wear
High-traffic areas can show scratches or dull spots.
7. Moisture Damage
Water can cause swelling, discoloration, or warping.
Not every problem means you need to replace your floor. Many issues can be repaired with simple tools and methods.
Tools And Materials You’ll Need
Before you start, gather these tools. Having everything ready makes the job smoother.
- Rubber mallet
- Tapping block
- Pull bar
- Utility knife
- Pry bar
- Measuring tape
- Pencil
- Spacers
- Replacement planks (if needed)
- Adhesive putty or color-matched filler (for small chips)
- Moisture barrier tape (for subfloor issues)
- Cloth and mild cleaner (for cleaning)
Some repairs may need extra tools, but these basics cover most situations.
How To Fix Gaps In Click Lock Flooring
Gaps are one of the most common complaints. They can make your floor look old and can let dirt in. Here’s how to close them:
1. Check The Room’s Temperature And Humidity
Gaps often appear when the air is too dry. Use a humidifier to bring humidity to 35-55%. Wait a few days—planks may expand and close the gaps.
2. Clean The Gaps
Use a vacuum and a soft brush to remove dust and debris.
- Move the planks
- If the gap is near a wall, remove the baseboard.
- Use a pull bar and mallet to gently tap the planks toward the gap. Work from the wall outwards.
- Replace the baseboard when done.
- For gaps in the middle of the floor:
- Try a floor gap fixer tool (a weighted block with sticky pads).
- Attach it to the plank and tap it to shift the floor into place.
Pro tip:
Never use glue to close gaps. It prevents natural expansion and can cause buckling later.
Replacing A Damaged Click Lock Plank
If a plank is cracked, deeply scratched, or swollen, it’s best to replace it.
Removing A Damaged Plank Near A Wall
1. Take Off The Baseboard
Start at the nearest wall. Carefully pry off the baseboard with a flat tool.
2. Remove Planks
Lift each plank, one at a time, until you reach the damaged one.
3. Replace The Plank
Click in a new plank. Make sure it matches the direction and pattern of the rest.
4. Reinstall The Floor
Place the other planks back. Tap them gently to lock them tight.
5. Replace The Baseboard
Nail or glue it back into place.
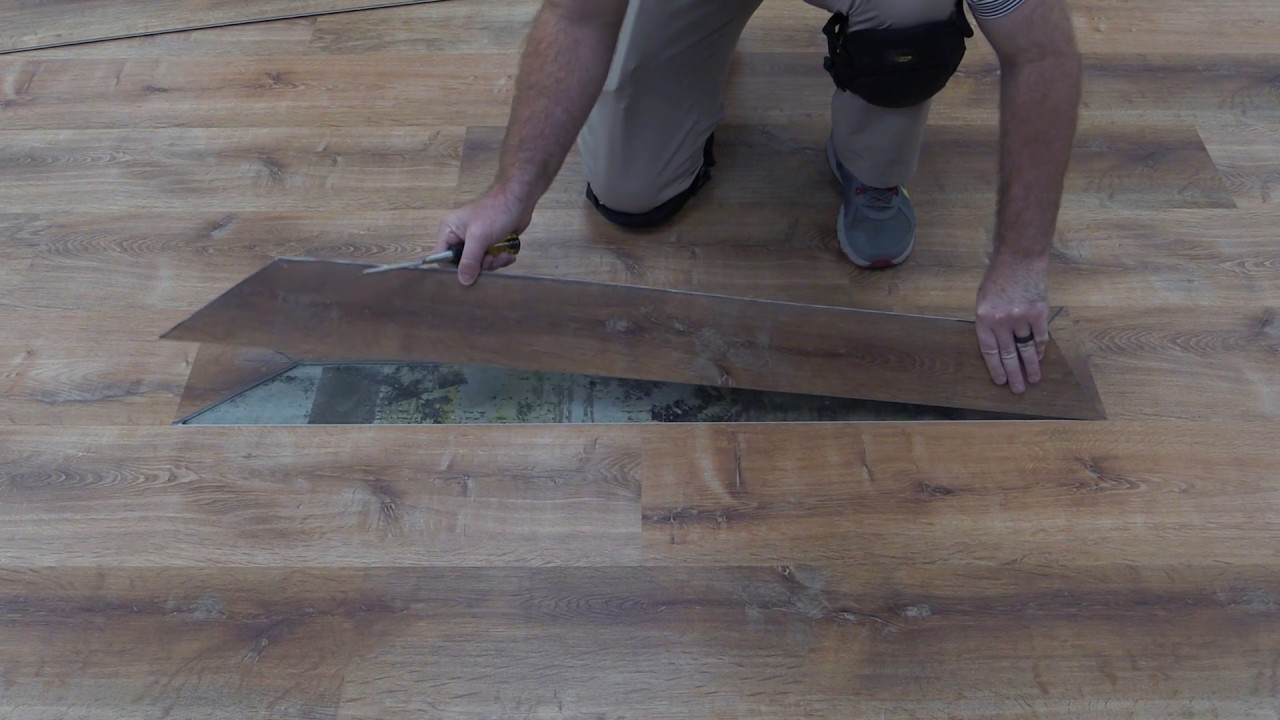
Replacing A Plank In The Middle Of The Room
This is trickier but possible:
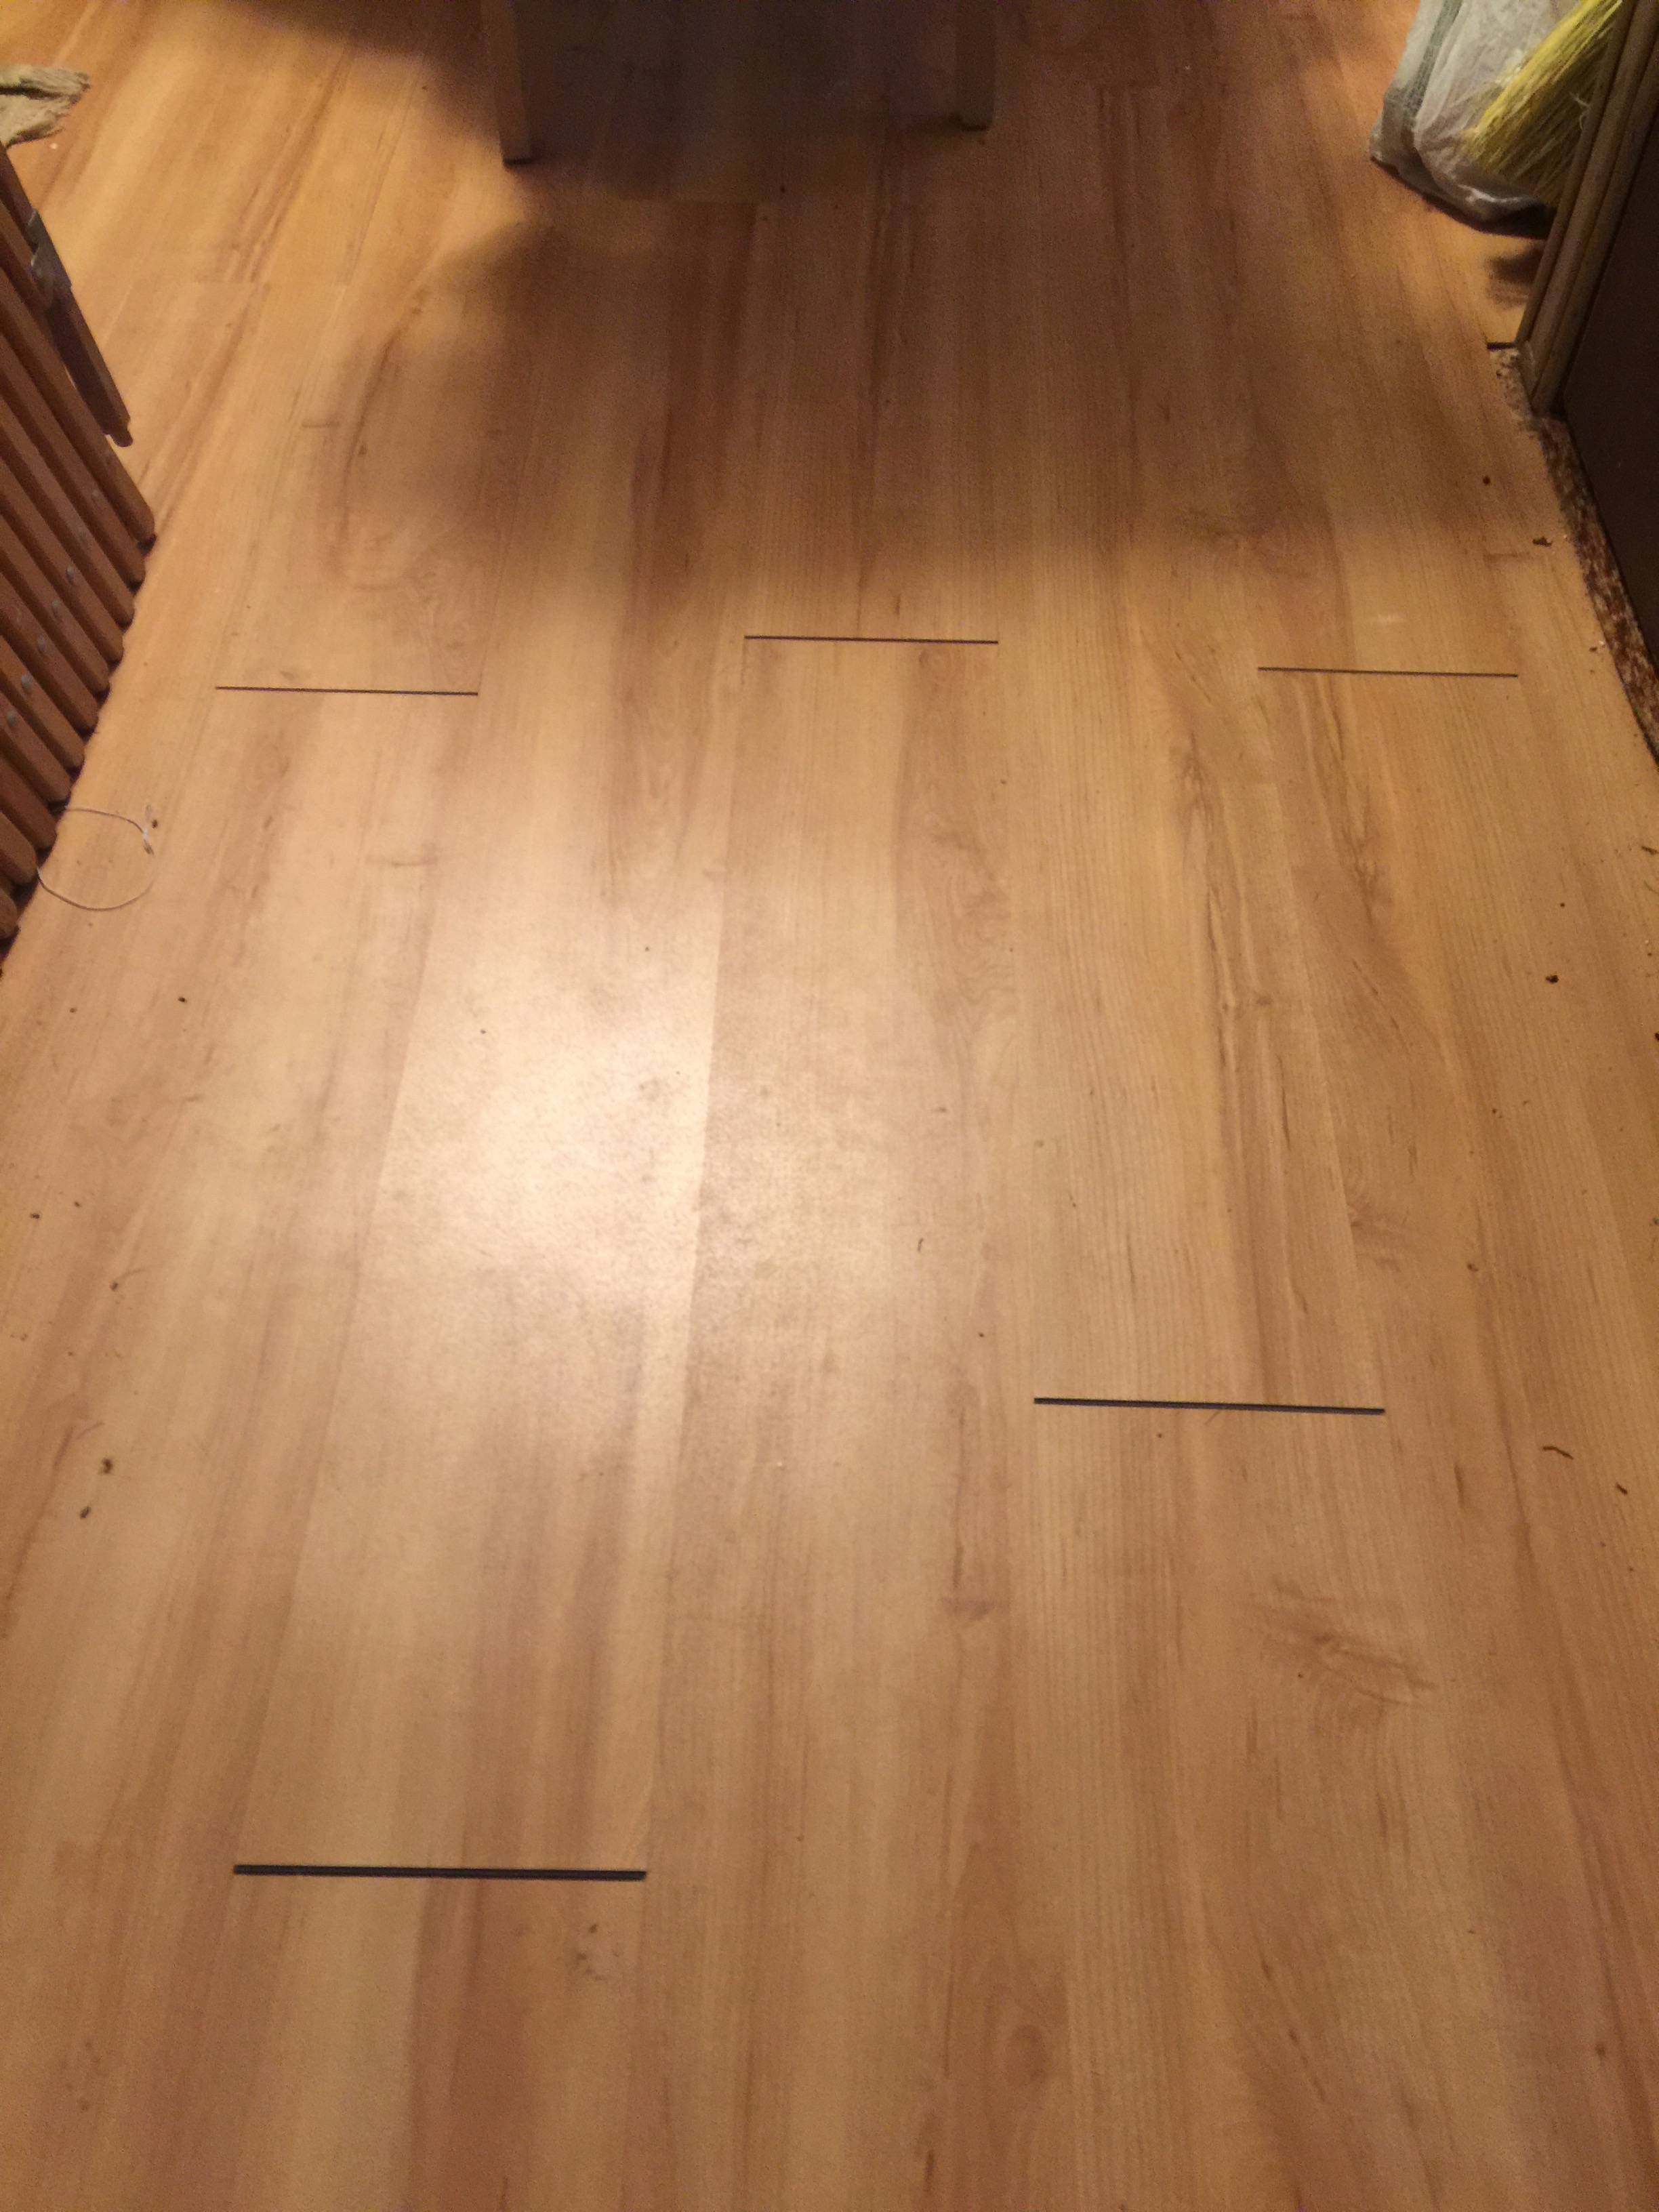
1. Mark The Plank
Use tape or pencil to show which plank to remove.
2. Cut The Plank
Use a circular saw or oscillating tool. Cut a line down the center, then two angled cuts to the corners.
3. Remove The Pieces
Pry out the center piece first, then the sides.
4. Prepare The New Plank
Trim the bottom of the groove edge with a utility knife so it will fit in.
5. Insert The Plank
Place it in, apply wood glue on the cut edges, and press down. Use weights to hold it overnight.
Non-obvious insight:
Even if your floor is “floating,” always check for underlayment or heating wires before cutting. Damaging these can lead to bigger problems.
Fixing Peaking, Buckling, And Lifting
Peaking happens when planks push up at the seams. Buckling is when planks lift off the subfloor. Both can trip you or ruin the look.
Causes
- No expansion gap left at walls
- Floor too tight around door frames or pipes
- Moisture trapped under the floor
How To Fix
1. Find The Source
Check the edges of the room. Is the floor touching the wall or trim?
2. Increase The Expansion Gap
Use a saw to trim planks at the wall. Leave 1/4 inch for expansion.
3. Check Door Frames And Pipes
Make sure nothing blocks the floor’s movement. Cut around these spots if needed.
4. Fix Moisture Problems
If you find water, dry the area completely before replacing planks. Add a moisture barrier if needed.
5. Lay Planks Flat
If planks are warped, replace them.
Common mistake:
People often try to nail or glue down peaking planks. This can make the problem worse. Click lock floors should float freely.
Repairing Squeaks And Floor Noises
A noisy floor can be annoying. Most squeaks come from movement between the planks or from the floor touching the subfloor.
Steps To Silence Squeaks
1. Find The Noisy Spot
Walk around and mark squeaky areas with tape.
2. Check For Loose Planks
Use a tapping block and mallet to snug planks together.
3. Add Weight
Place heavy objects (like books) on the area for a day to help the floor settle.
4. Check The Subfloor
If the noise continues, the subfloor may be uneven. Remove planks and level the subfloor if needed.
5. Use Powder
Sprinkle talcum powder or graphite between planks and sweep it in. This can reduce friction and noise.
Non-obvious insight:
Click lock floors installed over foam underlayments are less likely to squeak. If you’re often repairing squeaks, consider upgrading your underlayment.
Repairing Scratches And Surface Wear
Minor scratches are normal, but you can make them less visible.
For Light Scratches
1. Clean The Area
Use a damp cloth and mild floor cleaner.
2. Apply Repair Marker
Use a color-matched marker or crayon. Fill in the scratch and wipe off excess.
3. Buff Gently
Use a soft cloth to blend the repair.
For Deeper Scratches
1. Use A Repair Kit
These kits have wax fillers and tools. Melt a small amount of wax, fill the scratch, and level it with a plastic spatula.
2. Polish The Area
After the wax dries, buff with a soft cloth.
For Large Worn Areas
If the top layer is worn through, replacing the plank is the best fix.

Credit: www.reddit.com
Dealing With Moisture Damage
Water is the enemy of most click lock floors, especially laminate.
How To Handle Water Damage
1. Find The Source
Fix leaks, spills, or humidity problems.
2. Dry The Floor
Use fans and dehumidifiers. Remove damaged planks.
3. Check Subfloor And Underlayment
Make sure they are dry and not moldy.
4. Replace Swollen Or Warped Planks
If planks have swelled or changed shape, they cannot be fixed—replace them.
5. Install Moisture Barrier
For future protection, install a plastic moisture barrier under the repaired area.
Data point:
According to the North American Laminate Flooring Association, 98% of moisture damage in laminate flooring comes from leaks and spills left for more than 24 hours.
Preventing Future Problems
Repair is good, but prevention is better.
- Maintain proper humidity (35-55%) with a humidifier or dehumidifier.
- Clean spills immediately. Do not let water sit on the floor.
- Use furniture pads under chairs and tables.
- Sweep or vacuum regularly to avoid scratches.
- Check expansion gaps every year, especially after a season change.
- Do not drag heavy items across the floor.
- Trim pet nails to prevent scratches.
Credit: www.youtube.com
When To Call A Professional
Most repairs can be done yourself. But call a pro if:
- The damaged area is very large.
- There is mold or bad water damage.
- The subfloor is uneven and you’re not sure how to fix it.
- You need many planks replaced and the floor pattern is complex.
Cost Of Repair Vs. Replacement
Is it worth repairing, or should you replace the whole floor? Here’s a simple comparison:
| Repair Type | DIY Cost | Pro Cost | When to Replace |
|---|---|---|---|
| Single plank replacement | $10–$40 | $100–$250 | If over 25% planks are damaged |
| Fixing gaps | $0–$20 | $50–$150 | If gaps are everywhere and won’t close |
| Moisture repair | $50–$200 | $300–$600 | If swelling, warping in large areas |
Credit: diy.stackexchange.com
Choosing Replacement Planks
If you need to buy new planks, match them as closely as possible.
What Matters When Choosing
- Color and pattern: Some batches can vary. Bring a sample to the store.
- Thickness: Use the same thickness for smooth transitions.
- Locking system: Make sure the new plank’s lock matches the old ones.
- Manufacturer: If possible, buy from the same brand and line.
Tip:
If your floor is discontinued, look for leftover stock online or at specialty flooring stores. Sometimes, you can buy small quantities from sellers who have extra boxes.
How To Level A Subfloor Before Repair
An uneven subfloor is a hidden cause of many problems. Fixing it before repair saves time later.
- Remove planks over the problem area.
- Check with a long level or straight edge. Look for dips or high spots.
- Fill low spots with a self-leveling compound. Let it dry fully.
- Sand down high spots. Use a belt sander or hand sander.
- Clean up dust and debris.
- Reinstall the underlayment and planks.
Comparison Of Repair Methods
Which repair method is best for each problem? Here’s a quick overview:
| Problem | Best DIY Fix | Time Needed | Skill Level |
|---|---|---|---|
| Gaps | Tap planks together | 1-2 hours | Easy |
| Damaged plank near wall | Remove and replace | 2-3 hours | Medium |
| Damaged plank in middle | Cut and patch | 2-4 hours | Advanced |
| Squeaks | Tap tight, powder | 30 mins–1 hour | Easy |
| Scratches | Marker or wax kit | 30 mins | Easy |
| Peaking/buckling | Trim edges, replace plank | 2–3 hours | Medium |
Safety Tips For Diy Floor Repair
- Wear safety glasses when cutting planks.
- Use gloves to protect your hands from splinters and sharp tools.
- Work in a well-ventilated area if using glue or fillers.
- Read instructions for any tools or chemicals.
- Lift with your legs, not your back, when moving heavy items.
Real-life Example: Fixing A Gap In A Living Room
Let’s say you find a 1/4-inch gap in your living room laminate floor after winter. Here’s how you’d fix it:
- Check humidity: It’s only 30%. You use a humidifier, and after three days, the gap shrinks.
- Clean the gap: You vacuum up crumbs and dust.
- Tap planks: You remove the nearest baseboard, use a pull bar to shift planks toward the gap, and the floor looks perfect again.
- Replace baseboard: You finish by reinstalling the baseboard neatly.
This shows that small repairs can be quick and need just a few tools.
Helpful Resources
For more details about floor types and repairs, see the Laminate flooring Wikipedia page.
Frequently Asked Questions
What Is The Main Cause Of Click Lock Flooring Problems?
The most common causes are improper installation, lack of expansion gaps, and moisture. Always follow the manufacturer’s guidelines and keep your home’s humidity stable.
Can I Repair Click Lock Flooring Without Removing The Furniture?
For small repairs, yes. For plank replacement near the middle or large areas, you may need to move furniture to work safely and avoid damaging items.
How Do I Tell If My Click Lock Floor Is Laminate, Vinyl, Or Engineered Wood?
Check the surface and core. Laminate feels harder, has a photographic layer, and a wood fiber core. Vinyl is softer, waterproof, and flexible. Engineered wood has a real wood top layer and plywood core.
What If My Click Lock Floor Keeps Buckling Even After Repair?
Persistent buckling means a bigger issue, usually with moisture or a missing expansion gap. Re-check all edges and fix humidity problems before repairing again.
Is It Possible To Repair A Single Plank Without Removing The Whole Floor?
Yes, but it’s harder if the plank is in the middle. You’ll need to cut out the damaged plank and modify the new one to fit. It takes time but saves replacing the entire floor.
Click lock flooring is a smart, flexible choice for most homes. With the steps and tips above, you can repair most issues yourself, saving money and keeping your floor looking its best for years to come.