Repainting a china cabinet can transform an old or outdated piece into a beautiful focal point for your home. Many people feel nervous about repainting furniture, especially something as special as a china cabinet. But with the right preparation, tools, and steps, anyone can achieve a professional-looking finish—even if you have never painted furniture before.
In this guide, you will learn everything you need to know to repaint a china cabinet, from choosing paint to troubleshooting common problems. You will also discover practical tips that save time, avoid mistakes, and help your cabinet look stunning for years to come.
Why Repaint A China Cabinet?
A china cabinet is more than just storage for dishes or collectibles. It often holds family memories and sentimental value. Over time, finishes can become scratched, faded, or simply out of style. Repainting is a cost-effective way to:
- Refresh the look of your furniture
- Match new decor styles without buying a new piece
- Preserve a family heirloom while giving it new life
- Increase the value and functionality of your cabinet
Many people are surprised how much a simple color change can update an entire room. Painting also lets you personalize your cabinet with colors and finishes that fit your taste.
Beyond looks, repainting gives you the chance to address any wear and tear. For example, a cabinet that has faded spots or water marks can look new again with the right paint. If your style has changed—from traditional to modern, or from dark woods to light tones—a fresh color can make your space feel more cohesive.
And if you’ve inherited a piece that’s not quite your style, painting it means you don’t have to hide it or give it away.
Some people also repaint cabinets to create a themed look—like a coastal blue for a beach house or a distressed white for a farmhouse. The options are endless, and repainting gives you total control over the final appearance.
Planning Your Project
Before you start, take time to plan. Good preparation makes the process smoother and the results better.
Choose Your Finish And Color
Think about where the cabinet will go. Light colors can make a room feel bigger, while dark colors add drama. Popular options for china cabinets include white, cream, navy blue, charcoal gray, and even bold colors like teal or emerald green. Also, decide if you want a matte, satin, or gloss finish.
For a classic look, choose a neutral color with a satin finish. For a modern style, try a bold color with a high-gloss finish. If your home is farmhouse or cottage style, distressed or chalk paint finishes work well.
It’s also a good idea to bring home paint swatches or test small samples on the cabinet before committing. Lighting can change how a color looks—natural daylight might make a color look bright, while evening lighting can make it seem warmer or darker.
If you’re not sure, ask friends or family for their opinions, or take inspiration from decor magazines and websites.
Some people experiment with two-tone styles, painting the exterior one color and the interior another for contrast. For example, a white exterior with a pale blue or patterned interior can make displayed items stand out.
Assess The Cabinet’s Condition
Inspect for damage or repairs. Look for:
- Scratches and dents
- Loose doors or shelves
- Old hardware that needs replacing
Fixing these issues before painting gives a smoother finish and longer-lasting results.
Check for any wobbling, especially if the cabinet is older. Sometimes, tightening screws or adding a small amount of wood glue to joints can make the cabinet sturdier. If glass panels are loose, remove them before painting and reinstall after everything is dry.
Also, check the back panel—many older cabinets have thin backing that might need reinforcement or painting as well.
Gather Tools And Materials
You need more than just paint. Here’s a list of must-have supplies:
- Screwdriver (for removing hardware and doors)
- Sandpaper (120 and 220 grit)
- Wood filler (for scratches or holes)
- Putty knife
- Painter’s tape
- Drop cloths or plastic sheeting
- Degreaser or mild soap
- Clean rags
- Paintbrushes (angled and flat)
- Small foam roller
- Primer (if needed)
- Paint (latex, chalk, or enamel)
- Clear sealer or topcoat (optional)
- Respirator mask (for sanding and painting)
- Gloves
Some beginners forget to use painter’s tape or drop cloths, which can lead to messy floors and paint lines. Setting up your workspace properly is key.
You might also want a small bucket for washing or rinsing, and a step stool if your cabinet is tall. Having all supplies ready before you start avoids mid-project trips to the store, which can be frustrating and break your focus.
Decide Where To Paint
Paint in a well-ventilated area, such as a garage or covered outdoor space. Lay down drop cloths to protect floors. Make sure you have good lighting to spot drips or missed spots.
If painting inside, open windows and doors, and use fans to keep air moving. Some people set up a temporary painting station with saw horses and boards, which makes it easier to reach all sides. Remember, paint fumes can linger, so if you’re painting in a main living area, try to keep the space closed off from pets and children.
Prepping The China Cabinet
Proper preparation is the foundation for a smooth, lasting finish. Skipping these steps is a common beginner mistake.
Remove All Items And Hardware
Take everything out of the cabinet—dishes, shelves, glass panels if possible. Use a screwdriver to remove knobs, handles, and hinges. Place small screws in a labeled bag so you don’t lose them.
If your cabinet has adjustable shelves, remove them for easier painting and better coverage. Glass doors or shelves can often be lifted out once hardware is removed. Taking extra time now makes painting faster and helps avoid paint drips on hardware or glass.
Clean Thoroughly
Old cabinets often have grease, dust, or polish that can keep paint from sticking. Wash all surfaces with a degreaser or a mixture of warm water and mild dish soap. Rinse with clean water and dry completely.
Don’t forget hidden corners, undersides of shelves, or the top of the cabinet. If your cabinet has sticky residue from old tape or stickers, use a little rubbing alcohol to help remove it. This deep cleaning step makes a huge difference in paint adhesion and final smoothness.
Repair And Fill
Check for holes, deep scratches, or dents. Use wood filler and a putty knife to fill in imperfections. Let dry, then sand smooth.
For chipped veneer or missing wood, layer wood filler gradually and sand between applications. If your cabinet has ornate details or carvings, use a small brush or a cotton swab to press filler into tiny cracks. Let everything dry fully—rushing can lead to cracks or uneven spots later.
Sanding
Sanding helps new paint stick and removes old gloss. Use 120-grit sandpaper for rough areas, then 220-grit for a smooth finish. Always sand in the direction of the wood grain.
After sanding, wipe down the cabinet with a damp cloth to remove all dust. Skipping this step can lead to a gritty finish.
For cabinets with a thick, shiny finish, consider using a liquid deglosser in addition to sanding. This product helps break down old varnish and creates a better surface for paint to grip. Remember to wear a mask and gloves during sanding, as fine dust can be irritating.
Tape And Protect
Apply painter’s tape along edges you don’t want painted—like glass panels, mirrors, or inside areas. Cover the floor and nearby furniture with drop cloths.
Press tape firmly into corners and along edges for clean paint lines. If you’re painting close to walls or built-in shelving, tape those areas as well. Taking extra time now prevents frustrating cleanup later.
Choosing The Right Paint
Different paints give different results. Here’s a look at the most popular options:
| Paint Type | Best For | Pros | Cons |
|---|---|---|---|
| Latex | General use, easy clean-up | Low odor, fast drying | Needs primer, can chip if not sealed |
| Chalk Paint | Distressed, vintage look | Easy to use, little prep | Needs wax/topcoat, fewer color options |
| Enamel | Durability, high-traffic areas | Hard finish, washable | Longer dry time, stronger smell |
For beginners, chalk paint is popular because it requires less sanding and priming. However, for a smooth, modern look, enamel or acrylic latex paint with primer is a better choice.
If your cabinet will be touched or cleaned often (such as in a dining room), choose a paint that dries hard and resists scratches. Cabinets in kitchens, for example, benefit from semi-gloss or enamel finishes. When in doubt, ask for advice at your local paint store—they often have furniture-specific recommendations.
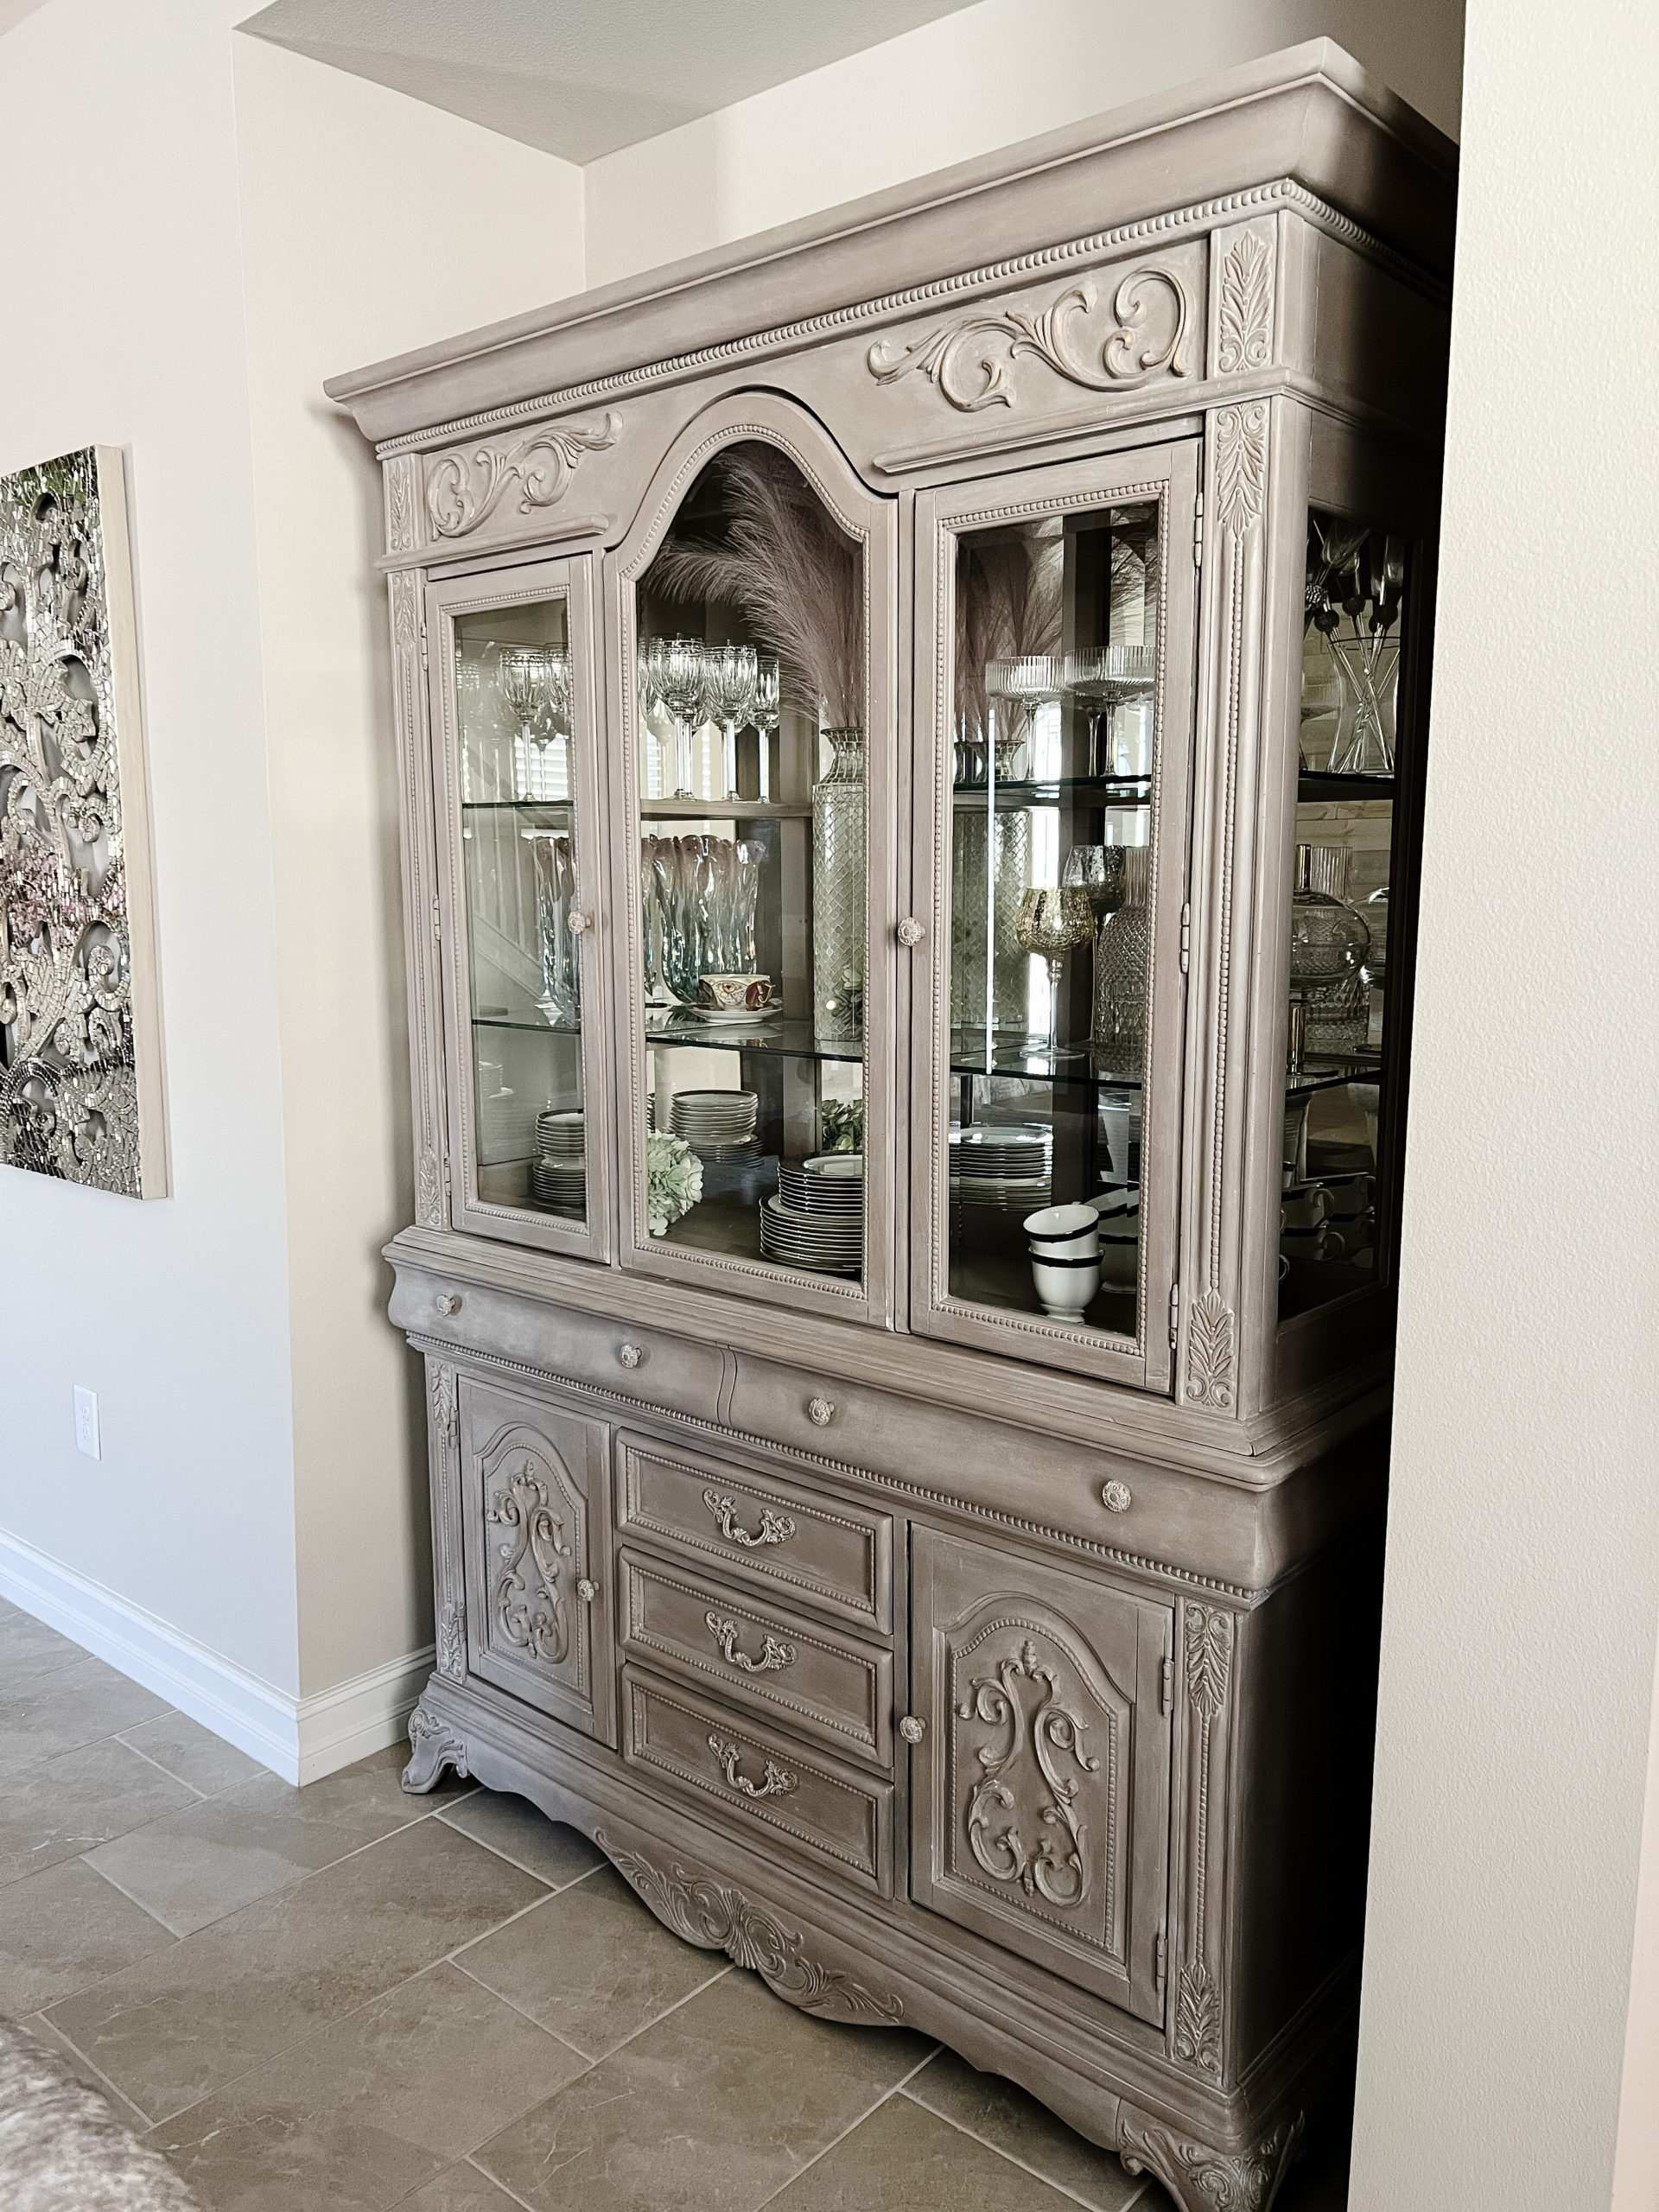
Credit: www.shadesofblueinteriors.com
Priming The Cabinet
Not all projects need a primer, but it’s often wise. Primer helps paint stick, blocks stains, and makes colors more vibrant. Use primer if:
- The cabinet is dark and you want to paint it a light color
- The wood is stained, oily, or old
- You want the smoothest, most even result
Apply one coat of primer with a brush for corners and a roller for flat surfaces. Let it dry completely before painting.
If you use a stain-blocking primer, it can prevent old wood tannins or stains from bleeding through your new paint. This is especially important for antique cabinets or those with knots in the wood. Some primers are tinted—these can help with coverage if you’re painting a very dark cabinet a light color.
Painting The China Cabinet
Now for the fun part. Painting takes patience for the best results.
Choosing Brushes And Rollers
Use an angled brush for corners, edges, and details. For large, flat areas, a foam roller gives a smooth finish. Small cabinets may only need brushes.
Synthetic bristle brushes are best for water-based paints, while natural bristle brushes work better with oil-based products. A small artist’s brush can help with intricate carvings or tight corners. Don’t use cheap brushes—they shed bristles and leave marks.
Applying The First Coat
Stir your paint well. Start at the top and work down. Use long, even strokes. Don’t overload your brush—thin coats prevent drips and streaks.
Let the first coat dry as directed (usually 2–4 hours). Don’t rush; painting over wet paint causes smudging.
If you see areas where the old color shows through, don’t worry—this is normal after the first coat. Resist the urge to cover everything at once with thick paint, as this can lead to drips and longer dry times.
Sanding Between Coats
For the smoothest finish, lightly sand between coats with 220-grit sandpaper. Wipe away dust before adding the next layer.
This extra step removes tiny bumps or brush marks and helps the next coat stick better. For chalk paint, you can sometimes skip this step, but for latex or enamel, it makes a noticeable difference.
Second And Third Coats
Most cabinets need at least two coats. Dark colors or light-over-dark may need three. Always let each coat dry completely.
Look for even color and coverage. If you notice spots that are still patchy, add another thin coat. If you want an especially durable finish, you can add a third coat even if the color looks good after two.
Painting Inside The Cabinet
Decide if you want to paint the inside. Some people leave it wood for contrast, others paint it for a seamless look. If painting inside, use a smaller brush and allow extra drying time before replacing shelves or doors.
If you want a patterned or wallpapered look inside, you can use peel-and-stick wallpaper after the paint dries. This adds a unique touch and can highlight your displayed items.
Adding Special Finishes
You can give your china cabinet extra style with special techniques:
- Distressing: Sand edges after painting for a vintage look.
- Glazing: Apply a tinted glaze for depth and character.
- Two-tone: Paint the interior a different color from the exterior.
Many people skip these steps, but they can make your cabinet unique and more high-end.
You can also try adding stencils or decals to doors or sides for a custom design. Metallic waxes or gilding can make handles and details pop. If you want a “washed” look, thin your paint with water and brush it on lightly, letting some wood show through.
Sealing And Protecting Your Finish
A topcoat protects your paint from scratches and stains, especially on cabinets used daily.
Choosing A Topcoat
Popular options include polycrylic, polyurethane, or furniture wax. Water-based polycrylic works well for most painted furniture. Avoid oil-based sealers on white paint—they can yellow over time.
Apply with a clean brush or foam roller. Two thin coats offer more protection than one thick coat. Allow to cure for several days before heavy use.
If you’re sealing chalk paint, furniture wax gives a classic matte look, while polycrylic offers more protection and is easier to clean. Always follow the product’s instructions for best results. For high-gloss finishes, let each coat dry fully and sand lightly between coats.
Reattaching Hardware And Doors
Once the cabinet is fully dry (usually 24–48 hours after the last coat), remove the painter’s tape. Reattach doors, shelves, and hardware. Consider updating the hardware with new knobs or pulls for a modern touch.
If you reused the old hardware, give it a quick polish or spray-paint it for a fresh look. When reinstalling glass, clean both sides before placing them back—fingerprints are easier to remove now than later.
Cleaning Up
Dispose of used paint, solvents, and rags according to local rules. Clean brushes and rollers with soap and water (for latex/chalk paint) or mineral spirits (for oil-based paint).
Let brushes dry flat to keep their shape. Store leftover paint in a tightly closed can for touch-ups. Wipe up any drips or spills right away to avoid sticky spots.
Styling Your Repainted Cabinet
With painting finished, it’s time to style your cabinet. Replace dishes, glassware, or collections carefully. Use the opportunity to organize and maybe add some new decor. LED lighting strips inside cabinets can make your new paint shine.
Display favorite pieces at eye level, and mix heights for visual interest. Adding a few decorative items like small vases, plants, or framed photos can make your cabinet look intentional and styled. Some people use pretty paper or fabric on the back wall to add a pop of color or pattern.
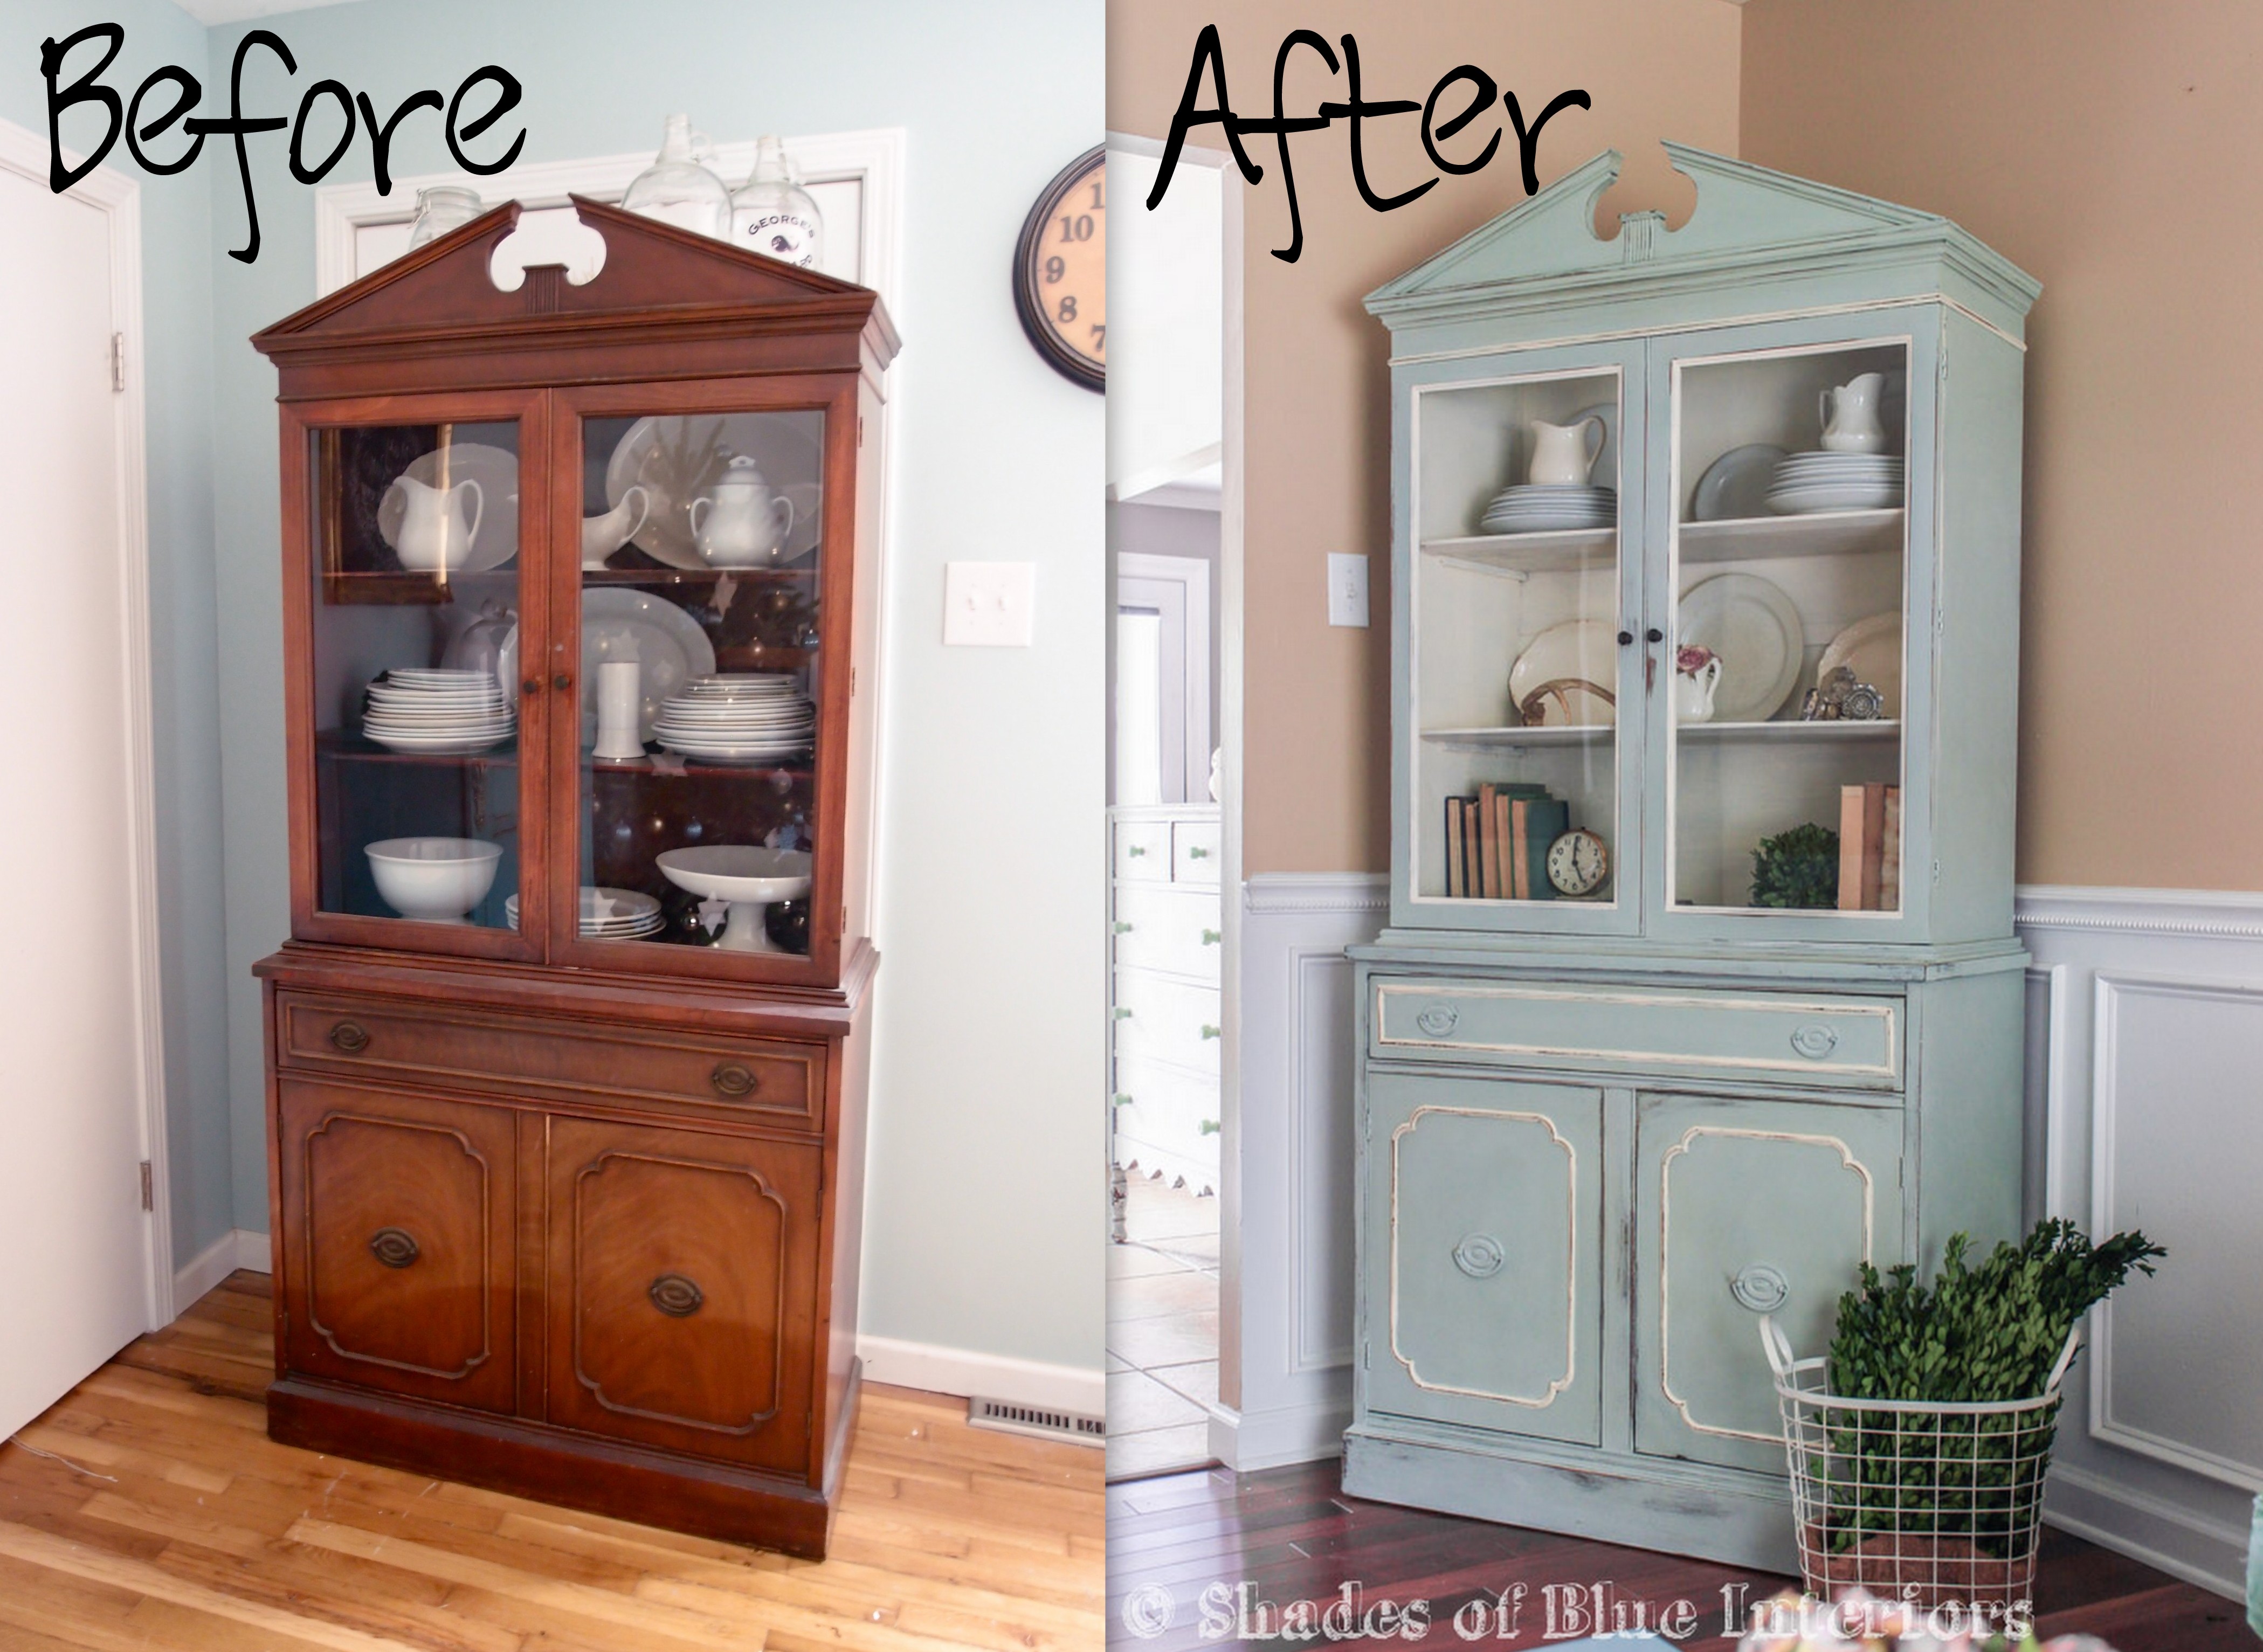
Real-world Example: Transforming An Old Cabinet
Maria had an oak china cabinet from her grandmother. It was solid but looked dated. She chose a soft sage green chalk paint and replaced the hardware with brushed gold knobs.
Steps Maria followed:
- Removed doors and hardware
- Cleaned thoroughly with degreaser
- Sanded lightly, filled small holes
- Applied two coats of chalk paint
- Distressed edges with sandpaper
- Sealed with two coats of polycrylic
- Reinstalled glass and new hardware
The result: a beautiful, modern cabinet that became the center of her dining room. Maria spent under $100 and one weekend.
If you want to try your own makeover, start with a small cabinet or nightstand first. This builds confidence and lets you experiment with colors or techniques before tackling a big piece.
Common Mistakes To Avoid
Even small errors can affect the final look. Here are mistakes to watch out for:
- Skipping prep work – Paint won’t stick to dirty or glossy surfaces.
- Not allowing enough drying time – Leads to smudges and uneven finish.
- Painting in poor lighting – Missed spots and drips are hard to see.
- Using the wrong primer or paint – Can cause peeling or yellowing.
- Ignoring hardware – Old knobs can make even a freshly painted cabinet look dated.
- Painting over wet wood filler – Always let filler dry completely before sanding or painting.
A less obvious mistake is forgetting to label or photograph hardware placement. Taking photos during disassembly helps you remember exactly how doors, hinges, and shelves fit together, saving time and frustration during reassembly.
Quick Comparison: Chalk Paint Vs. Latex Paint
| Feature | Chalk Paint | Latex Paint |
|---|---|---|
| Prep Needed | Minimal | Moderate |
| Dry Time | Fast | Medium |
| Finish Look | Matte, vintage | Satin, gloss |
| Durability | Needs topcoat | Durable if sealed |
| Color Choices | Limited | Wide |
If you’re unsure, start with latex paint—it’s widely available, comes in many colors, and is easy to clean up. Chalk paint is best for a vintage or distressed look and can be a fun way to practice different finishes.
Credit: apieceofmyhaven.com
Extra Tips For A Flawless Finish
- Practice first on a small, hidden area to test color and technique.
- Use a tack cloth after sanding to remove every bit of dust.
- Let paint and topcoat cure for several days before heavy use.
- If your cabinet has glass shelves, wait until everything is fully dry before reinstalling to avoid scratches.
- Consider adding felt pads to the bottom to protect floors and make moving easier.
Another tip: mark the position of shelves and doors with small pieces of painter’s tape so you can put everything back exactly where it was. If you want a professional look, lightly buff the final topcoat with a fine sanding sponge for a silky-smooth finish.
Safety And Ventilation
Paint and sanding dust can be harmful. Always:
- Work in a well-ventilated area
- Wear a mask when sanding or painting
- Keep children and pets away until paint is dry
Some paints have strong fumes. If you feel dizzy or get a headache, take a break and air out the room.
Read all product labels before starting, especially if using chemical strippers or oil-based products. Always store materials out of reach of children and away from open flames.

Credit: www.youtube.com
Budgeting Your Project
A full repaint is much cheaper than buying new furniture. Here’s a rough breakdown:
| Item | Estimated Cost (USD) |
|---|---|
| Paint (quart) | $20–$30 |
| Primer | $15–$20 |
| Topcoat | $15–$25 |
| Brushes/Roller | $10–$20 |
| Sandpaper | $5 |
| Painter’s Tape | $5 |
| Hardware (optional) | $10–$40 |
Most projects cost between $50–$150, depending on the size of your cabinet and the materials you choose.
You can save money by reusing brushes and rollers or checking for supplies you already have. Borrowing tools from friends or family is another way to keep costs low.
When To Call A Professional
Some cabinets are antiques or have sentimental value. If you’re worried about damaging the wood, or if your cabinet has lead paint (common in very old pieces), consult a professional restorer. Also, glass panels or mirrors that are hard to remove may need expert help.
Professionals have access to advanced tools and products that can repair or restore even badly damaged wood. If your cabinet is part of a set or has historical value, getting expert advice helps keep its value.
Where To Find More Inspiration
For ideas on paint colors, hardware styles, and techniques, check out design magazines, Pinterest, or local furniture stores. Before-and-after photos are especially helpful. If you want technical details about different paint types, you can visit This Old House for expert advice.
You can also join social media groups or forums focused on furniture makeovers. Members often share tips, photos, and answers to common questions. Seeing other people’s projects can spark new ideas or give you the confidence to try something bold.
Frequently Asked Questions
How Long Does It Take To Repaint A China Cabinet?
It usually takes 2–3 days. One day for prep and repairs, one day for painting (with drying time between coats), and another day for sealing and reassembly. Plan for extra time if you add special finishes or have high humidity.
If you live in a humid area, drying times may be longer—sometimes up to 24 hours between coats. Make sure each layer is fully dry before moving to the next step to avoid smudges or sticky spots.
Can I Paint A Laminate Or Veneer Cabinet?
Yes, but extra prep is needed. Clean well, sand lightly to scuff the surface, and use a strong bonding primer. This helps the paint stick to smooth surfaces.
Bonding primers are designed for difficult surfaces and help prevent peeling. Always check the manufacturer’s instructions for the best results. Veneer cabinets can look amazing painted, but skipping prep often leads to chipping.
What’s The Best Way To Paint Around Glass Panels?
Use painter’s tape to mask the glass edges. A small angled brush helps you paint close to the glass without making a mess. Remove the tape before the paint fully dries to get clean lines.
If a little paint gets on the glass, wait for it to dry, then scrape gently with a razor blade. For extra protection, slide a thin piece of cardboard between the frame and glass while painting.
How Do I Avoid Brush Marks And Streaks?
Use high-quality brushes and foam rollers. Apply thin coats and avoid overworking the paint. Sand lightly between coats for a super-smooth finish.
Work quickly, keeping a “wet edge” so new paint blends with the last stroke. If you see brush marks forming, stop and let the area dry before fixing.
Do I Need To Seal Chalk Paint?
Yes. Chalk paint is porous and can stain easily. Use furniture wax or a water-based polycrylic topcoat for protection and durability.
Apply wax with a soft cloth, buffing for a subtle sheen. For higher durability (especially on shelves or doors), polycrylic is the better option.
Repainting a china cabinet is a rewarding project that can breathe new life into your furniture. With careful steps, patience, and creativity, you can create a piece that will be admired for years. Enjoy your transformed space and the satisfaction of a job well done!