When you see a crack where the wall meets the ceiling, it’s easy to feel worried. You might think it’s a sign of a big problem. But in most homes, these cracks are common—and fixable. This guide explains how to fix cracks where the wall meets the ceiling, why they happen, and how to stop them from coming back.
You’ll learn how to spot serious issues, what materials to use, and the best repair methods—step by step. With clear instructions and practical tips, even beginners can handle this project and restore a smooth, beautiful finish to any room.
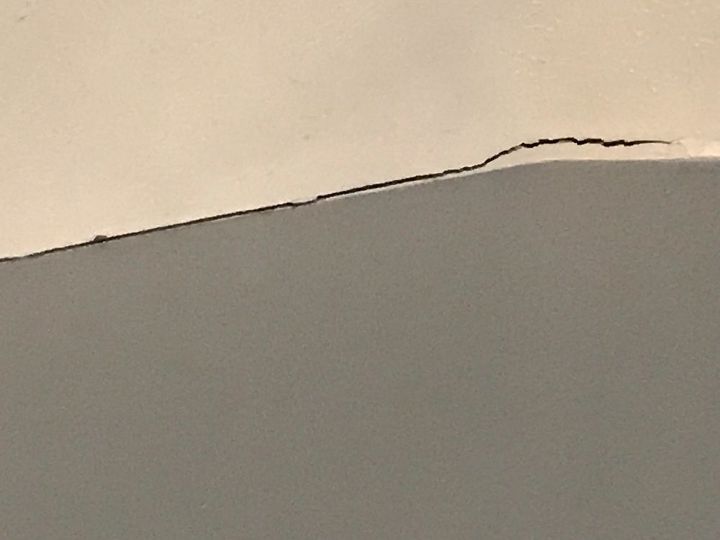
Why Cracks Appear Where Walls Meet Ceilings
Cracks in this area are usually caused by movement. Houses settle over time, wood expands and shrinks with moisture, and temperature changes make materials contract and expand. Here are the most common reasons:
- Foundation settling: As the foundation shifts, walls and ceilings move slightly.
- Humidity and temperature: Dry air causes wood to shrink; humid air makes it swell.
- Poor construction: If joints weren’t taped or finished well, cracks may form.
- Structural issues: Sometimes, cracks reveal deeper problems. Large cracks or cracks wider than 1/8 inch might need a pro’s help.
- Vibration: Closing doors, heavy foot traffic, or nearby construction can shake drywall seams loose.
Most cracks are harmless, but it’s wise to check for signs of bigger problems before you start repairs.
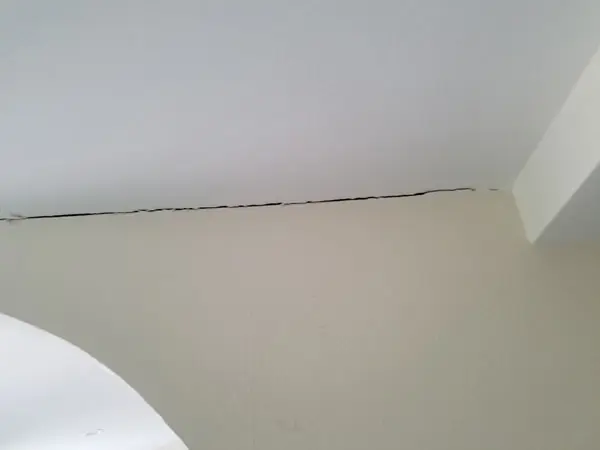
Inspecting The Crack: What To Look For
Before you grab a putty knife, study the crack. This helps you decide the right repair method and spot any warning signs. Here’s what to check:
- Length and width: Is the crack long but hairline, or wide and jagged?
- Direction: Cracks that run straight along the seam are usually less serious than diagonal or zigzag cracks.
- Movement: Press gently on the crack. If the wall or ceiling moves, there may be a loose drywall or framing issue.
- Water stains: Brown or yellow marks suggest a roof or plumbing leak.
- Multiple cracks: If you see many cracks in different places, it could mean foundation trouble.
If you find water stains, big gaps, or the crack keeps growing, call a professional. Otherwise, you can fix most cracks with simple tools and materials.
Tools And Materials You’ll Need
A good repair starts with the right supplies. Here’s what you’ll need for a standard drywall crack at the wall-ceiling joint:
- 6-inch and 12-inch drywall knives (for spreading joint compound)
- Utility knife (to cut loose drywall tape)
- Drywall taping knife (for corners)
- Pre-mixed joint compound (also called mud)
- Paper or fiberglass drywall tape
- Sandpaper (120-220 grit) or sanding sponge
- Drop cloths or plastic sheeting
- Paint brush or roller
- Primer and ceiling/wall paint
- Ladder or step stool
- Vacuum or dust brush
Optional but helpful:
- Corner bead (for large, damaged corners)
- Caulk (for small, flexible cracks)
- Painter’s tape
Having these on hand saves time and ensures a pro-quality finish.
Choosing The Right Repair Method
Not all cracks are the same. The best fix depends on the crack’s size, type, and location. Here’s a quick comparison:
| Crack Type | Best Repair Method | Materials Needed |
|---|---|---|
| Hairline crack (less than 1/16″) | Flexible caulk | Paintable latex caulk |
| Small crack (1/16″ – 1/8″) | Joint compound and tape | Joint compound, tape |
| Wide crack (>1/8″) | Cut out and retape | Utility knife, joint compound, tape |
| Repeated crack | Flexible repair + mesh tape | Mesh tape, flexible compound |
Most cracks where the wall meets the ceiling respond well to joint compound and tape. For very fine cracks, caulk works well and can handle small movement.
Credit: www.hometalk.com
Step-by-step Repair: How To Fix The Crack
Let’s walk through the process for a typical drywall crack at the wall-ceiling joint. Adjust the steps if your crack is larger or smaller.
1. Prepare The Area
Clear the space and protect your floors and furniture. Lay down drop cloths or plastic sheeting. Remove pictures or decorations from the wall.
Check for loose material. Gently run a utility knife along the crack. Scrape away loose paint, drywall, or old tape. For cracks with peeling tape, cut away the damaged tape and mud, leaving a clean, solid edge.
Use a vacuum or brush to remove dust and debris. Clean surfaces help the new compound stick well.
2. Widen And Undercut The Crack
For the joint compound to hold, the crack should not be too thin at the surface. Use a utility knife or a 5-in-1 tool to gently widen the crack to about 1/8 inch if needed. This creates a small “V” shape that helps the compound fill the gap.
Don’t make the opening too wide—just enough for the compound to bond well.
3. Apply Drywall Tape
For most cracks, paper drywall tape is best. It’s strong and flexible. For cracks that return, fiberglass mesh tape can help because it allows for more movement.
Cut a strip of tape to fit the length of the crack. If the crack runs along a corner, fold the tape in half (most paper tape has a crease).
Press the tape into the corner, making sure it’s centered over the crack. Use a taping knife to smooth out air bubbles and wrinkles.
4. First Coat Of Joint Compound
Scoop some joint compound onto your 6-inch knife. Apply a thin, even layer over the tape, pressing the mud into the crack and corners. Hold your knife at a slight angle and smooth out the compound.
Don’t worry if you see the tape through the first coat. The goal is to fill the gap and cover the tape lightly.
Let this coat dry completely—usually 12–24 hours, depending on humidity.
5. Second And Third Coats
After the first coat dries, gently sand it with 120–150 grit sandpaper or a sanding sponge. Remove bumps or ridges. Wipe away dust.
Apply a second, wider coat with a 12-inch knife. Feather the edges so the repair blends into the wall and ceiling. Let it dry, then sand lightly.
If needed, apply a third, very thin coat. Each layer should be a little wider than the last. Don’t rush drying between coats.
6. Final Sanding And Smoothing
Use fine sandpaper (180–220 grit) to smooth the final coat. Run your hand over the area—if you feel any bumps, sand them gently.
Vacuum or wipe the area to remove dust.
7. Prime And Paint
Raw joint compound absorbs paint unevenly. Use a quality primer to seal the repair. This step ensures the new paint matches the rest of the wall and ceiling.
After the primer dries, paint the area with matching ceiling and wall paint. Use a brush for corners and a roller for larger areas.
Let the paint dry, then check for any uneven spots. Touch up as needed.
Alternative: Using Caulk For Small Cracks
If your crack is very thin (hairline) and only in the joint, you can use paintable latex caulk instead of joint compound. Here’s how:
- Clean the crack and remove loose paint or debris.
- Cut the tip of the caulk tube at a 45-degree angle.
- Run a thin bead of caulk along the crack.
- Smooth with a wet finger or damp cloth.
- Let it dry, then prime and paint.
Caulk is flexible, so it moves with the house and is less likely to crack again. But it’s best for cracks less than 1/16 inch wide.
Repairing Textured Ceilings
Many ceilings have a texture—like popcorn or knockdown. After fixing the crack, you’ll need to match the texture.
- For popcorn ceilings, use a spray texture product.
- For knockdown, apply joint compound, then “knock down” with a wide knife after 10–15 minutes.
- For swirl or brush textures, use a brush or sponge to mimic the pattern.
Matching texture takes patience and practice. Try a small test area first. Don’t forget to prime before painting.
When To Call A Professional
Most cracks at the wall-ceiling joint are not serious. But you should call a pro if you notice:
- Cracks wider than 1/4 inch
- Cracks getting bigger over time
- Sagging ceiling or walls
- Water damage or mold
- Multiple cracks in different rooms
- Gaps you can fit a coin into
These signs may point to structural or moisture problems. A professional can check for foundation issues, leaks, or framing problems.

Credit: diy.stackexchange.com
Preventing Future Cracks
You can’t always stop cracks, but you can reduce the risk. Here’s how:
- Control humidity: Use a dehumidifier or air conditioner to keep moisture steady.
- Seal gaps: Use caulk around windows, doors, and trim to keep out drafts.
- Fix leaks fast: Address roof or plumbing leaks immediately.
- Use flexible materials: For areas that move a lot, use mesh tape or flexible caulk.
- Check attic insulation: Poor insulation leads to temperature swings, which stress drywall seams.
- Don’t slam doors: Vibration can loosen drywall joints.
For new homes, cracks are often just settling. Wait a year before major repairs to let the house adjust.
Common Mistakes To Avoid
Repairing cracks isn’t hard, but many people make the same errors:
- Skipping primer: Paint over raw joint compound often looks blotchy.
- Rushing drying time: Each coat needs to dry fully, or you’ll get bubbles and cracks.
- Not feathering edges: Thick, sharp edges are easy to spot after painting.
- Using the wrong tape: Paper tape is best for corners; mesh is for flat seams.
- Sanding too hard: Aggressive sanding can damage the repair.
Take your time—prep and patience give the best results.
Credit: www.dalinghausconstruction.com
Cost And Time Breakdown
Wondering how much this project will cost and how long it will take? Here’s a quick overview:
| Repair Size | Materials Cost | Time Needed |
|---|---|---|
| Small crack (1-2 feet) | $15–$30 | 2–3 hours (over 2 days) |
| Medium crack (3-6 feet) | $25–$50 | 3–4 hours (over 2–3 days) |
| Large crack (whole wall/ceiling joint) | $40–$70 | 4–6 hours (over 3 days) |
| Professional repair | $150–$400 | 2–4 hours (plus scheduling) |
Most DIY repairs take a few days because of drying time between coats. Actual hands-on work is usually less than an hour per day.
Real-world Examples And Insights
Many homeowners see cracks where walls meet ceilings within the first few years of moving into a new home. It’s especially common in areas with big temperature changes—like the Midwest or Northeast. In older homes, cracks may appear after a wet season or in rooms with poor ventilation.
One beginner mistake is to fill the crack with spackle or joint compound without using tape. This patch looks good at first but usually cracks again within months. Using tape (especially mesh in “problem” areas) gives the repair strength.
Another insight: Don’t ignore small, repeated cracks. They may point to a moisture problem or shifting structure. It’s better to check once than to repair the same spot every year.
Advanced Repairs: Large Gaps Or Loose Drywall
Sometimes, the crack is bigger than 1/4 inch, or the drywall is loose. Here’s what to do:
- Remove loose material: Cut out damaged drywall or tape with a utility knife.
- Secure drywall: If the drywall moves, add drywall screws into the studs or ceiling joists. Sink the screw heads just below the surface.
- Fill large gaps: For gaps over 1/4 inch, fill with quick-setting joint compound or foam backer rod before taping.
- Apply tape and compound: Follow the standard taping and mudding steps.
For corners with severe damage, you may need to install a corner bead for extra strength.
Repairing Plaster Cracks At Wall-ceiling Joints
Older homes may have plaster instead of drywall. Plaster cracks often look similar but need a slightly different approach:
- Widen the crack with a utility knife.
- Brush out dust and debris.
- Apply a bonding agent if needed.
- Use plaster patch or setting-type joint compound.
- Apply in thin layers, letting each dry.
- Sand, prime, and paint.
Plaster is less flexible than drywall, so cracks can return if the underlying movement isn’t fixed.
Safety Tips For Ceiling Repairs
Working near the ceiling means you’ll be on a ladder. Follow these tips:
- Make sure the ladder is stable and on level ground.
- Don’t overreach—move the ladder instead.
- Wear a dust mask and safety glasses when sanding.
- Open windows for ventilation, especially when painting.
If you’re sensitive to dust or chemicals, use low-dust joint compound and low-VOC paint.
Environmentally Friendly Repair Options
Want a greener repair? Look for:
- Low-VOC joint compound and paint (safer for indoor air)
- Reusable sanding sponges instead of disposable sandpaper
- Paper tape instead of plastic mesh
- Natural bristle brushes for painting
You can also check for eco-friendly brands at home improvement stores.
How To Match Paint After Repair
It’s frustrating to see a patch that doesn’t match the old paint. Here’s how to get a seamless look:
- Prime the area with a stain-blocking primer.
- Use leftover paint from the original job, if you have it.
- If not, take a paint chip to your local hardware store for color matching.
- Paint the entire wall or ceiling for best results. Touch-ups alone are often visible.
Flat and matte paints are easier to blend than gloss or semi-gloss.
Troubleshooting: If The Crack Comes Back
What if you fix the crack and it reappears in a few months? Don’t give up. Try these steps:
- Use flexible mesh tape instead of paper tape.
- Switch to a flexible patching compound.
- Check for sources of movement: Loose framing, foundation shifts, or moisture.
- If you suspect a leak or movement, address the root cause before patching again.
Persistent cracks may need professional inspection.
Frequently Asked Questions
What Causes Cracks Where Walls Meet Ceilings?
Cracks in this area are usually caused by house settling, humidity changes, or poor drywall installation. Rarely, they signal a bigger structural problem. If the crack is wide, growing, or accompanied by other damage, call a professional.
Can I Use Caulk Instead Of Joint Compound?
For very small, hairline cracks, paintable latex caulk is a good fix. It’s flexible and easy to apply. For bigger cracks or cracks that return, joint compound and tape give a stronger, longer-lasting repair.
How Do I Match Ceiling Texture After A Repair?
Use a spray texture for popcorn ceilings, or a brush or sponge for knockdown or swirl textures. Practice on a piece of cardboard first to match the pattern. Always prime before painting.
How Long Does It Take To Repair A Crack Where The Wall Meets The Ceiling?
Most repairs take 2–3 days because of drying time between coats. Actual work time is usually 1–2 hours, spread over several sessions.
When Should I Call A Professional?
Call a pro if the crack is wider than 1/4 inch, keeps growing, shows water stains, or if you see sagging or multiple cracks in different rooms. These signs may mean a bigger issue like foundation or moisture problems.
Fixing a crack where the wall meets the ceiling is a common, manageable project. With the right materials, careful prep, and a little patience, you can restore a smooth finish and prevent future cracks. For more on drywall repairs and home improvement, visit Family Handyman for expert tips and guides.