Laying laminate flooring on a concrete surface can completely change the look and feel of a room. Many homeowners choose laminate because it is affordable, easy to maintain, and looks like real wood. But installing laminate on concrete is not always simple—there are key steps and important details you must understand to get great results.
If you skip these steps, you might face problems like moisture damage, uneven floors, or noisy planks. Whether you are a DIY beginner or want to save money by doing it yourself, this guide will show you exactly how to put laminate flooring on concrete, avoiding common mistakes and getting a floor that lasts for years.
Understanding Laminate Flooring And Concrete Subfloors
Before you start, it’s essential to understand what you’re working with. Laminate flooring is made of several layers, usually with a high-density fiberboard core and a photographic image of wood on top. It’s strong, resists stains, and can handle daily wear. However, it is not waterproof, so moisture from the concrete can cause big problems.
Laminate flooring also has a wear layer, which is a clear protective surface that resists scratches and minor dents. While laminate is tough, it is not invincible—dragging heavy furniture or dropping sharp objects can still cause marks. Understanding the limits of laminate helps you plan its use in high-traffic areas or rooms where moisture is more common, like basements.
Concrete subfloors are common in basements, ground-level rooms, and some apartments. Concrete is hard and flat, which is good, but it can also have moisture or be uneven. Laminate flooring needs a smooth, dry base to look and perform its best.
Concrete can also transmit cold, which may make the floor chilly underfoot, especially in winter. Some people add an insulating underlayment for extra comfort. Also, older concrete may have cracks or surface roughness, so checking the subfloor age and condition is important before starting.
Benefits Of Installing Laminate Flooring On Concrete
Why choose laminate on concrete? There are several reasons:
- Cost-effective: Laminate is cheaper than hardwood or stone.
- Easy installation: Many laminate planks use a click-lock system, which means no glue or nails.
- Durability: Good for busy rooms or families with kids and pets.
- Variety: Many colors and patterns are available.
- Easy replacement: If a plank gets damaged, you can often replace just that piece.
But the main benefit is that you can install laminate over concrete if you follow the right steps, making it a great choice for basements and lower floors.
Another benefit is that laminate can mimic not just wood, but also tile or stone, giving you design flexibility without the higher cost or extra maintenance. Unlike carpet, laminate does not trap dust and allergens, which is better for people with allergies.
The floating floor system also means you can often lay it over existing concrete without removing the old surface, saving both time and effort.
Essential Tools And Materials
You’ll need more than just the planks. Here is what you should prepare:
- Laminate flooring planks (buy 10% extra for mistakes and cuts)
- Moisture barrier (plastic sheeting or special underlayment)
- Underlayment (foam or felt, unless attached to planks)
- Tape measure
- Utility knife
- Pencil and chalk line
- Rubber mallet
- Pull bar
- Tapping block
- Spacers (for expansion gap)
- Jigsaw or circular saw
- Level
- Vacuum or broom
- Duct tape (for sealing moisture barrier)
- Safety glasses and gloves
The extra planks are important for unexpected cuts, pattern matching, or future repairs. Some people forget to buy enough at the start and later find that color batches can change between store shipments.
Optional But Helpful
- Knee pads
- Moisture meter (to check the concrete)
- Hammer
- Crowbar (for removing old baseboards or trim)
Knee pads might sound unimportant, but on a hard concrete floor, they can make a big difference in comfort during installation. A moisture meter, while optional, gives peace of mind because you get a clear reading of moisture levels, helping you avoid costly mistakes.
Preparing The Concrete Subfloor
Proper preparation is crucial. Many laminate problems come from skipping these steps.
1. Check Moisture Levels
Concrete can hold moisture for years. If you install laminate over wet concrete, the planks can warp, swell, or grow mold. Always test for moisture.
- Tape a 2×2 foot piece of plastic to the floor. Wait 24 hours. If water appears under the plastic, the floor is too wet.
- Use a moisture meter for more accuracy. The concrete should have less than 4% moisture.
If moisture is present, wait longer or use a liquid moisture barrier (special sealant paint) before moving forward.
Moisture can also come from leaks, faulty drainage, or seasonal changes. If you’re working in a basement that sometimes feels damp or musty, solve the moisture problem first—add a dehumidifier or improve drainage outside.
2. Clean The Floor
Sweep and vacuum thoroughly. Remove all dust, dirt, and debris. Even small stones can create bumps.
Pay extra attention to corners and along walls, where debris often collects. If any old adhesive or paint remains, scrape or sand it off. A perfectly clean floor ensures that the underlayment sits flat, which helps prevent squeaks and unevenness.
3. Repair Cracks And Holes
Small cracks are normal, but fill all cracks wider than a quarter-inch. Use concrete patch or leveling compound. Allow it to dry completely.
For very deep holes, fill in layers and let each layer cure before adding more. If cracks keep coming back, check for underlying structural problems or water pressure from below. Never skip this step—unrepaired cracks can let moisture through and damage your floor over time.
4. Level The Surface
Laminate needs a flat base. Use a long level or straight edge to check for dips or bumps.
- No area should be more than 3/16 inch out of flat over 10 feet.
- Use a self-leveling compound if needed.
Leveling compounds are easy to use: mix, pour, and spread. They will flow into low spots and harden to a smooth finish. Remember to let all leveling products cure as long as the instructions recommend before starting your installation.
5. Remove Baseboards And Door Trims
For a neat look, remove baseboards before starting. Door trims should be undercut so laminate can slide underneath.
Removing baseboards lets you hide the expansion gap, making the finished floor look more professional. When undercutting door trims, use a scrap piece of laminate and underlayment as a guide to cut the exact height needed.
Credit: www.youtube.com
Choosing The Right Underlayment
Underlayment is a thin layer placed between the concrete and laminate. It protects against moisture, softens sound, and evens out tiny bumps.
A good underlayment also adds comfort underfoot and can even help with minor insulation. Some underlayments have built-in antimicrobial properties, which can be helpful in basements or humid areas.
Underlayment Types
| Type | Best For | Notes |
|---|---|---|
| Foam | Basic installations | Affordable, easy to install |
| Felt | Sound reduction | More cushioning |
| Combination (Foam + Film) | Concrete subfloors | Includes moisture barrier |
| Pre-attached | Quick installs | No extra underlayment needed |
If your laminate already has underlayment attached, you may still need a moisture barrier on concrete.
Some brands specify which underlayments are compatible, so always check the packaging or manufacturer’s instructions. Using the wrong underlayment can void the warranty or lead to noise issues.
Installing A Moisture Barrier
This is usually 6-mil thick plastic sheeting. Lay it over the concrete, overlapping seams by 8 inches. Tape all seams with duct tape. The barrier should go up the wall by 2 inches. This prevents any moisture from reaching your floor.
Be careful not to puncture the plastic while moving tools or walking. If you do, patch the hole with tape right away. Remember, the plastic’s main job is to block hidden vapor, not just visible water. In areas with high humidity, double-check for any gaps or loose edges.
Planning Your Layout
Planning saves time and reduces mistakes. Here’s how to start:
- Acclimate the planks: Bring the laminate into the room 48 hours before installing. This lets it adjust to temperature and humidity.
- Measure the room: Find the center and decide the direction of planks. Most people lay planks parallel to the longest wall or towards the main light source.
- Check plank width at walls: If the last row is less than 2 inches wide, cut the first row narrower so both edges look even.
- Layout dry rows: Without clicking them together, lay a few rows to see how they fit.
Also, consider the location of any heating vents or floor transitions. Planning where seams and cuts fall can help avoid having small, weak pieces at doorways. If you want a more natural wood look, stagger the joints randomly—avoid visible “stair-step” patterns.
Step-by-step Installation Process
Now you’re ready to lay your laminate flooring on concrete. Follow each step closely.
1. Install The Moisture Barrier
Roll out the plastic sheeting, covering the entire floor. Overlap each row and tape the seams. Run the plastic up the wall slightly. Trim off excess later.
The barrier should be smooth and wrinkle-free. Take your time here, as air pockets or folds can create noise when you walk on the finished floor.
2. Add The Underlayment
If using foam or felt, roll it out over the moisture barrier. Butt the edges together (don’t overlap), and tape the seams. If using combination underlayment, follow the manufacturer’s instructions.
Make sure the underlayment covers every part of the floor, including closets or alcoves. Gaps can cause uneven support or allow moisture to reach the laminate.
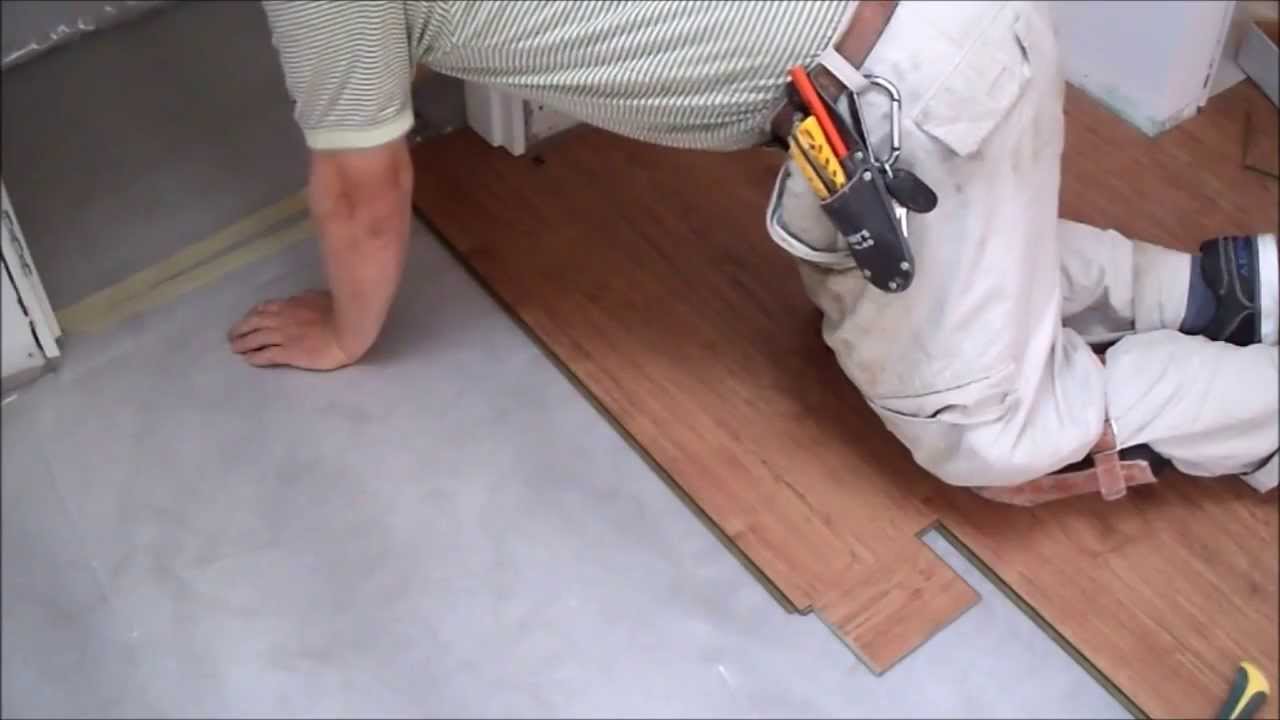
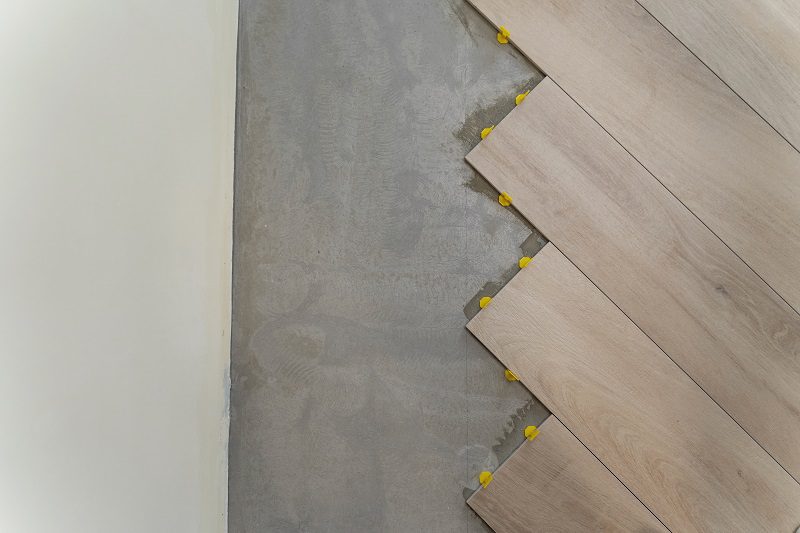
3. Start The First Row
- Place spacers against the wall to create a 1/4 inch expansion gap. This gap lets the floor expand and contract with temperature changes.
- Lay the first plank with the tongue side facing the wall.
- Click the next plank into place, end to end.
- Cut the last plank to fit, remembering the gap.
Use a straight edge to keep the first row perfectly aligned. If your walls are not straight, you may need to trim the first row to match their shape for a tight fit.
4. Stagger The Joints
For strength and appearance, never align plank ends in adjacent rows. Cut the first plank of the second row by at least 12 inches. Continue this pattern. This is called “staggering. ”
Random staggering not only looks more natural but also helps spread weight and stress across the floor, making it less likely to open at the seams over time.
5. Continue Across The Room
- Use the tapping block and mallet to snug planks together.
- Use the pull bar for tight spots near walls.
- Cut planks as needed for a tight fit.
Check each seam for tightness before moving to the next row. If you notice gaps, adjust or re-tap the planks right away. Working slowly at this stage prevents problems later.
6. Fitting Around Doorways And Obstacles
- Undercut door trims with a saw so planks can slide underneath.
- Measure and cut planks for vents or corners with a jigsaw.
When fitting around pipes or posts, drill a hole slightly larger than the pipe and cut a wedge out of the plank. After fitting it around the pipe, glue the wedge back in behind the pipe for a seamless look.
7. Final Row
- Measure the space for the last row. Cut planks lengthwise to fit, remembering the expansion gap.
- Use the pull bar to click the last row in place.
Be careful with measurements in the final row—walls are rarely perfectly straight, so measure at several points along the wall and cut accordingly.
8. Remove Spacers And Install Baseboards
Once all planks are installed, carefully remove spacers. Reinstall or add new baseboards to cover the expansion gap. Do not nail baseboards into the laminate—attach them to the wall.
If you want a truly professional finish, use matching quarter-round molding to further hide the expansion gap and create a polished look.
Key Mistakes To Avoid
Many beginners make small errors that lead to big headaches later. Here’s what to watch for:
- Skipping the moisture barrier: Even if the concrete feels dry, moisture can rise. Always use a barrier.
- Not leveling the floor: High or low spots can make planks move or break.
- Forgetting the expansion gap: Laminate expands and contracts. Without a gap, the floor will buckle.
- Laying planks too quickly: Allow time for planks to acclimate or they may swell or shrink.
- Nailing baseboards into planks: This can stop the floor from moving and cause warping.
Another common mistake is not cleaning up sawdust or debris while working. Even small bits under the planks can cause noise and unevenness. Also, always check that you’re using the correct side of the plank—tongue and groove systems only fit one way.
Real-world Example: Basement Laminate Installation
Let’s look at a practical example. Sarah wanted new flooring for her 300 sq. Ft. basement. She chose 8mm thick laminate planks with an attached underlayment.
- Moisture test: Her concrete had slightly high readings. She used a liquid moisture sealant and let it dry for 3 days.
- She installed a 6-mil plastic barrier, then the planks.
- The job took 2 days, with help from a friend.
- Total cost: $2.50 per sq. Ft. for materials, much less than hardwood.
Sarah’s tip: “Double-check for dips in the floor. We missed one spot and had to redo that area.”
After finishing, she noticed that the room felt warmer and looked brighter, thanks to the light oak finish she picked. The click-lock system made it possible for her and her friend to complete the job over a weekend, saving on contractor fees.
The most challenging part was cutting planks to fit around the stairway and heating vents. She advises others to measure twice before making cuts, especially in tricky corners.
Comparing Laminate To Other Flooring On Concrete
You might wonder if laminate is the best choice. Here’s how it compares to other common options:
| Flooring Type | Pros | Cons |
|---|---|---|
| Laminate | Affordable, easy install, many styles | Not waterproof, can be noisy without underlayment |
| Vinyl Plank | Waterproof, DIY-friendly | More expensive for high quality |
| Engineered Wood | Real wood surface, looks premium | Costly, sensitive to moisture |
| Ceramic Tile | Very durable, waterproof | Cold, hard underfoot, labor intensive |
Laminate is more forgiving on uneven subfloors than tile and is softer and warmer than bare concrete or ceramic. For areas at risk of flooding or heavy water exposure, vinyl plank may be a safer choice. For those who want real wood, engineered wood is an option, but it requires more careful installation and maintenance on concrete.
Tips For A Professional Finish
- Use transition strips where laminate meets other flooring types or doorways.
- Cut planks face-up to avoid chipping the finish.
- Maintain a clean workspace to keep dust from getting under planks.
- Order extra planks for repairs or mistakes.
- Check manufacturer’s instructions for special requirements.
You can also use matching stair-nosing or reducer strips for stairs and uneven thresholds. Seal all exposed edges in bathrooms or laundry rooms with silicone to prevent water from seeping under the floor.
Caring For Your Laminate Floor
Once installed, laminate is easy to maintain:
- Sweep or vacuum regularly to remove grit.
- Wipe up spills quickly—laminate is not waterproof.
- Use damp mops (not wet); never let water pool.
- Add furniture pads under heavy items to prevent scratches.
Laminate lasts 15–25 years with proper care.
Use rugs in high-traffic areas and mats at entryways to catch dirt and grit. Never use steam cleaners, which can force moisture into seams. If you move furniture, lift it instead of dragging to avoid damaging the floor.
Advanced Tips Most Beginners Miss
Many guides stop at the basics, but these advanced tips can save you trouble later:
1. Plan Expansion Joints for Large Areas
If your room is longer than 30 feet or wider than 30 feet, add an expansion joint (a small gap covered by a molding). This stops the floor from buckling during extreme changes in humidity.
2. Test for High pH in Concrete
Some concrete floors have a high pH, which can break down adhesives in underlayment or harm the moisture barrier. Use a pH test kit, especially in new builds. If pH is over 9, treat the concrete with a neutralizer.
3. Mind Floor Height
Laminate plus underlayment can add height to your floor. Check door clearances and plan to shave or adjust doors if needed. This is often missed until the floor is done, causing frustration and extra work.
4. Consider Soundproofing
In apartments or upper floors, use an underlayment with sound-blocking properties. Some local building codes require a minimum level of sound insulation.
Troubleshooting Common Problems
Gaps Between Planks
This usually means the subfloor is not flat, or planks were not clicked together tightly. Use a pull bar to close gaps. For large problems, you may need to reinstall.
Creaking or Noisy Floors
Usually caused by no underlayment or uneven subfloor. Check for movement and add shims under bouncy spots.
Moisture Damage
If you see swelling or warping, check for leaks or high humidity. Fix the source and replace damaged planks.
Another issue can be peaking, where the joints rise higher than the rest of the floor. This often happens if there’s no expansion gap or something is blocking the floor’s movement. Remove obstructions, and the floor should settle back down.
Credit: tekaflooring.co.uk
When To Call A Professional
DIY is possible, but call a pro if:
- The concrete is very uneven or cracked.
- You have ongoing water problems.
- You want a warranty (some brands require pro installation).
A professional can also help with custom transitions or tricky staircases.
If you’re unsure about any step—especially moisture barriers or leveling—getting expert help can save money in the long run. Pros have the right tools to fix subfloor issues quickly.
Frequently Asked Questions
What Type Of Underlayment Is Best For Laminate On Concrete?
The best underlayment is a combination foam and moisture barrier. This type blocks moisture, adds a bit of cushion, and reduces sound. Always check your laminate’s instructions—some planks have underlayment already attached.
Can I Glue Laminate Flooring To Concrete?
No, most modern laminate floors are “floating” and should not be glued down. Gluing prevents the floor from expanding and contracting, which can cause buckling. Only use glue if your manufacturer specifically allows it.
How Long Should The Concrete Dry Before Installing Laminate?
Concrete should be fully cured—at least 60 days for new slabs. Always test for moisture before installing. Even old concrete can have moisture problems if it’s below ground level.
Do I Need A Vapor Barrier If My Underlayment Already Has One?
If your underlayment has a built-in vapor barrier, you don’t need to add another. But if you’re unsure, it’s safer to add a 6-mil plastic sheet. Extra protection is better than not enough.
What Is The Best Way To Cut Laminate Flooring?
A jigsaw is best for curves and around obstacles. For straight cuts, a circular saw or laminate cutter works well. Always cut with the finished side up to avoid chipping.
Credit: www.youtube.com
Bringing It All Together
Installing laminate flooring on concrete is a smart way to upgrade your space, but it’s only easy if you pay attention to each step. The key is stopping moisture from reaching the planks, leveling the floor, and using the right underlayment. Take your time with planning, and don’t rush the installation—small mistakes can lead to big repairs.
With the right tools, careful preparation, and the step-by-step guidance above, you can get a beautiful, long-lasting floor for a fraction of the price of hardwood. For more technical details, you can visit the Home Depot’s official guide.
Remember, the extra effort you put into prepping the concrete and following each step carefully will show every time you walk into your room and see a floor that looks and feels just right. With patience and close attention, your new laminate floor will be a source of pride and comfort for many years to come.