Painting a basement ceiling can completely change the look and feel of your lower level. Many homeowners avoid this task, thinking it’s too hard or messy. But with the right steps, materials, and a little patience, you can transform an unfinished basement into a modern, welcoming space.
Whether you want to create a cozy family room, a stylish home gym, or just make your basement brighter, painting the ceiling is a smart, budget-friendly upgrade.
Most basements have exposed beams, pipes, and wires. These might look ugly now, but with the right paint and technique, you can turn them into a design feature. Painted ceilings are popular in industrial-style homes and modern renovations. They offer a clean look, hide imperfections, and make the space feel bigger by removing the visual “clutter” of different materials.
This guide will walk you through the entire process of how to paint a basement ceiling. You’ll learn about the tools you need, the best paint to use, how to prepare the space, and tips for a professional finish. We’ll also cover safety advice, common mistakes, and answer the most important questions people ask about this project.
Let’s get started on giving your basement ceiling a fresh, updated look.
Why Paint Your Basement Ceiling?
Painting your basement ceiling is more than just a cosmetic upgrade. There are several practical and design benefits:
- Brighter space: A painted ceiling reflects more light, making dark basements feel larger and less gloomy.
- Hides imperfections: Exposed pipes, ducts, and wires blend into the background when painted, creating a cleaner look.
- Cost-effective: Painting is much cheaper than installing a drop ceiling or drywall.
- Easier access: If you need to fix wiring or plumbing in the future, you can reach everything easily.
- Modern style: Many designers use painted ceilings for a trendy, industrial vibe.
- Moisture resistance: Certain paints can help protect surfaces from moisture and mildew, a common basement problem.
Non-obvious insight: Many people don’t realize that paint can help seal in dust and old insulation fibers, making the air quality in your basement better.
Is Painting A Basement Ceiling Right For You?
Before you decide to paint, consider these questions:
- Are there exposed pipes, wires, or ductwork?
- Do you want to save money compared to installing a drop ceiling?
- Is the ceiling surface in good shape, without leaks or heavy mold?
- Are you comfortable with an “exposed” look, even after painting?
If you answered yes to most, painting is likely a good solution. If your basement has low ceilings, this method avoids losing headroom, which happens when you add drywall or panels.
Hidden challenge: If your basement ceiling is very rough (crumbling concrete, flaking paint, or heavy rust), you may need repairs before painting. Painting is not a fix for serious structural issues.
Choosing The Best Paint For Basement Ceilings
Your paint choice has a big impact on the final look and durability. Not all paints are equal for basement ceilings. Here’s what to consider:
Latex Vs. Oil-based Paint
- Latex paint: Most popular for DIY projects. Low odor, dries fast, and easy to clean up with water. Good for wood, metal, and previously painted surfaces.
- Oil-based paint: More durable and moisture-resistant, but strong smell and longer drying time. Clean-up requires special solvents.
Finish Options
- Flat/matte: Hides imperfections best. Creates a soft look but is harder to clean.
- Eggshell or satin: Slight sheen, easier to clean, reflects more light.
- Semi-gloss: Highest durability and brightness, but can highlight flaws.
Specialty Paints
Some paints are made for ceilings or basements:
- Stain-blocking paints: Cover water stains or marks.
- Mold-resistant paints: Useful in damp basements.
- Spray paint: Fast for covering pipes, but more expensive and requires good ventilation.
Color Choices
- White: Brightest, most reflective, makes ceilings “disappear.”
- Black: Popular for a modern, industrial look. Hides everything, but space may feel smaller if lighting is weak.
- Gray or other colors: A trendy compromise between white and black.
Paint Comparison Chart
Below is a quick comparison of common paint types for basement ceilings:
| Paint Type | Pros | Cons | Best For |
|---|---|---|---|
| Latex (Flat) | Easy cleanup, hides flaws | Harder to clean, less durable | Most wood/metal ceilings |
| Latex (Eggshell/Satin) | Easy to clean, more light reflection | Can show more imperfections | Modern, lived-in basements |
| Oil-Based | Durable, moisture-resistant | Strong odor, harder cleanup | High-moisture or utility spaces |
| Spray Paint | Fast, covers details | Expensive, ventilation needed | Pipes, ducts, uneven surfaces |
Tools And Materials You Need
Gathering the right materials before you start will save you time and headaches. Here’s what you’ll need:
Essential Tools
- Paint sprayer or roller/brushes (sprayer is best for exposed ceilings)
- Extension pole (for rollers)
- Drop cloths or plastic sheeting
- Painter’s tape
- Respirator or high-quality mask
- Safety goggles
- Work gloves
- Sturdy ladder
Materials
- Paint (choose the type and color based on your ceiling)
- Primer (if covering bare wood, metal, or stains)
- Degreaser or cleaner (for prep)
- Sandpaper or wire brush (to clean surfaces)
- Caulk or filler (for sealing gaps, optional)
- Rags or sponges
Optional Gear
- Shop vacuum: For cleaning dust before you paint.
- Dehumidifier: Helps paint dry in damp basements.
- Portable work lights: Basements are often dark.
Non-obvious insight: A paint sprayer will give the most even finish for exposed ceilings but needs practice and strong ventilation. If you’re new to sprayers, test on scrap cardboard first.
Credit: bethbryan.com
Preparing Your Basement Ceiling
Good preparation is the secret to a professional result. Skipping these steps is a common beginner mistake.
Clear The Area
Move furniture, boxes, and anything else out of the way. Cover anything you can’t move with plastic sheeting.
Clean The Ceiling
Dust, cobwebs, and grease will ruin your paint job. Use a shop vacuum to remove loose dirt. Wipe down wood, pipes, and ducts with a damp rag and degreaser. Wait for everything to dry.
Check For Problems
Look for water stains, peeling paint, rust, or mildew. Fix leaks or moisture issues before painting. Remove loose paint with a wire brush.
Seal Gaps And Holes
Use caulk to seal small gaps around pipes or between boards. Fill nail holes or cracks with spackle and sand smooth.
Protect Walls And Floors
Tape plastic sheeting to the walls just below the ceiling. Lay drop cloths on the floor. Use painter’s tape around windows, doors, or anything you don’t want painted.
Ventilation
Open basement windows if possible. Set up a fan to blow fumes outside. Wear a respirator if using oil-based paint or a sprayer.
Practical tip: Don’t skip cleaning metal ducts and pipes. Paint sticks poorly to greasy or dusty surfaces.
Priming The Ceiling
Priming is often skipped, but it can make or break your paint job, especially in old basements.
When To Prime
- If you have bare wood, metal, or new construction
- Over water stains, smoke, or heavy marks
- If you want to switch from a dark color to a light color
Choosing Primer
Use an all-purpose latex primer for most surfaces. For metal pipes or ducts, use a rust-inhibiting metal primer. For stains, use a stain-blocking primer.
Applying Primer
Use a sprayer for the fastest coverage, especially on exposed beams and pipes. Otherwise, use a roller with an extension pole and a brush for details. Let primer dry completely before moving on.
Hidden mistake: Not priming over stains can cause them to bleed through your new paint, ruining your finish.

Credit: www.youtube.com
Painting Methods: Sprayer Vs. Roller
How you apply the paint is almost as important as what paint you use.
Paint Sprayer
- Pros: Fastest, best coverage for pipes and beams, even finish
- Cons: Needs practice, messy, uses more paint, requires strong ventilation
If you rent or buy a sprayer, read the manual and practice first. Hold the sprayer 12–18 inches from the surface. Use smooth, overlapping passes. Keep moving to avoid drips.
Roller And Brush
- Pros: Cheaper, easier for beginners, less overspray
- Cons: Slow for pipes and wires, may leave roller marks
Use a heavy-nap roller (¾ inch or more) for rough wood or concrete. Use a brush for edges and tight spots.
Method Comparison Table
Here’s a quick look at the main differences:
| Application Method | Best For | Speed | Finish | Difficulty |
|---|---|---|---|---|
| Paint Sprayer | Exposed ceilings, beams, pipes | Very fast | Smooth, even | Intermediate to advanced |
| Roller/Brush | Flat drywall, small spaces | Slow to moderate | May show texture | Beginner |
Practical tip: For most exposed basement ceilings, a sprayer is the best investment. You can rent one from a hardware store if you don’t want to buy.
Step-by-step: How To Paint A Basement Ceiling
Now let’s break down the process into clear steps. Take your time and don’t rush—good prep and patience mean better results.
Step 1: Safety First
Wear safety goggles, gloves, and a respirator. Open windows and run fans if possible. Make sure pets and children stay out of the basement while painting and drying.
Step 2: Prep The Space
Move or cover everything. Tape off walls, lights, and anything you don’t want painted. Lay down drop cloths.
Step 3: Clean And Repair
Vacuum, wipe, and degrease all surfaces. Fix any leaks or water issues. Patch holes and sand rough spots.
Step 4: Prime
Apply primer to all surfaces as needed. Let it dry according to the manufacturer’s instructions—usually 1–2 hours for latex, longer for oil-based.
Step 5: Paint
- If using a sprayer: Thin paint if required (check paint can instructions). Work in sections. Overlap each pass slightly. Watch for drips and move steadily.
- If using a roller: Use a heavy-nap roller for beams and rough surfaces. Use a brush for details and tight corners.
Let the first coat dry (at least 2–4 hours, longer if humid). Apply a second coat for best coverage and durability.
Step 6: Inspect And Touch Up
Once dry, check for missed spots or thin areas. Touch up with a brush or small roller as needed.
Step 7: Clean Up
Remove tape and plastic sheeting carefully. Clean tools right away. Dispose of paint and solvents safely.
Non-obvious insight: If you’re painting over old insulation, be gentle with your sprayer or roller. Too much pressure can blow loose insulation fibers into the air.
Tips For A Professional-looking Finish
These little details make a big difference in the final result:
- Paint pipes and wires the same color as the ceiling. This makes everything blend and look tidy.
- Use two thin coats instead of one thick coat. Thick paint drips and peels more easily.
- Angle your lighting while painting. Shadows help you spot missed spots.
- If you want a dramatic look, paint ducts and pipes a contrasting color (for example, gray ceiling with black pipes).
- Don’t forget to paint above ductwork if it’s visible from below.
- Use mold-resistant paint if your basement is damp or humid.
- Label or photograph any wiring or pipes before painting, in case you need to repair them later.
Common Mistakes (and How To Avoid Them)
Painting a basement ceiling isn’t hard, but these mistakes can ruin your hard work:
- Skipping cleaning: Paint will not stick to dust, grease, or cobwebs.
- Not using enough drop cloths: Overspray from sprayers travels farther than you think.
- Painting over wet surfaces: Paint will bubble and peel if applied to damp wood or metal.
- Using the wrong paint: Regular wall paint may not stick well to pipes or wood.
- Ignoring ventilation: Fumes from paint, especially oil-based, can be dangerous.
- Not checking for leaks first: Moisture problems under fresh paint cause peeling and mold.
- Painting in poor light: You’ll miss spots and see uneven coverage when the project is done.
- Applying too much paint in one coat: Leads to drips and sags.
Hidden insight: Many people don’t realize that basement humidity can slow drying by 50% or more. Use a dehumidifier to help paint cure properly.
How Long Does It Take To Paint A Basement Ceiling?
For a typical unfinished basement ceiling (about 800 square feet):
- Prep and cleaning: 2–4 hours
- Priming (if needed): 1–2 hours (plus drying time)
- First coat: 2–4 hours
- Second coat: 2–3 hours
- Touch-ups and cleanup: 1–2 hours
Total time: Plan for a full weekend, especially if you’re new to painting or using a sprayer.
Pro tip: If your basement is larger or has lots of pipes, add extra time for detail work.
How Much Does It Cost?
Costs can vary based on materials, ceiling size, and whether you rent equipment.
Main Expenses
- Paint: $25–$60 per gallon (1 gallon covers about 350 square feet)
- Primer: $20–$50 per gallon
- Sprayer rental: $40–$100 per day
- Drop cloths, tape, cleaning supplies: $30–$80
Total DIY cost for a 1,000 sq. ft. ceiling: $200–$500 (if you do all the work yourself)
Hiring a pro: $2 to $4 per square foot, or $2,000–$4,000 for a 1,000 sq. ft. basement.
Money-saving tip: Borrow or rent a sprayer, and buy paint when it’s on sale.
Safety Tips And Precautions
Basements can be tricky places to work. Here’s how to stay safe:
- Always wear a respirator when using sprayers or oil-based paint.
- Keep a fire extinguisher nearby if painting near a furnace, water heater, or electrical panels.
- Watch out for lead paint in very old homes (built before 1978).
- Don’t paint over mold—fix leaks and remove mold first.
- Never use open flames or smoke near paint fumes.
If you’re not sure about electrical wiring or plumbing, consult a professional before painting.
Further reading: Learn more about safety with paint and chemicals from the U.S. Environmental Protection Agency.
Maintenance: Keeping Your Painted Basement Ceiling Looking Good
Painted basement ceilings are easy to care for, but a little maintenance goes a long way.
- Dust regularly: Use a broom or vacuum with a brush attachment.
- Touch up chips: Save leftover paint for easy repairs.
- Check for leaks: Fresh paint can hide leaks. Inspect pipes and ducts once a year.
- Clean gently: For marks or stains, use a damp sponge (avoid harsh cleaners).
- Watch for mold: If you see spots or discoloration, fix moisture problems right away.
Pro tip: If you ever need to repaint, a light sanding and one new coat is usually enough.
When To Call A Professional
While most homeowners can paint a basement ceiling, some situations need expert help:
- Major water damage or mold
- Asbestos insulation or very old pipes
- Extensive wiring or complicated HVAC systems
- Very high ceilings (over 10 feet)
- You’re sensitive to paint fumes or chemicals
A pro will have the right equipment and experience to handle these challenges safely.
Real-world Examples
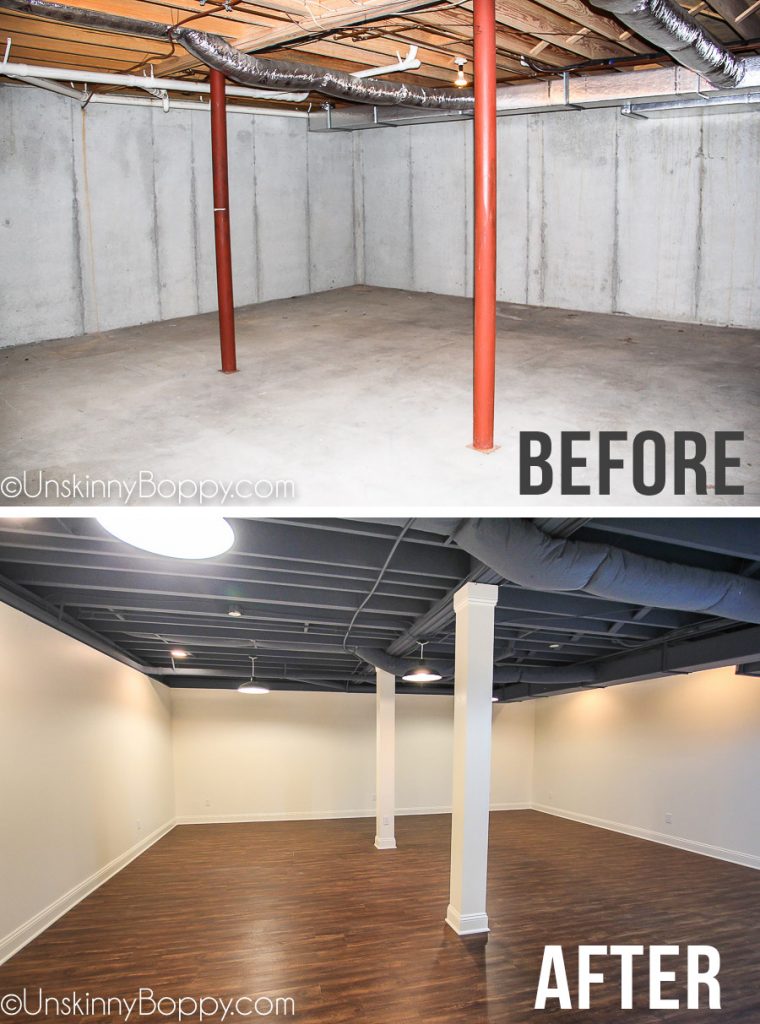
Let’s look at how painting the ceiling changed two different basements:
- Modern Family Room: The homeowners used flat black paint on their exposed beams, pipes, and ducts. The black ceiling made the white walls pop and gave their basement a trendy, industrial look. LED track lighting finished the effect, and the space became their favorite movie spot.
- Bright Home Gym: Another homeowner chose bright white latex paint for their low ceiling. The new color made the space feel twice as tall, and even the old pipes looked fresh. By using a sprayer, they finished in just one weekend and saved thousands compared to adding drywall.
Troubleshooting: What If Something Goes Wrong?
Even the best plans sometimes hit a snag. Here’s how to fix common problems:
- Drips and sags: Let dry, sand smooth, and repaint lightly.
- Missed spots: Touch up with a small brush or roller.
- Peeling paint: Usually caused by moisture. Fix leaks, scrape, prime, and repaint.
- Uneven color: Add a second coat, making sure to mix your paint well before starting.
- Strong paint smell: Use fans and open windows. The smell fades after a few days.
Frequently Asked Questions
How Many Coats Of Paint Do I Need For A Basement Ceiling?
Most ceilings need two coats for full coverage and durability. If you’re covering a dark color with a lighter one, or have a lot of pipes and beams, you may need a third thin coat in some areas.
Can I Paint A Basement Ceiling Without A Sprayer?
Yes, you can use rollers and brushes. A roller with a thick nap covers wood and flat surfaces well, but it’s slower on pipes and beams. For the most even finish, a sprayer is best—but rollers work if you’re patient.
Should I Use Primer On My Basement Ceiling?
Primer is highly recommended for bare wood, metal, water stains, or switching from dark to light colors. Primer helps paint stick and prevents stains from bleeding through.
What’s The Best Color For A Basement Ceiling?
White creates the brightest, biggest feel. Black hides everything and gives a modern look, but can make the space feel smaller if lighting is poor. Gray is a good in-between. Choose based on your style and how much light your basement gets.
Is Painting A Basement Ceiling A Good Diy Project?
Yes, if you’re comfortable with basic tools and safety steps. It’s a cost-effective way to upgrade your basement, but prep and patience are key. For large basements or complex layouts, consider hiring a professional.
Painting your basement ceiling is one of the most rewarding upgrades you can make. It’s affordable, practical, and can transform a dark, unfinished space into a modern, bright, and inviting part of your home. With the right tools, paint, and some careful planning, you’ll be amazed at how much impact a freshly painted ceiling can have.
Whether you choose classic white, dramatic black, or something in between, your basement will become a space you actually want to spend time in.
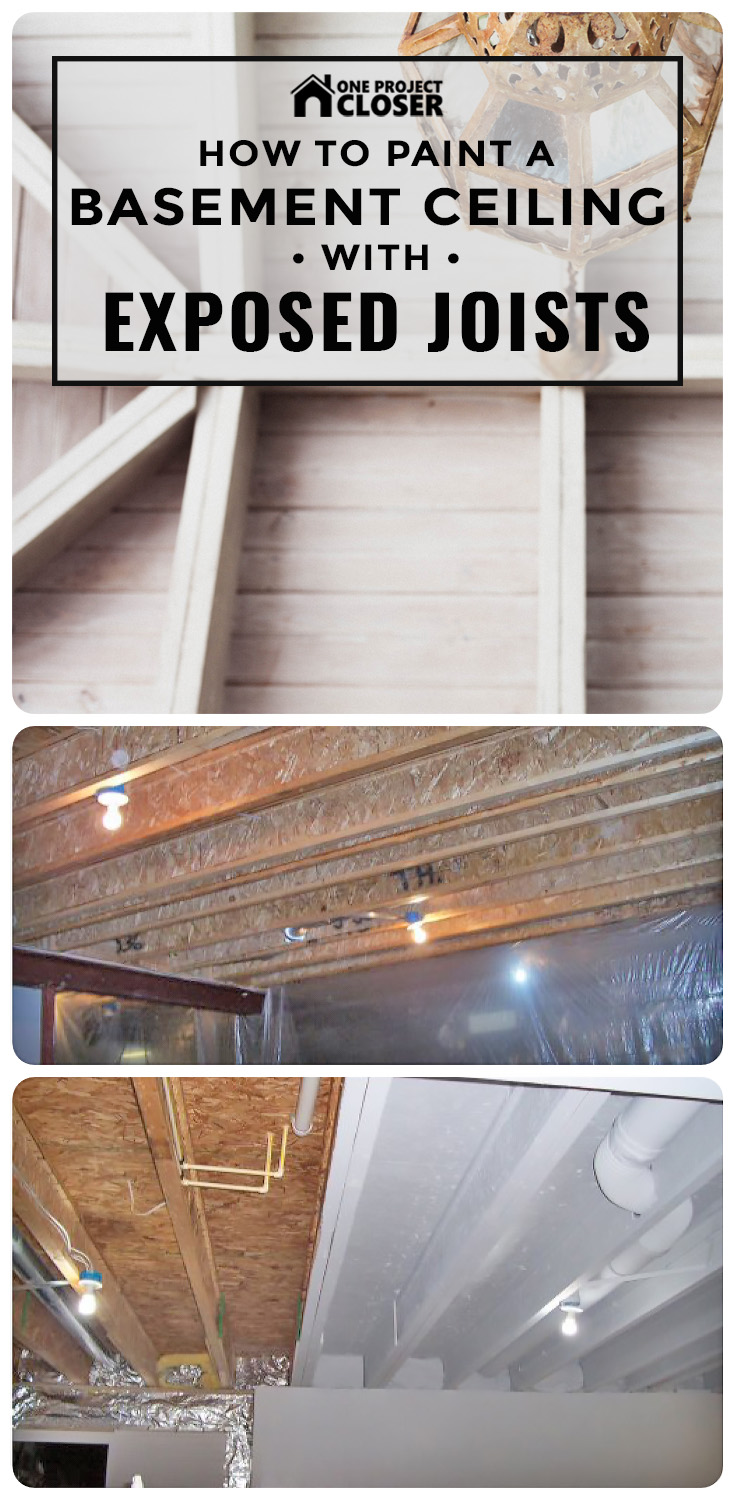
Credit: www.oneprojectcloser.com