A dresser is more than just a piece of furniture—it’s a daily companion that keeps your space organized and beautiful. But the top of a dresser is often the first place to show signs of wear. Scratches from jewelry boxes, water rings from cups, fading from sunlight, and spills from perfumes can all damage the surface.
If you want your dresser to look great for years, it’s important to protect the dresser top from these common threats.
Many people overlook this simple step, only to regret it when they see permanent marks or dull patches. Protecting a dresser top is not complicated, but it does require a thoughtful approach. In this article, you’ll learn practical ways to keep your dresser top safe, from choosing the right protective materials to cleaning techniques and smart habits.
Whether your dresser is an antique heirloom or a new purchase, these methods will help you keep it looking its best.
Why Dresser Tops Get Damaged
Before diving into protection strategies, it helps to know what causes dresser top damage. A dresser top faces constant threats in daily life, such as:
- Scratches from keys, jewelry, or rough objects
- Water damage from spills, plants, or drink glasses
- Heat damage from hair tools or hot mugs
- Stains from perfumes, lotions, and makeup
- Sun fading when placed near windows
- General wear from frequent cleaning or moving items
Many dressers are made with wood, veneer, laminate, or painted finishes. Each of these materials reacts differently to damage, but all can be harmed by careless use. Even a small scratch can make an expensive dresser look old. Understanding these risks is the first step to avoiding them.
Choosing A Protective Covering
One of the simplest ways to keep your dresser top safe is by adding a protective layer. There are several options, each with advantages and disadvantages. The best choice depends on your style, budget, and how you use the dresser.
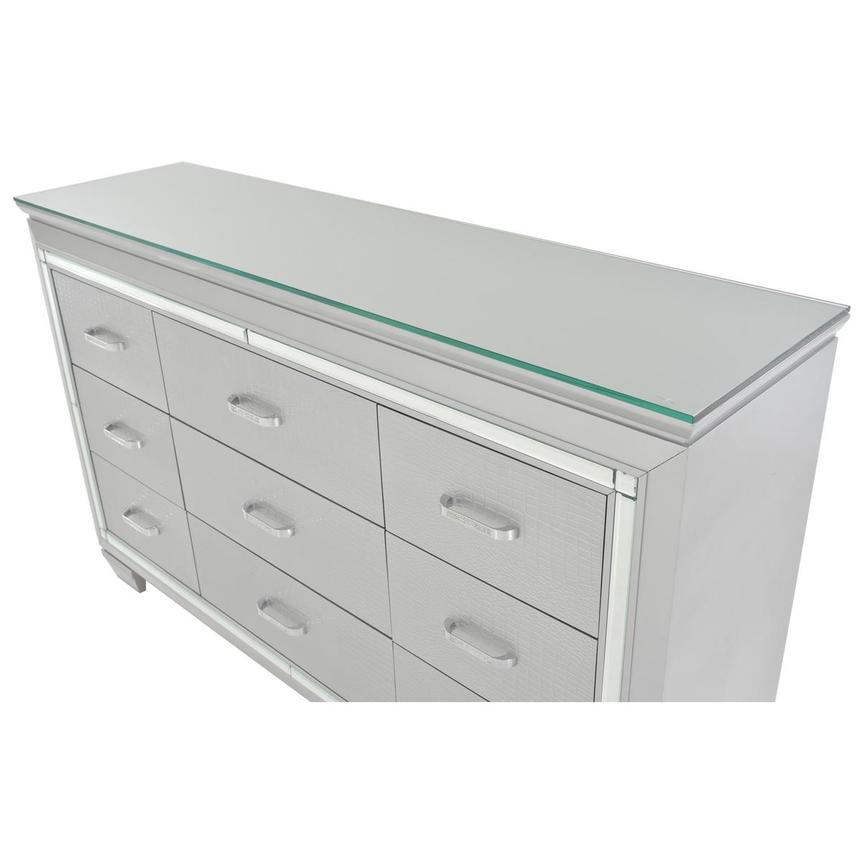
1. Glass Tops
A custom-cut glass top is a popular choice for high-end dressers. Glass is easy to clean, protects against spills, and lets the beauty of the wood show through. Thick tempered glass (at least 1/4 inch) offers the best durability.
Pros:
- Waterproof and heat-resistant
- Doesn’t hide the dresser’s finish
- Lasts for years if handled properly
Cons:
- Can be expensive
- Needs to be custom measured
- Edges can chip if objects are dropped
Tip: Always add small rubber bumpers under the glass to prevent scratching the dresser’s finish.
2. Acrylic Or Plexiglass Sheets
Acrylic sheets (sometimes called plexiglass) are a lightweight, shatter-resistant alternative to glass. They are easier to cut at home improvement stores and cost less than glass.
Pros:
- Lightweight and safe for homes with kids
- Less expensive than glass
- Good transparency
Cons:
- Scratches more easily than glass
- Prone to static, which can attract dust
- Not as heat-resistant
Insight: If you have young children, acrylic is less dangerous if broken, but always wipe gently to avoid scratching.
3. Fabric Runners And Mats
Decorative runners or thick mats can add style while protecting from minor scratches and spills. Choose materials that are machine washable for easy care.
Pros:
- Many colors and styles available
- Easy to replace and clean
- Adds a decorative touch
Cons:
- Won’t protect from heavy spills
- Can slip if not secured
- Needs regular washing
Practical Tip: Use a non-slip pad underneath to keep the runner in place.
4. Tray Organizers
Placing trays or organizer boxes on top of the dresser helps contain small items like perfume bottles, jewelry, or makeup. This keeps them from scratching the surface directly.
Pros:
- Organizes clutter
- Easy to move for cleaning
- Limits the area of potential damage
Cons:
- Only protects the area under the tray
- May leave an outline or fade if left for years
Non-Obvious Insight: Occasionally move or lift trays to clean underneath and avoid uneven fading.
5. Clear Adhesive Films
Self-adhesive films or contact paper can be cut to size and stuck directly to the dresser top. These are especially useful for children’s rooms or rental furniture.
Pros:
- Inexpensive and easy to apply
- Waterproof and replaceable
- Available in clear or decorative patterns
Cons:
- May leave sticky residue when removed
- Can bubble if not applied carefully
- Not suitable for antiques or valuable wood
Data Point: According to surveys, adhesive films are most popular for protecting dressers in college dorms and rentals.
6. Coasters And Placemats
A simple but effective method is using coasters for drinks and placemats for hot tools. These small accessories prevent rings, heat marks, and stains.
Pros:
- Cheap and easy to find
- No installation required
- Adds a touch of style
Cons:
- Only protects where placed
- Relies on consistent use
Practical Advice: Keep a few extra coasters in the drawer to encourage guests and family to use them.
7. Decorative Tiles Or Stone Slabs
Some people use marble slabs or ceramic tiles as a protective accent on their dresser top. This works well for high-moisture areas, like holding perfumes or plants.
Pros:
- Extremely durable
- Adds luxury feel
- Easy to clean
Cons:
- Heavy and can scratch if slid
- Expensive for large surfaces
- May not suit all décor
Expert Tip: Place felt pads under stones or tiles to avoid scratching the wood.
Cleaning Techniques That Protect Your Dresser Top
How you clean your dresser top matters as much as the protective covering. The wrong cleaning methods can scratch, dull, or discolor the finish.
1. Use Gentle Cleaning Products
Avoid harsh chemicals, bleach, or abrasive powders. Instead, use:
- Mild soap (like dish soap) mixed with water
- Microfiber cloths for dusting
- Furniture polish (for wood) used sparingly
Insight: Too much polish can build up and attract dust, so use only as needed.
2. Clean Up Spills Immediately
Liquid spills can damage wood or seep into seams. Always blot (don’t rub) spills right away with a soft cloth.
Pro Tip: For sticky or colored spills, use a slightly damp cloth, then dry thoroughly.
3. Dust Regularly
Dust particles can scratch surfaces if allowed to build up. Dust at least once a week, using a microfiber or soft cotton cloth.
4. Avoid Excess Water
Never soak your dresser top. Water can seep into joints, causing swelling or warping. Use damp, not wet, cloths for cleaning.
5. Dry Thoroughly
After cleaning, always dry the surface to prevent water spots or streaks.
6. Test In A Hidden Area
Before trying a new cleaner or polish, test it on a small, hidden spot to check for any reaction.
Preventing Damage With Smart Habits
Sometimes, small changes in behavior make a big difference in keeping your dresser top safe.
1. Assign Storage Zones
Divide your dresser top into zones for specific items—like a jewelry zone, a beauty zone, and a catch-all tray. This helps control clutter and reduce the risk of scratches.
2. Lift, Don’t Drag
Always lift items instead of sliding them across the dresser. Even soft-bottomed objects can catch grit and scratch the finish.
3. Keep Sharp Or Heavy Items Off
Avoid placing scissors, keys, tools, or heavy decor directly on the surface. Use a tray or pad underneath.
4. Rotate Decorative Items
Move lamps, vases, and trays occasionally. This prevents uneven fading or pressure marks.
5. Avoid Direct Sunlight
Sunlight can fade wood and painted finishes. If possible, place the dresser out of direct sun or use window treatments to block UV rays.
6. Don’t Overload
Dressers are designed for clothing storage, not for heavy piles on top. Too much weight can cause warping or cracks, especially in older or flat-packed furniture.
7. Check For Leaks
Plants and liquid containers can leak unnoticed. Always use a waterproof tray or saucer under plants and bottles.
Comparing Popular Dresser Top Protection Materials
To help you choose, here’s a comparison of the most common dresser top protectors:
| Material | Protection Level | Appearance | Cost | Maintenance |
|---|---|---|---|---|
| Glass | Excellent (scratches, spills, heat) | Clear, shows wood | High | Wipe clean |
| Acrylic | Good (spills, scratches) | Clear, lightweight | Medium | Wipe, avoid abrasion |
| Fabric Runner | Moderate (scratches, dust) | Decorative, many styles | Low | Wash regularly |
| Adhesive Film | Good (spills, stains) | Clear or patterned | Low | Replace as needed |
| Tray/Mat | Spot protection | Varies | Low-Medium | Move to clean |
Non-Obvious Insight: While glass is the most durable, a combination (such as a runner with trays) often gives the best mix of style and function.
How To Install A Glass Or Acrylic Dresser Top Protector
If you choose a glass or acrylic cover, proper installation is key to avoiding future problems.
1. Measure Carefully
Measure the dresser top’s length and width, allowing a small margin (1/8 to 1/4 inch) so the protector fits without overhanging or catching on edges.
2. Order The Right Thickness
For glass, use at least 1/4 inch thick tempered glass for strength. For acrylic, 1/8 inch is usually enough, but thicker sheets add stability.
3. Finish Edges Smoothly
Request “pencil-polished” or rounded edges to prevent cuts or chips. Sharp edges are dangerous, especially in homes with children.
4. Use Bumpers
Place small clear rubber bumpers at each corner between the dresser and the protector. This prevents direct contact, reduces slipping, and allows air to circulate.
5. Clean Before Placing
Clean both the dresser top and the underside of the protector to remove dust or grit that could scratch the finish.
6. Place Gently
Set the protector down carefully. Don’t slide it—this can scratch both surfaces.
7. Maintain Regularly
Clean the protector with a soft cloth and gentle cleaner. Avoid ammonia or abrasive products, which can cloud acrylic or dull the shine of glass.
Repairing And Restoring Damaged Dresser Tops
If your dresser is already scratched or stained, you can often repair or restore the surface before adding protection.
1. Minor Scratches
For light scratches on wood, use a wood touch-up marker or crayon in a matching shade. Buff gently with a soft cloth.
2. White Water Rings
Place a cotton cloth over the mark and run a warm iron (no steam) over it for a few seconds. The heat can help lift moisture trapped under the finish.
3. Deeper Scratches
Use a wood filler or wax stick, then carefully blend with the wood color. Finish with a gentle polish.
4. Painted Or Laminate Surfaces
Use a matching paint or laminate repair kit to cover chips or scratches.
5. Professional Refinishing
For valuable antiques, consult a professional. DIY fixes can sometimes worsen the damage if done incorrectly.
Caring For Different Dresser Top Materials
Not all dressers are made the same. Here’s how to care for the most common materials:
| Material | Best Protection | Key Cautions |
|---|---|---|
| Solid Wood | Glass, runner, trays | Avoid water and sunlight |
| Veneer | Acrylic, fabric, adhesive film | Don’t soak, avoid heat |
| Laminate | Any protector, easy clean | Can scratch, avoid harsh cleaners |
| Painted | Runner, tray, acrylic | Paint can chip, avoid strong chemicals |
Credit: www.eldoradofurniture.com
Diy Dresser Top Protection Ideas
If you enjoy crafts or need a quick solution, you can make your own protective covers with household items.
1. Laminated Placemat
Laminate a large placemat or printed photo to fit your dresser. It’s waterproof, unique, and easy to clean.
2. Cork Board Layer
Cut cork board to size and place under trays or jewelry boxes. Cork is soft, won’t scratch, and absorbs minor spills.
3. Upcycled Tablecloth
Use part of a vintage tablecloth or scarf as a decorative runner. Hem the edges to prevent fraying.
4. Peel-and-stick Wallpaper
Leftover wallpaper can be cut and applied as a temporary, stylish protector. Just be sure it’s easy to remove later.
5. Shelf Liner
Heavy-duty shelf liner (the kind for kitchen cabinets) can be trimmed to size and used under organizers or directly on the dresser top.
Creative Tip: Combine two or more DIY methods for custom protection that matches your style.
Common Mistakes To Avoid
Many people make simple errors when trying to protect their dresser top. Here’s how to avoid them:
- Skipping Protection because the dresser is “cheap”—damage can make any piece look worse and harder to resell or donate.
- Using harsh cleaners that strip finish or discolor paint.
- Letting clutter build up, increasing the risk of accidental spills and scratches.
- Ignoring sunlight exposure, which can cause fading and uneven color.
- Not moving trays or mats for years, leaving outlines or pressure marks.
- Forgetting to clean under protectors, allowing dust or moisture to build up unseen.
- Choosing the wrong protector for the material (e.g., strong adhesives on antique wood).
- Assuming coasters or mats will be used by everyone—make it easy and visible.
Non-Obvious Insight: Even temporary protectors (like runners or mats) can leave marks if not moved or cleaned regularly.
When To Replace Or Upgrade Your Dresser Top Protection
No protection lasts forever. Know when it’s time to refresh your setup:
- Glass or acrylic that’s deeply scratched or chipped
- Adhesive film peeling or leaving residue
- Fabric runners with stains or wear
- Trays or mats cracking or discoloring
Advice: Inspect your protection every 6 months and replace as needed.
How To Protect A Dresser Top In Special Situations
1. Homes With Kids Or Pets
Choose soft, shatterproof materials like acrylic, thick fabric, or rubber mats. Avoid glass, which can break, or small items that can be chewed or swallowed.
2. Rental Apartments
Use non-permanent solutions—fabric runners, trays, or non-adhesive liners—to avoid damaging property you don’t own.
3. Antique Dressers
Avoid adhesives and harsh chemicals. Use a custom-cut glass top with bumpers or a soft fabric runner. Always consult a restoration professional if unsure.
4. Humid Or Sunny Rooms
Opt for waterproof protectors and block sunlight with curtains or UV window film. Rotate items often to avoid fading.
5. Shared Or High-traffic Rooms
Use visible, easy-to-clean protectors like trays or thick mats. Label zones if needed so everyone knows where to put things.

Credit: www.amazon.com
Real-world Examples
- A family with young children uses a thick acrylic sheet, anchored with rubber bumpers, and a decorative runner. They clean weekly and move toys and trays around to avoid marks.
- A beauty enthusiast keeps all perfumes, lotions, and makeup inside a pretty tray on top of a marble slab. This prevents spills from reaching the wood.
- A plant lover places waterproof saucers under every pot and rotates them monthly to avoid water rings and uneven fading.
- An apartment renter uses peel-and-stick shelf liner and fabric runners, switching them out every season for a fresh look.
- An antique collector installed a glass top (with professional help) and only uses dry dusting, never liquid cleaners, to maintain the original finish.
Expert Recommendations
- Use multiple layers of protection for best results: For example, a glass top plus a runner or tray.
- Test cleaners and adhesives in a hidden spot first, especially on valuable dressers.
- Invest in quality protection—it’s cheaper than refinishing or replacing a damaged dresser.
- Educate family members (and guests) to use coasters and keep the top tidy.
- Inspect and clean under protectors regularly to avoid trapped dirt or moisture.

Credit: www.etsy.com
Frequently Asked Questions
How Do I Remove Sticky Residue Left By Adhesive Protectors?
Start with a few drops of vegetable oil or a commercial adhesive remover. Apply to the residue, let it sit for a few minutes, and gently wipe with a soft cloth. Always test in a hidden spot first. For stubborn spots, rubbing alcohol can help, but avoid using it on delicate or antique finishes.
Can I Put A Tv Or Heavy Object On My Dresser Top?
Most dressers can hold a moderate-weight TV or decor, but always check the manufacturer’s weight limit. Place a protective mat or felt pads under heavy objects to avoid pressure marks, and distribute weight evenly.
What’s The Best Way To Protect A Painted Dresser Top?
Use a fabric runner, tray, or acrylic sheet. Avoid strong adhesives or harsh chemicals, which can damage paint. Clean with a damp cloth and mild soap, and always dry thoroughly.
How Can I Protect My Dresser From Perfume Or Makeup Stains?
Use a tray, stone slab, or waterproof mat under all bottles and containers. Wipe up spills immediately, and clean the surface regularly to remove residue before it can stain.
Is A Glass Or Acrylic Top Better For My Dresser?
Glass is more scratch- and heat-resistant, but heavier and can break. Acrylic is lighter and safer for homes with children, but scratches more easily. Both should be custom-cut and placed with bumpers to avoid damaging the dresser.
For further reading on furniture care, see Wikipedia: Furniture Care.
Protecting your dresser top doesn’t need to be complicated, but it does require attention and a few smart choices. With the right protector, cleaning habits, and care, your dresser will look great for years—no matter what life puts on top of it.