Welcoming a new baby means preparing a safe and cozy space for them to sleep. Many parents choose a Restoration Hardware crib because of its stylish look and sturdy design. But once your baby grows, you might need to adjust the crib’s mattress height. Lowering the crib is a key safety step, but if you’ve never done it before, it can feel confusing. Maybe the instructions aren’t clear, or you worry about damaging the crib. Don’t worry—I’ll walk you through every detail, from why and when to lower your RH crib, to how to do it safely with real-life tips and examples.
Whether you’re a new parent, a grandparent, or a caregiver, this guide gives you everything you need. You’ll also learn how to avoid common mistakes, what tools to use, and how to double-check your work. By the end, you’ll feel confident that your child’s crib is set up just right for their next stage of growth.
Why Lowering Your Restoration Hardware Crib Matters
Lowering the crib isn’t just about following instructions—it’s about keeping your baby safe. As babies grow and learn new skills, their risk of falling out of the crib increases. An infant who can sit up or pull to stand may tumble over the side if the mattress is too high. The American Academy of Pediatrics reports that crib falls are a leading cause of injury in children under two.
Most cribs, including those from Restoration Hardware, have two or three mattress height options. The highest setting is for newborns (who can’t sit up), but once your child starts rolling or pushing up, it’s time to move the mattress lower.
Key reasons to lower the crib:
- Prevent falls: Babies can surprise you with new skills overnight.
- Follow safety guidelines: Most crib injuries happen when the mattress is too high.
- Adapt to growth: Your baby’s needs change as they develop.
Some parents wait too long, thinking their baby isn’t ready. But even a few days can make a difference, so it’s smart to act early.
Understanding Your Restoration Hardware Crib
Not all cribs are built the same. Restoration Hardware (RH) cribs are known for their solid wood frames and classic styles. But even between different RH models, the way you lower the mattress can vary. Before you start, it helps to know a bit about your specific crib.
Common features of RH cribs:
- Adjustable mattress support: Usually metal, wood, or a spring base.
- Multiple height levels: Usually 2 or 3 slots or notches for adjustment.
- Sturdy bolts or screws: Holds the mattress support in place.
Popular Restoration Hardware crib models:
- Adele Convertible Crib
- Jameson 4-in-1 Crib
- Kenwood Crib
- Aviator Crib
Each model may look a little different, but the basic process for lowering the mattress is similar. If you’re unsure of your model, check the label on the crib frame or the paperwork that came with your purchase.
Locating The Mattress Support
First, find the mattress support. In RH cribs, this is often a metal grid, wooden slats, or a mesh frame that holds the mattress. It’s attached to the crib’s four corners with bolts or screws. You’ll see several holes or slots along each leg—these are the height positions.
When To Lower The Crib
Parents often ask, “When should I lower the crib? ” The answer depends on your baby’s growth, not just their age.
Lower the mattress if your baby can:
- Roll over both ways (front to back, back to front)
- Push up on hands and knees
- Sit up or pull to stand
For most babies, these milestones happen between 4 and 8 months. Some babies reach them earlier or later. If you’re not sure, it’s safer to lower the mattress sooner.
Tools And Preparation
Before you begin, gather everything you’ll need. Being prepared makes the process smoother and faster.
Essential tools:
- Screwdriver: Phillips or flathead, depending on your crib’s screws
- Allen wrench: Some RH cribs use hex bolts
- Flashlight: For better visibility in tight corners
- Small bowl: To keep screws and bolts together
Helpful extras:
- Soft cloth: To protect the crib finish from scratches
- Partner or helper: Makes handling large crib pieces easier
Pro tip: If you can’t find the right tool, check the assembly kit that came with the crib. RH often includes the correct Allen wrench or hex key.
Step-by-step Guide To Lowering Your Restoration Hardware Crib
Now let’s get hands-on. This guide works for most RH cribs, but always check your crib’s manual for special notes.
1. Clear The Crib
Remove the mattress, sheets, and any toys or bumpers. The crib should be empty so you can work safely. You don’t want to drop screws into bedding or accidentally rip fabric.
2. Locate The Mattress Support And Bolts
Stand at the side of the crib and look under where the mattress was. You’ll see the mattress support frame, held at each corner by bolts or screws. Notice the different height positions—these are usually holes in the crib’s legs.
3. Remove The Bolts Or Screws
Using your screwdriver or Allen wrench, carefully unscrew the bolts at each corner of the mattress support. Hold the support with one hand as you remove the last screw so it doesn’t drop or scratch the crib. Place all hardware in your bowl.
Non-obvious insight: Some cribs have a safety clip or washer with the screw—don’t lose these, as they keep the mattress support stable.
4. Move The Mattress Support To A Lower Position
Once all screws are out, gently lower the mattress support. Line up the support with the next set of holes (usually the lowest setting for older babies). Double-check that all four corners are at the same level.
5. Reattach The Bolts Or Screws
Insert the bolts through the support frame and into the crib legs. Tighten each one, but don’t overtighten (this can strip the wood or metal). Go around to all four corners to make sure everything is even.
Pro tip: If a bolt feels loose, try switching it with one from a different corner—sometimes threads wear unevenly.
6. Test For Stability
Before putting the mattress back, gently shake the mattress support. It should feel solid with no wobble. Push down with your hand to check for movement. If anything moves, re-tighten the bolts.
7. Replace The Mattress And Bedding
Once you’re sure the support is secure, put the mattress back in place. Add fitted sheets and check that the mattress sits flat, with no gaps at the edges.
Non-obvious insight: If your mattress doesn’t fit snugly after adjustment, measure it. The standard crib mattress is 52 inches long by 28 inches wide, but older cribs may be slightly different.
Example Timeline
Let’s imagine your baby is six months old and just started sitting up. You notice them reaching for the crib rail. Over a weekend, you gather your tools, clear the crib, lower the mattress, and check stability. The whole process takes about 30–45 minutes, but now your baby is safe from falls.
Credit: rhbabyandchild.rh.com
Comparing Mattress Height Levels
Most Restoration Hardware cribs offer two or three mattress heights. Here’s a quick comparison of what each level is used for:
| Height Level | Recommended Age/Stage | Purpose |
|---|---|---|
| Highest Position | Newborn to 4 months | Easy access for parents; only if baby can’t sit or roll |
| Middle Position | 4 to 8 months | For babies who can roll or push up, but not yet pull to stand |
| Lowest Position | 8 months and older | For babies who can sit or stand; highest safety |
If your crib has only two positions, use the higher setting for newborns and the lowest once your baby shows signs of movement.
Safety Tips For Lowering And Using The Crib
Lowering the mattress is just one part of crib safety. Here are other important things to remember:
- Check screws regularly: Every few months, inspect the bolts and screws. Tighten any that are loose.
- Keep the crib clear: No pillows, blankets, or stuffed animals for babies under 12 months. These can cause suffocation.
- Mattress fit: The mattress should fit snugly with no more than two fingers’ width between the mattress and crib frame.
- Crib location: Place the crib away from windows, cords, or shelves to prevent climbing or entanglement.
- No drop-side rails: RH cribs do not have drop-side rails, which are now banned in the US, but check if you’re using an older model.
Practical example: You notice your child’s pacifier always falls between the mattress and crib. This could be a sign the mattress is too small or the crib is assembled incorrectly.
Common Mistakes And How To Avoid Them
Even careful parents can make mistakes. Here’s what to watch out for:
Using The Wrong Tools
Trying to use a butter knife as a screwdriver can strip screws and damage the crib. Always use the correct tool for the hardware.
Not Tightening Bolts Enough
If the mattress support moves or rattles, it’s not secure. Loose hardware can lead to the support collapsing. After adjustment, always check for stability.
Losing Hardware
Missing washers or screws means the crib isn’t as strong. Keep all small pieces in a bowl or bag. If you lose something, contact Restoration Hardware for replacements.
Setting Mattress At Uneven Level
If the mattress support isn’t level, your baby could roll to one side or get stuck. Use a small level or check by eye before tightening all screws.
Waiting Too Long To Lower
Some parents wait until their baby is standing. By then, the risk of falling is high. Lower the mattress at the first sign of rolling or sitting.
Non-obvious insight: If you have twins sharing a room, lower both cribs at the same time—even if one twin hits a milestone first. Babies often learn new skills by watching each other.
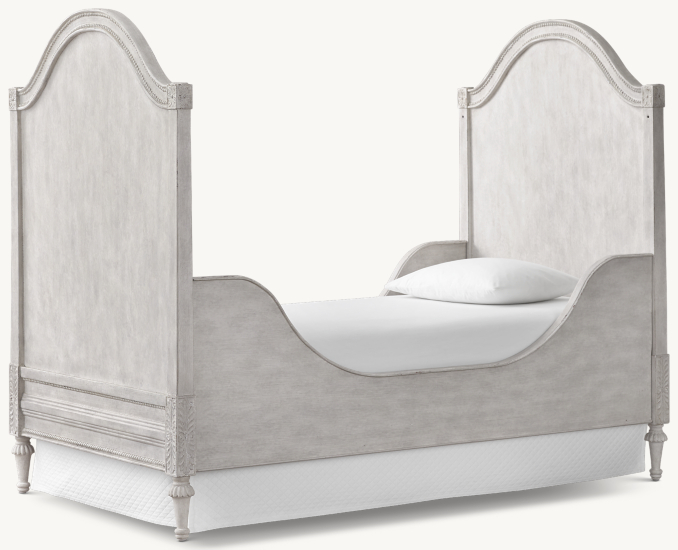
Special Cases: Converting Rh Cribs
Many RH cribs are convertible—they change from crib to toddler bed or daybed. Lowering the mattress is sometimes the first step in this process.
Converting To Toddler Bed
If your model allows, you may remove one side of the crib and keep the mattress at the lowest setting. Always follow your model’s instructions. Never modify the crib in a way not suggested by the manufacturer.
Using A Conversion Kit
Restoration Hardware sells conversion kits for some models. These kits include rails and hardware. If you plan to convert, keep all extra bolts and parts in a safe place.
Pro tip: Take photos during disassembly. This helps you remember how the crib fits together if you convert it later.
Troubleshooting: What If Something Goes Wrong?
Even with careful steps, you might run into problems. Here’s how to handle common issues:
Bolt Won’t Turn
If a bolt is stuck, spray a little WD-40 or rub with a bar of soap. Don’t force it, as this can strip the head.
Missing Holes Or Misaligned Parts
If the new holes don’t line up, double-check that you’re using the correct set for your model. Sometimes, the mattress support can flip over or rotate. Try turning it 180 degrees.
Wobbly Mattress Support
If the support is still loose after tightening, check for worn threads or stripped holes. You may need a slightly larger screw or a new washer.
Lost Manual
If you can’t find your crib’s manual, search the Restoration Hardware website or call their customer service. Manuals are often available as PDF downloads.
Mattress Doesn’t Fit After Lowering
If the mattress seems too small, measure both the crib interior and the mattress. If there’s a gap, stop and order a new mattress or consult the manufacturer.
Restoration Hardware Crib Models: Comparison
Here’s a look at three common RH crib models and their features related to lowering the mattress:
| Model | Mattress Height Levels | Conversion Options | Special Notes |
|---|---|---|---|
| Adele Convertible | 3 | Toddler bed, daybed, full bed | Allen wrench required for adjustment |
| Jameson 4-in-1 | 2 | Toddler bed, daybed, full bed | Spring mattress support, easy to lower |
| Kenwood Crib | 3 | Daybed, toddler bed | Heavy wood, may need two people |
If you’re unsure which model you have, look for a sticker or metal plate on the inside of the frame.

Credit: rhbabyandchild.rh.com
How To Maintain Your Rh Crib After Lowering
Lowering the mattress is only part of keeping your crib in top condition. Here are some simple maintenance tips:
- Check hardware monthly: Babies wiggle and bounce, which can loosen bolts over time.
- Clean gently: Use a soft, damp cloth to wipe down wood or metal. Avoid harsh chemicals.
- Inspect for damage: Look for cracks, splinters, or worn finishes. Repair or replace as needed.
- Rotate mattress: Every few months, flip the mattress to avoid uneven wear.
- Store manuals and extra hardware: Keep everything in a labeled bag or folder for future use.
Experience-based tip: Many parents forget to recheck the crib after a teething or climbing phase. Set a reminder on your phone to inspect the crib every month.
What To Do If Your Crib Is Missing Parts Or Hardware
It’s not uncommon to lose a screw or find a part missing, especially if you bought the crib secondhand. Here’s what you can do:
- Contact Restoration Hardware customer support: They can send replacement hardware for most models.
- Bring a sample screw to a hardware store: Staff can help you find a match.
- Avoid makeshift solutions: Never substitute with a nail or generic screw that doesn’t fit snugly.
Missing or mismatched hardware can make the crib unsafe. Always use parts that are designed for your model.
How To Tell If The Crib Is At The Lowest Setting
Parents sometimes worry they haven’t gone low enough. Here’s how to check:
- Look for the lowest set of holes: Most cribs have three clearly spaced slots. The lowest is usually just above the floor.
- Measure from the mattress to the top rail: The distance should be at least 26 inches for safety, according to US standards.
- Consult your manual: It will show the correct lowest setting for your crib.
If you’ve used the lowest holes and the mattress support is secure, you’ve done it right.
When To Transition Out Of The Crib
Lowering the mattress only delays the next step—moving your child to a toddler bed. Here are signs it’s time:
- Your child can climb out: Even with the mattress at the lowest setting, if they escape, it’s time to transition.
- Age 35 inches or taller: Most cribs have a height limit; check your manual.
- Repeated attempts to climb: Even if not successful, climbing is risky.
If your crib converts to a toddler bed, follow the manufacturer’s instructions for safe assembly.
Real-life Stories: Parents’ Experiences Lowering Rh Cribs
Case 1: First-Time Parents
Alex and Mia bought a Restoration Hardware Kenwood crib for their first baby. When their daughter rolled over at five months, they lowered the mattress. The process took about an hour because they double-checked each bolt and had to call RH for an extra washer.
They felt much more confident the second time.
Case 2: Busy Parents with Twins
James and Sophia have twins in matching RH cribs. When one twin started sitting up, they decided to lower both mattresses at once. They found the hardest part was keeping the twins occupied during the process! They recommend enlisting help if you have more than one crib to adjust.
Case 3: Secondhand Crib
Maria received a used RH crib from her sister. She discovered a missing screw while trying to lower the mattress. After a quick call to Restoration Hardware, she received the correct part in a week. She learned to always check for missing pieces before starting.
Quick Reference: Lowering Your Rh Crib In 10 Steps
- Gather tools (screwdriver/Allen wrench, bowl for hardware)
- Remove mattress and bedding
- Locate mattress support and bolts
- Unscrew bolts and keep them safe
- Lower support to next set of holes
- Check all corners are even
- Reattach bolts, tighten securely
- Test stability by shaking and pushing down
- Replace mattress and bedding
- Inspect for gaps and loose parts
Pro tip: Take a photo of each step. It’s easy to forget how things fit together, especially if you need to raise the mattress for a future child.

Credit: www.aptdeco.com
Additional Resources
For further details on crib safety, visit the official Consumer Product Safety Commission. This resource covers the latest US crib safety standards and recalls.
Frequently Asked Questions
How Often Should I Lower The Crib Mattress?
Lower the crib mattress as soon as your baby meets key milestones: rolling, sitting, or pulling up. Usually, you only need to adjust it two or three times as your baby grows. Always check the manufacturer’s guidelines for your crib.
Can I Lower A Restoration Hardware Crib By Myself?
Yes, you can, but it’s easier and safer with help—especially if your crib is heavy or large. If you work alone, move slowly and support the mattress frame while loosening screws.
What If I Lost The Manual For My Rh Crib?
Don’t worry. Most manuals are available on the Restoration Hardware website or by calling customer support. You can also search for your model name and “manual” online.
What Should I Do If My Mattress Doesn’t Fit After Lowering?
First, measure the crib and mattress to ensure they match standard sizes. If there’s a gap, stop and order a new mattress or call the manufacturer for advice. Never use extra padding to fill gaps—it’s unsafe.
Is It Safe To Reuse An Older Rh Crib?
Yes, as long as it meets current safety standards. Check for recalls, inspect for missing or damaged parts, and use only the correct hardware. Avoid using drop-side cribs, as they are now banned in the US.
Lowering your Restoration Hardware crib is a simple but important step as your baby grows. With the right tools, careful steps, and a focus on safety, you can make sure your child sleeps securely—giving you peace of mind every night.