When you invest in a hardwood floor, you expect beauty, durability, and a surface that feels solid underfoot. But sometimes, even the best hardwood floors develop problems. One of the most common—and worrying—issues is hardwood floor cupping. You notice boards with edges curling up, a wavy look, and unevenness when you walk. Panic sets in: Is your floor ruined? Can you fix it yourself, or do you need a professional?
Hardwood floor cupping is not rare, and it doesn’t mean your floor is destroyed. But you do need to act quickly and smartly. Fixing cupping is possible if you understand the causes, act with patience, and use the right steps.
This guide will walk you through everything—why cupping happens, how to fix it, and how to stop it from coming back. You’ll learn not just quick tips, but the full process, including expert insights most beginners miss.
What Is Hardwood Floor Cupping?
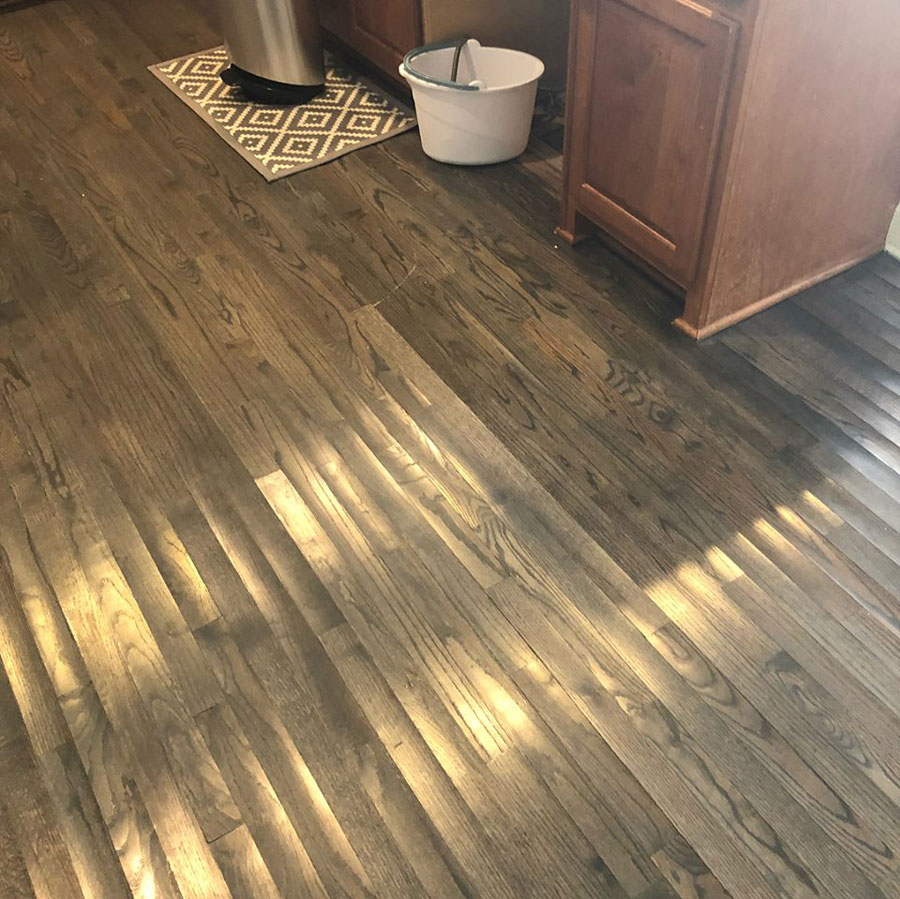
Cupping means the edges of floorboards curl up higher than the center, creating a “U” or cup shape. When you look across the floor, you see waves or dips. It often feels uneven when you walk or run your hand across the boards.
Cupping is a reaction to moisture imbalance. Usually, the bottom of the wood takes in more water than the top. This makes the edges lift and the floor loses its flat look.
Cupping is different from crowning (edges lower than the middle) and buckling (boards lift off the subfloor). Knowing the difference is important, as each has different causes and fixes.
Why Does Hardwood Floor Cupping Happen?
Understanding the root cause is the first—and most important—step in fixing cupping. Here are the main reasons:
- Moisture from below: Water or moisture comes up from the subfloor, crawlspace, or basement.
- Spills or leaks above: Water spills, pet accidents, or leaks soak into the boards.
- High indoor humidity: Humid air, especially in summer, gets absorbed by the wood.
- Improper installation: Not leaving enough expansion space, or installing over wet concrete.
- No vapor barrier: Skipping a vapor barrier allows moisture to rise up.
Even a small change in moisture can cause hardwood to move. For example, a change from 30% to 60% humidity can add nearly a pound of water per square foot to the wood.
Real-life Example
Imagine a kitchen with a dishwasher leak. The water seeps under the hardwood, raising moisture under the boards. The bottom swells, the top stays dry, and within days, you see cupping.
Is Cupping Permanent? Can It Be Fixed?
In most cases, cupping is not permanent if you act soon enough. Wood is a natural material and will often flatten once moisture returns to normal levels. But if the problem continues too long, boards may stay cupped, crack, or even buckle.
Key insight: Don’t sand a cupped floor before the wood is fully dry. Sanding too soon can make the problem worse and may lead to crowning later.
How To Identify The Real Cause
Guesswork leads to wasted time and money. Here’s how to accurately find out why your floor is cupping:
- Visual inspection: Look for leaks, wet spots, or water stains on the floor and walls.
- Check under the floor: If you have a crawlspace or basement, look for standing water, mold, or high humidity.
- Measure humidity: Use a hygrometer to check indoor air humidity. Ideal is 35-55%.
- Moisture meter: Use a wood moisture meter to test both the top and bottom of boards. If the bottom is wetter, moisture is coming from below.
- Check nearby appliances: Dishwashers, fridges, and washing machines can leak slowly.
Beginner mistake: Only drying the surface without fixing the source. The problem will return.
How To Fix Hardwood Floor Cupping: Step-by-step
Let’s get into the practical steps you need to take. Fixing cupping is not a one-day task. It requires patience and the right order of actions.
1. Stop The Source Of Moisture
You must fix leaks or moisture problems before anything else. Otherwise, all other efforts will fail.
- Repair leaking pipes, appliances, or roofs.
- Seal cracks in the basement or foundation.
- Check exterior drainage—make sure water flows away from your home.
2. Dry Out The Floor Slowly
Rapid drying can warp the boards further. Aim for gentle, even drying.
Best methods:
- Use fans to increase airflow in the room.
- Open windows if the weather is dry (low humidity).
- Use a dehumidifier to pull moisture from the air.
- If there is standing water, remove it with towels or a wet vacuum.
Important: Do not use heaters or direct sunlight—they can dry the wood too fast and cause more damage.
3. Measure Moisture Content Regularly
Use a wood moisture meter (available at hardware stores) to track progress. Hardwood is usually safe to sand and finish at 6-9% moisture content. Compare to a piece of scrap wood or a hidden spot.
Pro tip: Test both the top and underside if possible. They should be similar before you proceed.
4. Wait For The Floor To Settle
Wood moves slowly. After drying, give the floor at least 2-4 weeks to stabilize. Sometimes, cupping disappears completely. If some cupping remains but the floor is dry and stable, you can move to repairs.
5. Sand And Refinish (if Needed)
If the floor stays cupped after drying, sanding can flatten the boards. But only do this if:
- The source of moisture is fixed.
- The wood is fully dry and stable.
Steps:
- Use a drum sander or hire a pro.
- Sand with the grain, starting with coarse grit and moving to fine.
- Vacuum dust between passes.
- Apply finish or sealant.
Caution: Sanding removes wood thickness. Do not sand too much—solid hardwood can handle 2-3 heavy sanding cycles in its life.
6. Replace Severely Damaged Boards
If some boards are cracked, split, or permanently warped, replace them. This is common with engineered wood or thin hardwood floors.
- Remove damaged boards using a circular saw.
- Cut new boards to fit.
- Nail or glue in place.
- Sand and finish to match the rest of the floor.
Expert insight: Matching old and new wood can be tricky. Use leftover boards from the original installation if possible.
Comparing Cupping, Crowning, And Buckling
Many people confuse cupping with other hardwood problems. Here’s a quick comparison for clarity:
| Problem | Appearance | Main Cause | Repair Method |
|---|---|---|---|
| Cupping | Edges higher than center | Moisture below | Dry, then sand if needed |
| Crowning | Center higher than edges | Surface moisture or sanding too soon after cupping | Let dry, may need sanding |
| Buckling | Boards lift off subfloor | Extreme moisture or flooding | Remove and replace boards, fix moisture |
Diy Vs. Professional Help: Which Is Better?
You can fix minor cupping yourself if you catch it early. But for severe cases, or if you’re not sure about moisture sources, a flooring professional is best.
DIY is best when:
- Cupping is mild (edges slightly raised)
- No deep cracks or buckling
- You identify and fix the moisture source
Hire a pro when:
- Severe or widespread cupping
- Subfloor is wet or damaged
- Boards are splitting or buckled
Cost tip: Professional repair can range from $500 for small jobs to $5000+ for large, complex repairs.
Preventing Hardwood Floor Cupping
Prevention is easier and cheaper than repair. Here’s how to keep your floor flat and beautiful:
1. Control Indoor Humidity
Keep indoor humidity between 35-55%. Use a dehumidifier in summer and a humidifier in winter. Check levels with a hygrometer.
2. Use A Vapor Barrier
If your hardwood is over concrete or a crawlspace, install a vapor barrier (6 mil plastic or special underlayment) to block moisture.
3. Maintain Good Ventilation
Airflow prevents hidden moisture. Use exhaust fans in kitchens and bathrooms. Open windows during dry weather.
4. Fix Leaks Fast
Small leaks can cause big problems if ignored. Check plumbing, appliances, and roofs regularly.
5. Don’t Wet-mop Hardwood
Use a damp mop, not a wet one. Too much water sits on the surface and seeps into seams.
6. Install Properly
Always leave an expansion gap (usually 1/2 inch) at walls during installation. This lets the wood expand and contract without cupping.
Overlooked insight: Many cupping cases come from skipped vapor barriers or no expansion gap—not just obvious water leaks.
Different Floor Types And Cupping
Cupping affects all wood floors, but some are more at risk:
Solid Hardwood
- Most likely to cup, but also most likely to recover if dried properly.
- Can be sanded several times.
Engineered Wood
- Cupping is less common, but when it happens, it often can’t be sanded flat.
- Boards may need to be replaced.
Bamboo Flooring
- Acts like hardwood, but some types are more moisture-resistant.
- Prone to swelling if exposed to water.
Laminate Flooring
- Not true wood, but can swell and warp if moisture gets underneath.
- Usually, damaged boards must be replaced.
Comparison Table: Risk of Cupping by Floor Type
| Floor Type | Cupping Risk | Repair Options |
|---|---|---|
| Solid Hardwood | High | Dry, sand, refinish |
| Engineered Wood | Medium | Dry, replace boards |
| Bamboo | Medium | Dry, sand if solid |
| Laminate | Low (but still possible) | Replace damaged pieces |
How Long Does It Take To Fix Cupping?
Drying time depends on how wet the floor is and your climate. Usually, the process takes:
- Mild cupping: 1-2 weeks to dry, another week to stabilize
- Severe cupping: 4-8 weeks or longer
Expert tip: Rushing the process leads to more problems. Be patient and measure moisture weekly.
Tools And Products You’ll Need
To fix hardwood floor cupping, gather these items:
- Dehumidifier (for controlling humidity)
- Fans (for air movement)
- Wood moisture meter (for accurate readings)
- Hygrometer (to measure room humidity)
- Shop vacuum or wet vac (for water removal)
- Replacement boards (if needed)
- Drum or orbital sander (for refinishing)
- Floor finish or sealant (to protect wood)
Common Mistakes To Avoid
Many homeowners try to fix cupping but make things worse. Watch out for these errors:
- Sanding too soon: This locks in moisture, causing crowning later.
- Using too much heat: Speeds drying, but can crack or split boards.
- Ignoring subfloor moisture: Floor dries on top, but stays wet underneath.
- Not leaving an expansion gap: Boards have nowhere to move, so they cup.
- Skipping regular checks: Moisture can return if leaks are not truly fixed.
How To Know When To Replace Vs. Repair
Not all floors can be saved. Here’s when replacement is best:
- Boards are split, cracked, or delaminated.
- Cupping remains after months of drying.
- Mold or mildew is present under the floor.
- Engineered wood’s top layer is worn through.
Repair is possible when:
- The floor is structurally sound.
- Cupping is mild to moderate.
- Moisture problem has been solved.
The Science Behind Wood Movement
Wood is “hygroscopic”—it takes in and gives off water depending on the environment. Even small changes can make a big difference.
- A 5% change in moisture can make a 3-inch wide board grow or shrink by as much as 1/8 inch.
- Warm air holds more moisture, so floors often cup in summer and flatten in winter.
Non-obvious insight: Floors installed in winter sometimes cup in summer, because indoor humidity rises. Always check humidity history, not just current readings.
What About Underfloor Heating?
Many modern homes use radiant floor heating. This can make wood dry out too quickly or unevenly.
Tips for underfloor heating:
- Raise temperature slowly at the start of heating season.
- Keep humidity balanced (use a humidifier if needed).
- Choose engineered wood, which handles temperature swings better.
Insurance And Warranty Issues
Cupping from sudden leaks (like burst pipes) may be covered by homeowners insurance. But slow leaks or poor maintenance usually are not.
Check your warranty: Many flooring warranties are void if a vapor barrier is not used or if humidity is not controlled as specified.

Credit: www.reddit.com
Real-world Case Study
A homeowner in Florida noticed cupping after a heavy rainstorm. The cause: gutters were clogged, and water ran under the house, raising crawlspace humidity to 80%. The boards cupped, but after cleaning gutters, installing a dehumidifier, and waiting 6 weeks, most of the floor flattened. Only 3 boards needed replacement.
Key lesson: Outdoor water can cause indoor cupping, even if you see no leaks inside.
How Much Does It Cost To Fix Hardwood Floor Cupping?
Costs depend on severity and repair method. Here’s a general guide:
| Repair Method | DIY Cost | Professional Cost |
|---|---|---|
| Drying with fans/dehumidifier | $50 – $300 (equipment rental) | $300 – $700 |
| Sanding & refinishing | $200 – $600 | $800 – $2,500 |
| Board replacement | $50 – $200 per board | $250 – $700 per board |
| Moisture barrier installation | $100 – $500 | $500 – $1,500 |
Note: These are average US prices as of 2024. Costs can be higher in big cities or for premium materials.
Credit: www.wagnermeters.com
Long-term Maintenance Tips
After fixing cupping, keep your hardwood floor healthy:
- Check humidity every month.
- Clean up spills immediately.
- Inspect appliances and pipes for leaks every 6 months.
- Reapply finish every 3-5 years for extra protection.
- Use area rugs in high-moisture zones (kitchens, entryways).
Uncommon tip: Place a small piece of foil tape over seams near doors to test for moisture wicking up. If condensation forms, more drying is needed.
When To Get A Second Opinion
If you’re not sure what’s wrong, or if the floor keeps cupping after repairs, get a professional moisture inspection. Experts use advanced tools to test deep in the wood and subfloor.
A second opinion may reveal hidden problems, like:
- Broken pipes inside walls
- Poor ventilation in crawlspaces
- Mold or mildew under the floor
Don’t guess with expensive hardwood—expert advice can save thousands.
Additional Resources
For more technical details on wood movement and moisture, see the National Wood Flooring Association’s resources or visit NWFA official website.
Frequently Asked Questions
How Do I Know If My Hardwood Floor Is Cupping Or Crowning?
Cupping means the edges are higher than the center, forming a “U” shape. Crowning is the opposite—the center is higher than the edges. To check, lay a straightedge across several boards. If the edges touch the straightedge but the center does not, it’s cupping.
Can I Fix Hardwood Floor Cupping Without Sanding?
Yes, if the cupping is mild and you fix the moisture problem early, the floor may flatten as it dries. Sanding is only needed for severe or permanent cupping after the floor is fully dry and stable.
Is Engineered Wood Less Likely To Cup Than Solid Hardwood?
Engineered wood resists cupping better than solid wood, but it is not immune. If exposed to water or high humidity, engineered boards can still warp, and sometimes must be replaced rather than sanded.
What Humidity Level Is Safe For Hardwood Floors?
The best range is 35-55% relative humidity. Use a hygrometer to check. Staying in this range helps prevent both cupping in summer and gaps in winter.
Will Insurance Cover The Cost To Fix Cupped Hardwood Floors?
Insurance may cover sudden water damage (like a burst pipe), but usually not damage from slow leaks or poor maintenance. Check your policy and document the damage before starting repairs.
Hardwood floor cupping can feel stressful, but with the right approach, most floors can be saved. Fix the moisture source, dry slowly, and only sand if needed. Regular checks and good maintenance keep your floor flat and beautiful for years to come.
Credit: www.youtube.com