Bilco doors—also called basement hatchways or cellar doors—are a familiar sight on older homes, especially in the Northeast and Midwest. These metal doors sit at an angle, leading directly into basements. Their design is strong and simple, but they have one big problem: heat loss. In cold months, air leaks and poor insulation around these doors can make your basement freezing and push up energy bills. In summer, warm, damp air can sneak in, making it hard to keep things cool and dry. Many homeowners overlook this spot, but learning how to insulate Bilco doors can make a surprising difference for your comfort and budget.
If you’ve ever walked past your Bilco doors and felt a draft or noticed condensation, you’re not alone. Most Bilco doors were not built with energy efficiency in mind. But with the right approach, you can seal those leaks, reduce moisture, and even make your basement a better living space.
This guide walks you through everything you need to know, from the basics of why insulation matters, to step-by-step instructions, material choices, and real-world tips that save you time and money.
Why Insulate Bilco Doors?
Many people focus on insulating windows, attic spaces, and exterior walls. But a surprising amount of heat escapes through uninsulated Bilco doors. In some homes, this can account for up to 20% of basement heat loss, especially if you live in areas with harsh winters. Without insulation, you may notice:
- Cold drafts near the doors
- Condensation on the metal, leading to rust
- Higher energy bills in winter and summer
- Dampness or musty odors in the basement
- Pest entry through gaps or cracks
Insulating your Bilco doors is not just about comfort—it’s also about protecting your home’s value. Condensation and temperature swings can encourage rust and rot, leading to expensive repairs. By insulating, you not only keep warm air in and cold air out, but you also stop moisture, bugs, and even noise from getting through.
Understanding Bilco Doors: Construction And Weak Points
Before you start, it helps to know what you’re working with. Most Bilco doors are made of steel or heavy-gauge metal. They are designed to be tough, but not necessarily airtight. Here are the most common weak points:
- Gaps where the doors meet the frame
- Seams around the door panels
- The joint where the doors meet the concrete foundation
- Rust spots or old weatherstripping that has failed
Some newer Bilco doors come with basic gaskets or weather seals, but most older models are bare metal against concrete and air. This makes air infiltration and thermal bridging common problems.
Tools And Materials Needed
Having the right tools and materials makes the job easier and more effective. Here’s what you’ll need for most Bilco door insulation projects:
Tools:
- Tape measure
- Utility knife
- Caulking gun
- Screwdriver or drill
- Metal brush (for cleaning)
- Scissors or shears
- Gloves and safety glasses
Materials:
- Rigid foam board insulation (1-2 inch thick, foil-faced is best)
- Spray foam insulation (for small gaps)
- High-quality exterior caulk (silicone or polyurethane)
- Closed-cell weatherstripping tape
- Adhesive (construction adhesive rated for metal and foam)
- Metal primer and paint (if you need to repair rust)
- Self-tapping screws or rivets (if attaching panels)
- Vapor barrier or heavy-duty plastic sheeting (optional, for high-moisture areas)
Not every project needs every item, but having these on hand will prepare you for most surprises.
Step-by-step Guide: How To Insulate Bilco Doors
Let’s walk through the process from start to finish. Every home is a little different, so adjust as needed.
1. Inspect And Prepare The Doors
Start by opening your Bilco doors and cleaning the entire surface. Use a metal brush to remove rust, old paint, and dirt. If you see any holes or soft spots, patch them with metal repair putty and let dry. Check the hinges and locks—tighten any loose screws.
If there is old weatherstripping, pull it off and clean the surface with rubbing alcohol or soapy water. Allow everything to dry before moving on.
2. Seal Gaps And Cracks
Look for visible gaps where the doors meet the frame or foundation. Use high-quality exterior caulk to fill long cracks. For larger holes or uneven areas, spray foam works well, but be careful not to overfill—excess foam can block the door from closing.
One area beginners often miss is the bottom edge where the door sits on concrete. This is a common leak spot. Run a bead of caulk or apply weatherstripping to seal this seam.
3. Add Weatherstripping
Once the caulk is dry, apply closed-cell weatherstripping tape around the door edges. This tape compresses when the door is closed, creating a tight seal. Choose a thickness that compresses fully but does not prevent the door from latching.
Pay special attention to the top and side edges. Make sure the tape is continuous, with no gaps. If your doors have an uneven surface, use a thicker tape or double up layers.
4. Install Rigid Foam Board Insulation
Cut rigid foam board insulation panels to fit the inside surface of each door. Measure carefully—panels should cover as much area as possible, but not block hinges or locks. Foil-faced foam works best because it also reflects heat.
Attach the panels using construction adhesive made for metal and foam. Press the panel firmly in place for at least 30 seconds. If you want extra security, use self-tapping screws or rivets to anchor the panels, but keep fasteners away from hinges.
For best results, seal the edges of the foam panels with foil tape or caulk to stop air leaks.
Example Measurements
Here’s an example for a typical Bilco door panel (your measurements may vary):
- Panel width: 32 inches
- Panel height: 48 inches
- Foam thickness: 1.5 inches
Always double-check your own doors before cutting.
5. Add A Vapor Barrier (if Needed)
If your basement has high humidity or is prone to condensation, add a vapor barrier on the inside of the foam panels. Use heavy-duty plastic sheeting, cut to size, and attach with adhesive or double-sided tape. Seal all seams with tape.
This step is often skipped, but in damp basements, it prevents moisture from reaching the metal and insulation.
6. Paint And Protect
If you had to repair rust or patch holes, apply a metal primer and topcoat paint to any exposed surfaces. This keeps your doors looking good and prevents future rust.
Check the door operation—open and close it several times. The insulation should not rub or block movement.
7. Test Your Work
After everything is dry and cured, check for air leaks. On a windy day, hold your hand near the edges. If you feel a draft, add more weatherstripping or caulk as needed.
For a more precise test, use a smoke pencil or incense stick. Watch for smoke movement at the seams. A well-insulated Bilco door should have little or no air movement.
Comparing Insulation Options
There are several ways to insulate Bilco doors. Here’s how the most common methods compare:
| Insulation Method | R-Value per Inch | Cost | Moisture Resistance | Ease of Installation |
|---|---|---|---|---|
| Rigid Foam Board (Foil-faced) | R-6.5 | $$ | Excellent | Moderate |
| Spray Foam | R-7 | $$$ | Excellent | Difficult |
| Fiberglass Batt | R-3.5 | $ | Poor | Easy |
| Reflective Bubble Wrap | R-1-2 | $ | Good | Easy |
Rigid foam board is the best choice for most Bilco doors. Spray foam is effective but difficult for beginners and costly. Avoid fiberglass batts—they absorb moisture and can lead to mold.
Common Mistakes To Avoid
Even experienced DIYers make mistakes with Bilco door insulation. Here are problems to watch out for:
1. Skipping Surface Preparation
Paint, rust, and dirt stop adhesive from sticking. Always clean and prep the doors first.
2. Using The Wrong Materials
Fiberglass insulation absorbs moisture and sags. Use only closed-cell foam or other water-resistant materials.
3. Blocking Door Operation
Thick insulation can hit the frame or hinges. Check clearances before gluing anything.
4. Gaps In Weatherstripping
One small gap can let in a lot of cold air. Overlap tape and double-check all seams.
5. Ignoring Condensation
If you see water on the doors, add a vapor barrier or improve basement ventilation.
Many beginners forget to seal the foam board edges with tape or caulk. Air can sneak in behind panels if the edges are left open.
Cost And Energy Savings
Insulating Bilco doors is affordable compared to other home upgrades. Here’s a rough breakdown:
- Materials: $60–$150 (for most homes)
- Tools: Most are basic DIY tools
- Labor: DIY, or $200–$400 for a professional
The U.S. Department of Energy estimates that sealing air leaks and insulating basement entries can save up to 10–15% on heating and cooling costs each year. For a typical home, that means $150–$350 in annual savings. Over ten years, the project can pay for itself several times over.
Maintenance And Longevity
Good insulation lasts for years, but Bilco doors are exposed to weather, foot traffic, and temperature swings. Check your doors every fall and spring:
- Inspect weatherstripping for cracks or compression
- Look for rust or water stains
- Re-caulk any gaps
- Touch up paint as needed
With regular care, rigid foam insulation and weatherstripping can last 10–15 years before needing replacement.
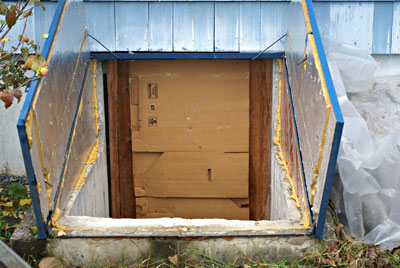
Credit: www.mofga.org
Real-world Example: Before And After
Consider a 1950s home in Pennsylvania with original Bilco doors. Before insulation, the basement was always chilly in winter, and the area near the doors had condensation and musty smells. The homeowner installed 1. 5-inch foil-faced foam, high-grade weatherstripping, and sealed all seams.
Results after one heating season:
- The basement was noticeably warmer
- Energy bills dropped by around $20/month
- No more condensation or musty odor
- Less noise from outside
This is a typical outcome, especially for older homes with little or no previous insulation.
Advanced Tips And Troubleshooting
If you want the best results or run into unusual problems, try these advanced strategies:
Double-layer Insulation
For extra-cold climates, use two layers of foam board (stagger seams for better air sealing). You’ll need deeper weatherstripping to allow for the extra thickness.
Removable Insulation Panels
If you need to use the Bilco doors often for moving large items, make insulation panels removable. Attach hook-and-loop tape (like Velcro) around the perimeter so panels can be taken off easily.
Addressing Water Leaks
If you have water coming in under the doors, insulation alone won’t solve the problem. Check exterior grading, gutters, and add a drain or raised threshold if needed.
Metal Door Condensation
Sometimes, metal Bilco doors sweat on the inside. This can happen if warm, humid air from the basement hits a cold door. Make sure your vapor barrier is sealed, and consider using a dehumidifier in summer.
Security Upgrades
Adding insulation can make doors heavier or change how they close. After installation, check that all locks and hasps work correctly. If not, adjust or replace hardware.

Credit: www.reddit.com
When To Call A Professional
Most Bilco door insulation projects are DIY-friendly, but there are times when you should consider hiring a pro:
- Significant rust or structural damage to the doors or frame
- Persistent water leaks that insulation alone can’t solve
- If the doors are very old and don’t close tightly
- If you are uncomfortable working with tools or heavy materials
A contractor can also recommend replacement doors with built-in insulation if yours are beyond repair.
Comparing Bilco Door Upgrades
If your Bilco doors are old, you might consider upgrading instead of just insulating. Here’s a quick comparison:
| Option | Cost | Energy Savings | Durability | DIY Potential |
|---|---|---|---|---|
| Insulate Existing Doors | Low | High | 10–15 years | Yes |
| Replace with New Bilco Doors (with insulation) | High | Very High | 20+ years | No |
| Add Interior Storm Door | Medium | Medium | 15 years | Yes |
Upgrading to new insulated Bilco doors is the best long-term solution but costs much more. For most homeowners, insulating the existing doors is the smart, cost-effective first step.

Credit: www.youtube.com
Environmental Impact
Insulating Bilco doors isn’t just good for your wallet—it’s good for the planet. By reducing heat loss and energy use, you lower your home’s carbon footprint. Rigid foam insulation is effective, but try to choose brands with recycled content or low global warming potential (GWP) blowing agents.
Proper disposal of old materials (like weatherstripping or paint chips) also helps protect the environment.
Safety Precautions
When working with insulation, adhesives, and caulk, remember:
- Wear gloves and safety glasses
- Work in a well-ventilated area
- Dispose of old materials properly
- Keep insulation away from open flames or heat sources
If you use spray foam, follow all label instructions—some types expand rapidly and can damage doors if used incorrectly.
Final Thoughts
Bilco doors are a classic feature, but they don’t have to be a source of energy loss. With a weekend of work and some basic materials, you can transform leaky, drafty basement doors into a sealed, insulated entryway. The benefits go beyond comfort—lower bills, less moisture, and even a quieter home.
Insulating Bilco doors is often overlooked, but it’s one of the best small investments you can make in your home’s efficiency. Tackle this project before the next cold snap, and you’ll feel the difference right away.
For more about energy-efficient home improvements, the U.S. Department of Energy offers helpful resources.
Frequently Asked Questions
How Thick Should Bilco Door Insulation Be?
For most Bilco doors, 1 to 2 inches of rigid foam board is ideal. This provides a good balance between energy savings and door operation. Thicker insulation offers more warmth but may interfere with opening and closing.
Can I Use Fiberglass Insulation For Bilco Doors?
It’s not recommended. Fiberglass insulation absorbs moisture, which can lead to mold and sagging. Always use closed-cell foam or other water-resistant materials for exterior metal doors.
How Do I Stop Condensation On My Bilco Doors?
Condensation happens when warm, damp air hits a cold metal surface. Add insulation and a vapor barrier to the inside of the doors, and consider using a dehumidifier in your basement during humid months.
How Long Does Bilco Door Insulation Last?
With proper installation and maintenance, rigid foam insulation and weatherstripping can last 10 to 15 years. Check seals and repaint as needed to extend their life.
Do Insulated Bilco Doors Need Maintenance?
Yes. Inspect seals and insulation twice a year, especially before winter. Replace weatherstripping if it cracks or compresses, and re-caulk any gaps to keep your doors airtight.
Insulating your Bilco doors may seem like a small project, but the energy savings and comfort gains are big. With a careful approach and the right materials, you can enjoy a cozier, more efficient home for years to come.