Getting paint off hardware is a common problem for anyone working on home improvement, restoration, or DIY projects. It happens when you repaint a room, refinish furniture, or renovate old doors and windows. The paint finds its way onto your door handles, screws, hinges, or cabinet pulls. Sometimes, you may even discover vintage hardware hidden under layers of old paint. While it can feel frustrating, the good news is: you don’t have to live with paint-covered hardware or replace it. With the right methods and tools, you can restore your hardware to its original shine.
In this guide, you’ll learn how to get paint off hardware using several approaches. You’ll find out which methods work best for different types of hardware and paint, what safety steps to follow, and how to avoid damaging metal, brass, or other finishes.
Whether you’re a beginner or have some experience, you’ll discover tips and tricks that make the process easier and more effective. By the end, you’ll know how to choose the right method and get the results you want.
Why Does Paint Stick To Hardware?
Paint bonds to hardware for a few simple reasons. Most paints are designed to stick well to surfaces, including metal, wood, and plastic. When you paint a door or window without removing the hardware, the paint coats everything it touches.
Over time, the paint can harden and form a strong bond with the hardware. Some paints, like oil-based types, are especially stubborn and harder to remove.
Older homes sometimes have many layers of paint, making removal more challenging. Brass, steel, aluminum, and iron all react differently to paint and cleaning chemicals. Knowing why paint sticks helps you choose the best way to remove it without causing damage.
Types Of Hardware Commonly Painted
Understanding what hardware you’re dealing with is important. Here are the most common types:
- Door knobs – Usually made of brass, steel, or glass.
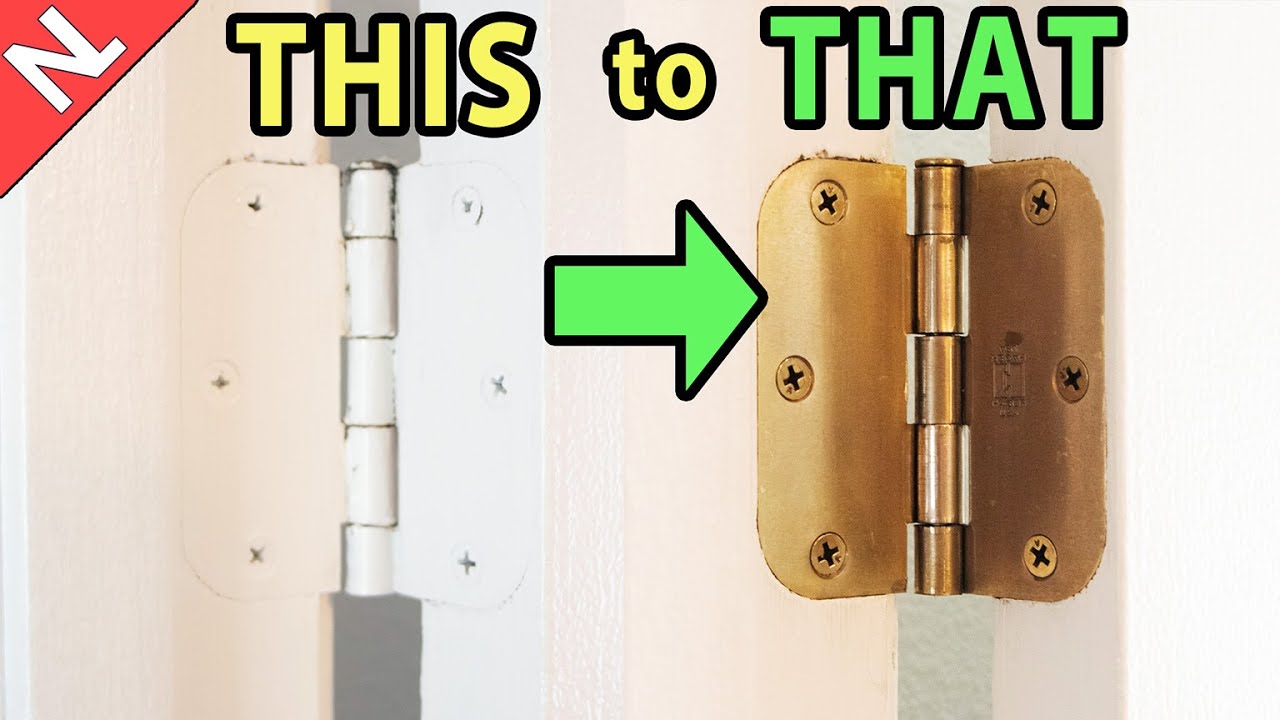
- Hinges – Often steel or brass, sometimes painted over many times.
- Screws and bolts – Small, tricky to clean if paint gets into grooves.
- Cabinet pulls and handles – Brass, steel, or zinc, often with intricate designs.
- Window latches – Small pieces, sometimes delicate.
- Light switch covers – Usually metal or plastic.
- Hooks and brackets – In closets, bathrooms, or kitchens.
- Decorative hardware – Includes antique or detailed pieces.
Each type may need a slightly different approach, especially if you want to preserve the finish.
Credit: www.youtube.com
How To Prepare Hardware For Paint Removal
Preparation is a key step before you start removing paint. It helps prevent damage and makes the process smoother.
- Remove hardware if possible. Unscrew handles, knobs, or hinges from doors or cabinets. This makes cleaning easier and protects surrounding surfaces.
- Label and store screws. Use small bags or containers to keep screws and small parts together. Label where each piece belongs to avoid confusion during reassembly.
- Wear gloves and eye protection. Some chemicals and paint dust can irritate skin or eyes.
- Work in a ventilated area. Open windows or use a fan if you’re working indoors.
- Test for lead paint. If your hardware is from before 1978, consider using a lead test kit. Lead paint is hazardous, and special safety steps are required. More info can be found on the EPA Lead Information page.
Taking these steps helps you avoid common mistakes and makes the paint removal process safer.
Methods To Remove Paint From Hardware
There’s no single way to remove paint from hardware. The best method depends on the type of hardware, the paint used, and the finish you want to preserve. Here are the main methods, with tips for each one.
1. Soaking In Hot Water (boiling Method)
This method is simple and works well for most metal hardware.
Steps:
- Fill a large pot with water. Use an old pot, not one for food.
- Add a small amount of mild dish soap.
- Place the hardware in the pot. Make sure pieces don’t touch each other if possible.
- Bring the water to a gentle boil, then simmer for 15–30 minutes.
- Carefully remove hardware using tongs.
- Use a stiff brush or old toothbrush to scrub off softened paint.
- Rinse with clean water and dry thoroughly.
Works best for: Steel, brass, and simple hardware.
Cautions: Don’t use this method for hardware with plastic, glued parts, or glass inserts. Extreme heat can damage or loosen them.
Tip: For stubborn paint, repeat the soaking process. Don’t force or scratch with sharp tools.
2. Using Baking Soda Or Vinegar
Baking soda and vinegar help loosen paint and are safe for most metals.
Baking Soda Method:
- Fill a pot with water.
- Add 1/4 cup of baking soda per quart of water.
- Bring to a boil and add hardware.
- Simmer for 20–30 minutes.
- Remove and scrub as above.
Vinegar Method:
- Mix equal parts white vinegar and water.
- Heat until almost boiling.
- Add hardware and simmer for 15–20 minutes.
- Scrub off paint after soaking.
Works best for: Small items, brass, and steel.
Cautions: Vinegar is acidic and may dull shiny finishes. Test on a small area if appearance matters.
Tip: These methods are eco-friendly and safe for most homes.
3. Chemical Paint Strippers
Chemical strippers dissolve paint quickly but require care.
Steps:
- Place hardware on a disposable tray or old newspaper.
- Apply a paint stripper gel or liquid (follow product instructions).
- Wait the recommended time (usually 10–30 minutes).
- Scrape off softened paint with a plastic scraper or brush.
- Wash hardware with soap and water to remove residue.
Works best for: Thick paint layers, stubborn spots, and most metals.
Cautions: Always wear gloves, eye protection, and work in good ventilation. Some chemicals can damage brass or plated finishes.
Tip: Use a stripper made for metal, not wood. Test first if you’re unsure of the hardware’s finish.
4. Manual Scraping And Brushing
Sometimes, a little elbow grease is enough.
Tools:
- Stiff-bristled brush
- Old toothbrush
- Plastic scraper
- Steel wool (fine grade)
Steps:
- Soften paint with water or a mild solvent if needed.
- Scrape gently to lift off paint.
- Use brushes to remove paint from grooves.
Works best for: Small areas, touch-ups, and intricate hardware.
Cautions: Don’t use hard metal scrapers, which can scratch surfaces.
Tip: For delicate or antique hardware, take your time to avoid damage.
5. Using A Heat Gun
A heat gun softens paint, making it easier to remove.
Steps:
- Set heat gun to low or medium.
- Hold hardware with pliers or tongs.
- Move the heat gun back and forth over paint.
- Scrape off softened paint with a plastic scraper.
Works best for: Large hardware, thick paint layers.
Cautions: Heat guns get very hot. Always wear gloves and keep away from flammable items.
Tip: Don’t overheat brass or delicate finishes; it can warp or discolor them.
6. Professional Paint Removers
Some removers are designed for antiques or delicate finishes.
Examples: Citristrip, Soy Gel, and other non-toxic brands.
How to use: Follow manufacturer’s instructions. Usually, these are gel-based and safe for brass, copper, and detailed hardware.
Works best for: Valuable or antique hardware, or when you want to avoid fumes.
Cautions: Read the label carefully, as some products are for wood, not metal.
Tip: Always test on a small, hidden area first.
7. Ultrasonic Cleaners
Ultrasonic cleaners use high-frequency sound waves in water or a cleaning solution to loosen paint.
Steps:
- Fill ultrasonic cleaner with water and a mild detergent.
- Place hardware inside the basket.
- Turn on the device and run for 10–20 minutes.
- Check results and repeat if needed.
Works best for: Small, detailed, or intricate hardware.
Cautions: Not suitable for hardware with glued or delicate parts.
Tip: This is a great option for cleaning lots of small pieces at once.
8. Sandblasting (for Professionals)
Sandblasting removes paint quickly but is best left to professionals.
How it works: High-pressure air and abrasive materials blast paint off hardware.
Works best for: Heavily painted, rusted, or industrial hardware.
Cautions: Can damage fine details or original finishes. Not for home use unless you have proper equipment and experience.
Tip: If you have valuable or antique hardware, avoid sandblasting.

Credit: www.youtube.com
Comparing Paint Removal Methods
Choosing the right method depends on your hardware type, paint, and desired results. Here’s a quick comparison:
| Method | Best For | Pros | Cons |
|---|---|---|---|
| Boiling/Hot Water | Most metal hardware | Simple, cheap, safe | Not for glued or delicate parts |
| Baking Soda/Vinegar | Brass, steel, small items | Eco-friendly, non-toxic | Can dull shiny finishes |
| Chemical Stripper | Thick or stubborn paint | Fast, effective | Fumes, can damage finishes |
| Manual Scraping | Touch-ups, intricate items | Precise, low-cost | Labor-intensive, risk of scratches |
| Heat Gun | Large hardware, thick paint | Quick, no chemicals | Risk of burns, warping |
| Ultrasonic Cleaner | Small, intricate hardware | Gentle, thorough | Requires special device |
| Sandblasting | Industrial, rusted hardware | Very effective | Can destroy details, expensive |
How To Choose The Right Paint Removal Method
Here are some questions to ask before you start:
- What is the hardware made of? Brass, steel, iron, and aluminum can react differently to chemicals or heat.
- How thick is the paint layer? Thin paint may come off with soaking or scraping. Thick paint may need a chemical stripper or heat.
- Is the hardware valuable or antique? For valuable pieces, choose gentle methods and avoid harsh chemicals or abrasive tools.
- Is the hardware detailed or plain? Intricate details are easier to clean with soaking or ultrasonic methods.
- Do you want to restore the original finish? Some methods may dull or scratch surfaces.
If you’re not sure, start with the gentlest method. If it doesn’t work, move to stronger options.
Step-by-step Examples
Let’s look at some real-world scenarios and how to handle them.
Removing Paint From A Brass Door Knob
- Remove the knob from the door.
- Fill a pot with water and add baking soda.
- Simmer the knob for 20–30 minutes.
- Use a brush to scrub away the paint.
- Rinse and dry thoroughly.
- Polish the brass with a soft cloth.
Tip: If paint remains in grooves, repeat the soak or use a toothpick for fine details.
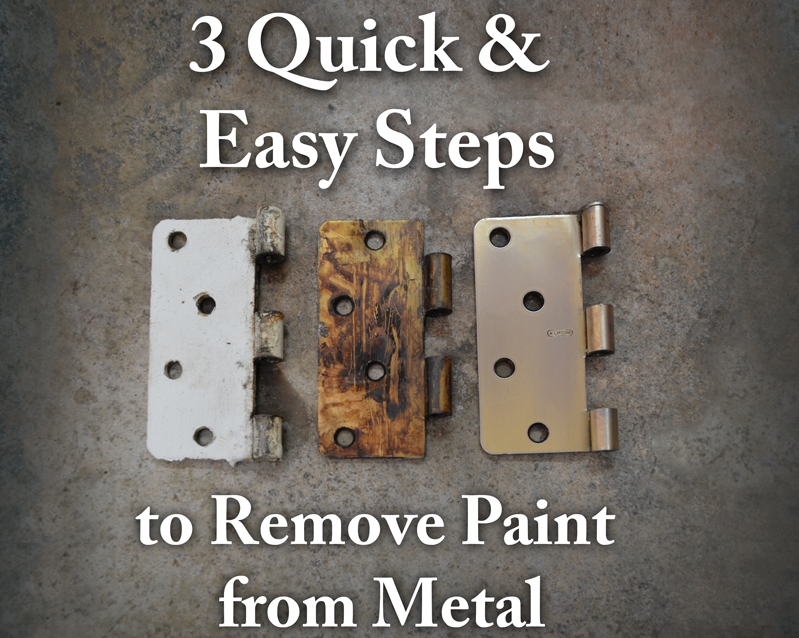
Cleaning Paint From Old Hinges
- Unscrew hinges from the door or frame.
- Soak in a vinegar and water solution for 20 minutes.
- Scrub gently with a toothbrush.
- For stubborn paint, use a fine steel wool pad.
- Rinse and dry.
Tip: If hinges are rusted, add a bit of baking soda to the soak to help lift rust.
Getting Paint Off Screws And Small Parts
- Place screws in a heat-safe glass jar.
- Pour in boiling water and a spoonful of baking soda.
- Let soak for 10–15 minutes.
- Shake the jar gently to help loosen paint.
- Pour out water and rinse screws.
- Use a wire brush to clean grooves.
Tip: A magnetic tray helps keep screws from rolling away during cleaning.
Restoring Antique Drawer Pulls
- Check for glued or delicate details. Avoid boiling if present.
- Use a gel-based professional paint remover.
- Apply with a brush, wait as directed.
- Gently brush away softened paint.
- Rinse in warm soapy water and dry.
- Polish with a cloth and brass polish if needed.
Tip: For valuable antiques, consult a restoration expert before using chemicals.
Essential Tools And Supplies
Having the right tools makes paint removal easier and safer. Here’s a checklist:
- Large pot (not for food use)
- Baking soda or vinegar
- Mild dish soap
- Old toothbrush or stiff brush
- Plastic scraper or putty knife
- Rubber gloves
- Safety glasses
- Disposable tray or old newspaper
- Fine steel wool
- Professional paint remover (if needed)
- Ultrasonic cleaner (optional)
- Heat gun (for tough jobs)
- Magnetic tray (for small parts)
Investing in a few key tools can save time and protect your hardware.
Safety Tips For Removing Paint From Hardware
Paint removal can be messy and sometimes dangerous. Follow these safety tips:
- Always wear gloves to protect your skin from chemicals and hot water.
- Use eye protection when scrubbing or using chemicals.
- Work in a well-ventilated area to avoid breathing fumes.
- Keep children and pets away from the work area.
- Test for lead paint if working with old hardware.
- Dispose of paint and chemicals properly, following local rules.
If you feel dizzy, get a headache, or have skin irritation, stop and get fresh air.
How To Restore Hardware After Paint Removal
Once the paint is gone, you may want to restore the hardware’s original look.
- Polish metal surfaces using a metal polish or a homemade solution (like a paste of baking soda and water).
- Buff with a soft cloth to bring back shine.
- Apply a protective coating (like wax or clear lacquer) to prevent tarnish, especially for brass or copper.
- Lubricate moving parts (like hinges) with a drop of oil.
- Check for damage or wear before reinstalling.
Restoring the finish can make old hardware look like new.
Credit: www.azdiyguy.com
Mistakes To Avoid When Removing Paint From Hardware
Even experienced DIYers make mistakes. Here’s how to avoid common problems:
- Using harsh chemicals on delicate finishes. Always test on a small area first.
- Scratching surfaces with metal tools. Use plastic scrapers and soft brushes.
- Overheating with a heat gun. This can warp or discolor metal.
- Soaking hardware with non-metal parts. Heat and chemicals can ruin plastic, wood, or glued pieces.
- Forgetting to label hardware. It’s easy to mix up screws or handles during a big project.
- Skipping safety gear. Gloves and goggles are essential.
- Rushing the process. Take your time for best results.
Cleaning And Maintenance After Paint Removal
Once hardware is clean, regular maintenance helps keep it looking good.
- Dust regularly with a soft cloth.
- Avoid harsh cleaners that can dull the finish.
- Reapply polish or wax every few months for protection.
- Check screws and moving parts for tightness after reinstalling.
- Store unused hardware in a dry place to prevent rust.
A little care goes a long way to keep your hardware shining.
When To Replace Hardware Instead
Sometimes, paint removal isn’t enough. Here’s when to consider replacing hardware:
- Severe rust or corrosion that can’t be cleaned.
- Broken or bent parts that don’t work properly.
- Missing details or heavy wear, especially on decorative pieces.
- Non-matching hardware if you want a new look.
If the hardware is valuable or historic, consider professional restoration instead of replacement.
Eco-friendly Paint Removal Options
Many people want to avoid harsh chemicals. Here are greener choices:
- Baking soda and vinegar soaking – Safe, cheap, and effective for light to medium paint.
- Citrus-based paint removers – Biodegradable and less toxic than traditional strippers.
- Manual scraping and brushing – Uses no chemicals, but takes more effort.
- Ultrasonic cleaning – Uses water and mild detergent.
These options are safer for your home and the environment.
Troubleshooting Common Paint Removal Problems
Some paint won’t come off easily. Here’s what to do:
- Paint remains after soaking: Repeat the process, or try a stronger method.
- Stubborn paint in grooves: Use a toothpick, dental pick, or old toothbrush.
- Cloudy or dull finish: Polish with a metal cleaner or a baking soda paste.
- Rust appears after removal: Soak in vinegar for a few minutes, scrub gently, and dry completely.
- Sticky residue: Wash with dish soap and water, or wipe with a little rubbing alcohol.
Don’t force paint off with sharp tools. Patience gives better results.
Cost Comparison: Diy Vs Professional Services
Is it worth doing it yourself, or should you hire a pro? Here’s a cost overview:
| Method | Estimated Cost | Time Required | Skill Level |
|---|---|---|---|
| DIY Boiling/Baking Soda | $0–$10 | 1–2 hours | Beginner |
| Chemical Stripper | $10–$30 | 1–3 hours | Intermediate |
| Ultrasonic Cleaner | $50–$150 (one-time) | 1 hour | Beginner |
| Professional Service | $50–$200+ per project | 1–3 days | Expert |
DIY methods are usually much cheaper, especially for small projects. Professional restoration is best for valuable or historic items.
Two Non-obvious Insights Most Beginners Miss
- Soaking hardware overnight in a baking soda solution can loosen even the oldest, thickest paint. Beginners often rush the process, but patience pays off—longer soaking means less scrubbing and less risk of scratching the hardware.
- Labeling each piece of hardware (and its screws) when removing them saves hours during reassembly. Many people skip this step and mix up parts, especially with doors and cabinets that look similar. Use a marker and small bags to keep everything organized.
Frequently Asked Questions
What Is The Safest Way To Get Paint Off Hardware?
The safest method is to soak hardware in hot water with baking soda or use a vinegar solution. These are gentle, non-toxic, and effective for most metals. Always wear gloves and work in a ventilated area. Avoid harsh chemicals for valuable or delicate pieces.
How Can I Tell If My Hardware Is Brass Or Just Brass-plated?
Solid brass hardware is heavier and won’t be magnetic. Hold a magnet to the piece; if it sticks, it’s likely brass-plated steel. Brass-plated items can be damaged by harsh chemicals or scrubbing, so use gentle methods like soaking and brushing.
Can I Remove Paint From Hardware Without Taking It Off The Door Or Cabinet?
Yes, but it’s much harder. Use a gel paint stripper and apply carefully with a brush. Protect surrounding surfaces with painter’s tape and plastic. Scrape off paint gently, and wipe clean with a damp cloth. Removing hardware gives better results and is less messy.
What Should I Do If I Suspect The Paint Is Lead-based?
Stop and test for lead with a lead test kit. Lead paint is dangerous, especially when sanding or stripping. If positive, follow EPA guidelines and consider hiring a certified professional. Always wear gloves, a mask, and work in a ventilated area.
How Can I Restore Shine To Hardware After Removing Paint?
Polish metal hardware with a metal polish or a homemade paste (baking soda and water). Buff with a soft cloth until shiny. For extra protection, apply a thin coat of clear wax or lacquer.
Getting paint off hardware doesn’t have to be stressful or expensive. With the right tools, methods, and patience, you can restore almost any piece to its original beauty. Whether you’re tackling a single door knob or a house full of hardware, these tips will help you get the job done safely and effectively.