Grinding a concrete floor may sound simple, but it is a task that requires patience, planning, and the right approach. Whether you want to prepare a floor for coating, remove old paint, or create a smooth, glossy surface, knowing how to grind concrete properly makes a big difference.
Many people think you just need a machine and some time, but there are details that beginners often miss—details that can affect the result, safety, and even the lifespan of your floor.
If you are new to this, or if you want to improve your results, this guide gives you practical, easy-to-understand advice. Here, you will learn about the tools you need, how to choose the right grinding method, how to avoid common mistakes, and tips that even some professionals forget.
By the end, you will have the confidence and knowledge to grind a concrete floor effectively.
Why Grind A Concrete Floor?
People grind concrete floors for several reasons. The most common are:
- Surface Preparation: Before applying paint, epoxy, or another coating, the floor must be clean and smooth.
- Smoothing Uneven Floors: Old or poorly poured concrete may be rough or have high spots.
- Removing Coatings: Paint, glue, or other materials can leave residues that must be removed.
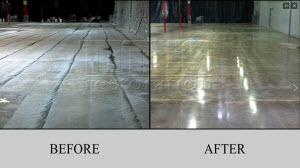
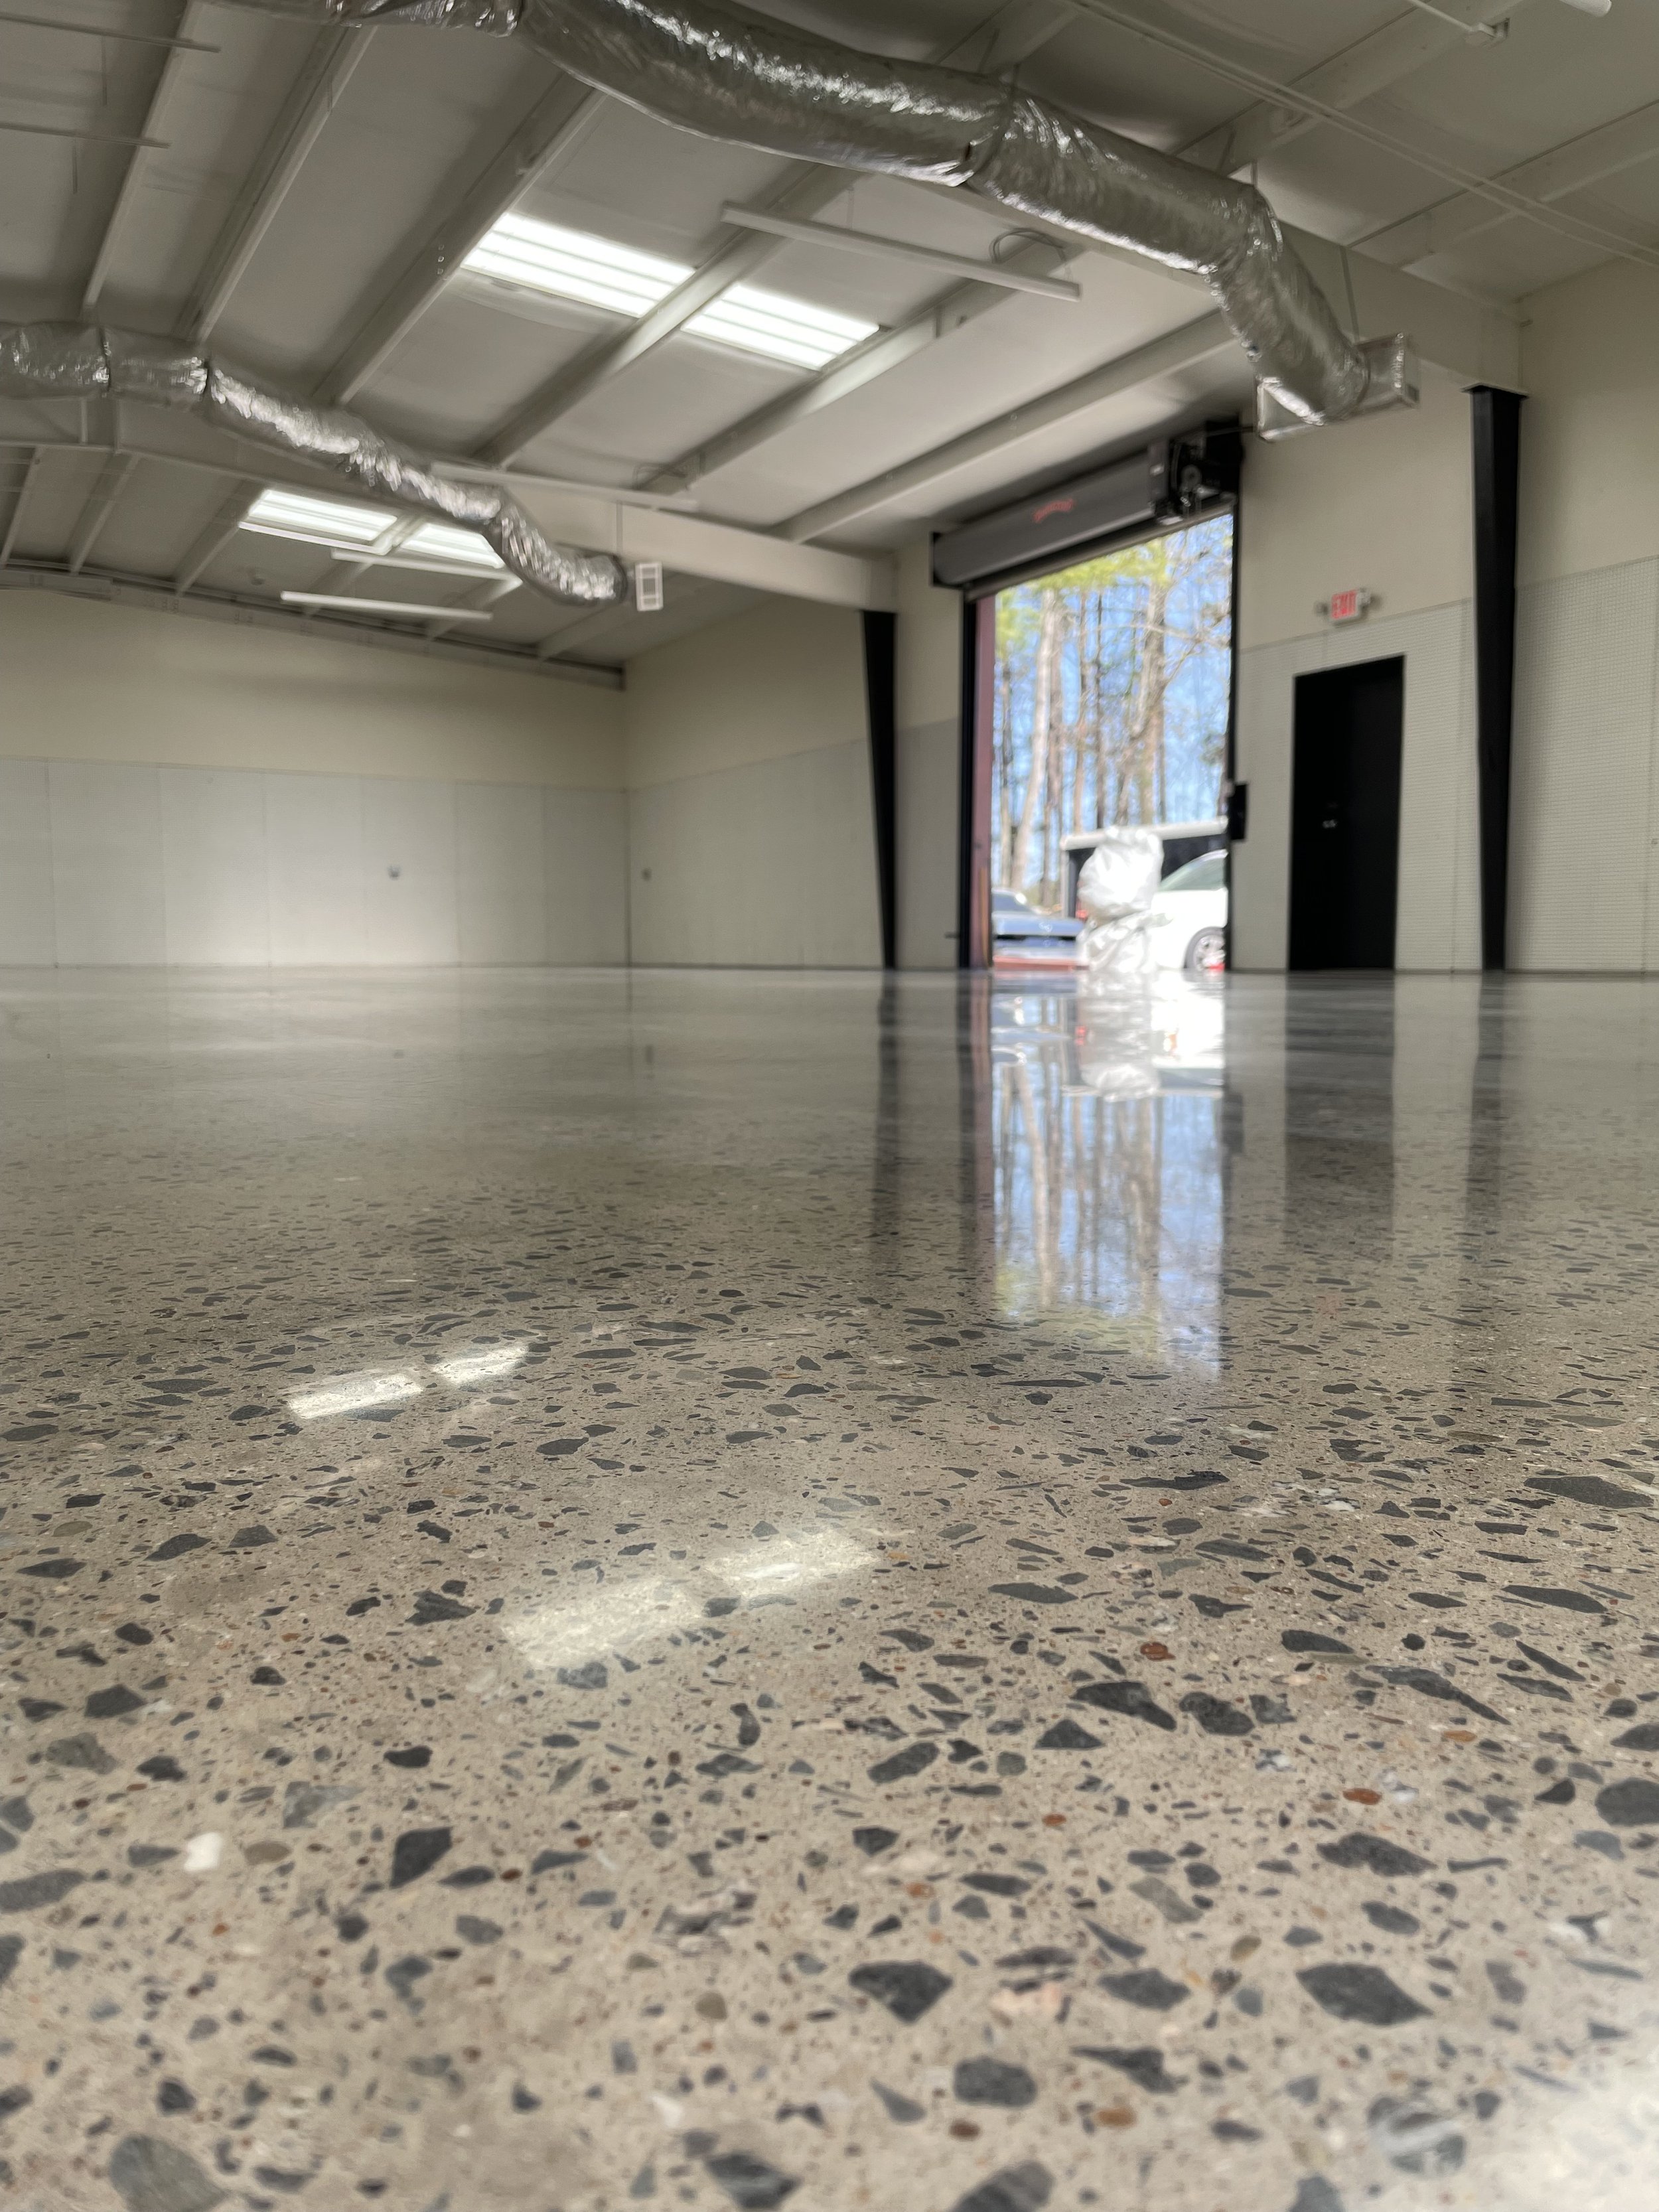
- Polishing: For a shiny, reflective finish, grinding is the first step before polishing.
Besides these, grinding helps expose the aggregate (small stones) in concrete for a decorative look. Some floors need grinding to meet safety requirements, such as reducing slip hazards.
Safety Precautions
Before you begin, safety comes first. Grinding concrete creates dust, noise, and flying debris. Injuries can happen if you ignore the basics.
- Wear Safety Gear: Always use safety glasses, a dust mask or respirator, hearing protection, gloves, and steel-toe boots.
- Ventilation: Grinding produces fine dust. Work in a well-ventilated area or use dust extraction equipment.
- Check for Hazards: Look for nails, electrical wires, or loose materials on the floor.
- Electricity: Use machines with proper grounding. Avoid wet grinding with machines not rated for water.
- Ergonomics: Grinding can be hard on your back and arms. Use a machine that fits your height, and take breaks.
Never skip safety steps. A few minutes of preparation can prevent accidents and long-term health problems.
Understanding Concrete Grinding: Basic Concepts
Concrete is a mix of cement, sand, water, and aggregate (small rocks). Over time, the surface can become rough, stained, or uneven. Grinding removes a thin layer from the top, creating a new, smooth surface.
The grinding process uses abrasive tools—usually diamond-tipped discs—that wear away the concrete. The coarseness of the tool (called “grit”) controls how much material is removed and how smooth the surface becomes.
- Coarse Grit (16–30): Removes lots of material quickly; good for leveling or removing coatings.
- Medium Grit (40–80): Smooths the floor after initial grinding.
- Fine Grit (100–400): Used for polishing and fine finishing.
Grinding is not the same as polishing. Polishing uses much finer grits and sometimes chemicals to create a glossy, reflective surface.
Essential Tools And Equipment
Choosing the right equipment is crucial. The tools you need depend on the size of your floor and your goals.
Floor Grinders
There are two main types:
- Handheld Grinders: Small, portable, good for edges, corners, and small areas.
- Walk-Behind Grinders: Larger, faster, and more powerful; best for big surfaces.
Grinding Discs
Grinding discs (also called wheels or pads) come in different materials and grit levels. For concrete, diamond discs are most effective.
Other Tools And Supplies
- Vacuum/Dust Extractor: Reduces dust, protects health, and keeps the area clean.
- Extension Cords: Heavy-duty, rated for the grinder.
- Buckets and Water (for wet grinding): Wet grinding reduces dust and cools the tool.
- Brooms and Mops: For cleaning before and after grinding.
Optional Tools
- Edge Grinders: Special machines for grinding near walls or obstacles.
- Scarifiers or Shot Blasters: For heavy-duty removal of thick coatings.
Here’s a quick comparison of main grinder types:
| Type | Best For | Coverage (sq ft/hr) | Typical Power |
|---|---|---|---|
| Handheld Grinder | Edges, corners, small repairs | 10–30 | 1–3 HP |
| Walk-Behind Grinder | Large open areas | 200–500 | 5–15 HP |
| Edge Grinder | Walls, tight spots | 10–20 | 1–2 HP |
.jpg?width=700&height=525&name=OF%20Training%201%20(2).jpg)
Credit: blog.onfloor.com
Choosing The Right Grinding Method
There are two main methods for grinding concrete: dry grinding and wet grinding. Each has advantages and disadvantages.
Dry Grinding
- Pros: Easier setup, faster for small jobs, no need for water.
- Cons: Creates lots of dust; needs a powerful vacuum.
Wet Grinding
- Pros: Less dust, cooler tools, better for large jobs.
- Cons: Messy cleanup, risk of slips, not all machines are water-safe.
Most professionals use dry grinding with dust control systems. However, wet grinding is sometimes better for polishing or when working indoors where dust is a bigger problem.
Step-by-step Process: How To Grind A Concrete Floor
Grinding a concrete floor involves several key steps. Skipping or rushing any of these can cause poor results or damage.
1. Inspect And Prepare The Area
Clear the room completely. Remove furniture, carpets, and any obstacles. Inspect the floor for nails, screws, or objects that can damage the grinder. Fill cracks or holes if needed, or mark them for attention later.
2. Clean The Surface
Sweep and vacuum the floor to remove dirt, dust, and debris. Leftover materials can get caught in the grinder and scratch the surface.
3. Choose The Starting Grit
Begin with a coarse grit if you need to remove a lot of material or coatings. For a floor that just needs smoothing, start with a medium grit.
4. Set Up The Grinder
Install the correct grinding disc on your machine. Make sure all bolts are tight and the machine is in good working order. Connect your vacuum if you are dry grinding, or set up water for wet grinding.
5. Start Grinding
- Begin in one corner of the room.
- Move the grinder in overlapping passes, like mowing a lawn.
- Do not press down hard; let the machine’s weight do the work.
- Keep moving to avoid creating low spots.
6. Check Progress
After the first pass, vacuum or rinse the floor. Inspect the surface for uniformity. Look for missed spots, high areas, or leftover coatings.
7. Repeat With Finer Grits
After the initial grinding, switch to a finer grit disc. Repeat the process, making sure each pass removes the scratches from the previous grit.
8. Edge Work
Use a handheld or edge grinder to reach areas near walls or in corners. Try to blend these areas with the main floor for a consistent finish.
9. Final Cleaning
Clean the floor thoroughly after grinding. Remove dust or slurry (if wet grinding). A clean surface is essential for coatings or sealers.
10. Apply Sealer Or Coating (optional)
If you are finishing the floor, wait for it to dry completely. Then apply your chosen sealer, paint, or epoxy according to the manufacturer’s instructions.
Tips For Better Results
Here are some expert tips that many beginners miss:
- Test a Small Area First: Not all concrete is the same. Test your grinder and disc on a small spot to see how quickly it removes material.
- Change Discs as Needed: Grinding discs wear out. If progress slows, check the disc and replace it if needed.
- Overlap Passes: Always overlap your grinding paths by about a third. This ensures an even surface.
- Watch for Dust: If you see a lot of dust escaping, check your vacuum or water system.
- Keep the Machine Moving: Stopping in one spot can create a dip that’s hard to fix.
- Keep Track of Grit Progression: Write down which grits you’ve used so you don’t repeat or skip steps.
Common Mistakes To Avoid
Grinding concrete may seem simple, but many people make mistakes that cost time and money.
- Skipping Grit Steps: Jumping from coarse to fine grit leaves scratches that are hard to fix.
- Using the Wrong Disc: Not all discs are made for concrete. Using the wrong type can damage your floor or tool.
- Ignoring Edge Work: Failing to grind edges makes the finish look uneven.
- Grinding Too Fast: Rushing creates swirl marks or missed spots.
- Not Checking for Flatness: Use a straight edge to check for high or low spots after grinding.
- Poor Dust Control: Breathing concrete dust is dangerous. Always use dust extraction or water.
- Not Letting the Floor Dry: If you use water, let the floor dry before applying coatings.
- Neglecting Machine Maintenance: Dull discs or loose parts reduce performance and safety.
When To Call A Professional
Some jobs are best left to experts, especially if:
- The floor has a lot of cracks or damage.
- You need a high-gloss, mirror finish.
- The area is very large (over 1,000 sq ft).
- There are health risks, such as asbestos in old adhesives.
Professionals have access to better machines and can often finish the job faster and safer.
Cost Of Grinding A Concrete Floor
The price of grinding a concrete floor depends on several factors:
- Size of the Floor: Larger floors cost less per square foot.
- Condition of Concrete: Damaged or uneven floors need more work.
- Desired Finish: Polished floors cost more than simple grinding.
- Location: Costs vary by region.
Here’s a comparison of typical costs:
| Finish Type | Average Cost per Sq Ft | Best For |
|---|---|---|
| Basic Grinding | $2–$5 | Surface prep, paint removal |
| Polished Finish | $5–$12 | Showrooms, decorative floors |
| High-Gloss Finish | $8–$15 | Luxury homes, commercial spaces |
DIY can save you money, but be honest about your skill level and the tools you have. Sometimes, renting equipment and doing it yourself is worth it, but in other cases, hiring a professional saves you time and trouble.
Grinding Vs. Other Surface Preparation Methods
You may wonder if grinding is the best choice. Here’s how it compares to other common methods:
- Shot Blasting: Uses small metal beads to clean the surface. Faster for large areas, but can leave a rougher texture.
- Scarifying: Uses rotating blades to cut grooves in the concrete. Removes thick coatings but leaves a coarse finish.
- Chemical Strippers: Dissolve coatings with chemicals. Less dust but can be messy and require extra cleaning.
Grinding offers more control over the final surface smoothness and is suitable for most residential and commercial jobs.
Important Details Beginners Often Miss
Some details are easy to overlook, but they matter:
- Moisture Content: Grinding releases moisture in the concrete. If the floor is damp, wait before applying coatings. Use a moisture meter for accuracy.
- Power Supply: Large grinders use a lot of electricity. Make sure your power supply can handle the load.
- Floor Hardness: Not all concrete is equally hard. Harder floors need more powerful machines and higher-quality discs.
- Curing Time: New concrete should cure for at least 28 days before grinding.
These may seem minor, but ignoring them can lead to peeling coatings, damaged equipment, or wasted effort.
Credit: www.titusrestoration.com
Environmental Considerations
Grinding concrete is not just about the floor. It can affect the environment too.
- Dust Control: Concrete dust contains silica, which is harmful if inhaled. Always use dust collection systems.
- Waste Disposal: Slurry from wet grinding must be disposed of properly. Never pour it down drains.
- Noise: Grinding is loud. Work during acceptable hours and warn neighbors if necessary.
Some companies now use machines with better dust filters to reduce air pollution. Always choose the safest and most responsible method.
Essential Maintenance After Grinding
Once your floor is smooth and clean, taking care of it is important.
- Sealing: Use a good sealer to protect against stains and moisture.
- Regular Cleaning: Sweep and mop regularly to avoid scratches.
- Mat Placement: Place mats at entrances to reduce dirt and grit.
- Inspect Annually: Check for cracks or wear and repair as needed.
A well-maintained concrete floor can last 20 years or more, making your hard work worthwhile.
Credit: www.grindkingsflooring.com
Tools: Buy Or Rent?
You may wonder whether to buy or rent grinding equipment. Here are some points to consider:
- Renting: Good for one-time or small jobs. Costs less upfront but adds up for big projects.
- Buying: Worth it if you plan to grind multiple floors or need custom features.
- Quality: Rental machines are often well-maintained, but check before use.
Here’s a quick comparison:
| Option | Best For | Average Cost per Day |
|---|---|---|
| Renting | DIY, small jobs | $75–$200 |
| Buying | Frequent use, contractors | $1,500–$8,000 (one-time) |
Renting is usually the best choice for beginners, especially if you are not sure about the process or do not need the machine again soon.
How Long Does Grinding Take?
The time needed depends on:
- Floor Size: Larger areas take longer, but big machines can speed up the process.
- Surface Condition: Removing old coatings or deep leveling takes more time.
- Number of Passes: Each grit level requires a separate pass.
On average, grinding 500 square feet takes 4–8 hours with a walk-behind grinder. Edges and corners add extra time. Add more if you need to polish or apply coatings.
Real-world Example
Let’s say you have a 400 sq ft garage with some old paint. You want a smooth, ready-to-paint surface.
- Preparation: 1 hour (moving items, cleaning, inspection)
- Grinding (coarse grit): 2 hours
- Medium grit pass: 1 hour
- Edge grinding: 1 hour
- Final cleaning: 30 minutes
Total: About 5.5 hours (not including drying time or coating).
Useful Resources
If you want to learn more, detailed guides and technical standards are available from the CDC’s NIOSH Concrete Dust Control page. This resource covers health risks and best practices for dust management.
Frequently Asked Questions
What Grit Should I Start With For Grinding Concrete?
Start with a coarse grit (16–30) if you need to remove old paint or level a rough floor. For surfaces that are already smooth, a medium grit (40–80) is usually enough. Always test a small area first.
Is Wet Or Dry Grinding Better For Beginners?
Both methods work, but dry grinding with a good vacuum is usually easier for beginners. Wet grinding creates less dust but can be messy and requires more cleanup. Always check your machine’s instructions.
Can I Grind A Concrete Floor Without Professional Help?
Yes, many people DIY concrete grinding for small projects. Renting a walk-behind grinder and following safety steps makes it possible. For large or complex jobs, hiring a pro is safer and often gives better results.
How Do I Avoid Swirl Marks Or Scratches?
To prevent marks, use the correct grit progression and always overlap your passes. Do not skip grit levels and keep the grinder moving at all times. Inspect the surface between steps.
Do I Need To Seal The Floor After Grinding?
Sealing is not required, but it’s highly recommended. A good sealer protects against stains, dust, and moisture. It also makes cleaning easier and extends the floor’s lifespan.
Grinding a concrete floor may seem challenging at first, but with the right preparation, tools, and patience, you can achieve a smooth, attractive surface that lasts for years. By understanding every part of the process—from safety to finishing touches—you set yourself up for success, whether you are a homeowner or a first-time DIYer.
Take your time, follow best practices, and your floor will reward you with durability and beauty.