Taking apart furniture can look simple at first glance, but many people find it more challenging than they expect. Maybe you’re moving to a new place, selling a large table, or just need to clear space. Whatever your reason, knowing how to disassemble furniture is a practical skill that can save time, money, and headaches. If you do it the right way, you’ll avoid damaging your furniture or hurting yourself. This guide covers everything you need to know, from basic tools to step-by-step instructions for different furniture types. You’ll also learn small tricks that make the process smoother, and get advice on handling special situations people often overlook.
Why Disassemble Furniture?
Disassembling furniture is not just about making things fit through the door. When you take apart large items like beds, desks, or wardrobes, you reduce the risk of scratches, dents, and other damage during moving. It also makes heavy items easier to carry, which protects your back and walls.
If you plan to sell or store your furniture, taking it apart keeps it in better shape. Some moving companies actually require large items to be disassembled before transporting them.
There’s another benefit most people miss: reassembly. When you disassemble carefully, you make it much easier to put things back together. You avoid missing screws, broken pieces, and frustrating guesswork.
Tools And Supplies You’ll Need
Before you start, gather the right tools. Having these ready saves time and prevents mistakes.
- Screwdrivers: Both flat-head and Phillips screwdrivers in different sizes.
- Allen wrenches (hex keys): Many flat-pack items use these.
- Adjustable wrench: For bolts and nuts.
- Pliers: Useful for gripping or turning stubborn pieces.
- Hammer or rubber mallet: Sometimes you need a gentle tap.
- Drill (with screwdriver bits): For fast removal of many screws.
- Utility knife: To cut tape or fabric.
- Ziplock bags or small containers: For screws and small hardware.
- Tape and labels: To mark parts for easy reassembly.
- Blankets or cardboard: Protect floors and furniture surfaces.
- Camera or smartphone: To take photos for reference.
- Measuring tape: Helps check sizes and fit.
Pro tip: Some furniture requires specialty tools—like star-shaped Torx drivers or unique keys. Check the manufacturer’s manual before starting. If you’ve lost the manual, try searching the model name online.
Step-by-step: General Furniture Disassembly Process
While every piece of furniture is a bit different, there is a reliable process to follow. Doing these steps in order will help avoid problems.
1. Clear Your Workspace
Move the furniture away from walls. Clear the area so you have space to work and walk around. Lay down a blanket or cardboard to protect both the furniture and your floors.
2. Remove Any Loose Items
Take out drawers, shelves, cushions, and anything not fixed in place. This makes the furniture lighter and lets you see all the connection points.
3. Photograph Before You Start
Take clear pictures of the furniture from all angles. Snap close-ups of how pieces connect, especially tricky parts. These images will be a lifesaver during reassembly.
4. Label All Parts
As you remove each piece, use tape and a marker to label it. For example, “left side panel” or “top shelf. ” If you have many similar-looking pieces, numbering them helps.
5. Store Hardware Carefully
Place screws, bolts, and other small hardware in separate bags or containers. Label each bag to match the part it came from. Some people tape the bags to the furniture pieces themselves.
6. Work In Logical Order
Start by removing parts that come off easily, like top panels or legs. Always work from the outside in. Leave the main structure for last to keep things stable.
7. Don’t Force Anything
If a part won’t come off, double-check for hidden screws, clips, or fasteners. Forcing can break the furniture or strip screws.
8. Keep Track Of Everything
Make a simple drawing or use your phone to note the order of disassembly. This helps when you put things back together.
9. Stack Parts Safely
Lay pieces flat and out of the way. Don’t pile heavy items on top of delicate ones.
How To Disassemble Common Types Of Furniture
Different furniture types have their own challenges. Here’s how to handle the most common ones.
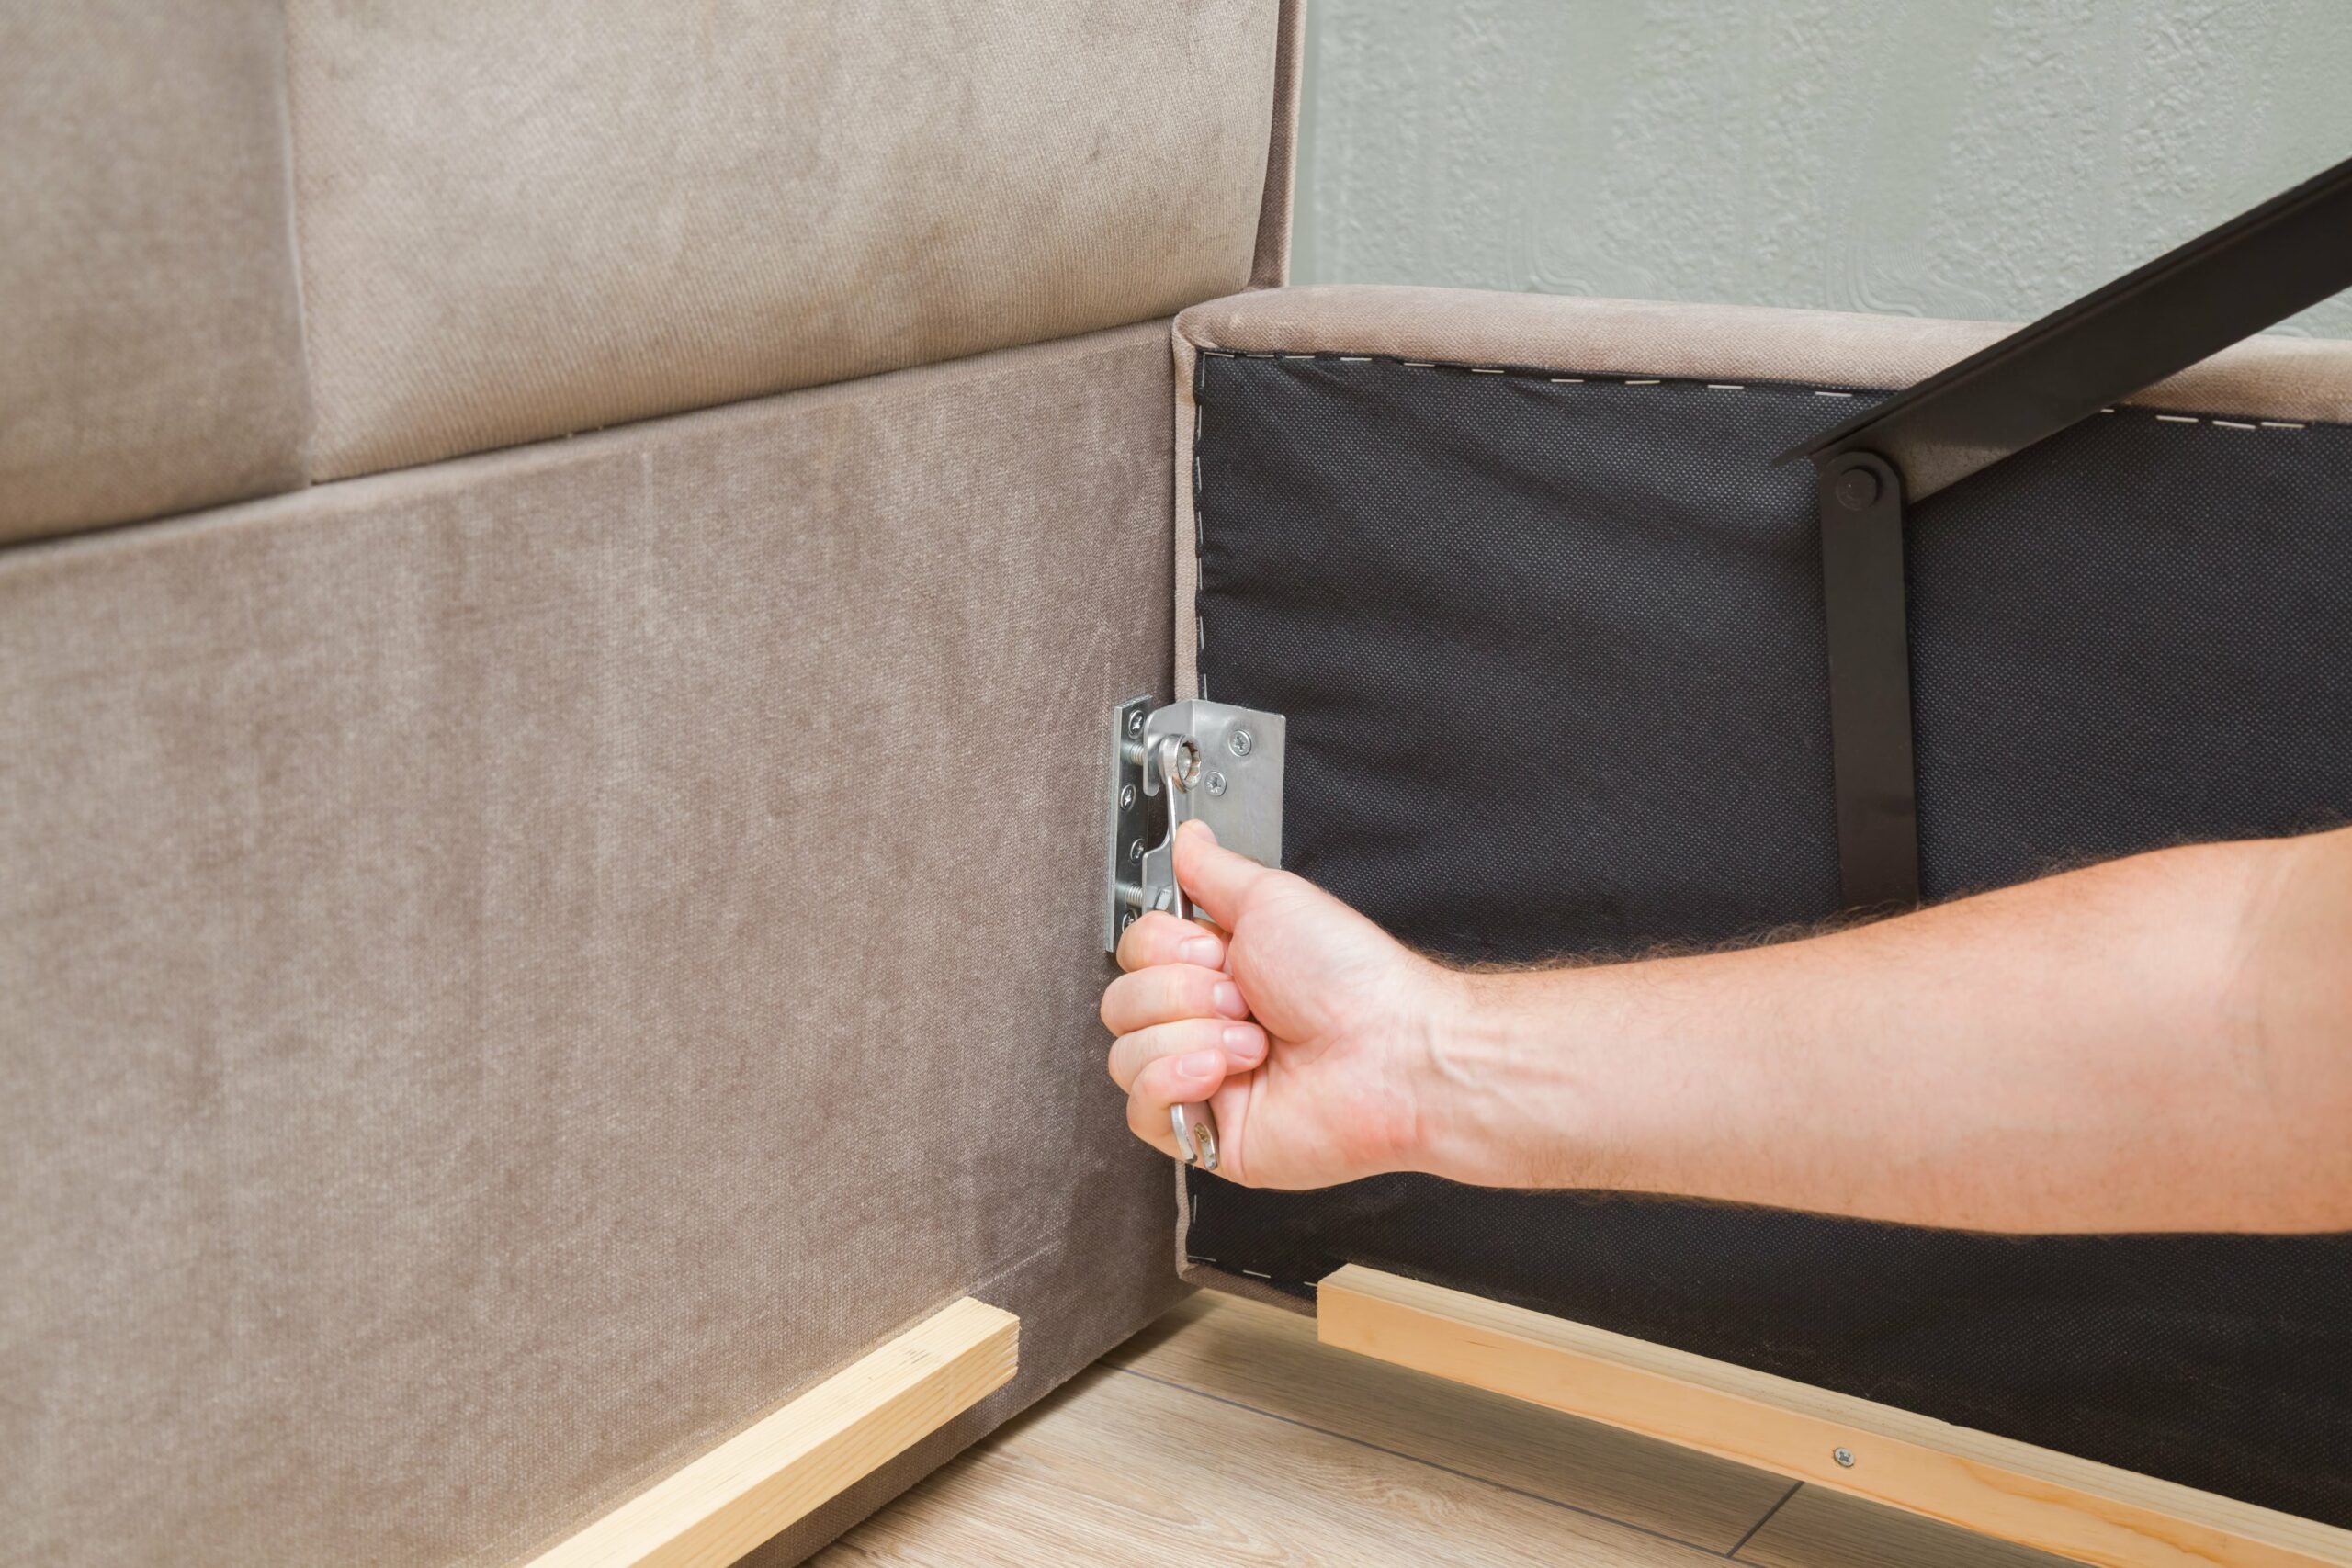
Beds (frames And Headboards)
Most beds are too large to move in one piece. The steps below apply to both metal and wood frames.
- Remove mattress and bedding.
- Take out slats or support boards.
- Unscrew side rails from the headboard and footboard. For some frames, there may be bolts or brackets underneath.
- Keep all bolts and screws in labeled bags.
- For storage beds, remove drawers first.
Non-obvious insight: Some beds have hidden locking pins or plastic caps covering screws. Look closely at joints before pulling.
Sofas And Couches
Many sofas can be partly disassembled to fit through doorways.
- Remove cushions and any decorative pillows.
- Unscrew the legs (most twist off by hand or with a wrench).
- For sectional sofas, disconnect clips or brackets joining sections.
- On some models, you can unscrew the arms or backrest.
Pro tip: If you can’t find screws, check under the fabric flaps or Velcro panels.
Tables (dining, Coffee, Desks)
Tables are usually held together with bolts or screws.
- Turn the table upside down or on its side (protect the top).
- Unscrew the legs from the tabletop. Some may be attached with brackets.
- For extendable tables, remove the leaf first.
Common mistake: Forgetting to support the tabletop while removing the last leg. Ask someone to help hold it steady.
Wardrobes And Cabinets
Large wardrobes are often built in sections.
- Remove doors first by unscrewing hinges.
- Take out shelves and hanging rods.
- Unscrew side panels from the top and base.
- For sliding doors, lift and pull them out of the track.
Non-obvious insight: Many wardrobes use cam locks (round metal fasteners). Use a flat-head screwdriver to unlock them.
Bookcases And Shelving Units
Bookcases may have fixed or adjustable shelves.
- Remove all books and contents.
- Take out adjustable shelves.
- Unscrew the back panel if it’s attached with screws.
- For fixed shelves, check if they are screwed or glued. If glued, don’t force—transport as one piece if possible.
Dressers And Chests
Dressers are heavy because of solid wood and drawers.
- Remove all drawers.
- Unscrew drawer handles and set aside.
- Some dressers have removable legs or top panels—check underneath.
Pro tip: For tall chests, never tip them forward; always lay them flat before removing parts.
Office Chairs
Many office chairs have more parts than you think.
- Remove the base with wheels (usually a single central bolt).
- Take off the armrests (screws underneath).
- For some models, you can remove the backrest as well.
Common mistake: Not releasing the gas lift before pulling the base. Use gentle rocking motion to separate.
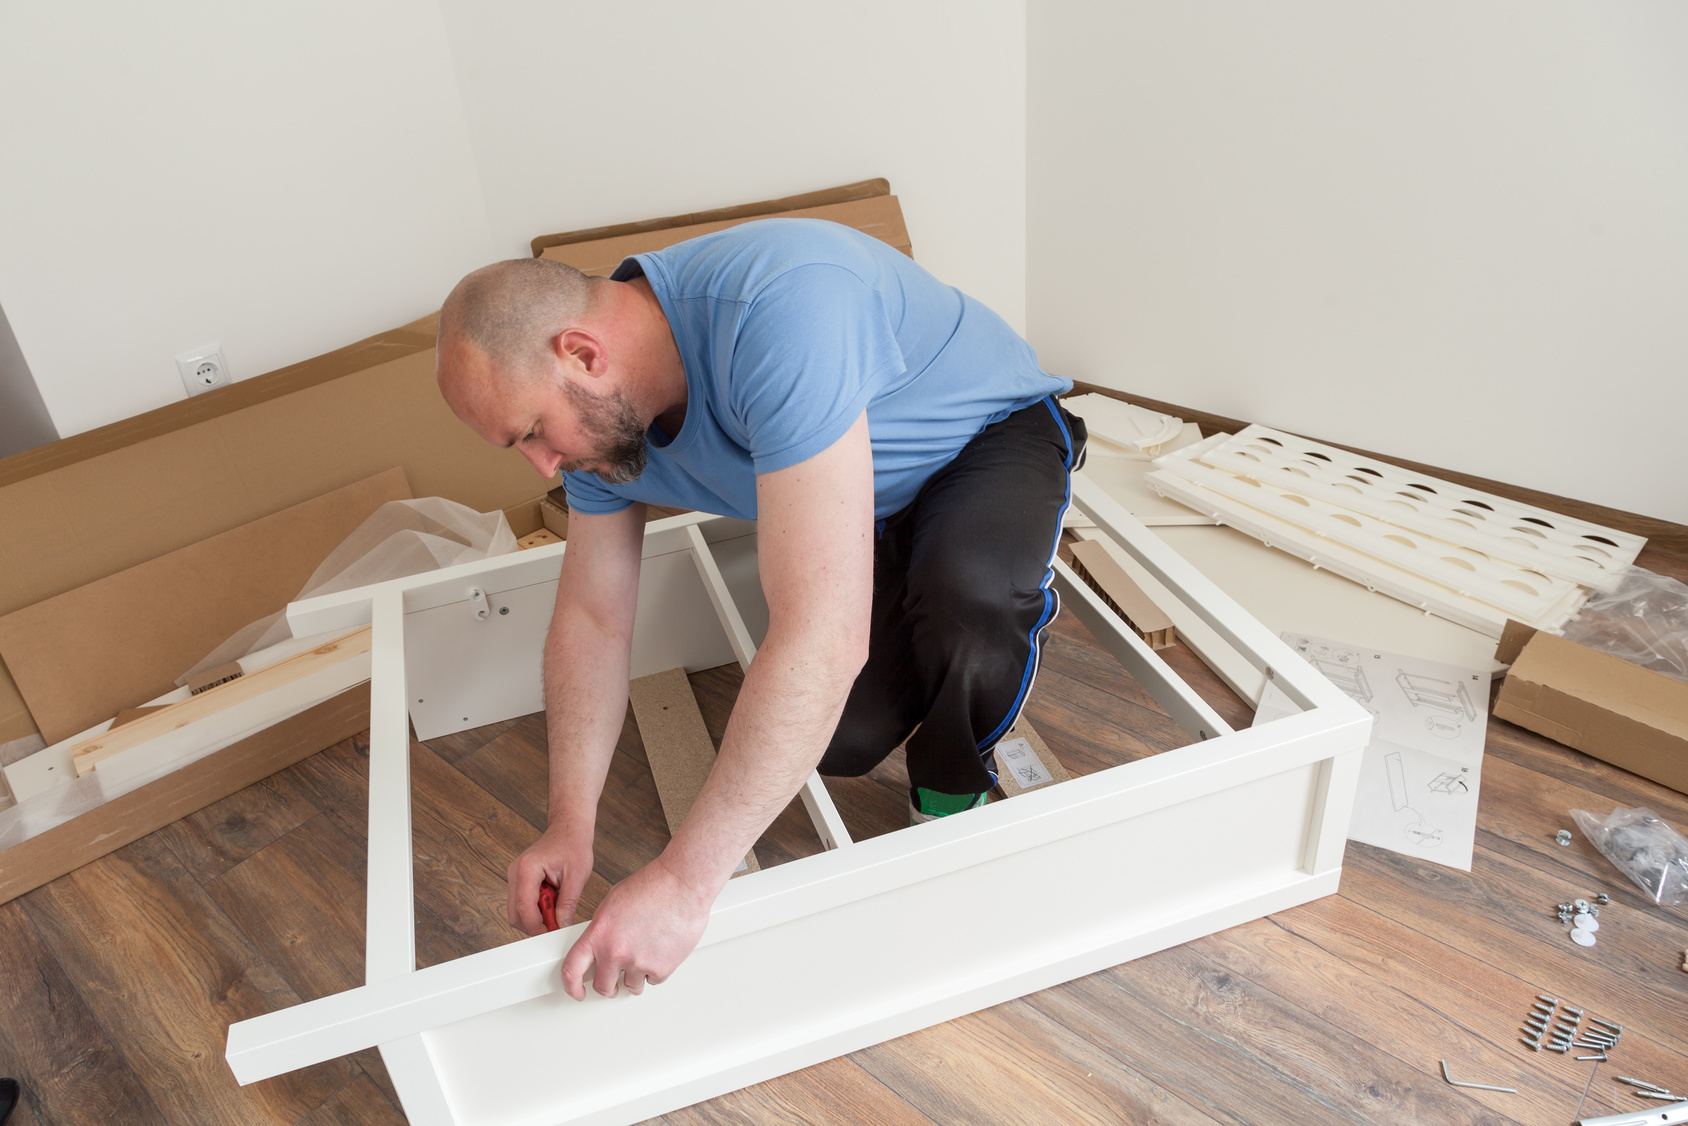
Modular Or Flat-pack Furniture
IKEA and similar brands use special connectors.
- Check for cam locks, dowels, and hidden screws.
- Follow the original assembly manual in reverse if possible.
- Take extra care with particle board, as it chips easily.
Non-obvious insight: If you lost the manual, you can usually find a PDF version on the manufacturer’s website.
Data Comparison: Most Difficult Furniture Types To Disassemble
Some furniture is much harder to take apart than others. Here’s a quick comparison:
| Furniture Type | Difficulty Level (1-5) | Special Challenges |
|---|---|---|
| Modular Wardrobe | 5 | Heavy, many connectors, can collapse if not careful |
| Sofa (Sectional) | 4 | Hidden clips, awkward size |
| Dining Table | 3 | Heavy top, legs may stick |
| Bed Frame | 3 | Hidden fasteners, large panels |
| Office Chair | 2 | Gas lift can be tight |
| Bookcase | 2 | Back panel may be nailed |
Handling Special Furniture Materials
How you disassemble depends on the material. Here’s what to watch for:
Wood
Solid wood is strong but heavy. Particle board can crack if you over-tighten or force screws. Always support pieces so they don’t snap under their own weight.
Metal
Metal frames (beds, shelves, tables) often use bolts. Metal can be sharp—wear gloves to protect your hands.
Glass
Glass shelves and tabletops need extra care. Always lift with two hands and wrap glass in blankets or bubble wrap immediately after removal.
Non-obvious insight: Never stack glass panels together without padding between them. Even small bumps can cause cracks.
Upholstery
For sofas and chairs, fabric can hide fasteners. Look under flaps or zippers for screws. Never cut the fabric unless you plan to reupholster.

Credit: moveadvisor.com
Packing Disassembled Furniture For Transport
Disassembly is only half the battle. Packing each piece well prevents damage.
- Wrap all panels in moving blankets or bubble wrap.
- Bundle hardware with each piece using tape or zip ties.
- Label everything with the room it belongs to and the furniture name.
- Stack carefully so heavy items are on the bottom, and fragile pieces are on top.
- Tape the corners of large panels to prevent chipping.
Pro tip: If you’re using movers, show them your labeled hardware bags and photos. It helps keep everything together.
Reassembly: How To Make It Easy
Many people forget how the furniture went together and get stuck. Here’s how to avoid trouble.
- Lay out all parts and hardware before starting.
- Review your photos and notes.
- Assemble in the reverse order you took it apart.
- Don’t over-tighten screws until everything is lined up.
- If a part doesn’t fit, check for backwards pieces or missing dowels.
Non-obvious insight: Take a break before reassembly if you feel frustrated. Tired hands make more mistakes.
Safety Tips
Disassembling furniture can be physically demanding. Stay safe by following these tips:
- Always lift with your legs, not your back.
- Wear gloves for heavy or sharp-edged pieces.
- Use a friend for large or awkward items.
- Never use power tools without the right bit.
- Keep children and pets away from the work area.
Common Mistakes To Avoid
Even careful people make mistakes. Here are errors to watch for:
- Losing hardware by not labeling bags.
- Forgetting to photograph complex connections.
- Using the wrong tool, which can strip screws.
- Forcing parts that don’t come off easily.
- Skipping the manual—it often has important details.
- Not protecting surfaces, leading to scratches or chips.
- Stacking glass without padding.
Real-life Example: Taking Apart An Ikea Wardrobe
Let’s look at a practical example. Taking apart a large IKEA wardrobe (like the PAX series) is a common real-life challenge.
- Start by emptying the wardrobe and removing all shelves and drawers.
- Take off the doors by unscrewing the hinges—have someone hold the door while you unscrew.
- Remove the clothing rod.
- Unscrew side panels from the top and bottom.
- Watch for cam locks—use a flat-head screwdriver to twist and unlock them.
- Lay each panel flat and wrap with a blanket.
Pro tip: If you plan to rebuild later, keep the assembly manual and all hardware together.
Table: Time Needed To Disassemble Different Furniture Types
How long will it take? Here’s a comparison, assuming two people working together.
| Furniture Type | Average Disassembly Time | Skill Level Needed |
|---|---|---|
| Bed Frame | 20–40 minutes | Beginner |
| Wardrobe | 45–90 minutes | Intermediate |
| Sofa | 30–60 minutes | Beginner |
| Dining Table | 15–30 minutes | Beginner |
| Office Chair | 10–20 minutes | Beginner |
| Bookcase | 15–25 minutes | Beginner |
| Large Modular Unit | 60–120 minutes | Advanced |
Credit: sofamover.com
When To Call A Professional
Some situations are best left to experts:
- Antique or valuable furniture that can be damaged easily.
- Built-in units attached to walls or floors.
- Pianos, pool tables, or heavy safes.
- If you lack the right tools or physical strength.
Professionals have experience and the right equipment. They’re insured, so if something breaks, it’s covered.
Environmental Tips: Reuse And Recycling
If you’re getting rid of furniture, think green. Many materials can be recycled. Metal frames and solid wood are usually accepted at recycling centers. Old particle board is harder to recycle, but some cities have special programs. You can also donate usable furniture to charities or sell it online.
For more about recycling furniture, check the Wikipedia: Furniture recycling page.
Table: Where To Donate Or Dispose Of Old Furniture
You have options for what to do with old furniture after disassembly.
| Option | Best For | Notes |
|---|---|---|
| Charity thrift stores | Usable, clean items | Check donation guidelines first |
| City recycling center | Metal, wood, particle board | May need to separate materials |
| Online marketplaces | Good condition pieces | List parts or whole sets |
| Bulk waste pickup | Damaged or unusable items | Check city rules for pickup days |
Frequently Asked Questions
How Do I Know If My Furniture Can Be Disassembled?
Most modern furniture, especially flat-pack or modular items, is designed to come apart. Look for visible screws, bolts, or connectors. If you don’t see any, check the manual or search for the model online. Antique or handmade pieces may be glued or nailed and are harder to take apart without damage.
What Should I Do If I Lose A Screw Or Small Hardware Piece?
Try to keep all hardware in labeled bags, but if you lose something, take the part to a hardware store. Most screws and bolts are standard sizes. Some furniture brands sell replacement hardware sets. If you can’t find a match, contact the manufacturer.
Is It Safe To Move Furniture Without Disassembling It?
Sometimes, yes—small or sturdy items like nightstands or small chairs can be moved whole. For large, heavy, or delicate furniture, disassembly is safer. It reduces the chance of damage to the furniture, your walls, and your back.
Can I Put My Furniture Back Together Without The Manual?
Yes, if you took photos and labeled all parts during disassembly. Most furniture can be reassembled by reversing the steps. Manuals help with tricky parts, so try to download a PDF if you lost yours. Check the manufacturer’s website for support.
What’s The Best Way To Transport Glass Panels Or Shelves?
Wrap each glass panel in a moving blanket or several layers of bubble wrap. Never stack glass directly on glass—use cardboard or thick padding between each piece. Transport them upright if possible, not flat, to reduce stress and risk of breakage.
Disassembling furniture may sound complex, but with the right tools, a careful plan, and some patience, you can do it safely and efficiently. Remember to stay organized, label everything, and take your time. By following these steps, you’ll protect your furniture, your home, and your peace of mind—making your next move or project much smoother.
Credit: www.optimove.com.au