Spray painting can give you a smooth, professional finish, but many people struggle with thick or sticky paint that doesn’t flow well through a paint sprayer. If you’ve ever faced clogged nozzles, uneven coats, or a spitting spray, you know how frustrating it can be. Learning how to dilute paint for sprayer use is a simple skill that makes a huge difference. With the right thinning, your sprayer can deliver a flawless finish—saving you time, paint, and patience.
This guide will walk you through everything you need to know about thinning paint for all kinds of sprayers. You’ll learn how to choose the right thinner, measure properly, avoid common mistakes, and adjust for different paint types and projects.
Whether you’re painting walls, cabinets, fences, or furniture, you’ll gain confidence and get better results.
Why Diluting Paint Matters
Most paints are made for brushing or rolling, not spraying. They are thick to help cover surfaces well, but this thickness can cause issues in a paint sprayer. If you use paint directly from the can, it can:
- Clog the sprayer nozzle
- Cause splattering or spitting
- Lead to uneven coverage
- Make the finish rough or bumpy
By diluting paint for sprayer use, you make the paint flow smoothly. This helps create even coats and a cleaner finish, especially on large or detailed surfaces. Proper dilution also helps you use less paint, as the sprayer atomizes the paint better.
Understanding Different Types Of Paint
Not all paints are the same, and each type needs a different approach when thinning. The three main types used for spraying are latex, acrylic, and oil-based paints.
Latex Paint
Latex paint is water-based and commonly used for walls, ceilings, and large surfaces. It dries fast and cleans up easily with water. However, it is usually too thick for sprayers and must be thinned with water.
Acrylic Paint
Acrylic paint is also water-based but has more plastic polymers, making it durable and flexible. It’s popular for furniture, crafts, and exterior projects. Like latex paint, it usually needs water for thinning.
Oil-based Paint
Oil-based paint uses mineral spirits or turpentine as a base. It is thicker and takes longer to dry, but gives a strong, glossy finish. You can’t thin it with water; you need solvents like mineral spirits or turpentine.
Specialty Paints
Some paints, like chalk paint, enamel, or lacquer, have special formulas. Always check the can for the manufacturer’s recommended thinner and dilution ratio.
How Paint Sprayers Work
Paint sprayers use pressure to break paint into fine droplets, spraying a mist onto the surface. There are three main kinds of sprayers:
- Airless sprayers: Use a pump to push paint out at high pressure. Great for large surfaces and thick paints.
- HVLP (High Volume Low Pressure) sprayers: Use air to atomize paint. Best for detail work and thinner paints.
- Compressed air sprayers: Use an air compressor. Good for smooth finishes on furniture or cars.
The type of sprayer affects how much you need to thin your paint. Airless sprayers can handle thicker paint, while HVLP and compressed air sprayers need thinner paint for a fine mist.
Choosing The Right Thinner
The best thinner depends on your paint type:
- Latex and acrylic paints: Use clean water.
- Oil-based paints: Use mineral spirits or turpentine.
- Lacquer: Use lacquer thinner.
- Enamel: Use the solvent recommended on the can.
Don’t use gasoline, acetone, or unknown chemicals. They can ruin the paint, damage your sprayer, and release dangerous fumes.
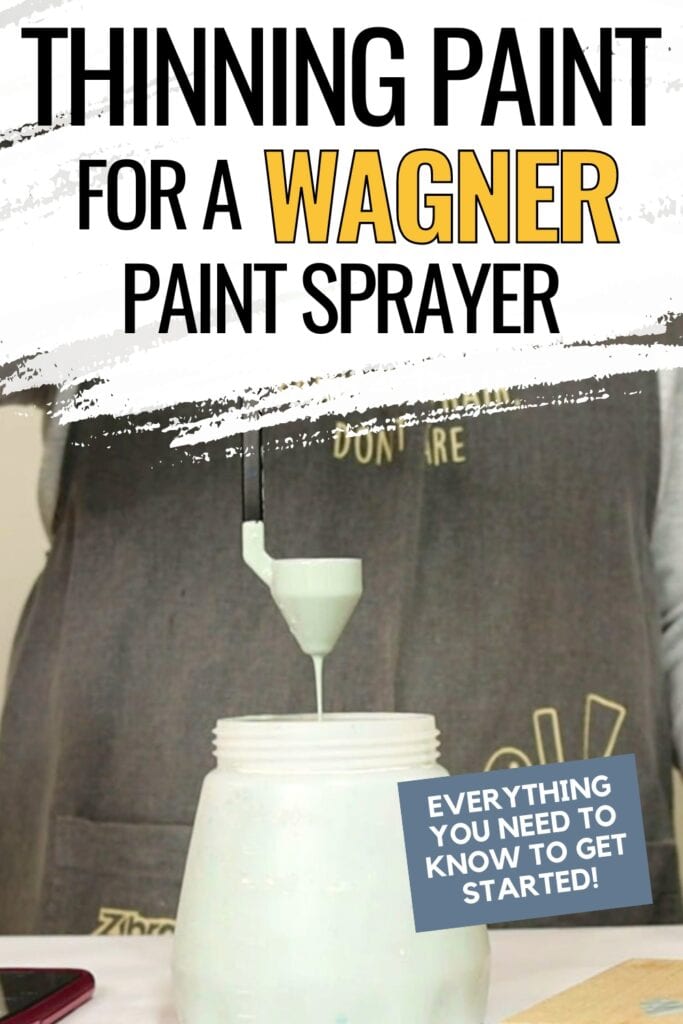
How To Dilute Paint For Sprayer: Step-by-step Guide
Getting the right consistency is essential. Follow these steps for the best results.
1. Gather Your Supplies
You’ll need:
- Paint
- Correct thinner (water, mineral spirits, etc.)
- Measuring cup or container
- Stir stick
- Funnel
- Strainer (optional but helpful)
- Test surface (cardboard or scrap wood)
- Sprayer manual
2. Read The Paint Can And Sprayer Manual
Manufacturers often list recommended thinning ratios. For example, latex paint might say “add up to 10% water. ” Your sprayer manual may also have advice for maximum viscosity or thinning limits. Always start here.
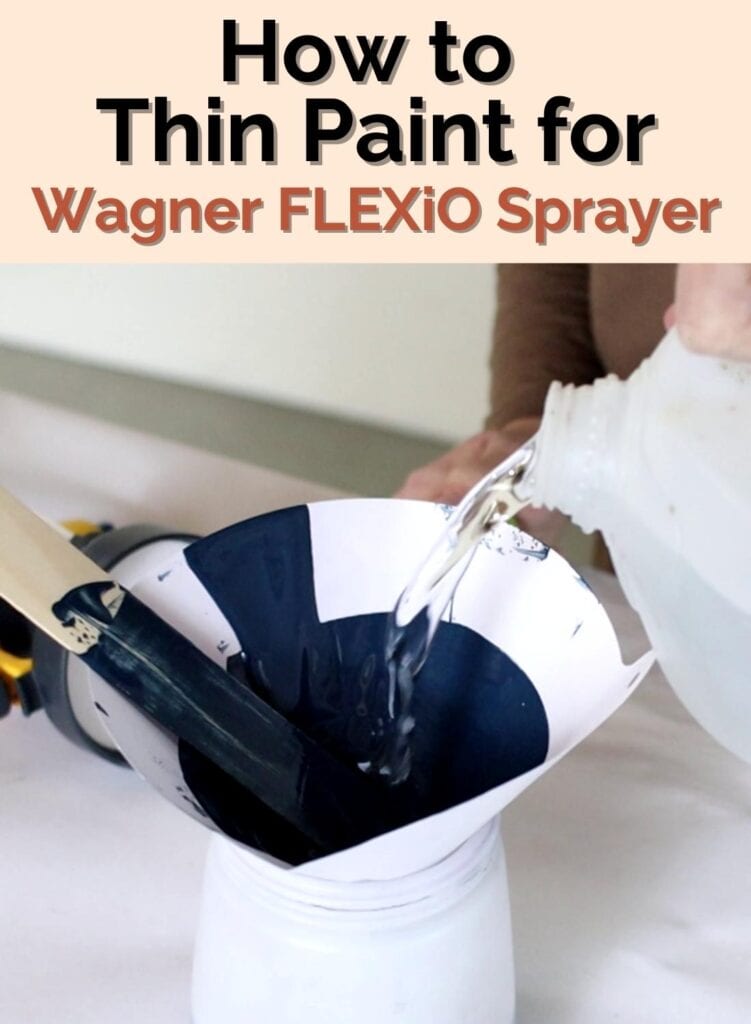
3. Mix The Paint
- Pour the paint into a clean bucket.
- If the paint is old or lumpy, strain it first.
- Add a small amount of thinner—start with 5-10% of the paint volume.
- For example, for 1 gallon (128 oz) of latex paint, add 6–13 oz of water.
- Stir slowly and thoroughly for at least 2 minutes.
4. Test The Consistency
- Dip a stir stick into the paint, then lift it out and let the paint drip.
- It should flow in a steady stream, not thick globs.
- If it’s still too thick, add a little more thinner (a few ounces at a time) and mix again.
5. Strain The Paint
Run the thinned paint through a paint strainer or fine mesh. This removes clumps that could clog your sprayer nozzle.
6. Test Spray
Pour some paint into the sprayer. Spray on a test surface. Check for:
- Even, fine mist
- No spitting or clogging
- Smooth, even coverage
If the paint spits, clogs, or leaves a rough finish, repeat steps 3–6, adding thinner slowly.
7. Adjust As Needed
Sometimes you need to tweak the paint or sprayer settings:
- If the paint runs or drips, it’s too thin—add a little more paint.
- If the spray is uneven or the nozzle clogs, add a bit more thinner.
8. Record Your Ratios
Write down the exact ratio that worked. This will help you repeat your success on future projects.
Common Thinning Ratios For Paint Types
Here’s a quick reference for starting ratios. Always check the paint can and adjust as needed.
| Paint Type | Common Thinner | Starting Ratio | Notes |
|---|---|---|---|
| Latex | Water | 5-10% water | Start low, add more if needed |
| Acrylic | Water | 5-10% water | Similar to latex |
| Oil-based | Mineral spirits | 5-15% mineral spirits | Mix well, use proper ventilation |
| Enamel | Paint thinner | 10% thinner | Check can instructions |
| Lacquer | Lacquer thinner | As directed on can | Highly flammable, ventilate well |
Credit: arayofsunlight.com
How To Test Paint Consistency Like A Pro
A simple drip test can save you a lot of trouble.
- Stir the paint well.
- Dip a clean stir stick into the paint.
- Lift it and watch the paint drip.
- For spraying, it should drip off in a steady stream, not in thick drops.
- If it holds on the stick or falls in heavy drops, it’s too thick.
- If it runs off like water, it’s too thin.
Another method is to use a viscosity cup (also called a Ford or Zahn cup). This is a small cup with a hole at the bottom. You fill it with paint and time how long it takes to drain. Most sprayer manuals give a recommended “drain time” for the right viscosity.
Adjusting For Different Sprayers
Each sprayer type handles paint differently. Here’s how to adjust your dilution:
Airless Sprayers
- Can handle thicker paint.
- Often need little or no thinning for latex paint.
- If using a small tip, thin the paint 5–10%.
Hvlp Sprayers
- Need thin paint for a fine mist.
- Thin latex or acrylic paint 10–20%.
- For oil-based paint, use the lower end of the range.
Compressed Air Sprayers
- Need smooth, thin paint.
- Thin latex or acrylic paint 15–20%.
- Test and adjust as needed.
How Temperature And Humidity Affect Thinning
Paint flows differently in hot, cold, dry, or humid conditions:
- High temperature: Paint dries faster, may need more thinner.
- Low temperature: Paint thickens, needs less thinner.
- High humidity: Slows drying, so you can use less thinner.
- Low humidity: Paint dries fast, add a bit more thinner.
Always test a small batch before starting your project. Environmental conditions can change how paint sprays and dries.
Diluting Paint For Different Projects
Not all projects need the same dilution. Here’s a guide for common tasks:
Walls And Ceilings
- Use latex or acrylic paint.
- Thin 5–10% for airless sprayer, 10–20% for HVLP.
- Multiple thin coats are better than one thick coat.
Cabinets And Furniture
- Use acrylic or enamel paint for a hard finish.
- Thin 10–15% for a smooth, glassy look.
- Test on a hidden area before spraying the whole piece.
Doors, Trim, And Baseboards
- Use latex or oil-based paint.
- Thin 10–15%.
- Aim for even coverage without drips.
Fences And Exteriors
- Use exterior-grade latex or acrylic.
- Thin 5–10% for airless, 10–15% for HVLP.
- Spray on calm, dry days for best results.
Practical Tips For Best Results
- Mix slowly and thoroughly. Fast mixing creates bubbles.
- Strain your paint every time. Even new paint can have lumps.
- Clean your sprayer after each use. Thinner paint can still leave residue.
- Work in good ventilation. Thinners can create strong fumes.
- Practice first. Test your spray pattern and coverage on scrap material.
Common Mistakes To Avoid
Many beginners run into the same issues. Here’s how to avoid them:
- Adding too much thinner: Makes paint watery and causes drips.
- Not straining paint: Causes clogs and uneven spray.
- Skipping test sprays: Leads to surprises on your project.
- Using the wrong thinner: Can ruin paint or damage your sprayer.
- Ignoring temperature and humidity: Results in poor drying or finish.
How To Clean Up After Spraying
Cleaning up properly keeps your sprayer working and prevents accidents.
For Water-based Paints
- Run clean water through the sprayer until it runs clear.
- Wipe down all surfaces with a damp cloth.
- Let parts dry before storing.
For Oil-based Paints
- Use mineral spirits or paint thinner.
- Clean sprayer parts and run solvent through the system.
- Dispose of used thinner safely—don’t pour down the drain.
Extra Tip
Label your leftover thinned paint with the ratio used. This helps for touch-ups later.
Safety Tips When Using Thinners
- Wear gloves and goggles to protect your skin and eyes.
- Work in a well-ventilated area to avoid inhaling fumes.
- Store thinners safely, away from heat or open flames.
- Dispose of waste according to local regulations.
Real-world Example: Thinning Latex Paint For A Home Project
Imagine you want to spray-paint your living room walls with latex paint and an HVLP sprayer.
- Check the paint can: It says, “Thin with water up to 10%.”
- You’re using 1 gallon (128 oz) of paint.
- Start by adding 10 oz of water (about 8%) and stir well.
- Strain the paint.
- Test spray on cardboard: The pattern is a little thick, so add another 2 oz of water.
- Mix and test again—now it sprays evenly.
- Record your mix: 1 gallon paint, 12 oz water (9.4%).
- Spray the walls in even passes. The finish is smooth and professional.
This approach saves you time, avoids clogs, and gives a consistent result.
Comparison Of Thinner Costs And Performance
Different thinners have different prices and effects on paint performance.
| Thinner Type | Average Price (per gallon) | Best For | Notes |
|---|---|---|---|
| Water | $0.01 | Latex, Acrylic | Cheap, safe, easy |
| Mineral Spirits | $12.00 | Oil-based | Strong fumes, flammable |
| Paint Thinner | $15.00 | Enamel | Check can for compatibility |
| Lacquer Thinner | $18.00 | Lacquer | Very strong, use with care |
Frequently Missed Insights
- Not all tap water is equal: Hard water (high in minerals) can affect how latex and acrylic paints thin and dry. If you have very hard water, use distilled water for best results.
- Paint age matters: Old paint gets thicker over time, even if sealed. You may need to thin old paint more than new paint, and always strain it to remove clumps.
Environmental And Health Considerations
Always consider safety and the environment when using thinners.
- Ventilation: Many thinners release fumes that can cause headaches or worse. Open windows and use fans.
- Disposal: Don’t pour leftover thinners or paint down the drain. Check local rules for hazardous waste disposal.
- Personal Protection: Gloves, goggles, and a mask can protect you from splashes and fumes.
The U.S. Environmental Protection Agency offers advice on safe use and disposal of paint and thinners. For more, see the official EPA Safer Choice website.
Credit: arayofsunlight.com
Troubleshooting: What To Do If You Have Problems
Paint Won’t Spray
- Check for clogs in the nozzle or filter.
- Make sure the paint is thinned enough.
- Increase pressure if your sprayer allows.
Paint Is Dripping Or Running
- Paint is too thin. Add more paint or reduce thinner.
- Apply thinner coats.
Spray Pattern Is Uneven
- Clean or replace the sprayer tip.
- Stir paint more thoroughly.
- Strain paint to remove debris.
Paint Dries Too Fast Or Too Slow
- Adjust thinner based on temperature and humidity.
- Work in ideal weather conditions when possible.
Advanced Tips For Experienced Users
- Custom finishes: For ultra-smooth finishes (like auto body or furniture), try thinning in very small increments and testing with a viscosity cup.
- Mixing additives: Some paints allow special flow agents or retarders for better leveling or slower drying. Only use additives recommended by the paint brand.
- Multiple thin coats: Always better than one heavy coat. Thinner paint dries faster, so you can apply more layers for a perfect finish.
How To Store Leftover Thinned Paint
- Store in a clean, tightly sealed container.
- Label with paint type, color, and thinning ratio.
- Use within a few months for best results; thinned paint can separate or spoil faster than unopened paint.
Case Study: Spray Painting A Wooden Fence
Suppose you have a 100-foot wooden fence to paint. You choose exterior latex paint and an airless sprayer.
- Read the paint instructions—allow up to 10% water.
- Mix 5 gallons of paint with 2 quarts (64 oz) of water.
- Stir and strain the mixture.
- Test spray on a small section. It’s smooth, so you continue.
- The job goes quickly with no clogs or splatter.
Because you pre-tested and thinned properly, you avoided common headaches and got a durable finish.
Paint Thinning And Application Comparison
Here’s a look at how thinning affects spraying different surfaces.
| Surface | Paint Type | Recommended Thinning | Notes |
|---|---|---|---|
| Drywall | Latex | 5-10% | For even coverage |
| Wood Furniture | Acrylic/Enamel | 10-15% | Smooth finish |
| Metal Railings | Oil-based | 10-15% | Rust prevention |
| Exterior Fence | Latex | 5-10% | Weatherproofing |
Frequently Asked Questions
How Much Should I Thin Latex Paint For A Sprayer?
Start with 5–10% water. For 1 gallon of paint, add 6–13 ounces of water. Always test the spray and add more water if needed, but don’t exceed 20% total.
Can I Use Tap Water To Thin Paint?
Yes, for latex and acrylic paints, tap water is usually fine. However, if your water is very hard, use distilled water to avoid mineral buildup or drying issues.
What Happens If I Thin Paint Too Much?
Over-thinned paint becomes watery, leading to poor coverage, drips, and weak color. If you add too much thinner, add more paint to restore the right consistency.
Do All Sprayers Require The Same Thinning Ratio?
No. Airless sprayers can handle thicker paint, while HVLP and compressed air sprayers need thinner paint. Always check your sprayer’s manual and test before starting.
How Do I Know If My Paint Is The Right Consistency?
Do a drip test: Dip a stick in the paint and watch it flow off. For spraying, it should flow in a steady stream, not heavy drops. Also, test spray on cardboard to check for a smooth, even pattern.
Diluting paint for your sprayer is a simple step that makes a huge difference in results. With the right approach, you’ll get smooth, professional finishes every time, save money, and reduce frustration on your next painting project.

Credit: www.youtube.com