Keeping your Rainmate clean is not just about making it look good—it’s essential for its performance and for the air you breathe. Over time, dust, water residue, and even bacteria can build up inside your Rainmate, making it less effective and possibly releasing unpleasant smells or even harmful particles into your home.
If you own this popular air purifier, you probably love how it freshens the air with scents and helps remove allergens. But many users don’t realize that regular cleaning is the only way to keep it working like new.
If you have never cleaned a Rainmate before, or if you’re not sure you’re doing it right, don’t worry. This guide will walk you through each step, from gathering supplies to reassembling the unit. You’ll learn about common mistakes people make, signs your Rainmate needs cleaning, and tips to keep it running smoothly.
You’ll also find clear advice on how to avoid damage and keep your home’s air as fresh as possible.
What Is A Rainmate And Why Does Cleaning Matter?
A Rainmate is a compact air purifier that uses water to trap dust, pollen, and other particles. It works by pulling air through a swirling pool of water, which captures debris and spreads your favorite scent if you add fragrance. This simple design is effective, but it also means that dirt, mold, and bacteria can build up quickly if you don’t clean it.
A dirty Rainmate can cause problems like:
- Reduced air cleaning ability
- Bad smells or musty odors
- Shorter machine life
- Possible health risks from bacteria or mold
Some owners notice their unit sounds louder or the water becomes cloudy faster. These are signals that cleaning is overdue.
How Often Should You Clean Your Rainmate?
How often you clean depends on how you use your Rainmate and your home’s air quality. Most experts recommend a basic cleaning every week and a deeper cleaning once a month. If you use essential oils or live in a dusty area, you might need to clean more often.
Here are signs your Rainmate needs cleaning:
- The water looks dirty after a day or two
- You smell something strange from the unit
- The airflow seems weaker
- There’s visible buildup inside the bowl or lid
Supplies You Need For Cleaning
Before you start, gather these items:
- Mild dish soap (no harsh chemicals)
- Soft sponge or microfiber cloth
- Small brush (a toothbrush works well)
- White vinegar (for deep cleaning)
- Warm water
- Paper towels or clean, dry cloths
- Q-tips or cotton swabs (for small corners)
Do not use bleach, rough scrubbers, or anything that could scratch the plastic. The Rainmate is sturdy, but it’s easy to damage the clear bowl or the fan if you use the wrong tools.
Step-by-step: Basic Weekly Cleaning
Regular cleaning keeps your Rainmate fresh and working well. Here’s a simple routine most users can do in 10–15 minutes.
1. Unplug The Rainmate
Safety comes first. Always unplug the unit before cleaning. Never put electrical parts in water.
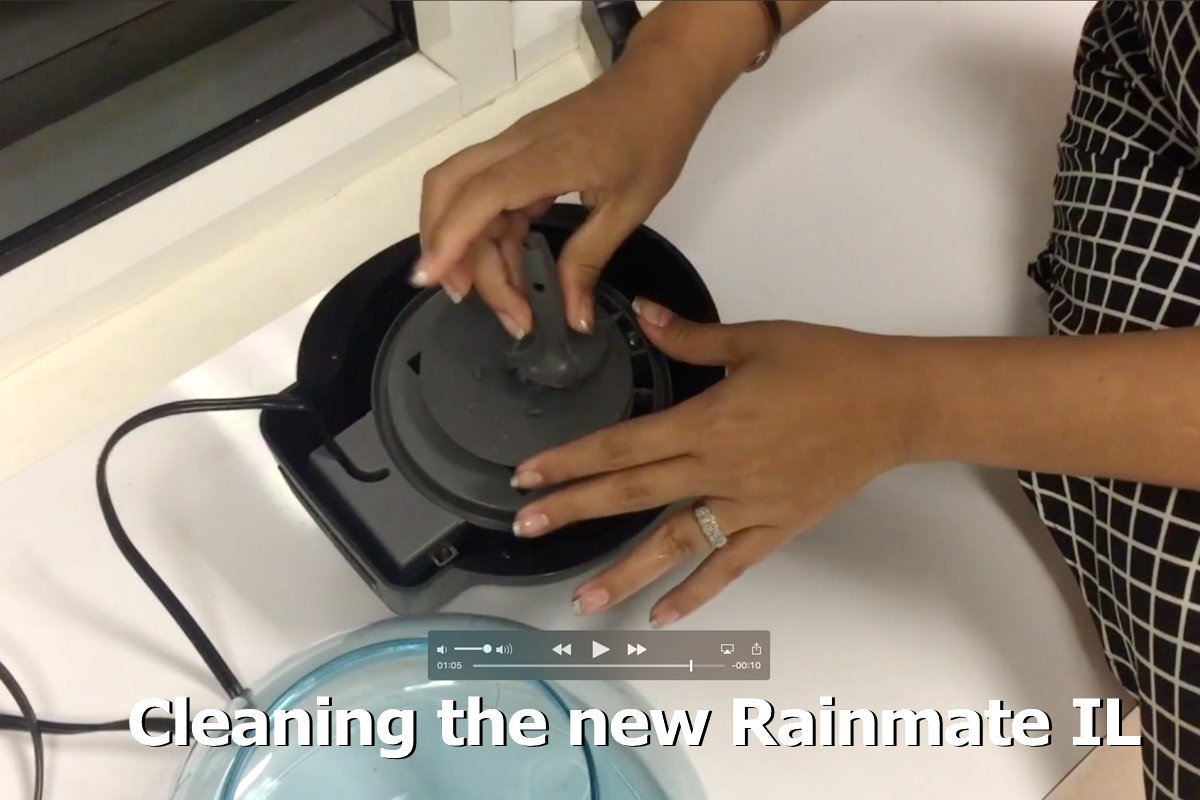
2. Remove The Top
Lift off the top part (motor section) and set it aside. Be careful not to spill water from the base.
3. Empty The Water Basin
Pour out any water left in the bowl. If you see floating debris or oil residue, that’s normal.
4. Wash The Bowl
Add a few drops of mild dish soap and warm water to the bowl. Use a soft sponge to clean the inside and outside surfaces. Scrub any stubborn spots gently. Avoid scratching the clear plastic.
Rinse the bowl with clean water until there’s no soap left.
5. Clean The Lid And Fan Area
Wipe the underside of the lid with a damp cloth. Use a Q-tip for tight spaces near the fan blades. Do not soak or submerge the top—this part contains electrical components.
6. Dry All Parts
Use paper towels or a clean cloth to dry the bowl and lid completely. Let them air dry if you’re not in a hurry.
7. Reassemble And Refill
Put the Rainmate back together. Fill the bowl with fresh water and your chosen fragrance, then plug it in.
Deep Cleaning: Once A Month Or As Needed
A deeper clean removes buildup that weekly washing might miss. This is especially important if you use oils, see cloudy water, or notice any smell.
1. Disassemble Completely
Unplug and separate all removable parts. Check the manual if you’re unsure.
2. Soak The Water Basin
Fill the bowl with a mix of one part white vinegar and three parts warm water. Let it soak for 30 minutes. Vinegar breaks down mineral deposits and kills bacteria.
3. Scrub And Rinse
Use a soft brush to clean tough spots, especially where the bowl meets the base. Rinse thoroughly to remove vinegar smell.
4. Clean The Fan Area
Dampen a cloth with the vinegar solution. Wipe around the fan housing and any crevices. Dry with a towel.
5. Clean Odors And Stains
If there’s a strong smell, add a spoonful of baking soda to the bowl after scrubbing. Let it sit for 15 minutes, then rinse.
6. Check And Clean The Fragrance Tray
Some Rainmate models have a small tray for oils or scents. Remove and wash it with soap and water. Dry fully before using again.
7. Reassemble And Test
Make sure all parts are dry before putting the Rainmate back together. Fill with water and run it for a few minutes to check for leaks or noise.
How To Clean The Motor And Electrical Parts
The motor section should never be submerged or soaked. But dust can build up around the air vents and fan blades. Here’s how to clean it safely:
- Unplug the unit.
- Use a dry, soft brush to sweep away dust from vents.
- Wipe the outer surface with a damp (not wet) cloth.
- For sticky spots, use a tiny bit of mild soap on the cloth, then wipe again with plain water.
Never spray water or cleaner directly onto the motor area.

Credit: watervacuummaster.com
Cleaning With Essential Oils: Special Tips
Many Rainmate fans use essential oils for fragrance. Oils can leave sticky films or clog small parts if not cleaned regularly.
- Always add oil to water, not directly onto the bowl or tray.
- Use only a few drops per use.
- Clean more often if you notice oil residue.
- If the bowl feels slippery or smells off, do a deep clean with vinegar.
Removing Tough Stains And Odors
Sometimes, stains or smells won’t go away with regular cleaning. Here’s what to try:
- For hard water stains: Soak with vinegar, scrub gently, and rinse.
- For mold or mildew: Use a vinegar and baking soda mix, scrub, and rinse well.
- For stubborn smells: Let the bowl air out overnight, or place it in the sun for a few hours.
If stains remain after several cleanings, it may be time to replace the bowl.
Drying And Reassembling The Rainmate
Moisture left inside can cause mold or damage. Always dry all parts before reassembling.
- Use a dry cloth for the bowl and lid.
- Let small parts air dry for at least 30 minutes.
- Make sure the electrical section is completely dry before plugging in.
If you’re short on time, a hairdryer on a cool setting can help (but keep it away from the motor).
How To Store A Rainmate When Not In Use
If you won’t use your Rainmate for a few days or longer:
- Empty all water.
- Wash and dry every part.
- Store with the lid off to prevent trapped moisture.
- Keep in a cool, dry place away from sunlight.
This keeps the machine fresh and ready for next use.
Common Mistakes To Avoid
Some cleaning errors can damage your Rainmate or make cleaning harder in the future.
- Using bleach or harsh chemicals
- Scrubbing with rough pads (scratches the bowl)
- Forgetting to dry parts before reassembling
- Overfilling the bowl with water or fragrance
- Running the unit with dirty water
Always stick to gentle cleaners and take your time.
Troubleshooting: What If Your Rainmate Still Smells Or Runs Poorly?
If you’ve cleaned your Rainmate but problems continue, try these steps:
- Double-check for hidden buildup around the fan or in small corners.
- Make sure all parts are 100% dry before use.
- Replace the water more often—even daily if your air is dusty.
- Try running the machine with just water for a few hours to clear out old fragrance.
- Check for cracks or worn parts that might hold smell.
If problems persist, contact the manufacturer for support or replacement parts.
How Cleaning Extends The Life Of Your Rainmate
A well-maintained Rainmate can last for years. Regular cleaning prevents:
- Motor strain from buildup or blockages
- Plastic discoloration or cracks from mineral deposits
- Bad odors that force you to replace the unit early
Most users who clean weekly report their Rainmate works like new for 5–7 years or more.
Table: Cleaning Frequency Recommendations
The table below shows how often to clean your Rainmate based on usage.
| Usage Type | Basic Cleaning | Deep Cleaning |
|---|---|---|
| Light (few hours/week) | Every 2 weeks | Every 2 months |
| Moderate (daily use) | Every week | Every month |
| Heavy (all day, fragrance/oils) | 2-3 times/week | Every 2 weeks |
Table: Safe Vs Unsafe Cleaning Products
Knowing which products are safe can prevent damage. Review this chart before starting.
| Product | Safe for Rainmate | Notes |
|---|---|---|
| Mild dish soap | Yes | Best for regular cleaning |
| White vinegar | Yes | Great for deep cleaning |
| Baking soda | Yes | Use for odors/stains |
| Bleach | No | Can damage plastic |
| Ammonia | No | Too harsh |
| Essential oils (directly on bowl) | No | Always mix with water |
Table: Rainmate Models And Cleaning Tips
Different models have small differences. See the table for quick advice.
| Model | Special Cleaning Note | Unique Parts |
|---|---|---|
| Rainmate IL | Fan area collects more dust | Night light feature |
| Rainmate SLX | Bigger bowl, clean corners well | Multiple speed settings |
| Rainmate SP | Check fragrance tray for residue | Separate scent tray |
How To Keep Your Rainmate Cleaner Longer
Regular cleaning helps, but a few habits can extend time between deep cleans:
- Use distilled water instead of tap (reduces mineral buildup)
- Wipe the bowl dry before refilling
- Avoid overfilling with fragrance or oils
- Keep the Rainmate away from dusty vents or windows
- Replace water every 1–2 days for best results
Non-obvious insight: Many users don’t realize that running the Rainmate for long hours with the same water actually increases dust and bacteria, not cleaning the air more. Fresh water is key.
Signs It’s Time To Replace Rainmate Parts
Even with perfect cleaning, some parts wear out. Watch for:
- Cracks or cloudiness in the bowl that don’t wash away
- Loud noises from the motor (means buildup inside)
- Persistent smells after cleaning
If you need a new bowl or motor, buy only official parts to fit your model.
Real-world Example: Cleaning Results
Sarah, a Rainmate owner in Texas, noticed her air purifier started smelling after a few months. She cleaned it weekly but never did a deep clean. After soaking the bowl with vinegar and wiping the fan area, the smell disappeared and the air felt fresher. Her tip: “Don’t skip the fan blades—dust collects there even if you can’t see it.”
Environmental Benefits Of Regular Cleaning
A clean Rainmate doesn’t just help your home—it helps the planet. When you clean and maintain your machine, you use less energy (because the motor doesn’t work as hard), reduce waste (fewer replacements), and keep chemicals out of your air.
When To Seek Professional Help
Most cleaning can be done at home. But if you notice:
- Electrical smells or smoke
- Water leaking from the motor area
- Unit won’t turn on after cleaning
Stop and contact a professional or the manufacturer. Don’t open the motor or try to fix wiring yourself.
Expert Tips For A Better Cleaning Routine
- Mark your calendar for cleaning days to stay consistent.
- Keep a spare bowl if you use your Rainmate often, so you can swap and clean at your pace.
- If you use strong-smelling oils, clean the unit more often to avoid residue.
- Never store the unit with water inside.
Credit: watervacuummaster.com
The Rainmate Cleaning Routine: Quick Summary
Here’s a quick recap for busy owners:
- Unplug and disassemble the Rainmate.
- Wash the bowl with soap and warm water weekly.
- Deep clean with vinegar monthly.
- Dry all parts before reassembling.
- Replace water regularly.
- Avoid harsh chemicals.
- Check for signs of wear and replace parts as needed.
Additional Resources
For more about air purifiers and maintenance, you can visit the Wikipedia page on air purifiers.

Credit: www.youtube.com
Frequently Asked Questions
How Often Should I Clean My Rainmate?
For best results, do a basic cleaning every week and a deep cleaning every month. If you use oils or live in a dusty area, clean more often.
Can I Use Bleach Or Strong Cleaners On My Rainmate?
No. Bleach and harsh chemicals can damage the plastic and leave harmful residue. Stick to mild dish soap, vinegar, and baking soda.
Why Does My Rainmate Smell Even After Cleaning?
There may be residue in hard-to-reach places, like the fan area or corners of the bowl. Try a deeper clean and let all parts air dry fully before reassembling.
Is It Safe To Run The Rainmate With Essential Oils?
Yes, but only add a few drops to the water. Clean more often to prevent oil buildup, and never pour oils directly onto the bowl or motor.
What Should I Do If My Rainmate Stops Working After Cleaning?
First, check that all parts are dry and correctly assembled. If it still won’t run, contact the manufacturer or a professional—never open the motor yourself.
Keeping your Rainmate clean is a simple way to protect your air quality, machine, and health. With these steps, you’ll enjoy fresh, clean air for years to come.