Building your own record cabinet is a rewarding experience, whether you’re a passionate vinyl collector or just starting out. The right cabinet keeps your records safe, organized, and easy to access. Even more, a custom piece can match your style and space perfectly. But for beginners, the process can seem overwhelming: choosing materials, making precise cuts, assembling parts, and finishing. This guide breaks down every step in simple terms, so you can build a sturdy, beautiful record cabinet—even if you’ve never built furniture before. With some planning and patience, you’ll not only protect your records but also create something you’re proud to show off.
Why Build A Record Cabinet?
Buying a record cabinet is easy, but building your own offers unique benefits. First, you can customize the size to fit your growing collection. Standard store-bought cabinets may not be deep or tall enough for your records or equipment. With a DIY approach, you choose the exact dimensions, number of shelves, and style.
Second, homemade cabinets are often sturdier. Many commercial cabinets use thin materials or weak joints. By selecting strong wood and proper joinery, your cabinet will last longer and better protect your valuable vinyl.
Finally, building is often cheaper for similar quality. You pay for tools and materials, but save on labor and retail markups. Plus, you gain new skills and the satisfaction of creating something with your own hands.
Planning Your Record Cabinet
Before you buy materials, think carefully about your needs and space. A clear plan makes the build smoother and avoids mistakes.
Decide On Size And Capacity
Start by measuring your record collection. Most vinyl records are 12 inches by 12 inches, but you’ll want a little extra room. For each row, allow at least 13. 5 inches in height and 13 inches in depth.
- For 100 records, plan for about 13 inches wide per row.
- For 200 records, double the width to 26 inches, or add a second row.
Also, consider extra space for your turntable, amplifier, or speakers. If you want equipment on top, make the cabinet’s surface strong and deep enough—about 16 inches deep is safe.
Sketch A Simple Design
A sketch helps you visualize the final piece. Draw a rectangle for the main box, then add vertical and horizontal dividers for shelves. Decide if you want doors, drawers, or open shelves. Simpler designs are easier for beginners.
Choose Materials
The best record cabinets use solid wood or plywood. Avoid particle board or MDF for the main structure—they sag under weight. Birch plywood is a popular choice: it’s strong, attractive, and easy to cut. For a classic look, choose oak, walnut, or maple.
- 3/4-inch (18mm) thick plywood is best for outer panels and shelves.
- 1/4-inch (6mm) plywood is good for the back panel.
You’ll also need wood glue, screws, and finish (paint, stain, or clear coat).
Make A Cut List
A cut list is simply a list of every panel you’ll need, with exact sizes. For a basic cabinet (holds 200 records, two rows, each 26″ wide):
- 2 sides: 16″ deep x 30″ tall
- 1 top: 16″ deep x 54″ wide
- 1 bottom: 16″ deep x 54″ wide
- 1 center divider: 16″ deep x 28.5″ tall
- 2 shelves: 16″ deep x 26″ wide
- 1 back panel: 30″ tall x 54″ wide (thin plywood)
Adjust these as needed for your collection or space.
Tools And Materials You’ll Need
Having the right tools makes building easier and safer. Here’s what you’ll need for most record cabinets:
- Circular saw or table saw (for straight cuts)
- Drill and bits
- Measuring tape
- Speed square or carpenter’s square
- Clamps (at least 4)
- Sanding block or orbital sander
- Paintbrush or roller (for finish)
- Wood glue
- 1 1/4-inch wood screws
- Screwdriver
- Pencil
Optional, but useful:
- Pocket hole jig (for hidden, strong joints)
- Edge banding (to cover plywood edges)
- Level
Quality tools help a lot, but you don’t need every tool from the start. Many hardware stores will cut panels for you if you ask.
Step-by-step: How To Build A Record Cabinet
The following steps guide you through the entire process, from preparation to finishing.
1. Measure And Cut Panels
Use your cut list to measure each piece of wood carefully. Mark lines with a pencil and check with a square for accuracy. Cut panels with a circular saw or table saw. For safety, wear goggles and work on a stable surface.
Beginner tip: Cut the largest pieces first (top, bottom, sides), then smaller shelves and dividers from leftover wood. This reduces waste.
2. Sand All Edges
After cutting, smooth all edges and surfaces with sandpaper (120-grit, then 180-grit). Sanding removes splinters and helps the finish stick later. Pay extra attention to edges that will be visible.
3. Assemble The Main Box
Lay out the sides, top, and bottom on a flat surface. Apply wood glue to the edges, then join the pieces together. Clamp tightly and check with a square to keep corners at 90 degrees.
Drive screws through the sides into the top and bottom panels. Space screws about every 8 inches for strength. Wipe away glue squeeze-out with a damp rag.
Non-obvious insight: If you want the cabinet to support heavy records, avoid only using nails or staples. Screws and glue together provide much stronger joints and prevent sagging over time.
4. Add Center Divider And Shelves
Mark the center of the cabinet and insert the vertical divider. Glue and screw it to the top and bottom panels. This divider adds strength and keeps shelves from sagging.
Install shelves by screwing through the sides or using pocket holes underneath. For adjustable shelves, you can drill a series of small holes and use shelf pins.
Beginner mistake to avoid: Don’t make shelves too long without support. Over 26 inches, plywood may sag under vinyl’s weight. Add vertical dividers for anything wider.
5. Attach The Back Panel
Lay the cabinet face-down. Place the back panel (thin plywood) on the frame, making sure it’s square. Nail or screw it in place every 8 inches around the edges. The back panel stops racking (sideways movement) and keeps the cabinet square.
If you want cables to pass through for equipment, drill holes in the back before attaching.
6. Install Feet Or Base
A record cabinet needs to sit off the floor, so air circulates and records stay dry. You can use simple wooden blocks, metal hairpin legs, or a plinth (solid base).
- For wooden feet, screw them into the bottom corners from inside.
- For a plinth, build a simple frame from 2x2s and attach the cabinet on top.
Check that the cabinet is level before moving on.
7. Edge Banding And Detailing
Plywood edges can look rough. To cover them, apply edge banding—a thin strip of wood with glue on the back. Iron it onto each edge, then trim with a sharp knife.
You can also round over edges with sandpaper for a softer look. Add door handles or shelf label holders if you like.
8. Finish: Paint, Stain, Or Clear Coat
Choose a finish that matches your decor and protects the wood. Common options:
- Stain: Highlights natural wood grain. Apply with a cloth, then wipe off excess.
- Clear polyurethane: Protects wood and adds shine. Brush on thin coats, sand lightly between coats.
- Paint: For a modern look. Use primer first, then two coats of paint.
Let each coat dry fully. Good ventilation is important.
Extra tip: For a glassy-smooth finish, sand lightly with very fine paper (220-grit) between coats.
9. Final Assembly And Moving
Once the finish is dry, insert any adjustable shelves. Attach doors if you’ve added them. Move the cabinet into place—get help, as wood cabinets are heavy.
Finally, add felt pads under the feet to protect your floor.

Credit: johnvantine.com
Data Table: Record Cabinet Materials Comparison
Choosing the best material is key for both durability and style. Here’s a quick comparison:
| Material | Strength | Cost | Appearance | Best For |
|---|---|---|---|---|
| Baltic Birch Plywood | High | $$ | Clean, modern | Most home builds |
| Solid Oak | Very High | $$$ | Classic, warm | Premium projects |
| MDF | Medium | $ | Flat, no grain | Painted cabinets only |
| Pine | Low-Medium | $ | Rustic, soft | Budget builds |
Custom Features You Can Add
A basic cabinet works well, but small upgrades can make your cabinet more useful or stylish.
Sliding Doors
Sliding doors protect records from dust, but don’t need extra space to open. Use a simple track system at the top and bottom. Glass or acrylic doors let you see the records inside.
Drawers For Accessories
Drawers hold cleaning brushes, headphones, or adapters. Make sure drawers are not too deep—4 to 6 inches is enough.
Cable Management
If you keep a turntable or speakers on top, drill 1-2 inch holes in the back for cables. Add rubber grommets for a neat look.
Adjustable Shelves
For flexibility, use shelf pins. Drill a series of holes every 2 inches, so you can move shelves as your collection grows.
Locking Casters
Wheels make moving the cabinet easy, but make sure they lock so the cabinet stays in place.
Table: Recommended Record Cabinet Dimensions
Cabinet size depends on your space and collection. Here’s a guideline for common needs:
| Capacity | Width | Height | Depth | Notes |
|---|---|---|---|---|
| 100 records | 13 in | 14 in | 16 in | One shelf |
| 200 records | 26 in | 30 in | 16 in | Two rows |
| 400 records | 54 in | 30 in | 16 in | Four rows (2×2) |
| Turntable shelf | 18 in | 7 in | 16 in | Top surface |
Always measure your records and equipment before starting.
Safety Tips When Building
Working with wood and tools is safe if you follow simple rules:
- Always wear safety glasses when cutting or sanding.
- Cut on a steady surface, with wood clamped down so it doesn’t move.
- Keep hands away from saw blades. Use push sticks for small pieces.
- Work in a ventilated area, especially when painting or staining.
- Lift heavy cabinets with your legs, not your back.
Non-obvious insight: Test-fit pieces before gluing or screwing. Sometimes, even small measurement errors can cause problems. Adjust as needed before final assembly.
Common Mistakes And How To Avoid Them
Even careful builders make mistakes. Here are a few to watch out for:
- Incorrect measurements: “Measure twice, cut once” is classic advice for a reason. Double-check all numbers.
- Weak joinery: Relying only on nails or butt joints leads to weak cabinets. Use screws and glue for strength.
- Skipping sanding: Unsanded wood feels rough and looks bad after finishing.
- Overloading shelves: Too long or unsupported shelves will sag. Keep each span under 26 inches, or add dividers.
- Rushing the finish: Paint or stain needs proper drying time. Rushing causes sticky or uneven surfaces.
Caring For Your Record Cabinet
A good cabinet lasts decades if you take care of it:
- Keep out of direct sunlight to prevent fading or warping.
- Avoid damp areas—vinyl and wood both hate moisture.
- Dust regularly with a soft, dry cloth.
- Check screws and joints once a year, tightening as needed.
If you spill something, wipe it up right away. Use coasters under drinks if you put them on top.
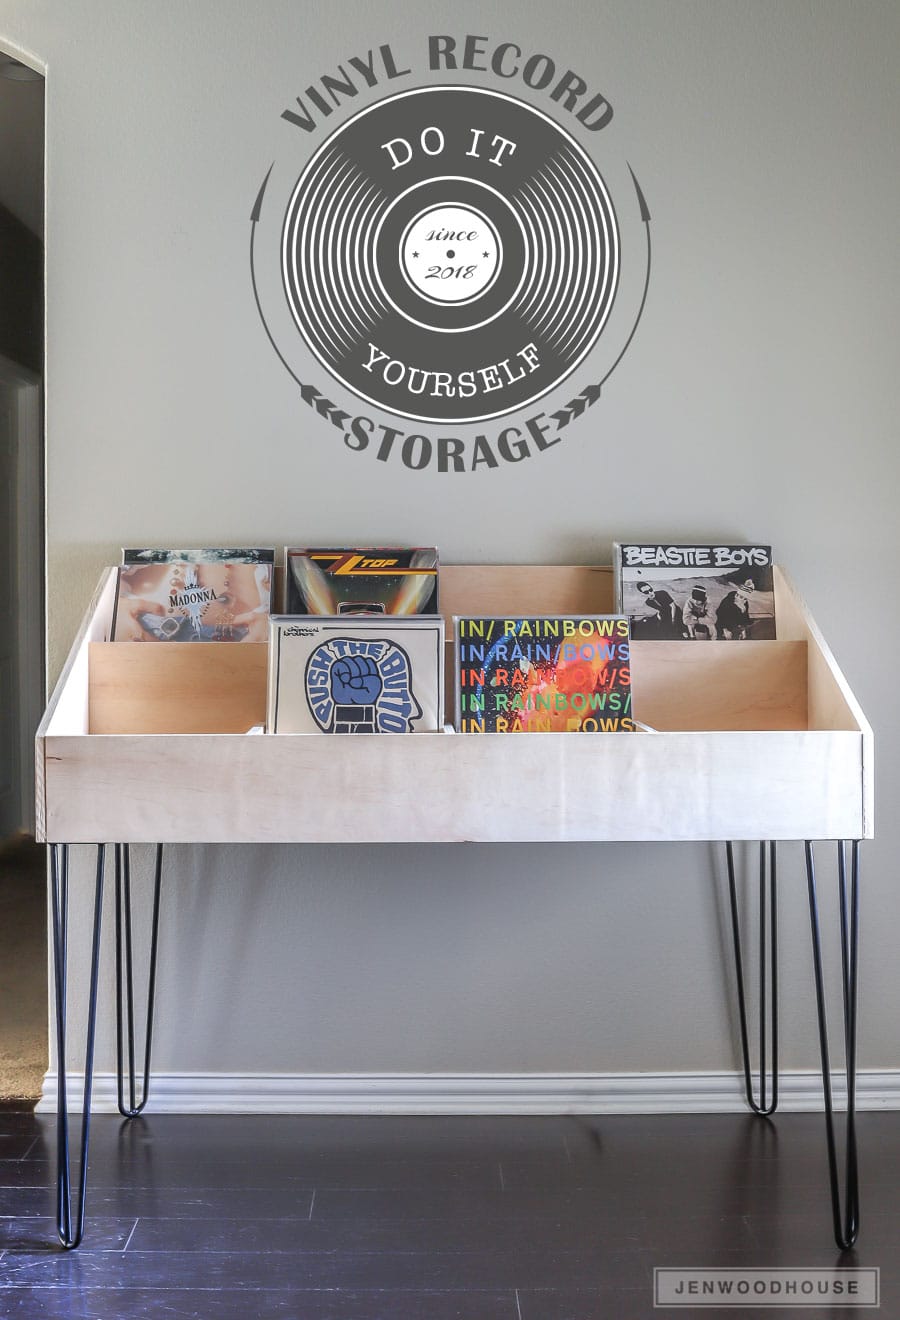
Credit: jenwoodhouse.com
Table: Essential Tools For Record Cabinet Building
Not sure which tools you really need? This table breaks down the essentials and their purpose:
| Tool | Purpose | Beginner Friendly? | Buy or Borrow? |
|---|---|---|---|
| Circular Saw | Cutting panels | Yes | Buy or borrow |
| Drill | Drilling holes, driving screws | Yes | Buy |
| Clamps | Holding pieces during assembly | Yes | Buy |
| Sander | Smoothing wood | Yes | Buy or borrow |
| Pocket Hole Jig | Making strong, hidden joints | Yes (with guide) | Borrow (optional) |
Where To Find More Inspiration
If you want unique ideas, look at online forums, Pinterest, or furniture catalogs. Many builders share free plans or photos. You can also visit Woodworking Talk for more tips and project examples.
Remember, your cabinet doesn’t have to be perfect. Each build teaches you something new. Over time, you’ll find ways to improve your skills and designs.

Credit: www.youtube.com
Frequently Asked Questions
What Is The Best Wood For A Record Cabinet?
The best wood for a record cabinet is birch plywood or solid hardwood like oak or maple. These materials are strong enough to support heavy records and look attractive. Birch plywood is easy to cut and finish, making it a favorite for DIY projects.
How Many Records Fit In A Standard Cabinet?
A standard shelf 13 inches wide and 13 inches tall holds about 100 records. For larger collections, double the width or add more shelves. Always measure your records before building, as some box sets are larger than standard albums.
Can I Build A Record Cabinet Without Power Tools?
It’s possible, but power tools make the process much faster and more accurate. If you only have hand tools, use a hand saw, brace and bit (for drilling), and sanding block. Many hardware stores will cut wood to size for you, which helps a lot.
How Do I Prevent Shelves From Sagging?
Keep each shelf span under 26 inches. For longer shelves, add a center divider or extra support. Use 3/4-inch thick wood for shelves and always glue and screw joints for strength.
What Is The Best Finish For A Record Cabinet?
Stain and clear polyurethane are most popular. Stain brings out the wood’s natural beauty, while polyurethane protects against scratches and moisture. For a modern look, use paint with a primer base.
Building your own record cabinet is both practical and creative. With careful planning, good materials, and some patience, you’ll have a piece that keeps your records safe—and shows off your craftsmanship for years to come.