Hardwood floors are a beautiful investment that add warmth and elegance to any home. But over time, dust, grit, and everyday traffic can dull their shine. If you want your hardwood floors to look their best, a mop and broom are not always enough. This is where a floor buffer steps in—a powerful tool that can restore the luster of your wood flooring. But using a floor buffer on hardwood isn’t as simple as plugging it in and pushing it around. Done incorrectly, it can damage the finish or even the wood itself. Done right, it can make your floors gleam like new.
You might have seen professionals use these machines in schools, offices, or even hotel lobbies. But with the right steps, you can safely and effectively use a floor buffer at home—even if you’re not a cleaning expert. In this guide, you’ll learn everything you need to know: what a floor buffer is, how to choose the right one, safe preparation, step-by-step usage, and pro tips that most beginners miss. Whether you’re preparing for a big event, dealing with scuff marks, or just want to bring back the shine, this article will help you get professional results—while protecting your valuable hardwood floors.
What Is A Floor Buffer?
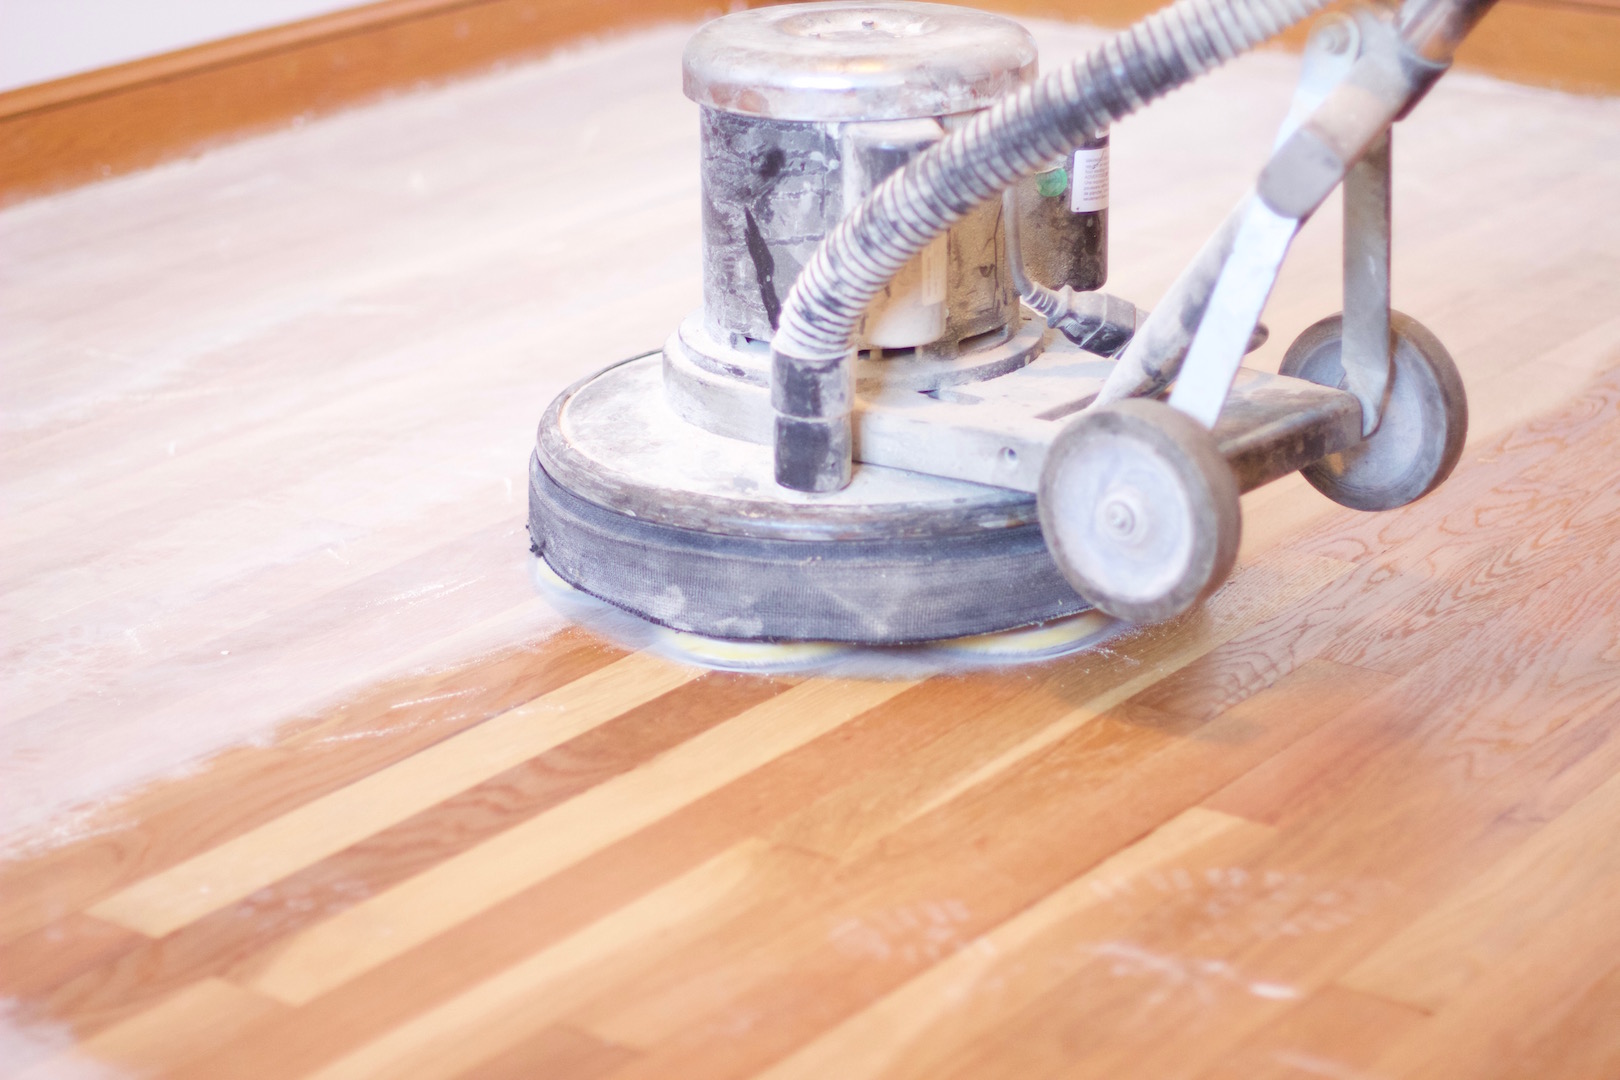
A floor buffer (sometimes called a rotary floor machine or polisher) is a heavy-duty electrical tool used to clean, polish, and maintain smooth floor surfaces. It has a large, round pad that spins at high speed to scrub, buff, or polish the floor. While buffers are often used on tile or vinyl, many models are safe for hardwood when used properly.
Buffers come in different types and sizes. Most home-use machines are lighter and easier to control than commercial models. The main parts are:
- A handle for steering and control
- A motor that powers the spinning motion
- A base that holds the rotating pad or brush
Some buffers have built-in solutions tanks for cleaning liquids, while others require you to spray the floor separately. The pad type and speed can be changed for different tasks, such as cleaning, buffing, or polishing.
Key insight: Not all floor buffers are suitable for hardwood. Using the wrong pad or setting can scratch or dull your wood finish. Understanding your machine’s features—and the type of wood you have—is the first step to a safe, successful job.
Is It Safe To Use A Floor Buffer On Hardwood Floors?
Many people wonder if using a buffer on hardwood is too aggressive. The answer depends on several factors:
- The type of wood (solid, engineered, or laminate)
- The condition of the finish (waxed, polyurethane, or oil-based)
- The type of buffer and pad used
Most modern hardwood floors with a durable finish (like polyurethane) can be safely buffed if you use the right pad and technique. However, older or waxed floors require extra care. If your floor is damaged, loose, or has deep gouges, buffing may make the problem worse.
Common beginner mistake: Using a floor buffer with a harsh pad or too much pressure. This can remove the finish or even gouge the wood. Always check your floor’s manufacturer guidelines before starting.
Benefits Of Buffing Hardwood Floors
Buffing is not just about making the floor shiny. Here’s why it matters:
- Restores Shine: Removes dullness and brings back the floor’s original gloss.
- Removes Minor Scratches: Buffing can smooth out small scuffs and light surface scratches.
- Improves Cleanliness: The spinning pad lifts embedded dirt and particles a regular mop can’t reach.
- Extends Floor Life: Regular maintenance with a buffer can help delay the need for full sanding or refinishing.
- Prepares for Recoating: Buffing is a key step if you plan to apply a fresh topcoat.
Pro tip: Buffing does not remove deep scratches or change the wood’s color. It is mainly for surface cleaning and light polishing.
Choosing The Right Floor Buffer For Hardwood
Not all machines are made equal. Choosing the right floor buffer will make your work easier and protect your floor.
Key Factors To Consider
- Weight: Lighter buffers (under 50 pounds) are easier to control on hardwood and less likely to cause damage.
- Pad Speed: Low-speed machines (175–300 RPM) are recommended for hardwood. High-speed models are for specialized commercial tasks.
- Pad Size: A 13- to 17-inch pad is usually sufficient for home use and easy to maneuver.
- Pad Type: Use a white or beige polishing pad for hardwood. Avoid black or brown pads—they’re too abrasive.
Comparing Buffer Types
Here’s a quick look at the types of buffers you might encounter:
| Buffer Type | Typical Use | Safe for Hardwood? | Notes |
|---|---|---|---|
| Low-Speed Rotary | Buffing, cleaning, polishing | Yes | Most common for homes |
| High-Speed Burnisher | Polishing only | No | Too aggressive for wood |
| Orbital Floor Machine | Light cleaning, scrubbing | Yes | Gentle motion, easy to use |
Renting Vs. Buying
If you only need to buff once or twice a year, renting is more cost-effective. Rental stores often provide different pad options and can give advice for your floor type.
Insider tip: Try to rent from a store that maintains their machines well. Worn-out machines can vibrate or scratch.

Credit: buffandcoatvirginia.com
Preparing Your Hardwood Floor
Proper preparation is the key to a safe and effective buffing job. Skipping these steps can lead to poor results or even permanent damage.
1. Check The Floor’s Finish
Before anything else, know what finish is on your floor:
- Polyurethane (most common): Usually clear and glossy, can be buffed with a polishing pad.
- Wax: Needs a special approach—never use water or harsh cleaners.
- Oil-based: Check the manufacturer’s guidelines.
If you’re unsure, test a small hidden area. Polyurethane will resist a drop of water; wax may turn cloudy.
2. Inspect For Damage
Look for:
- Deep scratches or gouges
- Loose boards or nails
- Sticky spills or wax buildup
Fix these before buffing. Buffers will not remove deep damage and may make it worse.
3. Remove Furniture And Rugs
Clear the area completely. Buffers need space to move, and bumping into furniture can cause accidents.
Beginner mistake: Leaving chairs or rugs in the way. Even small items can trip up the buffer or get scratched.
4. Vacuum And Dust Thoroughly
Grit and sand can scratch the finish when buffed. Use a soft-bristle vacuum attachment, then a microfiber mop.
- Pay special attention to corners and under baseboards.
- Don’t forget to clean air vents—dust can fall onto your fresh finish.
5. Spot Clean Stains
Use a damp (not wet) cloth for sticky spots. Avoid harsh chemicals that can react with the finish.
Gathering Materials And Safety Gear
You’ll need more than just the buffer to do the job right.
Essential items:
- Floor buffer (with appropriate pad)
- Extension cord (heavy-duty)
- White or beige polishing pads
- Floor cleaner suitable for hardwood
- Microfiber mop and vacuum
- Painter’s tape (for baseboards)
- Soft cloths or towels
- Safety glasses and ear protection
- Dust mask (especially if you’re sensitive to dust)
Pro insight: Always use pads made for your exact buffer model. Pads that are too large or small can slip or damage the machine.

Credit: www.youtube.com
Setting Up The Floor Buffer
Follow these steps before you start buffing:
1. Read The Manual
Every buffer is a bit different. Review the manufacturer’s instructions for your specific model.
2. Attach The Pad
- Make sure the machine is unplugged.
- Place the pad holder on the base.
- Center the pad carefully—off-center pads can cause vibration.
- Secure the pad according to the machine’s instructions.
3. Test The Machine
- In an open area, plug in and turn on the buffer for a few seconds.
- Check for smooth operation—no wobbling or strange noises.
- Test on a small, hidden part of your floor.
4. Protect Baseboards And Walls
Apply painter’s tape along baseboards to prevent accidental scuffing.
Practical tip: Open windows for good ventilation, especially if your cleaner has a strong smell.
Step-by-step Guide: How To Use A Floor Buffer On Hardwood Floors
Now you’re ready for the main event. Take your time—the right technique protects your floors and gives the best results.
1. Start In The Corner
Begin in the farthest corner from the exit, so you don’t walk on freshly buffed areas.
2. Apply Cleaner (if Using)
- For most hardwoods, use a small amount of pH-neutral cleaner made for wood.
- Lightly mist the floor in front of you, or use the buffer’s solution tank if available.
- Never soak the floor—excess moisture can damage wood.
3. Turn On And Guide The Buffer
- Hold the handles firmly, but don’t grip too tightly.
- Start the machine and let it reach full speed.
- Move the buffer slowly in a straight line, overlapping each pass by about one-third.
- Don’t force the machine—let the pad do the work.
Beginner mistake: Moving too quickly. Slow, steady passes are more effective.
4. Work In Small Sections
- Divide the room into manageable areas (about 4×4 feet).
- Buff one section at a time, overlapping edges to avoid streaks.
5. Watch For Pad Build-up
- Check the pad every 10–15 minutes.
- If it’s dirty or clogged with wax or debris, replace or clean it.
- Using a dirty pad can spread dirt and scratch the floor.
6. Buff The Edges By Hand
Buffers can’t reach into corners or along baseboards. Use a hand-held polishing pad or microfiber cloth to finish these areas.
7. Wipe And Inspect
- After each section, wipe with a clean, dry microfiber cloth to remove any residue.
- Check for missed spots, streaks, or haze.
8. Let The Floor Dry
If you used a cleaner, allow the floor to dry completely (usually 30–60 minutes) before walking on it or replacing furniture.
Practical insight: For best results, wait a few hours before putting area rugs or chairs back.
Common Mistakes To Avoid
Many first-timers make errors that lead to frustration or damage. Here’s what to watch out for:
- Using an Abrasive Pad: Black, brown, or green pads are too harsh for hardwood. Stick to white or beige.
- Skipping Dust Removal: Even tiny bits of grit can scratch the finish when buffed.
- Buffing Wet Floors: Too much moisture can seep into wood, causing warping.
- Moving Too Fast: Buffing works best with slow, steady passes. Rushing leaves streaks and missed spots.
- Ignoring Pad Maintenance: Dirty pads can cause swirl marks and actually dull the finish.
- Not Checking Floor Condition: Buffers won’t fix deep scratches or loose boards.
- Not Testing the Machine: Always test in an out-of-sight area to ensure compatibility.
Unique tip: Some hardwood finishes (like aluminum oxide) are extra tough and may not respond to standard buffing. If you’re unsure, consult a flooring professional.
Caring For Your Hardwood After Buffing
Buffing isn’t the end of your floor care. To keep the shine:
- Avoid dragging furniture across the floor—use felt pads under legs.
- Sweep or vacuum regularly to remove dust and grit.
- Clean up spills immediately to prevent water damage.
- Use rugs in high-traffic areas.
Non-obvious insight: Buffing too often can wear down the finish. For most homes, once or twice a year is enough.
When To Call A Professional
Buffing is a great DIY project, but there are times when expert help is best:
- If your floor has deep scratches, stains, or water damage
- If you’re not sure about your floor’s finish or composition
- If the area is larger than you feel comfortable handling
Professional floor technicians have industrial-grade equipment and experience with different wood types. They can also advise on recoating or refinishing if needed.
Comparing Buffing To Other Floor Maintenance Methods
It’s easy to confuse buffing with other cleaning or refinishing methods. Here’s how buffing stacks up:
| Method | Removes Scratches? | Changes Color? | Best For | DIY Friendly? |
|---|---|---|---|---|
| Buffing | Light only | No | Shine, surface cleaning | Yes |
| Screening & Recoating | Light to moderate | No | Prep for new finish | Somewhat |
| Sanding & Refinishing | All scratches | Yes | Deep repair, color change | No (usually) |
| Mopping | No | No | Regular cleaning | Yes |
Pro tip: If your floor looks dull but has no deep scratches, buffing is usually all you need.
Credit: www.gandswoodfloors.com
Advanced Tips For Best Results
Most guides stop at the basics, but these advanced tips can help you get a truly professional finish:
- Work with the Light: Buff in the same direction as the main light source (like windows). This reduces visible swirl marks.
- Rotate Pads: If you have a large area, rotate or flip pads halfway through. This keeps wear even.
- Use the Right Cleaner: Only use cleaners made for hardwood. Avoid vinegar, ammonia, or oil soaps—they can dull or damage finishes.
- Buff in Seasons with Low Humidity: High humidity can make wood swell and affect results.
- Polish After Buffing: For extra shine, use a wood floor polish after buffing (following manufacturer instructions).
- Test New Products: Always test new cleaners or pads in a closet or behind a door.
Unique insight: If your home has radiant heating, turn it off a few hours before buffing. Warm floors can make cleaners evaporate too quickly, leading to streaks.
Eco-friendly Floor Buffing
Many homeowners want greener options. Here’s how to buff hardwood floors while being eco-conscious:
- Choose biodegradable cleaners with no harsh chemicals.
- Use reusable pads—wash them instead of throwing them away.
- Run the buffer during daylight to reduce electricity use.
- Open windows for ventilation instead of using fans.
Resource: The EPA offers guidelines on green cleaning products for home use. For more, visit the EPA Safer Choice program.
Frequently Asked Questions
How Often Should I Buff My Hardwood Floors?
For most homes, buffing once or twice per year is enough to maintain shine and cleanliness. Over-buffing can wear down the protective finish.
Can I Use A Regular Mop With My Floor Buffer?
No. Floor buffers require specific polishing pads. Using a mop or the wrong pad can damage both the machine and your floor.
What Should I Do If The Buffer Leaves Swirl Marks?
Swirl marks usually mean the pad was dirty or too abrasive. Use a clean, soft pad and buff again with less pressure. If marks remain, consult a professional.
Is Buffing The Same As Sanding?
No. Buffing is a surface treatment for cleaning and polishing. Sanding removes the top layer of wood to fix deep scratches or change color.
Can I Buff Engineered Hardwood Floors?
Most engineered hardwood with a strong finish can be buffed using a soft pad. Always check the manufacturer’s guidelines first, as some thin veneers may be too delicate.
Buffing hardwood floors with a floor buffer can seem intimidating, but with careful preparation and the right technique, it’s a rewarding DIY project. You’ll not only restore the beauty of your floors—you’ll protect them for years to come. With the insights and tips above, you’re ready to tackle the job with confidence and achieve results you’ll be proud of.