Turning an old dresser into a stylish TV stand is one of the most rewarding DIY projects you can do for your home. Many people have an unused dresser sitting in their bedroom, garage, or even find them for cheap at thrift stores. Instead of letting it collect dust or sending it to the landfill, you can repurpose it into a functional and attractive TV stand. Not only does this save money, but it also gives you a unique piece of furniture that fits your style and needs.
This project might sound complex, but with the right guidance, almost anyone can do it. From choosing the right dresser, planning the layout, making the right cuts, and finishing with paint or stain, every step matters. You’ll learn how to make smart choices, avoid common mistakes, and add features that make your TV area more organized and beautiful.
Let’s break down everything you need to know to turn a dresser into a TV stand, with practical advice, clear examples, and tips you won’t find in most guides.
Why Turn A Dresser Into A Tv Stand?
Repurposing a dresser comes with several benefits. First, it’s cost-effective. Buying a new TV stand can be expensive, especially for solid wood or custom pieces. Dressers, especially used ones, can cost much less. Second, it’s eco-friendly. Reusing old furniture reduces waste and the demand for new materials.
Another big reason is customization. You can choose the color, hardware, and layout to match your style and your room. Dressers often have more storage than standard TV stands, with deep drawers and wide surfaces. That means more space for games, movies, controllers, and wires.
Many people also like the story that comes with a DIY project. Your TV stand isn’t just furniture – it’s something you made, with a unique look that you won’t see in anyone else’s home.
Choosing The Right Dresser
Not every dresser is a good fit for a TV stand. You need to consider several factors:
- Size and Proportion: The dresser should be at least as wide as your TV, and ideally a bit wider. This gives a balanced look and prevents the TV from hanging over the sides.
- Sturdiness: TVs are heavy. Make sure the dresser is solid wood or a strong composite, not cheap particleboard.
- Height: For comfortable viewing, the TV’s center should be at your eye level when sitting. Most TV stands are about 24 to 30 inches high. Many dressers are taller, so you may need to shorten the legs or remove the wheels.
- Drawer Layout: Think about what you want to store. Deep drawers are good for blankets or games, but you may want to remove some drawers for open shelves.
- Condition: Look for a dresser with no major structural damage. Scratches and surface stains are easy to fix, but broken frames or warped wood can be hard to repair.
Example Dresser Types
- Long, low dressers (6+ drawers): Best for large TVs and lots of storage.
- Tall, narrow dressers (4–5 drawers): Good for small spaces but may need height adjustment.
- Vintage dressers: Great for character but check for lead paint if very old.
Planning Your Tv Stand Design
Before you start taking the dresser apart, it’s important to have a clear plan. Here are the main design choices:
Open Shelves Vs. Drawers
Most TV stands have a mix of open shelves (for devices like DVD players or game consoles) and drawers (for storage). Decide how many drawers you want to keep and which sections should be open.
- Removing the top drawers: This is the most common approach. The open space can hold electronics, and you can run wires through the back.
- Keeping all drawers: Works if you only need a surface for the TV and want hidden storage.
Cable Management
Electronics need wires, and messy cables ruin the look. Plan where you’ll drill holes for cables. At least one hole in the back for each shelf is needed. For a clean look, use grommets (small plastic rings) to cover the holes.
Style And Finish
How Do You Want Your Tv Stand To Look?
- Modern: Simple lines, neutral colors, sleek hardware.
- Rustic: Distressed paint, natural wood, vintage handles.
- Glam: Glossy paint, metallic accents, crystal knobs.
Collect photos for inspiration. Pinterest and Instagram are full of ideas.
Measuring And Sketching
Measure your TV’s width and depth, and the area where the stand will go. Make a simple sketch of your dresser and mark which drawers to remove, where to cut shelves, and where to drill holes.
Tools And Materials You’ll Need
Having the right tools makes the project much easier. Here’s a basic list:
- Screwdriver (Phillips and flathead)
- Pry bar or hammer (for removing drawers)
- Drill and drill bits (for cable holes)
- Saw (hand saw or jigsaw, for cutting shelves)
- Measuring tape and pencil
- Sandpaper (medium and fine grit)
- Paintbrush or roller (if painting)
- Wood filler (for holes and scratches)
- Wood glue (for reinforcing)
- New hardware (knobs or handles, optional)
- Primer and paint or stain
If you don’t have power tools, most hardware stores can make simple cuts for you.
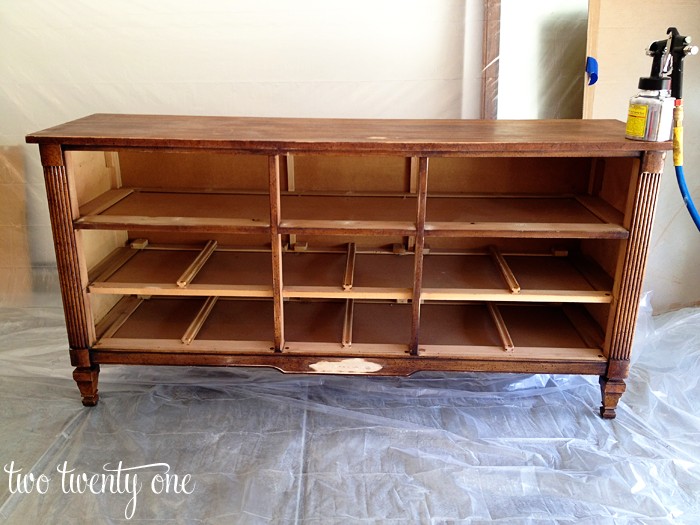
Credit: www.twotwentyone.net
Step-by-step: Turning A Dresser Into A Tv Stand
Now let’s walk through the full process, from start to finish.
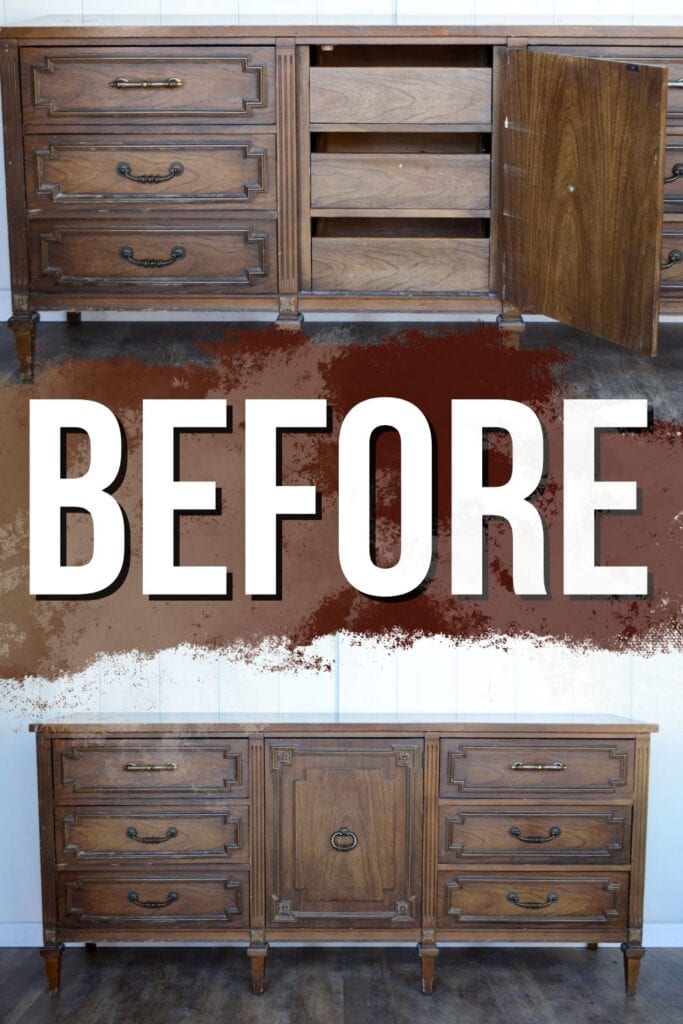
1. Prep The Dresser
First, remove all drawers and hardware. Clean the dresser thoroughly. Dust, dirt, or old polish can affect paint or glue.
Inspect the frame for weak spots. Tighten screws, add wood glue to loose joints, and let it dry. If the dresser has a back panel, check if it’s sturdy. You may need to replace thin cardboard with a stronger plywood panel.
2. Remove Drawers For Shelves
Decide which drawers will become open shelves. Usually, people remove the top row or the middle section.
- Take out the drawers.
- Remove the drawer slides or hardware inside the frame.
- If the shelf will hold electronics, cut a thin piece of plywood to fit as the new shelf. Attach it with wood glue and small nails. Make sure it’s level and strong.
If you want more than one shelf, repeat the process for other sections.
3. Cut Cable Holes
Use a drill with a hole saw bit (about 2 inches wide) to make holes in the back panel where your devices will sit. If you want a neater look, install plastic grommets.
Don’t forget to sand the edges of the holes so wires don’t snag.
4. Modify The Height (if Needed)
If the dresser is too tall, you have options:
- Remove legs or casters.
- Cut the bottom off the sides (use a circular saw for straight cuts).
- Replace tall legs with shorter ones.
Always measure carefully before cutting. After changing the height, check that the dresser is level and stable.
5. Sand And Repair
Sand all surfaces, starting with medium-grit sandpaper (120–150) and finishing with fine grit (220). This removes old finish and helps new paint or stain stick.
Fill holes, dents, or scratches with wood filler. Let it dry, then sand smooth.
6. Paint Or Stain
Wipe away dust with a damp cloth. Apply primer if you’re painting. This helps color stick and cover old finishes.
Use a brush or roller for paint, or a rag for stain. Two or three thin coats give a better finish than one thick coat. Let each coat dry fully.
For extra durability, especially on the top surface, add a clear sealer or polyurethane.
7. Add New Hardware
If you want a fresh look, replace old knobs or handles. You can find modern, vintage, or unique hardware online or at hardware stores.
Tip: If the new hardware holes don’t match the old ones, fill the old holes with wood filler, sand, and drill new ones.
8. Reassemble And Install
Put the drawers you’re keeping back in place. Insert the new shelves. Put the back panel on if you removed it earlier.
Move the dresser to its new spot. Place your TV on top, arrange devices on the shelves, and thread cables through the holes.
Check that everything is stable and tidy. Enjoy your new custom TV stand!
Creative Customization Ideas
Once you’ve mastered the basics, you can add features to make your TV stand truly unique.
Built-in Power Strip
Mount a surge protector or power strip inside the back. This keeps plugs out of sight and makes it easy to turn everything off at once.
Sliding Doors
Instead of open shelves, use sliding doors (barn door style) for a modern farmhouse look. You can buy sliding hardware kits, and they’re not hard to install.
Glass Or Mesh Inserts
Cut out the center of some drawer fronts and replace with glass or wire mesh. This lets remote controls work while hiding messy electronics.
Two-tone Paint
Paint the top and sides one color, and the drawers another for a custom look. Use painter’s tape for clean edges.
Add Lighting
Stick-on LED lights inside the shelves make it easy to see and add a cool glow at night.
Common Mistakes And How To Avoid Them
Many beginners run into the same problems when turning a dresser into a TV stand. Here’s how to avoid them:
- Skipping Measurements: Always measure your TV and space first. Don’t guess.
- Forgetting to Reinforce Shelves: Electronics are heavy. Add support under new shelves if needed.
- Using the Wrong Paint: Furniture paint or enamel works best. Wall paint chips easily.
- Neglecting Cable Management: Plan holes before you start. Retroactive drilling can damage finished wood.
- Rushing the Finish: Let each coat of paint or stain dry fully. Rushing leads to sticky or uneven surfaces.
Example: From Dresser To Tv Stand
Let’s look at a real-world example. Suppose you find a six-drawer dresser at a yard sale for $40. It’s 60 inches wide, 32 inches high, and made of solid oak.
Steps taken:
- Remove the top two drawers for open shelves.
- Sand the entire piece, fill a few dents, and paint it navy blue.
- Replace all knobs with brushed nickel handles.
- Drill cable holes in the back panel.
- Add a plywood shelf in each open space.
- Finish with a clear polyurethane top coat.
Result: A sturdy, stylish TV stand with two open shelves for devices and four drawers for storage. Total cost (dresser, paint, plywood, hardware) is about $90 — much less than a new TV stand of similar quality.
Budget And Time Comparison
Here’s how converting a dresser compares to buying a new TV stand.
| Option | Cost Range | Time Needed | Pros | Cons |
|---|---|---|---|---|
| DIY Dresser TV Stand | $50–$200 | 1–3 days | Custom look, more storage, eco-friendly | Requires tools and effort |
| Store-Bought TV Stand | $150–$600+ | 1–2 hours (assembly) | Quick, easy, many styles | Less unique, less storage, more expensive |
Materials And Tools: Quick Comparison
If you’re not sure which tools to buy or borrow, here’s a summary:
| Task | Basic Tool | Recommended Upgrade | Why It Matters |
|---|---|---|---|
| Drilling holes | Hand drill | Power drill with hole saw | Faster, cleaner holes |
| Sanding | Sandpaper | Orbital sander | Saves time, smoother finish |
| Cutting shelves | Hand saw | Jigsaw/circular saw | More accurate, easier on thick wood |
Safety Tips
DIY projects are fun, but safety comes first. Here are must-follow tips:
- Wear safety glasses when cutting or drilling.
- Work in a well-ventilated area, especially when painting or staining.
- Use a mask to avoid breathing dust.
- Secure the dresser when cutting to prevent slips.
- Let paint or stain dry fully before moving electronics onto the stand.
Two Non-obvious Insights
Many guides skip these advanced tips, but they can make a big difference:
- Test Fit Shelves Before Painting: Always dry-fit your shelves and electronics before you start painting or staining. Sometimes, shelves or devices don’t fit as expected, and it’s much easier to adjust bare wood than a finished surface.
- Use Felt Pads on the Bottom: Adding felt pads or sliders under your new TV stand protects your floor and makes it easier to move for cleaning or cable changes. This small step prevents scratches and extends the life of both the furniture and your floor.
Credit: arayofsunlight.com
Maintenance Tips For Your New Tv Stand
Once your TV stand is finished, a little maintenance keeps it looking great for years.
- Dust regularly with a soft cloth to prevent scratches.
- Check for loose screws every few months, especially if you move the stand.
- Wipe spills quickly to avoid water rings or stains.
- Polish hardware with a gentle cleaner if it starts to tarnish.
- Inspect cable holes to make sure wires aren’t rubbing on rough edges.
When To Call A Pro
Most people can handle a dresser-to-TV-stand project with basic DIY skills. But if your dresser has structural damage, or if you want to install lighting or glass inserts, consider hiring a professional. The same goes for painting with special finishes like lacquer or high-gloss — these need experience for best results.

Credit: www.youtube.com
Eco-friendly And Upcycling Benefits
Turning a dresser into a TV stand is more than a money saver. It’s a way to reduce landfill waste and give old furniture a second life. The EPA reports that over 9 million tons of furniture end up in US landfills each year.
Every upcycled piece helps lower that number and reduces the demand for new materials.
If you want to learn more about the environmental impact of furniture waste, check the EPA’s official data.
Frequently Asked Questions
How Do I Know If My Dresser Is Strong Enough For A Tv?
Most solid wood dressers are strong enough for even large TVs. The key is to check the top surface and the frame. If it feels wobbly, reinforce with wood glue and screws. Avoid dressers made of thin particleboard, as they can sag over time.
Can I Turn Any Dresser Into A Tv Stand?
Almost any dresser can be used, but the best choices are wide, low, and sturdy. Avoid dressers with water damage, rot, or weak joints. If you’re new to DIY, start with a simple, solid piece.
Do I Need Special Paint For My Tv Stand?
Yes, furniture paint or enamel is best. These paints are made to handle wear and tear, and they clean easily. Wall paint often chips or peels on furniture surfaces.
How Do I Hide Wires And Cables?
Drill holes in the back panel behind each shelf or device. Use plastic grommets for a neat look. Run all wires through these holes to a power strip mounted inside or behind the stand. Velcro ties keep cables organized.
What Should I Do If The Dresser Is Too High For My Tv?
You can shorten the dresser by removing legs or cutting the bottom. Make sure the new height matches your viewing comfort. After cutting, always check that the stand is level and stable before adding your TV.
Turning a dresser into a TV stand is a project that blends creativity, practicality, and sustainability. With the right tools, a good plan, and a bit of effort, you can create a piece that’s both useful and beautiful — and that tells a story every time you turn on your TV.