As an Amazon Associate I earn from qualifying purchases.
Breathing new life into a tired wood dresser can completely change the look of your room. Staining a wood dresser is one of the best ways to enhance its natural beauty while adding your personal touch. Many people think staining is hard, but with the right steps, anyone can do it—even if you have never worked with wood before.
This guide will take you through everything you need to know about how to stain a wood dresser, from preparing your furniture to sealing the finish. You’ll discover essential tips, practical advice, and expert insights that will help you avoid common mistakes and achieve a professional look at home.
Why Stain A Wood Dresser?
Staining is not just about changing color. It’s about protecting the wood, highlighting the grain, and making your furniture last longer. A good stain can hide small scratches and make old wood look new. Unlike paint, which covers the surface, stain soaks into the wood, allowing the natural texture to show.
This creates a warm, classic look that fits almost any style.
Many people choose staining over painting because:
- Durability: Stain penetrates the wood, making it less likely to chip or peel.
- Natural look: Stain enhances the wood’s character and grain patterns.
- Customization: You can choose from many shades, from light oak to dark walnut.
Let’s explore how to stain a wood dresser, step by step.
Understanding The Types Of Wood And Stain
Before you start, it’s important to know what type of wood your dresser is made from. Some woods take stain better than others. For example, oak absorbs stain easily and shows grain patterns clearly, while pine can stain unevenly due to its soft and hard spots.
Common Woods Used In Dressers
| Wood Type | Stain Absorption | Grain Visibility |
|---|---|---|
| Oak | High | Very Clear |
| Pine | Uneven | Moderate |
| Maple | Low | Subtle |
| Cherry | Medium | Rich |
| Birch | Medium | Soft |
If your dresser is made from engineered wood or has a veneer (a thin layer of real wood over plywood), staining can be tricky. Veneers are thin and can be damaged easily by sanding. Always check before starting.
Types Of Wood Stain
Stains come in different types, each with pros and cons:
- Oil-based stain: Penetrates deeply, dries slowly, and is durable. Good for beginners.
- Water-based stain: Dries faster, has less smell, and is easier to clean up. Shows wood grain well.
- Gel stain: Thicker, sits on the surface, and is good for woods that stain unevenly.
Choosing the right stain depends on your dresser’s wood and your desired finish.
Credit: grillo-designs.com
Tools And Materials You’ll Need
Gather all your supplies before you start. Having the right tools makes the process smoother and helps you get a better result.
Essential materials:
- Wood stain (choose your color and type)
- Sandpaper (medium, fine, and extra-fine grits: 120, 180, 220)
- Tack cloth or lint-free rags
- Foam brushes or staining pads
- Wood conditioner (especially for softwoods like pine)
- Wood filler (for fixing dents or holes)
- Painter’s tape
- Screwdriver (to remove hardware)
- Drop cloths or plastic sheets
- Rubber gloves
- Safety goggles and mask
- Sealer or topcoat (polyurethane or lacquer)
- Paint stirrer
- Disposable container (for stain)
- Old clothes (stain can be messy)
Optional but helpful:
- Orbital sander (for large, flat surfaces)
- Vacuum (to remove sanding dust)
- Small paintbrush (for corners and details)
Preparing The Workspace
Staining is messy and needs good ventilation. Choose a spot with plenty of fresh air, like a garage with the door open or an outdoor covered area. Lay down drop cloths to protect the floor. Make sure you have enough light to see the wood grain and stain color clearly.
Remove everything from the dresser, including drawers, knobs, and handles. Place them on a flat surface to stain separately. Label the drawers if you think you might mix them up.
Step-by-step: How To Stain A Wood Dresser
Let’s break down the staining process into clear, practical steps.
1. Remove Old Finish And Hardware
Use a screwdriver to take off all handles, knobs, and metal parts. This prevents them from getting stained or scratched. Keep all hardware in a safe place.
If your dresser has an old layer of paint or varnish, you’ll need to remove it. You can use sandpaper or a paint stripper. For thick finishes, a chemical stripper speeds up the process, but always follow safety instructions. Scrape off the loosened finish with a putty knife, then wipe with a clean rag.
2. Sand The Surface
Sanding is the secret to a smooth, even stain. Start with medium-grit sandpaper (120 grit) to remove any roughness, then move to fine-grit (180 grit) and finish with extra-fine (220 grit). Always sand with the wood grain, not against it. This avoids scratches that will show after staining.
For flat surfaces, use an orbital sander for speed and even pressure. For corners and curves, sand by hand. Don’t rush this step—smoothness makes a big difference in the final look.
After sanding, wipe away all dust with a tack cloth or a damp rag. Even small dust particles can cause bumps in the finish.
3. Fix Dents, Holes, And Imperfections
Inspect the dresser for small holes, dents, or scratches. Fill them with a stainable wood filler. Press the filler into the hole, smooth it with a putty knife, and let it dry fully. Sand again lightly to make sure the filled area is flush with the wood.
Non-obvious insight: Choose a wood filler that matches your stain color. Some fillers absorb stain differently, which can leave spots. Test on a small area if you’re unsure.
4. Apply Wood Conditioner (if Needed)
Some woods, like pine, cherry, or birch, can absorb stain unevenly, causing blotches. A pre-stain wood conditioner helps the stain go on evenly.
Brush or wipe on the conditioner, following the product instructions. Wait for the recommended time (usually 15-30 minutes), then wipe off any excess. Stain within 2 hours for best results.
5. Stain The Dresser
Stir the stain well before using. Don’t shake the can—shaking can cause bubbles. Pour a small amount into a disposable container.
Dip a foam brush or staining pad into the stain, then apply it in the direction of the wood grain. Work on one section at a time (for example, the top, then the sides, then the drawers). Don’t let the stain pool or drip.
After a few minutes (usually 5-15, depending on the stain and desired color), wipe off the excess with a clean, lint-free rag. The longer you leave the stain before wiping, the darker the color will be. For a richer color, you can apply a second coat after the first one dries.
Comparing Stain Application Tools
| Tool | Best For | Pros | Cons |
|---|---|---|---|
| Foam brush | Flat surfaces, edges | Cheap, easy to use | May tear, not for corners |
| Staining pad | Large areas | Even coverage, reusable | Not for fine details |
| Linen rag | Wiping excess | No lint, flexible | May soak up too much stain |
| Paintbrush | Crevices, carvings | Precise, detailed work | Brush marks possible |
6. Let The Stain Dry
Drying time depends on the type of stain, the wood, and the room temperature. Most stains need at least 8-24 hours to dry fully. Check the label for exact times. Do not rush to the next step—if the stain is tacky, it is not ready.
7. Apply Additional Coats (if Needed)
If you want a deeper color, repeat the staining process. Lightly sand the surface with extra-fine sandpaper (320 grit) between coats for the smoothest finish. Always wipe away any dust before applying more stain.
8. Seal The Stain
Stain alone does not protect the wood from water, scratches, or wear. A clear sealer is essential for a long-lasting finish. The two most common types are polyurethane (oil- or water-based) and lacquer.
- Oil-based polyurethane: Very durable, slightly amber tint, longer drying time.
- Water-based polyurethane: Dries clear, fast drying, low odor.
- Lacquer: Very glossy, dries quickly, best for spray applications.
Apply the sealer with a clean brush or foam applicator. Use long, even strokes, and avoid over-brushing. Allow to dry (usually 4-6 hours for water-based, 12-24 for oil-based), then sand lightly with 320-grit sandpaper. Remove dust and add 1-2 more coats for the best protection.
Non-obvious insight: Never seal before the stain is fully dry. Even a little leftover moisture can cause clouding or peeling.
9. Reattach Hardware And Drawers
When the final coat of sealer is fully dry (wait at least 24-48 hours), reattach all the handles, knobs, and other hardware. Insert the drawers and place the dresser where you want it.
If you want a vintage or distressed look, lightly sand the edges and corners before sealing.
Common Mistakes To Avoid
Many people make the same errors when staining for the first time. Here’s how to avoid them:
- Skipping sanding: Stain won’t hide scratches or rough spots. Sand thoroughly for a pro finish.
- Not removing dust: Dust under the stain causes bumps and uneven color.
- Applying stain too thick: Thick layers don’t dry well and can look blotchy.
- Ignoring wood conditioner: Skipping conditioner on softwoods leads to blotchy results.
- Rushing the process: Allow full drying time between steps, especially before sealing.
- Forgetting to test stain: Always test on a hidden spot or scrap wood to see the actual color.

Credit: www.instructables.com
Choosing The Right Stain Color
Picking a stain color can feel overwhelming. Consider the style of your room, other furniture, and how much you want the wood grain to show.
Lighter stains (like natural, golden oak, or honey) make rooms feel bigger and brighter. Darker stains (like walnut, espresso, or ebony) give a dramatic, modern look. Medium stains (like cherry or pecan) offer warmth and classic style.
Lighting affects how the color looks. Test your chosen stain on a hidden part of the dresser or a scrap piece before committing.
Caring For Your Stained Dresser
A stained and sealed dresser needs little maintenance but will last longer if you care for it properly.
- Wipe up spills immediately to avoid stains or watermarks.
- Dust regularly with a soft, dry cloth.
- Avoid harsh cleaners—use a damp cloth with mild soap if needed.
- Protect from sunlight—direct sun can fade the finish over time.
- Use coasters or mats under items to prevent scratches.
If the finish gets dull, you can refresh it with a wipe-on furniture polish or a new thin coat of polyurethane.
Advanced Tips For A Professional Finish
If you want to take your staining skills further, here are some expert techniques:
- Wet the wood before staining (called “water popping”). This raises the grain and helps the stain absorb evenly, especially on woods like maple.
- Mix stains to create a custom color. Blend small amounts in a separate container and test before applying.
- Layer different stains for depth. Apply a light stain, let it dry, then add a darker one.
- Use tinted sealers for extra color and protection in one step.
Non-obvious insight: Temperature and humidity matter. Stain and sealer dry slower in cool, damp weather. Plan your project for a dry, warm day if possible.
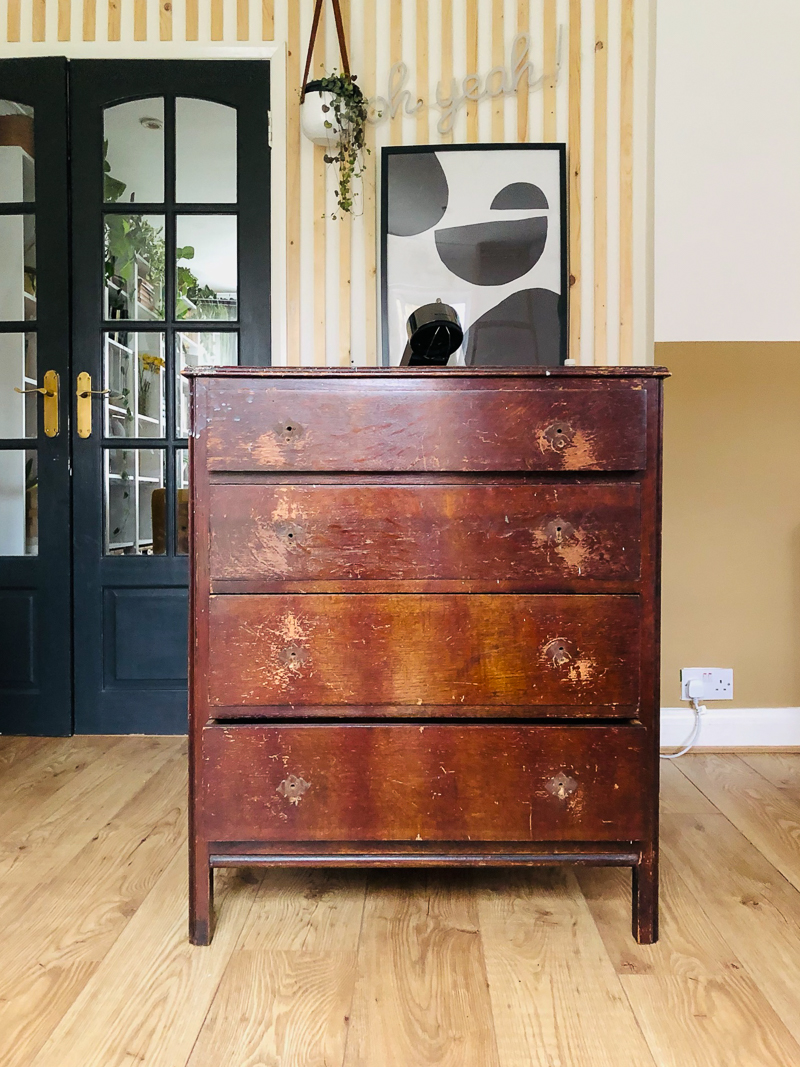
Real-life Example: Transforming A Vintage Dresser
Jessica found a solid wood dresser at a thrift store for $50. It was scratched, had an old orange finish, and the hardware was rusty. She wanted a modern, dark walnut look.
She started by removing all hardware and sanding the dresser down to bare wood, using a random orbital sander for large areas and hand sanding the details. She filled dents with a dark wood filler and used a pre-stain conditioner because the dresser was made of birch.
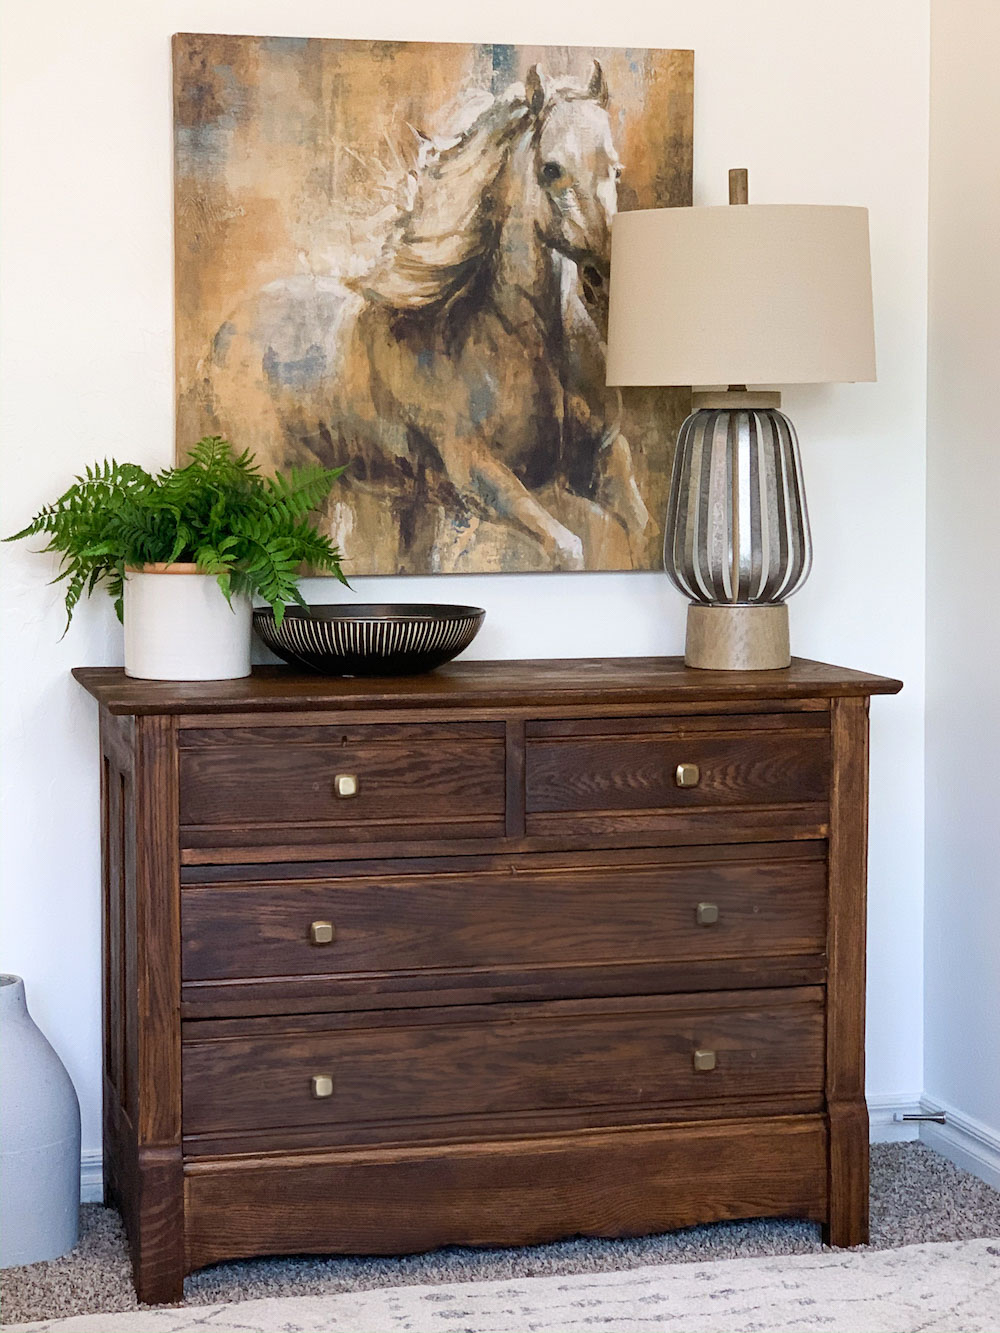
Jessica applied two coats of oil-based walnut stain with a foam brush, wiping away excess after 10 minutes. After letting it dry for 24 hours, she sealed it with three coats of water-based polyurethane.
After reattaching new matte black handles, the dresser looked brand new—at a fraction of the cost of buying one. The grain showed beautifully, and the finish was smooth and even.
Comparing Stain Vs. Paint For Dressers
If you’re still deciding between stain and paint, consider the differences:
| Feature | Stain | Paint |
|---|---|---|
| Shows wood grain | Yes | No |
| Durability | High | Medium |
| Color choices | Natural tones | Any color |
| Easy to repair | Yes | No |
| Prep time | More (sanding) | Less (can prime and paint) |
| Style | Classic, rustic | Modern, bold |
Stain is the better choice if you want to keep the wood’s character and enjoy a natural, timeless look.
Safety Considerations
Some stains and sealers contain strong chemicals. Always work in a well-ventilated area and wear gloves, goggles, and a mask. Keep rags soaked with oil-based stain in a sealed metal can or lay them out to dry outside. Oil-soaked rags can catch fire if piled up due to chemical reactions.
Keep all products away from children and pets. Read all instructions and warnings before you begin.
For more details on stain safety and wood finishing, you can visit the Wood Magazine Wood Stains Guide.
Credit: www.homedepot.com
Frequently Asked Questions
How Long Does It Take To Stain A Wood Dresser From Start To Finish?
Staining a dresser is usually a two-day project. Sanding and prepping can take 2-4 hours, staining about 1 hour, and each coat of sealer needs several hours to dry. Allow at least 24 hours for the stain to dry before sealing, and another 24-48 hours for the final sealer coat to cure before using the dresser.
Can You Stain Over An Old Finish Or Paint?
Stain will not work well over paint or a sealed finish. For the best results, you must remove all old paint or varnish by sanding or stripping. Stain needs to soak into bare wood to look good and last.
What If The Dresser Is Made Of Veneer, Not Solid Wood?
You can stain veneer, but be very gentle with sanding. Veneer is a thin layer and can be sanded through easily. Use a light touch and fine sandpaper (220 grit or higher). Test your stain on a hidden spot first.
How Can I Avoid Blotchy Or Uneven Stain?
Use a pre-stain wood conditioner on softwoods and woods with uneven grain, like pine or birch. Apply the stain evenly, work in small sections, and wipe off excess promptly. Always test on a scrap piece first.
Is It Okay To Use Water-based Stain With Oil-based Sealer?
Yes, you can use a water-based stain with an oil-based sealer, but let the stain dry completely (up to 48 hours) before applying the sealer. Always check the product labels for compatibility and drying times.
Bringing new life to an old wood dresser is rewarding and practical. With careful preparation, the right materials, and patience, you can create a beautiful piece that will last for years. Staining lets you show off the natural charm of wood, and each project helps you learn more about working with your hands.
Enjoy your renewed dresser and the satisfaction of a job well done!
