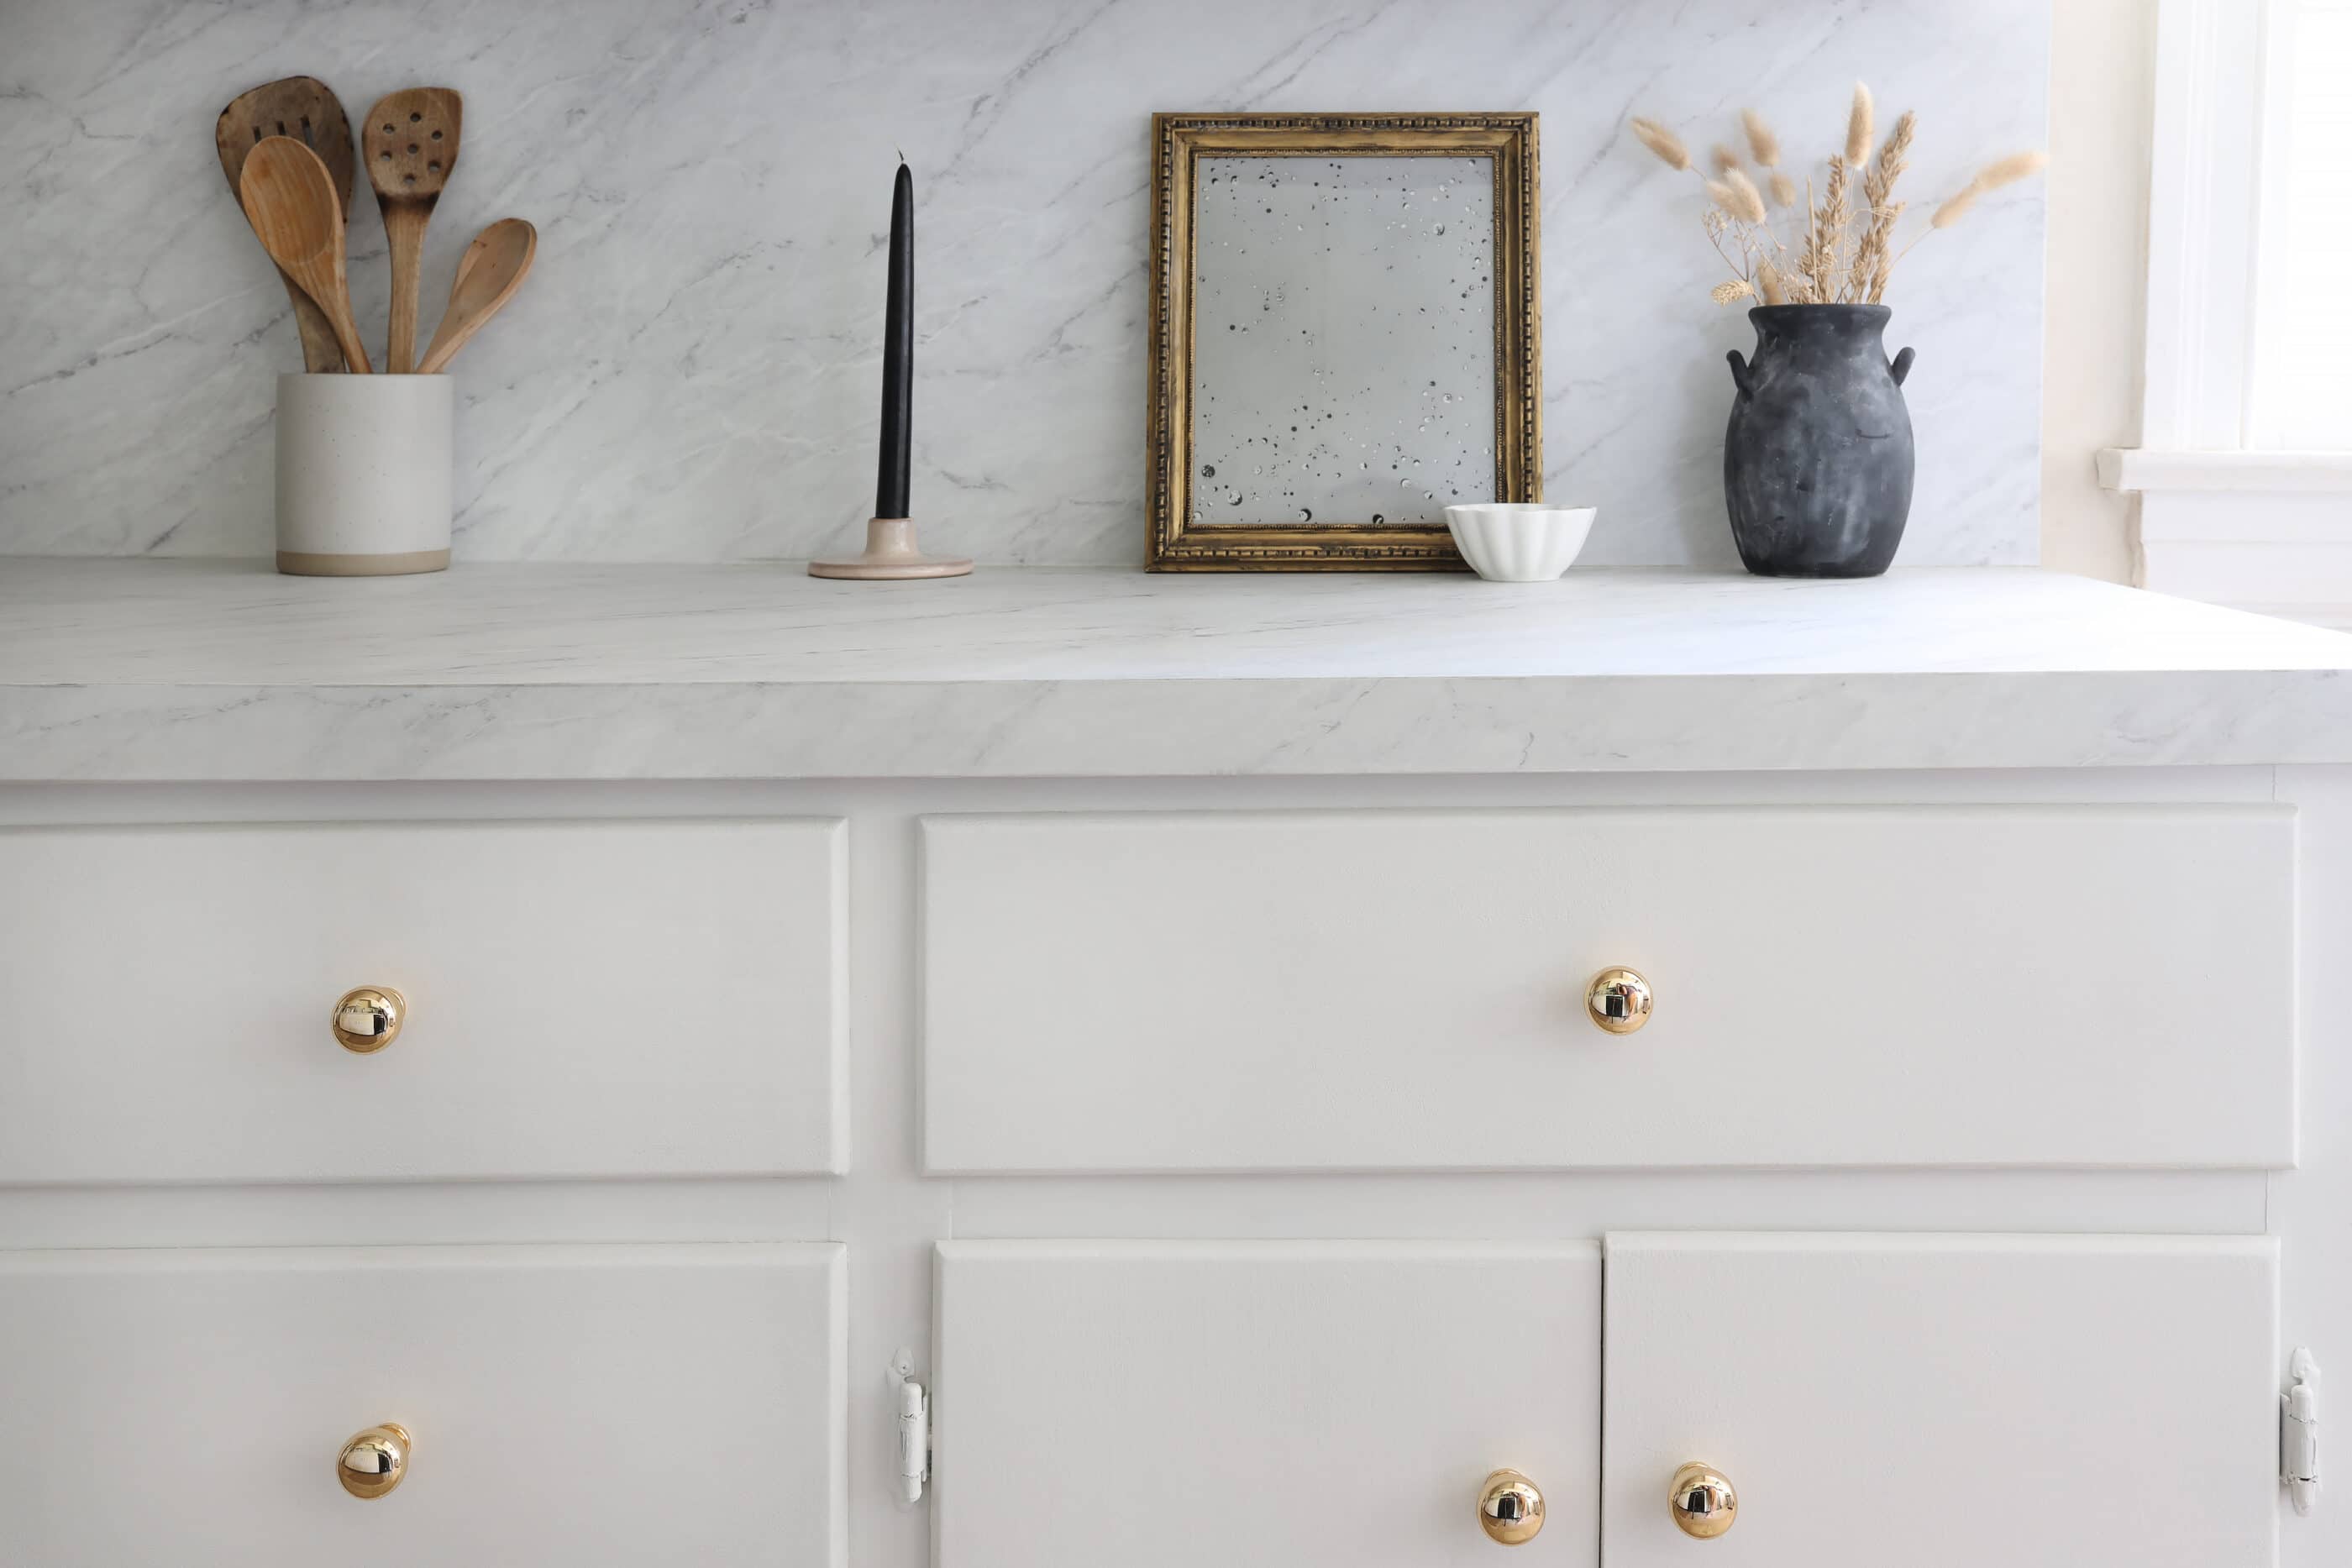
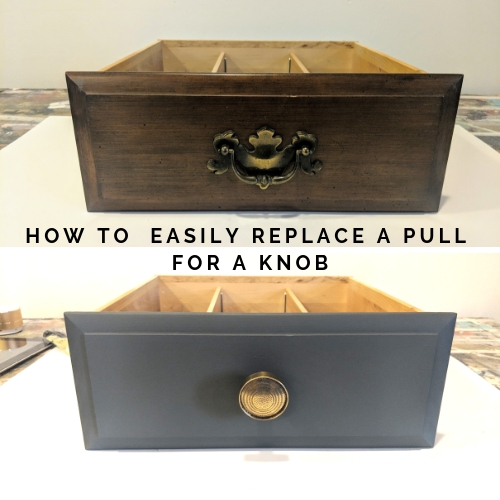
Changing drawer pulls can make old furniture look new again. This simple update is a favorite among homeowners, renters, and DIY lovers. You do not need special skills or expensive tools. With just a bit of care, you can change the look of your kitchen, bathroom, or bedroom drawers in less than an hour.
Drawer pulls are often the first thing people notice. They can turn a plain dresser into a stylish piece or make a kitchen feel more modern. If you have never replaced hardware before, this guide will help you avoid common mistakes and get a great result.
Many people think that replacing drawer pulls is just about unscrewing and screwing. But there are hidden steps that matter. For example, some pulls need a different size hole. Others have screws that do not fit well. There are tricks to choosing the right style and finish for your space, and little details about cleaning and measuring that make the job easier.
This guide will walk you through everything—from picking the best pulls to installing them perfectly. Whether you want a quick upgrade or a big transformation, you will find all you need here.
Why Replace Drawer Pulls?
Drawer pulls are more than just handles. They affect how your room looks and feels. Changing pulls is a fast way to refresh your furniture without buying new pieces. Here are a few reasons people replace them:
- Update style: New pulls can make old furniture look modern, classic, or trendy.
- Repair damage: Broken or loose pulls make drawers hard to use.
- Match décor: Sometimes, existing pulls do not fit with new paint or furniture.
- Increase comfort: Some pulls are hard to grip or too small for easy use.
- Boost value: Updated hardware can help sell a home or make rental units more attractive.
Replacing pulls is also cost-effective. Quality pulls start at $2–$5 each, and even designer options usually cost less than $20 per piece. Compared to buying new furniture, this is a smart investment.
Types Of Drawer Pulls
Drawer pulls come in many shapes, sizes, and finishes. Choosing the right type is important for both style and function. Here are the main types you will find:
| Type | Description | Common Uses |
|---|---|---|
| Knobs | Small, round or square, single screw | Dressers, kitchen cabinets |
| Handles/Bars | Longer, attached by two screws | Modern kitchens, office furniture |
| Cup Pulls | Half-moon shape, fingers slip underneath | Vintage, farmhouse style cabinets |
| Drop Pulls | Handle hangs down, swings when pulled | Antique furniture, traditional dressers |
| Ring Pulls | Round ring, attached to a base | Accent furniture, unique styles |
Each type has its own pros and cons. For example, knobs are easy to install and work well for smaller drawers. Handles give a strong grip and suit heavier drawers. Cup pulls are comfortable, but may not fit every style. When choosing, consider both looks and how you use the drawer.
How To Choose The Right Drawer Pulls
Picking the right pulls can be tricky. You need to balance style, size, and function. Here are key points to help you choose:
Size And Hole Spacing
Measure the distance between screw holes on your drawer. This is called center-to-center spacing. Most handles are made for 3 inches (76 mm), but some are 4 inches or more. If you have knobs, you only need one hole per drawer.
| Pull Type | Common Hole Spacing | Tip |
|---|---|---|
| Knobs | Single hole | Fits all drawers |
| Handles | 3″–5″ center-to-center | Measure before buying |
| Cup Pulls | 3″–4″ center-to-center | Check backplate size |
If you buy pulls that do not match your existing holes, you may need to drill new holes. This is not hard, but it adds a step.
Material And Finish
Drawer pulls are made from metal, wood, ceramic, and plastic. Metal pulls (like brass or nickel) last longer and are easier to clean. Wood pulls suit rustic styles, but can wear down. Ceramic pulls add color, but may chip. Match the finish to other hardware in your room—like faucets, door handles, or light fixtures—for a unified look.
Style Considerations
Pulls should match your furniture and room style. Here are some ideas:
- For a modern room, choose sleek bar handles in chrome or matte black.
- For classic spaces, brass cup pulls or glass knobs add charm.
- For farmhouse style, aged bronze or wooden pulls fit well.
Practical Advice
- Try to hold sample pulls before buying. Some feel sharper or heavier than others.
- For kitchens or bathrooms, pick pulls that are easy to clean and resist moisture.
- Avoid overly ornate pulls for high-traffic areas—they can catch on clothes or break.
Tools And Supplies Needed
You do not need a big toolbox to replace drawer pulls. Here are the basic items:
- Screwdriver (usually Phillips or flathead)
- Tape measure or ruler
- Level (optional, for handles)
- Pencil
- Drill (only if new holes are needed)
- New screws (sometimes included with pulls)
- Masking tape (to protect surfaces)
- Cleaner (for prepping old drawers)
If your pulls come with their own screws, check that they fit your drawer thickness. If not, you may need to buy longer or shorter screws.

Credit: www.hooksandknobs.com
Step-by-step Guide To Replacing Drawer Pulls
Follow these steps for a smooth upgrade. Each step matters—skipping one can lead to crooked pulls or damage.
Step 1: Remove Old Pulls
Open the drawer and look for screws on the inside. Use a screwdriver to remove them. If the pulls are stuck, wiggle gently—do not force. For painted pulls, use a bit of masking tape around the area to avoid chipping paint.
Step 2: Clean Drawer Surface
Old drawers often have dirt or sticky marks under pulls. Use a soft cloth and mild cleaner. If you see leftover paint or rough spots, sand lightly. This helps new pulls sit flat.
Step 3: Check Hole Spacing
Measure the distance between screw holes. If you are switching from knobs to handles, check if you need to drill extra holes. Mark new holes with a pencil. Use a level to make sure handles are straight.
Step 4: Drill New Holes (if Needed)
If your new pulls need different holes, place masking tape where you will drill. This prevents chipping. Use a drill bit that matches the screw size. Drill slowly and carefully.
Step 5: Attach New Pulls
Hold the pull in place and insert screws from inside the drawer. Tighten gently. Do not overtighten, or you could crack wood or strip the threads. For handles, check that both sides are level before tightening.
Step 6: Test Function
Open and close the drawer several times. Make sure the pull feels firm and comfortable. Check for wobbling or misalignment. If needed, loosen the screw and adjust position.
Step 7: Final Clean-up
Wipe off fingerprints or dust. Remove any leftover tape. Enjoy your refreshed drawers!
Tips For A Perfect Result
Replacing drawer pulls is simple, but a few expert tips make the process even better.
- Replace one pull first: Test fit and comfort before doing all drawers.
- Use a template: For multiple drawers, use a cardboard or plastic template to mark holes. This ensures uniform placement.
- Check screw length: Some drawers are thick or thin. If screws are too long, pulls will feel loose. If too short, they will not attach. Bring a sample screw when shopping.
- Mix styles carefully: If you want a mix of knobs and handles, keep the finish or color the same for a balanced look.
- Avoid common mistakes: Do not rush drilling. Crooked holes are hard to fix. Double-check measurements.
Credit: semistories.semihandmade.com
Common Challenges And Solutions
Even simple jobs can run into problems. Here are some issues people face:
Screws Don’t Fit
Drawer fronts can be thick or thin, so standard screws may not work. If screws are too short, buy longer ones at a hardware store. If too long, use washers or cut them down.
Holes Don’t Line Up
If you switch from handles to knobs (or vice versa), holes may not match. Fill old holes with wood filler, sand, and paint. Drill new holes as needed. For antique furniture, try to keep the original holes to protect value.
Paint Chips Or Splinters
Drilling can cause chips. Always use masking tape and a sharp drill bit. Sand gently after drilling.
Pulls Feel Loose
Loose pulls are usually caused by stripped threads or wrong screw length. Try a thread locking liquid or replace the screw.
Drawer Pull Styles Compared
Different styles suit different rooms and needs. Here’s a comparison of popular types:
| Style | Best For | Pros | Cons |
|---|---|---|---|
| Knobs | Small drawers, simple looks | Easy install, cheap | Less grip, can rotate |
| Handles/Bars | Heavy drawers, modern style | Strong grip, many designs | Needs two holes, harder to align |
| Cup Pulls | Vintage, farmhouse | Comfortable, hides screws | Bulky, limited styles |
| Drop Pulls | Antique furniture | Unique look, easy to grab | Can swing, tricky to install |
| Ring Pulls | Accent pieces | Decorative, unusual | Can catch on clothes |
How To Match Drawer Pulls To Your Room
Matching hardware is key to a cohesive look. Here are ways to do it:
- Look at finishes: If your faucet is brushed nickel, match pulls in the same finish.
- Consider color: Black pulls suit white cabinets; brass adds warmth to wood.
- Room style: Modern rooms need clean lines; vintage rooms look best with ornate pulls.
- Mixing finishes: If you must mix, keep one finish dominant and use the other as an accent.
Practical example: In a kitchen with stainless steel appliances, choose chrome or brushed nickel pulls. For a rustic bedroom, aged bronze or wooden pulls fit best.
Real-world Examples
Many people share before-and-after photos of drawer upgrades. For example, a $20 pack of matte black handles turned a dated oak dresser into a centerpiece. In kitchens, swapping old brass handles for sleek bars made the whole room look brighter and newer.
Home improvement sites report that updating hardware can increase home value by up to 5%. It is one of the best returns for small investments. Renters often use removable pulls to personalize their space.
Credit: www.hometalk.com
Cleaning And Maintaining Drawer Pulls
New pulls need care to stay looking good. Here’s how:
- Metal pulls: Wipe with a soft cloth. Use mild soap for sticky spots.
- Wood pulls: Dust often. Avoid water—use a dry cloth.
- Ceramic pulls: Clean gently, avoid hard scrubbing.
- Plastic pulls: Use soap and water, but avoid harsh chemicals.
If pulls tarnish, use a specialty cleaner. For brass, a mix of lemon and baking soda works well. For nickel, just wipe with a damp cloth.
Mistakes Beginners Make
People new to replacing pulls often make these errors:
- Not measuring hole spacing: Buying handles that do not fit the existing holes.
- Ignoring screw length: Using screws that are too short or long.
- Skipping cleaning: Installing pulls on dirty surfaces, causing uneven fit.
- Drilling too fast: Making crooked holes or causing splinters.
- Mixing too many styles: Creating a messy look instead of a coordinated one.
Avoid these by planning ahead and checking each step.
Advanced Tips For A Custom Look
If you want something unique, try these ideas:
- Paint old pulls: Use spray paint for a new finish—metallic, matte, or color.
- Add backplates: Decorative backplates cover old holes or add detail.
- Mix materials: Combine metal with wood or ceramic for a fresh look.
- Personalize pulls: Add initials, patterns, or stickers for a fun touch.
Some people even make their own pulls from rope, leather, or vintage items. This is popular in creative spaces or children’s rooms.
Environmental Impact Of Drawer Pulls
Most pulls are made from recyclable materials like metal and glass. When removing old pulls, donate them or use them for crafts. Avoid buying plastic if you want an eco-friendly option. Buying from local makers also cuts down on shipping emissions.
Where To Buy Drawer Pulls
You can find pulls at hardware stores, online shops, or specialty stores. Large retailers like Home Depot and Lowe’s have many choices. Online, sites like Wayfair and Amazon offer hundreds of styles. For unique pulls, try Etsy or specialty shops.
When buying, check reviews and return policies. Some pulls look different in person than online. If possible, buy a sample before ordering in bulk.
For more information about types and history of drawer pulls, you can read at Wikipedia.
Cost Comparison: Drawer Pulls
Drawer pulls range in price depending on material and style. Here’s a look at average costs:
| Material | Average Price (each) | Durability |
|---|---|---|
| Metal | $4–$15 | High |
| Wood | $3–$10 | Medium |
| Ceramic | $5–$12 | Medium |
| Plastic | $2–$6 | Low |
Buying in packs saves money. For example, a set of 10 metal handles may cost $40–$70. Designer pulls cost more, but for most projects, basic options look great.
Frequently Asked Questions
How Do I Know What Size Drawer Pull To Buy?
Measure the distance between existing holes on your drawer. This is the center-to-center spacing. If you are installing knobs, just check the size of the drawer front and choose a knob that fits comfortably in your hand.
Can I Use Different Styles Of Pulls In One Room?
Yes, but keep the finish and color similar for a unified look. For example, use knobs on upper drawers and handles on lower drawers, but all in matte black. Mixing styles works best when it feels intentional.
Do I Need A Drill To Replace Drawer Pulls?
Not always. If your new pulls fit the existing holes, a screwdriver is enough. If you need new holes, a drill is required. Always use masking tape to avoid splintering the wood.
What If The New Pulls Do Not Fit My Old Holes?
You can fill extra holes with wood filler and paint over them. Then, drill new holes as needed. For antique furniture, try to match the original holes to avoid lowering value.
How Can I Keep My New Pulls Looking Good?
Clean them regularly with a soft cloth. For metal, use mild soap if needed. Avoid harsh chemicals, especially on wood and ceramic. Check for loose screws every few months.
Changing drawer pulls is a small project with big impact. With careful planning and the right tools, you can refresh your furniture and room style in just a few hours. Remember to measure, match, and test each pull. This guide helps you avoid mistakes and create results you will love.
Whether you want a modern, classic, or creative look, the perfect drawer pull is out there—waiting for you to install.