
Turning a sunroom into a cozy, energy-efficient space is a dream for many homeowners. However, one area often overlooked is the sunroom ceiling. Without proper insulation, a sunroom can become uncomfortably hot in summer and chilly in winter, limiting its use for much of the year. Insulating the ceiling is one of the smartest steps you can take to make your sunroom comfortable, reduce energy bills, and even protect your furniture from harsh temperature swings.
Many people feel unsure about the best way to insulate a sunroom ceiling, especially with the variety of materials and methods available. This guide will walk you through everything you need to know—from understanding your sunroom’s structure, to choosing the right insulation, to step-by-step installation.
By the end, you’ll be ready to transform your sunroom into a space you can enjoy all year.
Why Insulate Your Sunroom Ceiling?
Sunrooms are unique spaces with large windows and often lightweight construction. The ceiling, in particular, is a major source of heat loss in winter and heat gain in summer. Here’s why proper insulation is essential:
- Temperature control: Insulation helps maintain a stable temperature, making your sunroom usable in all seasons.
- Lower energy costs: Preventing heat transfer means less work for your heating and cooling systems.
- Moisture control: Good insulation can help prevent condensation, mold, and mildew.
- Noise reduction: Insulation dampens outside noise, making the space quieter and more relaxing.
- Furniture protection: Reducing temperature swings protects fabrics, wood, and electronics.
Many sunrooms built decades ago have little or no ceiling insulation. Even newer sunrooms may lack adequate protection, especially if installed as a DIY kit. Upgrading the ceiling insulation is often the single most effective improvement you can make.
Understanding Your Sunroom’s Structure
Before you start, it’s important to understand the type of sunroom ceiling you have. This affects which insulation materials and methods work best.
Common Sunroom Ceiling Types
1. Glass Or Polycarbonate Roofs
These allow maximum sunlight but are poor insulators and can be tricky to retrofit.
2. Aluminum Or Metal Panel Roofs
Often used in prefab sunrooms. They conduct heat and cold easily.
3. Conventional Framed Roofs
Built with wood rafters and often covered with drywall or paneling. These are easiest to insulate.
4. Cathedral Or Vaulted Ceilings
Higher ceilings with more air space, sometimes with skylights.
Knowing your ceiling’s construction helps you choose insulation that fits, seals well, and won’t cause moisture problems.
Choosing The Right Insulation Material
The right insulation material depends on your climate, budget, and ceiling type. Here’s an overview of common options:
| Insulation Type | R-Value per Inch | Best For | Pros | Cons |
|---|---|---|---|---|
| Fiberglass Batts | 2.9 – 3.8 | Framed ceilings | Affordable, easy to install | Needs vapor barrier, can sag |
| Rigid Foam Boards | 4.5 – 6.5 | Metal or glass roofs, tight spaces | High R-value, moisture resistant | Costlier, may need furring strips |
| Spray Foam | 6.0 – 7.0 | Complex spaces | Air-sealing, high R-value | Expensive, professional install best |
| Reflective Foil | Varies | Hot climates, metal roofs | Blocks radiant heat | Less useful in cold climates |
- R-Value measures how well insulation resists heat flow. Higher numbers mean better insulation.
- Moisture and vapor barriers are important if your area has humid summers or cold winters.
Special Considerations
- For glass or polycarbonate roofs, consider removable shades or insulated panels, since most insulation materials cannot be applied directly.
- For metal roofs, combine rigid foam or spray foam with a radiant barrier for best results.
- In cold climates, vapor barriers are critical to prevent condensation.
Tools And Supplies Needed
Insulating a sunroom ceiling does not require rare or expensive tools, but being prepared makes the project smoother. Here’s a checklist:
- Tape measure
- Utility knife
- Straightedge or ruler
- Staple gun (for batts or foil)
- Construction adhesive (for rigid foam)
- Safety goggles and gloves
- Ladder or scaffold
- Caulk or spray foam (for sealing gaps)
- Vapor barrier material (if needed)
- Drywall or ceiling panels (for finishing)
- Dust mask or respirator (especially with fiberglass or spray foam)
Having all supplies ready prevents delays. Always check the manufacturer’s instructions for your chosen insulation.
Step-by-step Guide: How To Insulate A Sunroom Ceiling
The process will vary based on your ceiling type and insulation choice. Here are the most common scenarios with step-by-step instructions.
1. Preparation And Safety
Before starting, clear the sunroom as much as possible. Remove any light fixtures, fans, or ceiling decorations. Lay down drop cloths to protect floors and furniture. If you are dealing with electrical wiring, turn off power at the breaker.
Safety is critical. Wear gloves, long sleeves, eye protection, and a mask. Fiberglass and some foams can irritate skin and lungs.
2. Inspect And Repair Ceiling
Check for leaks, sagging panels, or mold. Any water problems must be fixed before you add insulation. Remove any damaged materials.
Look for gaps at the edges, around skylights, or where the ceiling meets the walls. Seal these with caulk or spray foam to prevent air leaks.
3. Install Vapor Barrier (if Needed)
In areas with cold winters or high humidity, a vapor barrier helps prevent moisture from entering the insulation. For framed ceilings, staple plastic sheeting to the underside of the rafters before installing insulation. Overlap seams by at least 6 inches and tape them securely.
Do not skip this step in climates with high seasonal moisture swings—it prevents rot and mold inside your ceiling.
4. Installing Fiberglass Batts
Fiberglass batts are the classic insulation for framed ceilings.
- Measure the space between rafters.
- Cut batts to fit snugly between the rafters. Do not compress the insulation.
- Place each batt with the vapor barrier facing the living space.
- Staple the tabs to the rafters (if present), or friction-fit the batts in place.
- Fill all gaps, especially at the edges and around fixtures.
- Install drywall or ceiling panels to enclose the insulation.
If your sunroom ceiling is already closed, consider blown-in insulation instead. Holes are drilled, insulation is blown in, and the holes are patched.
5. Installing Rigid Foam Boards
Rigid foam is ideal for flat or metal ceilings and offers a high R-value.
- Measure and cut foam boards to fit the ceiling panels.
- Apply construction adhesive to the back of each board.
- Press boards firmly into place, starting at one edge and working across.
- Seal seams between boards with special tape or spray foam.
- For extra insulation, you can add a second layer, staggering the seams.
- Install furring strips if needed, then attach drywall or ceiling finish.
Rigid foam is also good for cathedral ceilings—just ensure you leave an air gap above the insulation for ventilation.
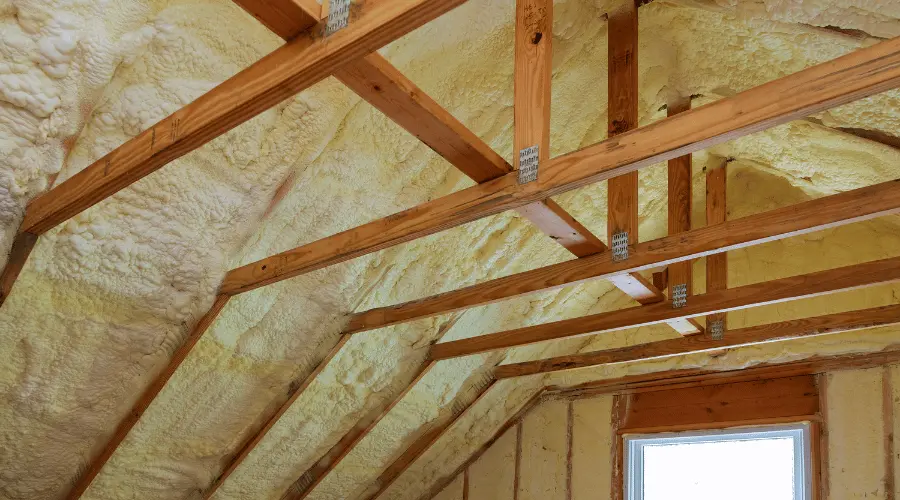
6. Installing Spray Foam
Spray foam offers superior air sealing and insulation but is best handled by professionals.
- The foam is sprayed directly onto the underside of the ceiling.
- It expands to fill all gaps and hard-to-reach spaces.
- Once cured, any excess is trimmed flush.
- The ceiling can then be finished with drywall or panels.
Spray foam is especially useful for complex ceiling shapes or where air leakage is a major problem.
7. Adding Reflective Foil
Reflective foil works best in hot climates and on metal roofs.
- Measure and cut foil to fit the ceiling panels.
- Attach with a staple gun or adhesive, leaving a small air gap above the foil for maximum effectiveness.
- Overlap seams and tape securely.
- For even better results, combine with fiberglass or foam boards.
Reflective foil blocks radiant heat, keeping your sunroom cooler in summer. It’s often used in combination with other insulations for layered protection.
Finishing The Ceiling
After installing insulation, you’ll need to finish the ceiling for both appearance and protection.
- Drywall: The most common finish, painted to match your decor.
- Tongue-and-groove wood: Adds a warm, natural look.
- Ceiling tiles or panels: Lightweight and easy to install.
- Paint: For metal or foam panels, use paint rated for the material.
Sealing any gaps and painting with moisture-resistant paint adds another layer of protection.

Credit: www.reddit.com
Addressing Skylights And Recessed Lights
Many sunrooms have skylights or recessed lighting, which are common sources of heat loss.
- For skylights, install insulated shades or covers that can be opened during the day.
- Around recessed lights, use insulation-safe fixtures (IC-rated) and leave a small air gap.
- Seal the trim with caulk or foam to prevent drafts.
If you have a ceiling fan, make sure insulation does not block air movement or interfere with wiring.
Comparing Insulation Methods: Cost, Efficiency, And Difficulty
To help you choose the best method for your sunroom, here’s a comparison of the most popular approaches:
| Method | Average Cost (per sq. ft.) | DIY Friendly? | Efficiency | Best For |
|---|---|---|---|---|
| Fiberglass Batts | $0.40 – $1.50 | Yes | Good | Framed ceilings |
| Rigid Foam | $1.00 – $2.50 | Yes (basic) | Very Good | Metal, complex roofs |
| Spray Foam | $2.00 – $4.00 | No (pro recommended) | Excellent | Complex, leaky ceilings |
| Reflective Foil | $0.15 – $0.50 | Yes | Fair (hot climates) | Metal roofs, sun control |
- Fiberglass batts are the most affordable and easiest for DIY.
- Spray foam offers the best air sealing but costs more and usually needs a pro.
- Rigid foam offers a good balance of R-value and ease for most sunrooms.
- Reflective foil is a low-cost upgrade for hot, sunny climates.
Common Mistakes To Avoid
Many first-time sunroom insulators make the same mistakes. Watch out for these:
- Skipping air sealing: Insulation works best when air leaks are sealed first.
- Ignoring moisture issues: Mold and rot can develop if you skip a vapor barrier where needed.
- Compressing insulation: Squashing fiberglass or foam reduces its effectiveness.
- Forgetting about ventilation: Some ceilings need an air gap to prevent moisture buildup.
- Using the wrong material: Not all insulation is suited for all ceiling types—check compatibility.
- Overlooking finishing: Unfinished insulation can release fibers or dust and looks unsightly.
One less obvious insight: Combining insulation types (for example, rigid foam plus reflective foil) often gives better results than using one alone.
Special Considerations For Older Sunrooms
Older sunrooms, especially those built before the 1980s, may have unique challenges:
- No existing insulation: You may need to open the ceiling to add insulation.
- Electrical wiring: Upgrades may be needed for safety.
- Structural issues: Old roofs may not support heavy materials—choose lightweight insulation.
- Lead paint or asbestos: If you suspect hazardous materials, consult a professional before starting.
In some cases, it may be more cost-effective to add a new ceiling layer rather than try to retrofit insulation into an old, thin roof.
Maintenance After Insulation
Insulating your sunroom ceiling is not a “set and forget” project. Annual checks will keep your space comfortable and safe.
- Inspect for water leaks after heavy rain or snow.
- Check for sagging, discoloration, or musty smells—signs of moisture issues.
- Look for gaps or cracks in ceiling panels, especially after extreme weather.
- Clean or replace any removable shades or covers seasonally.
If you spot problems, fix them early to avoid bigger repairs later.
How Insulation Affects Energy Bills
A well-insulated sunroom ceiling can make a noticeable difference in your home’s energy use. According to the U.S. Department of Energy, adding proper ceiling insulation can reduce heating and cooling costs by up to 20%. Sunrooms with large roof areas see the greatest savings.
Not only does this save money, but it also reduces your home’s carbon footprint. In addition, you may qualify for local rebates or tax credits for energy efficiency upgrades. Check with your local utility company for current programs.
Insulating A Glass Or Polycarbonate Sunroom Roof
Some sunrooms have all-glass or polycarbonate roofs, which present unique challenges. Traditional insulation cannot be applied directly, but you have options:
- Removable insulated panels: Custom panels can be inserted in winter and removed in summer.
- Thermal blinds or cellular shades: These trap air and add insulation.
- Reflective films: Special window films reflect heat and UV rays.
- Exterior shading: Awnings, sails, or pergolas reduce heat gain.
These solutions help control temperature without blocking all the natural light. Keep in mind that condensation is more likely with glass roofs, so choose products designed to resist moisture.
Professional Vs. Diy Installation
Many sunroom insulation projects can be handled by a confident DIYer. However, consider hiring a professional if:
- Your ceiling is high or hard to reach.
- Electrical or structural changes are needed.
- You want to use spray foam, which requires special equipment.
- You’re dealing with mold, asbestos, or other hazards.
A professional can recommend the best materials, ensure a proper vapor barrier, and finish the ceiling neatly. They can also advise on building codes, which may affect insulation thickness and fire ratings.
Credit: clarksvilleconstruction.net
Real-life Example: Sunroom Ceiling Insulation Project
To illustrate, here’s a real-world example:
A homeowner in Ohio had a 200-square-foot sunroom with a metal roof. In summer, temperatures reached over 100°F, making it unusable. After researching options, they chose to install 2-inch rigid foam boards with a radiant barrier.
- Preparation and sealing took one day.
- Foam board installation took two days.
- Finishing with tongue-and-groove panels took another day.
- Total cost: About $1,000 in materials.
- Result: Summer temperatures dropped by 18°F, and winter heating bills fell by 15%.
This project shows how the right insulation can quickly pay off and make a sunroom a favorite spot year-round.
Additional Tips For Maximum Comfort
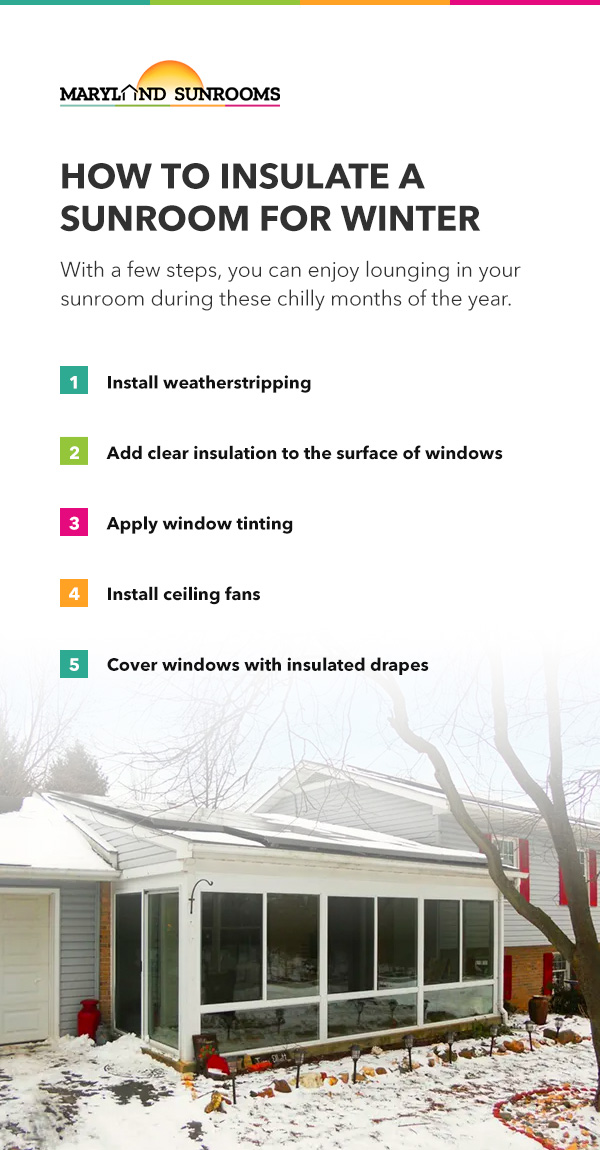
- Use thermal curtains or shades on windows for added insulation.
- Add ceiling fans to circulate air and reduce hot/cold spots.
- Choose light-colored roofing or reflective paint to reduce heat gain.
- Consider double-pane glass or storm windows for even better efficiency.
- Install a programmable thermostat if your sunroom is connected to central heating/cooling.
Layering strategies—insulation, window treatments, and smart ventilation—delivers the best comfort and savings.
Environmental Impact Of Sunroom Ceiling Insulation
Adding insulation is not just good for your wallet; it’s good for the planet. Using recycled or environmentally friendly materials can reduce your sunroom’s carbon footprint. For example, some rigid foams are made with eco-friendly blowing agents, and some fiberglass batts use recycled glass. When possible, choose low-VOC adhesives and finishes to improve indoor air quality.
Proper insulation also means your heating and cooling system works less, which reduces greenhouse gas emissions.
When To Insulate: Timing Matters
The best time to insulate your sunroom ceiling is during mild weather, when the space is not too hot or cold. This makes the work more comfortable and allows adhesives and caulk to cure properly. If you plan to renovate or paint, coordinate insulation at the same time for less disruption.
Remember, the sooner you insulate, the sooner you’ll enjoy the benefits.
Credit: www.marylandsunrooms.com
Frequently Asked Questions
How Thick Should Sunroom Ceiling Insulation Be?
The ideal thickness depends on the insulation type and your climate. In most U.S. regions, aim for an R-value of 30–38 in the ceiling. This usually means 8–12 inches of fiberglass or 4–6 inches of rigid foam. Always check local building codes for minimum requirements.
Can I Insulate Over An Existing Sunroom Ceiling?
Yes, you can add insulation over an existing ceiling by installing foam boards or a second layer of drywall with insulation sandwiched in between. Make sure to address moisture and air sealing first to avoid trapping condensation.
Is Spray Foam Insulation Safe For Sunroom Ceilings?
Spray foam is safe when installed by professionals. It offers excellent air sealing and moisture resistance. Off-gassing is minimal once cured, but proper ventilation during installation is important. For DIY, smaller kits are available, but professional installation is usually recommended.
What Is The Best Insulation For A Metal Sunroom Roof?
Rigid foam boards with a reflective foil facing are usually best for metal roofs. They combine high R-value with radiant heat blocking. Seal all seams carefully to prevent air leaks. In very hot climates, adding a radiant barrier on the outside can further reduce heat gain.
Where Can I Find More Information About Insulation Options?
For detailed, up-to-date advice, visit the U.S. Department of Energy’s Insulation Guide. They offer region-specific tips and product comparisons.
Upgrading your sunroom ceiling insulation is a project that pays off quickly in comfort, lower bills, and more use of one of your favorite spaces. With the right materials, a careful plan, and a bit of effort, you’ll enjoy a sunroom that feels great in every season.