
Plywood floors are often seen as a basic or unfinished surface. But with the right approach, you can turn plain plywood into a stylish, durable floor that fits any room. Many people overlook plywood as a real flooring option, but it actually offers great potential for customization, warmth, and affordability. Whether you want a rustic cabin look, a modern minimalist vibe, or a colorful statement, plywood can deliver—if you know what to do.
In this guide, you’ll discover how to make plywood floors look nice, from choosing the right plywood to applying the perfect finish. You’ll learn both simple upgrades and advanced design techniques. Plus, you’ll find real-world examples, clear steps, and practical advice that goes beyond what most beginners realize.
If you want your plywood floors to impress, not just “make do,” you’re in the right place.
Why Choose Plywood Floors?
Many homeowners and designers now see plywood floors as a smart choice for several reasons. First, cost is a big advantage. Plywood is much cheaper than hardwood, laminate, or tile. For example, quality plywood panels can cost $1 to $3 per square foot, while hardwood often starts at $6 per square foot or more.
Second, plywood is surprisingly versatile. You can cut it into planks, squares, or patterns. It takes paint, stain, and finish well, allowing for many creative styles. Plywood is also easier to install than hardwood for DIYers, saving time and money.
Third, plywood is eco-friendly. It uses less high-grade wood than solid planks, and some types are made with sustainable methods. If you care about the environment, you can find FSC-certified plywood that supports responsible forestry.
But the real appeal is how plywood can look great when treated well. With preparation and creativity, you can achieve a look that rivals more expensive floors.
Types Of Plywood Suitable For Floors
Not all plywood is equal. Choosing the right type is key for a good-looking, long-lasting floor.
1. Sanded Plywood
Sanded plywood has a smooth surface, making it ideal for floors. The top and bottom layers are free from major knots or defects. Choose grades like A/B or B/B for the best appearance.
2. Hardwood Plywood
This plywood has a thin layer of real hardwood (like oak, maple, or birch) on top. It costs more but gives a classic wood look and takes stain beautifully.
3. Subfloor Plywood
Standard subfloor plywood is strong but usually rough. Some people sand and finish it directly, but it may need extra prep to look nice.
4. Baltic Birch Plywood
Baltic birch is known for its uniform layers and strength. It’s a favorite for floors where you want durability and a clean look.
5. Marine-grade Plywood
This type uses waterproof glue and resists moisture, making it good for kitchens, bathrooms, or basements.
Comparison Of Popular Plywood Types For Flooring
| Type | Appearance | Durability | Cost (per sq.ft.) | Best Use |
|---|---|---|---|---|
| Sanded | Smooth, few knots | Medium | $1.50–$2.50 | Living areas, bedrooms |
| Hardwood | High-end wood look | High | $2.50–$4.00 | Dining rooms, entryways |
| Baltic Birch | Uniform, light color | High | $2.00–$3.00 | Modern, kids’ rooms |
| Marine-Grade | Smooth, few knots | Very high (water-resistant) | $3.00–$5.00 | Bathrooms, kitchens |
Insight: Beginners often buy the cheapest plywood, but spending a bit more on a smoother grade saves hours of sanding and gives much better results.
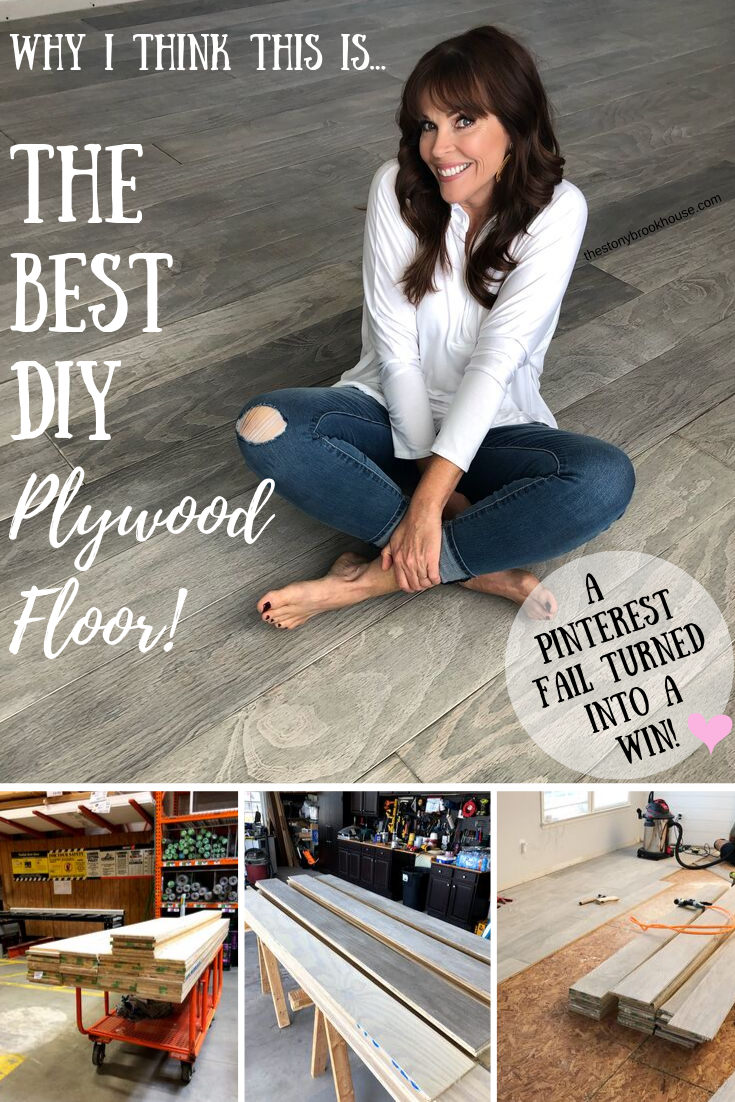
Credit: www.thestonybrookhouse.com
Preparing Plywood For A Beautiful Finish
Before you make plywood floors look nice, preparation is everything. Skipping steps here causes problems later.
Inspect And Select Boards
Check each plywood sheet for defects: large knots, splits, or warping. Even minor flaws stand out after finishing.
Acclimate The Plywood
Let the plywood sit in the room for at least 48 hours. This allows it to adjust to the room’s humidity and temperature, reducing the risk of gaps or buckling later.
Sand Thoroughly
Start with 80-grit sandpaper to remove roughness. Progress to 120-grit, then 220-grit for a silky finish. Always sand with the wood grain.
Fill Gaps And Holes
Use a wood filler that matches your plywood color. Fill nail holes, cracks, and knots. Once dry, sand again to smooth the surface.
Clean The Surface
Vacuum and wipe with a damp cloth to remove dust. Any leftover dust will ruin the finish.
Non-obvious insight: Even “sanded” plywood often has rough patches or raised grain. Don’t trust the label—feel every inch and sand as needed.
Creative Ways To Upgrade Plywood Floors
Plain plywood can be a blank canvas. Here are ways to make it stand out:
1. Paint For A Fresh Look
Painting is one of the fastest ways to change the look of plywood floors. You can go with a solid color or create patterns like stripes, checkerboards, or stencils.
- Use a high-quality floor paint for durability.
- Apply a primer first to block stains.
- For patterns, use painter’s tape to get clean lines.
2. Staining For A Wood Effect
Stain brings out the grain and gives warmth. Use a wood conditioner before staining to avoid blotches. Try layering different stain colors for a unique look.
3. Whitewashing For A Soft Style
Whitewashing creates a light, airy feel. Mix white latex paint with water (about 1:1 ratio), brush it on, then wipe off the excess. The grain shows through, but the color is soft.
4. Add A Clear Polyurethane Finish
For a natural look, apply several coats of clear polyurethane. This protects the plywood and brings out its beauty. Choose matte for a modern look or gloss for shine.
5. Create A Faux Plank Floor
Cut plywood sheets into “planks” (like 6” x 48”). Lay them with small gaps to look like real hardwood. Add a small “bevel” by sanding the edges.
6. Use Stencils Or Decals
Paint or stick on designs using stencils. Patterns like Moroccan tiles or geometric shapes can turn a plain floor into a statement.
7. Create Inlays With Tape Or Wood Strips
Add thin strips of contrasting wood or colored tape between planks for a custom inlay look.
8. Dye For Bold Color
Wood dye soaks in deeper than stain and comes in bright shades. It’s great for modern or artistic spaces.
Pro tip: Test every finish on a scrap piece before doing the whole floor. Plywood absorbs finishes unevenly, so results can surprise you.
Step-by-step Process To Upgrade Plywood Floors
Transforming your plywood floors involves these main steps:
Step 1: Gather Tools And Materials
You’ll need:
- Plywood sheets (chosen type and grade)
- Floor adhesive or nails/screws
- Sander and sandpaper (80, 120, 220 grit)
- Wood filler
- Primer, paint/stain/dye
- Brushes, rollers, rags
- Painter’s tape (for patterns)
- Polyurethane or floor sealer
- Vacuum and tack cloth
Step 2: Plan The Layout
Decide how you want the floor to look. Do you want wide planks, square tiles, or a whole sheet? For most rooms, planks offer the most realistic and attractive finish.
Step 3: Cut And Dry-fit
If making planks, cut sheets to your chosen width and length. Lay them out in the room without glue or nails to check the fit and pattern.
Step 4: Install The Plywood
- Apply adhesive or use screws/nails to attach the plywood to the subfloor.
- Stagger the seams for a natural look.
- Leave a small gap (about 1/8”) around the edges for expansion.
Step 5: Sand And Fill
Sand all surfaces smooth. Fill gaps and holes with wood filler. Sand again after the filler dries.
Step 6: Clean Thoroughly
Vacuum and wipe the floor to remove all dust.
Step 7: Apply Finish
- If staining or dying, apply wood conditioner first.
- Apply stain, dye, or paint in thin, even coats.
- For patterns, use tape and stencils as needed.
- Let each coat dry fully before adding the next.
Step 8: Seal For Durability
Finish with 2–4 coats of polyurethane or floor sealer. Let each coat dry and sand lightly between coats for smoothness.
Step 9: Add Final Touches
Install baseboards or trim to cover gaps at the wall edges. Add area rugs for comfort and style.
Common mistake: Skipping sealer to save time leads to stains, scratches, and water damage. Always seal your finished floor.
Maintenance Tips For Beautiful Plywood Floors
A nice-looking plywood floor needs the right care to stay that way.
- Sweep or vacuum often to remove grit that can scratch the finish.
- Use a damp mop (not wet) for cleaning. Too much water can seep into seams.
- Place felt pads under furniture to prevent dents and scratches.
- Avoid dragging heavy objects across the floor.
- Reapply a fresh coat of polyurethane every 2–3 years or as needed.
- Clean spills right away to prevent stains or swelling.
Overlooked detail: Direct sunlight can fade plywood finishes. Use curtains or UV-blocking window films to protect your floors.
Design Ideas And Real-world Inspiration
Plywood floors are more than a budget fix—they can be the highlight of a room. Here are some creative ideas and case studies:
Modern Loft Look
Cut plywood into wide planks, stain a cool gray, and finish with matte polyurethane. Add minimalist furniture and metal accents for an industrial vibe.
Scandinavian Style
Choose Baltic birch plywood, keep it natural, and use a whitewashed finish. Pair with simple, light-colored decor for a fresh, airy feel.
Bold Patterns
Paint large geometric shapes in black, white, and gold for a statement floor in a home office or child’s room.
Rustic Cabin
Stain plywood planks in warm brown tones and add visible “nail heads” for an old-fashioned look.
Artistic Studio
Use bright dyes or paint to create a rainbow or ombre effect across the floor.
Example: Homeowner Success Story
A family in Oregon transformed their old subfloor into a stylish living room floor for under $500. They cut plywood into 6” planks, stained them walnut, and sealed with three coats of water-based polyurethane. Visitors often ask if it’s real hardwood.
Note: For more ideas and real examples, check out Houzz’s plywood flooring gallery.
Common Problems And How To Solve Them
Understanding common issues helps you avoid disappointment and repairs.
1. Gaps Between Planks
This often happens when plywood isn’t acclimated or if the room’s humidity changes a lot. Always let plywood sit in the space and use a humidifier in dry climates.
2. Warping Or Buckling
Caused by moisture under the floor or poor installation. Check for leaks, use vapor barriers in basements, and leave expansion gaps at the room edges.
3. Finish Peeling Or Scratching
Low-quality finish or not enough coats can cause this. Use floor-grade polyurethane, apply multiple thin layers, and let each dry fully.
4. Visible Seams
If you want a seamless look, fill gaps with flexible wood filler and sand flush before finishing. For a plank look, embrace the seams as part of the design.
5. Stains Or Discoloration
Wipe spills quickly and avoid harsh cleaners. For tough stains, lightly sand the area and reapply finish.
Insider tip: If you have pets, choose a satin or matte finish to hide scratches better than glossy finishes.

Credit: dwellaware.me
Cost Breakdown And Value Comparison
How does a finished plywood floor compare to other flooring options? Here’s a quick side-by-side look:
| Flooring Type | Materials Cost (sq.ft.) | DIY Friendly | Durability (Years) | Appearance Options |
|---|---|---|---|---|
| Plywood | $1–$4 | High | 10–20 | Many (stain, paint, patterns) |
| Laminate | $2–$6 | Medium | 10–15 | Limited (wood look only) |
| Hardwood | $6–$12 | Low | 30–100 | Classic wood only |
| Vinyl | $2–$5 | High | 10–20 | Many patterns/colors |
Plywood offers a unique mix of affordability, DIY potential, and design freedom. It won’t last as long as solid hardwood, but with good care, it can look great for many years.
Mistakes To Avoid With Plywood Floors
Many DIYers make simple errors that hurt the final look.
- Skipping acclimation leads to gaps or buckling.
- Using cheap plywood with visible knots/voids makes finishing difficult.
- Not sealing edges or seams, especially in kitchens/bathrooms.
- Applying thick finish coats that take too long to dry or trap dust.
- Forgetting to protect finished floors during move-in or renovations.
Extra tip: Always keep a small can of your finish for touch-ups. Small scratches or chips are easy to fix if you have the original product.
When To Call A Professional
Some plywood floor projects are best left to pros, especially if:
- The subfloor is badly damaged or uneven
- The area is prone to moisture (like basements)
- You want an advanced design (like herringbone or inlays)
- You need a commercial-grade finish
A skilled installer can ensure a flawless look and longer durability. But for most basic projects, a careful DIYer can get impressive results.
Frequently Asked Questions
How Durable Are Plywood Floors Compared To Hardwood?
Plywood floors are less durable than solid hardwood but can last 10–20 years with proper care. The main wear occurs in the finish, not the plywood itself. Regular sealing and cleaning help maximize their lifespan.
Can Plywood Floors Be Installed In Bathrooms Or Kitchens?
Yes, if you use marine-grade plywood and seal all edges and seams with waterproof finish. Avoid standing water and wipe up spills quickly. For high-moisture areas, consider using rugs or mats in wet zones.
What’s The Best Way To Clean Plywood Floors?
Sweep or vacuum regularly, and mop with a damp (not wet) mop. Avoid strong chemicals; use gentle wood floor cleaners. Too much water can seep into seams, so keep cleaning light.
Do Plywood Floors Add Value To A Home?
Nicely finished plywood floors can appeal to buyers who like unique or modern designs. They may not add as much value as hardwood, but they look much better than plain subfloors and can help a home sell faster.
Can You Refinish Plywood Floors If They Get Damaged?
You can sand and refinish plywood floors, but only a few times. The surface veneer is thin, so avoid deep sanding. For small scratches, spot-fix with matching stain and finish.
Turning plywood floors into a feature, not a flaw, is possible with care, creativity, and the right know-how. Whether you want a simple upgrade or a bold statement, plywood gives you the flexibility to make your space unique. With these tips and techniques, your floors can look truly impressive—at a fraction of the cost of traditional options. For more details and inspiration, check out the resources at Family Handyman.
With the right prep and finish, you’ll never look at plywood the same way again.

Credit: www.thehunterhouses.co