As an Amazon Associate I earn from qualifying purchases.
Repairing a textured ceiling may sound difficult, but with the right steps, you can restore its look and strength. Textured ceilings, often called “popcorn” or “stucco” ceilings, became popular for their ability to hide flaws and add style. Over time, these ceilings can crack, stain, or develop holes from water leaks, impacts, or old age.
Many homeowners worry that repairs will not blend well, or that a patch will be obvious. But with careful work and attention to detail, you can achieve seamless results, often without hiring a professional. This guide covers everything you need to know, from diagnosing the problem to the final paint touch.
Whether you’re fixing a small dent or repairing a large damaged area, you’ll find step-by-step instructions, real-life tips, and solutions for common problems. Let’s help you bring your ceiling back to life.
Understanding Textured Ceilings
Before you start repairs, it’s important to know what kind of textured ceiling you have. The most common types are popcorn, knockdown, and orange peel. Each style uses a different technique and material, and this affects how you repair it.
Popcorn Ceilings
Popcorn ceilings have a bumpy, cottage cheese-like finish. They were popular from the 1950s to the 1980s. The texture comes from a spray-on or paint-on treatment containing small beads or particles.
Knockdown Ceilings
Knockdown ceilings look more subtle and modern. After spraying a thick texture, a trowel is used to flatten the peaks, creating a mottled, uneven surface.
Orange Peel Ceilings
Orange peel texture is finer and resembles the skin of an orange. It is usually sprayed and left as is, giving a softer look than popcorn or knockdown.
Knowing your ceiling’s type is essential for choosing the right repair method and matching the texture later.
Common Causes Of Ceiling Damage
Textured ceilings can suffer damage for several reasons. Understanding the cause helps you prevent future problems and choose the right repair approach.
- Water Leaks: Roof leaks, plumbing issues, or HVAC failures often cause stains and texture to peel or bubble.
- Cracks: House settling, temperature changes, or poor installation can lead to cracks in the drywall or plaster.
- Impact Damage: Accidental hits from moving furniture, toys, or repairs in the floor above can create dents or holes.
- Aging: Over time, textures can become loose, flake off, or discolor due to age and exposure.
A proper repair starts with identifying the root cause. Fix leaks or structural problems before working on the ceiling.
Tools And Materials Needed
Having the right tools makes the repair process smoother and gives better results. Here’s what you’ll need for most textured ceiling repairs:
- Protective gear: Safety goggles, dust mask, gloves
- Drop cloths or plastic sheeting: To cover floors and furniture
- Ladder or step stool: For safe access to the ceiling
- Putty knife or drywall knife: For scraping, patching, and smoothing
- Utility knife: To cut out damaged areas
- Sponge and bucket: For cleaning the area
- Joint compound or patching plaster: For filling holes and cracks
- Drywall tape: For larger cracks or holes
- Texture spray or mix: To match the existing texture (popcorn, knockdown, or orange peel)
- Primer and paint: To finish the repair
Some repairs may need extra items, such as a drywall saw, spray hopper, or special texture brushes. Always check your ceiling’s texture type before shopping.
Safety First: Handling Asbestos And Lead
Many textured ceilings installed before 1980 contain asbestos or lead paint. These substances are hazardous if disturbed. If your home was built before 1980, or you’re unsure, get a sample tested by a certified lab before scraping or sanding. Never dry-sand or use power tools on suspect material. If asbestos or lead is present, hire a licensed professional for removal. For more on safe renovation, visit the EPA’s asbestos page.
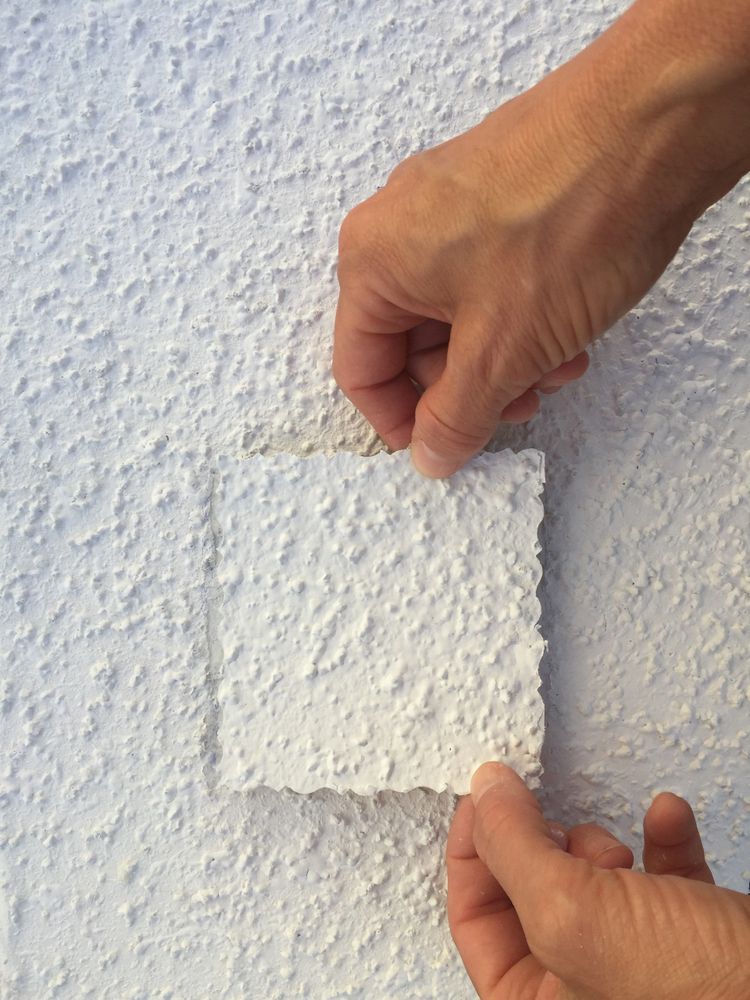
Credit: popcornpatch.com
Preparing The Work Area
A clean, safe workspace leads to better repairs and less cleanup. Here’s how to set up:
- Clear the room: Move furniture out or cover it completely with drop cloths.
- Cover the floors: Use plastic sheeting or old sheets to protect against dust and drips.
- Ventilate: Open windows and use fans if possible.
- Turn off electricity: If you’ll work near light fixtures, turn off power at the breaker.
- Wear protective gear: Goggles, a mask, and gloves keep you safe from dust and debris.
Inspecting And Assessing Damage
Take time to study the damaged area. Look for:
- Type of damage: Is it a small crack, a hole, a stain, or a large section of missing texture?
- Depth: Is the drywall or plaster itself damaged, or just the surface texture?
- Moisture: Is the area still damp, or has the leak been fixed? Never repair over active leaks.
Use a flashlight and a step stool to get a close look. Mark all spots needing repair with painter’s tape so you don’t miss anything.
Step-by-step Repair: Small Cracks And Flaking
Small cracks and minor flaking are common and easy to fix. Here’s how:
- Clean the area: Use a damp sponge to remove dust, cobwebs, and loose texture.
- Scrape loose material: With a putty knife, gently scrape away flaking or peeling texture. Don’t gouge the drywall.
- Apply joint compound: Use a small putty knife to fill cracks or bare spots. Smooth the compound flush with the ceiling.
- Let dry: Drying time depends on humidity, but usually 2–4 hours.
- Sand lightly: If needed, use fine-grit sandpaper to smooth the patched area. Wear a mask to avoid dust.
- Prime: Apply a stain-blocking primer if the area was stained.
- Match texture: Use a spray-on texture or a pre-mixed patch product to blend the repair. Feather the edges to blend with the old texture.
- Paint: After the texture dries, paint to match the rest of the ceiling.
Pro tip: For tiny cracks, sometimes just spot-painting after priming is enough.
Step-by-step Repair: Small Holes (under 2 Inches)
Holes from nails, screws, or small impacts are common. Here’s a simple method:
- Clean and scrape: Remove loose texture around the hole with a utility knife.
- Fill the hole: Use pre-mixed joint compound or spackle. Press it into the hole with a putty knife.
- Feather the edges: Smooth the area flat with the surrounding ceiling.
- Let dry and sand: Wait for it to dry, then lightly sand if needed.
- Add texture: Use a small dab of texture spray or a sponge to match the pattern.
- Prime and paint: Finish with ceiling paint.
For a perfect match, try to replicate the texture using a sponge, brush, or spray, depending on your ceiling type.
Step-by-step Repair: Large Holes Or Damaged Sections
When the damage is bigger than 2 inches, or drywall is missing or sagging, you’ll need to patch the area.
Cutting Out The Damaged Area
- Mark the area: Use a pencil to outline a square or rectangle around the damage. Straight edges are easier to patch.
- Cut carefully: Use a utility knife or drywall saw to cut out the damaged section. Remove it gently.
- Check for wires or pipes: Look inside before cutting deeply.
- Clean the edges: Scrape away loose texture and dust.
Installing A Drywall Patch
- Cut a new piece: Use drywall that matches the thickness of your ceiling (usually 1/2 inch).
- Secure backing: For holes not on a stud, screw a wood strip behind the opening to support the patch.
- Attach the patch: Screw the new drywall piece into place.
- Tape the seams: Use drywall tape over the joints to prevent cracks.
- Apply joint compound: Feather 2–3 thin layers over the patch, letting each dry before adding the next. Smooth the edges well.
- Sand smooth: After the last layer dries, sand until flush with the ceiling.
Matching The Texture
- Prime the patch: This helps the texture stick and prevents color changes.
- Apply texture: Use the method matching your ceiling style (see next section).
- Let dry and paint: Once the texture sets, finish with ceiling paint.
How To Match Ceiling Texture
Matching texture is the hardest part of ceiling repair. Here’s how to blend each main style:
Popcorn Texture
- Pre-mixed patch products: Sold in spray cans or tubs. These are good for small areas.
- DIY mix: Combine joint compound with water to a thick, lumpy paste. Dab on with a sponge or brush.
- Spray application: For large patches, use a texture sprayer or rent a hopper gun.
Pro tip: Test the pattern on cardboard first. Keep the repair area small for a better blend.
Knockdown Texture
- Spray on thick texture: Use a hopper or spray can for a heavy layer.
- Wait 10–15 minutes: Let the peaks firm up but not dry.
- Knock down: Lightly drag a drywall knife across the surface to flatten the tips.
Pro tip: Practice the timing. Too soon, it smears; too late, it chips.
Orange Peel Texture
- Spray texture: Use a can or hopper to spray a fine mist.
- No trowel needed: Let the texture dry as-is.
Pro tip: Adjust the nozzle for a finer or coarser spray to match the existing pattern.
Painting The Repaired Area
After the texture dries (usually 24 hours), prime the area with a stain-blocking primer. This prevents the patch from showing through the paint and helps the color match. Then, use high-quality ceiling paint and a roller to blend the new area with the old.
Painting the whole ceiling gives the most seamless result, but spot-painting is often enough for small repairs.
Special Situations And Advanced Tips
Some repairs need extra care or different methods. Here’s how to handle tricky cases:
Water Stains
After fixing the leak and letting the area dry completely, use a stain-blocking primer before texturing and painting. This prevents yellow or brown stains from bleeding through.
Sagging Or Bubbling Texture
This often means water damage or poor adhesion. Scrape off loose material, let the area dry, and patch as for a large hole.
Matching Old Or Unusual Textures
If your ceiling’s texture is unique or very old, take a photo and a small sample to a home center. Some stores can recommend the best product or technique for a good match.
Blending New With Old
Always feather joint compound and texture beyond the patch edges. This hides the transition and prevents a “patched” look.
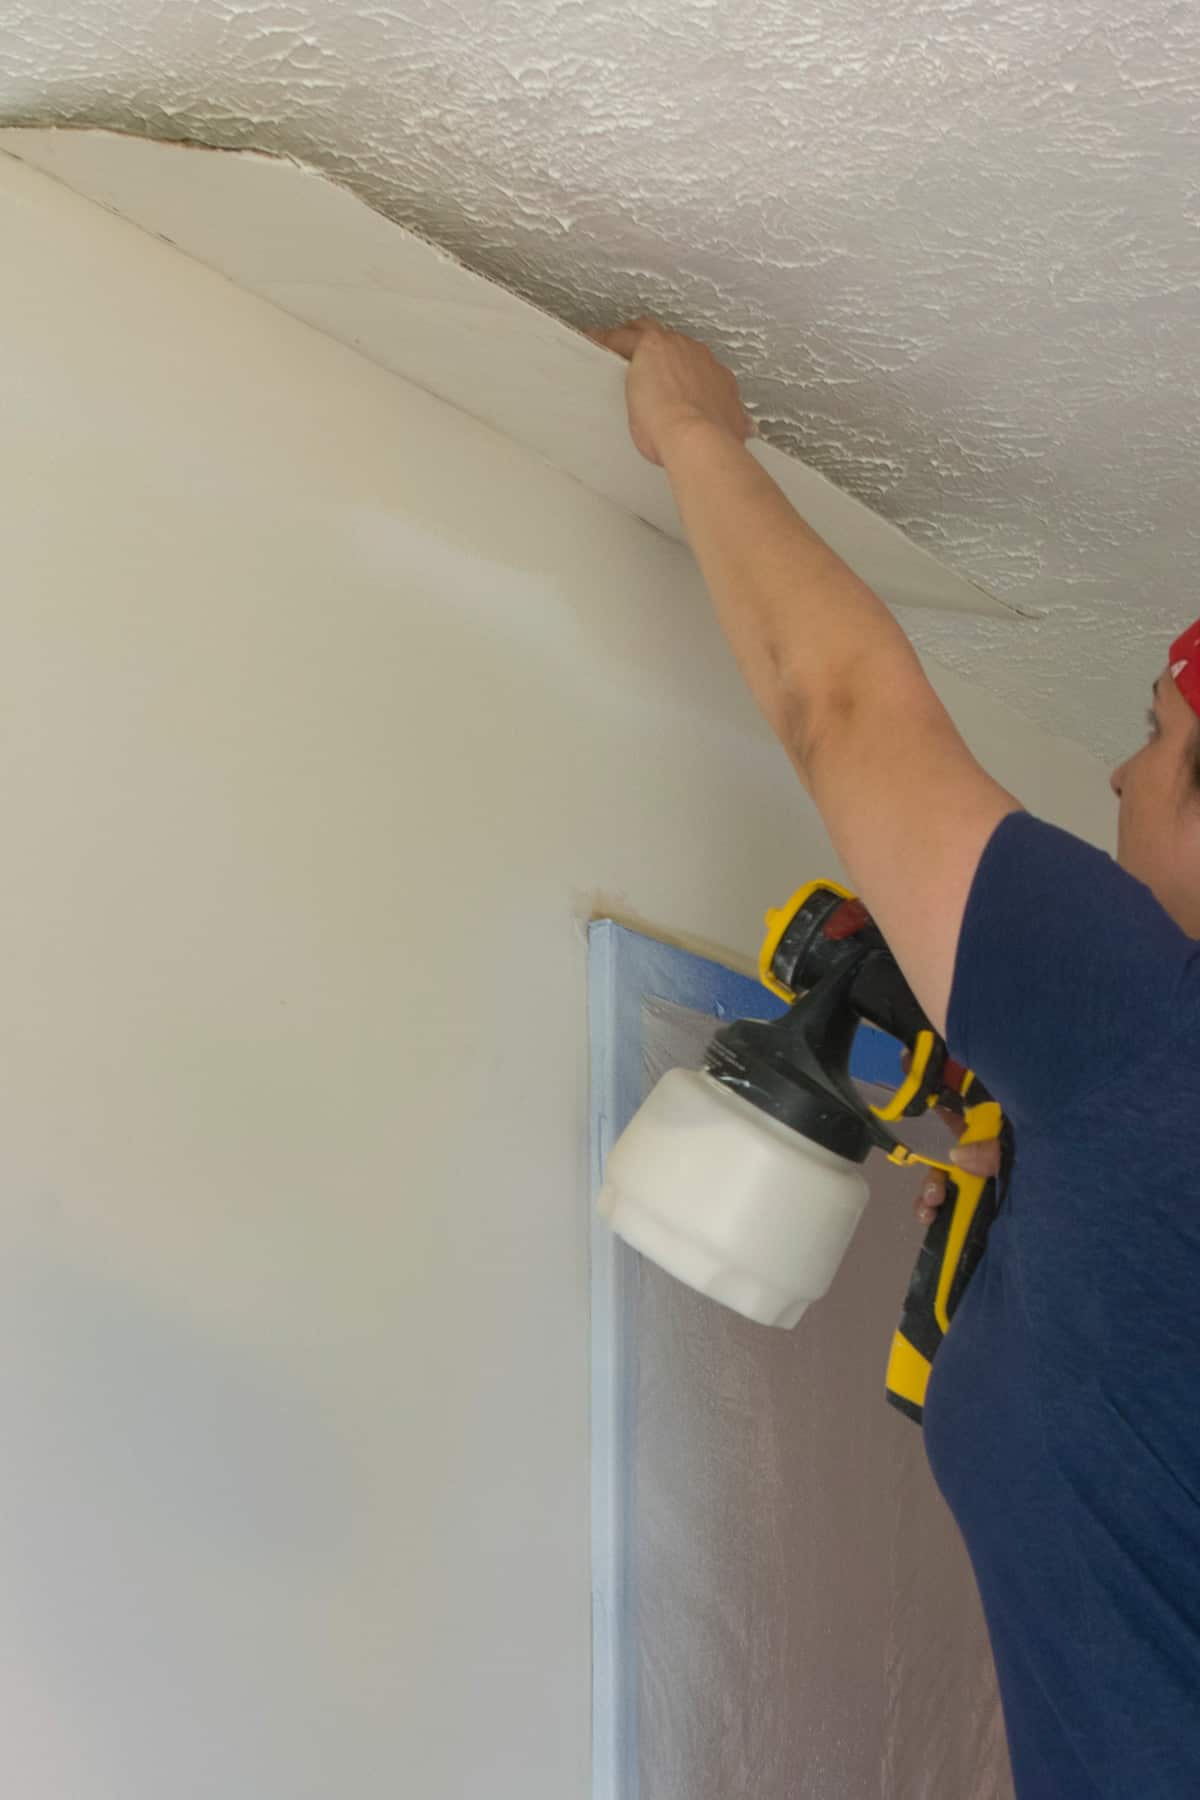
Credit: www.cravingsomecreativity.com
Data Table: Common Ceiling Textures And Repair Difficulty
Here’s a quick comparison of the main textures and how easy they are to repair.
| Texture Type | Repair Difficulty | Common Tools Needed |
|---|---|---|
| Popcorn | Moderate | Sponge, spray can, joint compound |
| Knockdown | Hard | Hopper gun, drywall knife |
| Orange Peel | Easy | Spray can, roller |
| Sand Swirl | Moderate | Brush, joint compound |
Cost Comparison: Diy Vs. Professional Repair
How much does it cost to repair a textured ceiling? Here’s a general breakdown.
| Repair Type | DIY Cost (Materials) | Professional Cost |
|---|---|---|
| Small Crack/Hole | $15–$30 | $100–$200 |
| Large Patch (1 sq. ft.) | $40–$80 | $300–$500 |
| Full Ceiling (100 sq. ft.) | $120–$200 | $500–$1,500 |
DIY repairs save money, especially for small jobs, but large or high ceilings may need a pro for safety and a perfect match.
Real-world Example: Blending A Popcorn Patch
Imagine you have a 4-inch water stain on a popcorn ceiling. After fixing the leak and letting the area dry, you:
- Scrape away all soft or stained texture.
- Prime with a stain-blocking primer.
- Apply joint compound to fill the patch, feathering the edges.
- Let dry and sand lightly.
- Use a spray-on popcorn texture, blending past the edges of the patch.
- Let dry, then paint with ceiling paint.
After painting, the patch disappears into the rest of the ceiling. Most visitors won’t spot the repair.
Practical Tips Most Beginners Miss
Many guides skip these details, but they can make or break your repair:
- Humidity matters: Don’t patch or paint on very humid days. Compound and paint won’t set well.
- Use a light touch: When blending texture, less is more. Heavy patches are easier to spot.
- Practice on cardboard: Always test your texture technique before applying it to the ceiling.
- Prime before texture for water damage: This prevents stains from coming back.
- Don’t rush drying: Rushing between steps leads to cracks or peeling later.
Mistakes To Avoid
Even experienced DIYers make mistakes. Here’s what to watch out for:
- Ignoring the cause: Fix leaks or structure issues before patching, or the damage will return.
- Skipping primer: Paint alone won’t hide repairs or stains.
- Over-texturing: Too much texture stands out and looks amateurish.
- Poor sanding: Uneven patches are easy to spot under ceiling light.
- Not matching paint: Always use the same brand and finish as the rest of the ceiling.
When To Call A Professional
Some repairs are best left to experts:
- Your ceiling may contain asbestos or lead.
- The damaged area is larger than 2–3 square feet.
- You’re uncomfortable on ladders or with drywall tools.
- The ceiling is very high or hard to reach.
Professionals have the right tools and experience for a seamless repair, especially for complex textures.
Table: Signs You Need A Professional
| Sign | Why Call a Pro? |
|---|---|
| Asbestos/Lead present | Special handling and disposal required |
| Large damaged area | Need experience for blending and safety |
| Ceiling over 10 ft. high | Risk of falls, need for scaffolding |
| Recurring leaks or cracks | May be a bigger structural issue |
Maintenance Tips For Textured Ceilings
Once your repair is done, regular care keeps your ceiling looking good:
- Dust regularly: Use a vacuum with a soft brush or a microfiber duster.
- Avoid water: Don’t wash textured ceilings; water can loosen the texture.
- Watch for leaks: Check for new stains or soft spots after heavy rain.
- Touch up paint: Keep some ceiling paint for small fixes.
Eco-friendly And Health Considerations
Many new ceiling products are low-VOC (low in volatile organic compounds), which means less odor and safer air. Always choose products labeled low-VOC or no-VOC if indoor air quality is a concern. Wear a mask and ventilate the room, even with safer products.
Frequently Asked Questions
How Can I Tell If My Textured Ceiling Contains Asbestos?
If your ceiling was installed before 1980, there’s a chance it contains asbestos. The only way to know for sure is to have a sample tested by a certified lab. Never scrape or sand a ceiling you suspect might have asbestos until you get results.
What’s The Best Way To Match Ceiling Paint Color?
Take a chip of the old paint to a paint store, or use leftover paint from the original job. Lighting changes can affect the color, so test a small area first. Ceiling paint is usually flat or matte to hide flaws.
Can I Repair Textured Ceilings With Regular Drywall Mud?
Yes, joint compound (drywall mud) is used for most repairs. For popcorn or heavy textures, you may need to mix it thicker or use a special patch product. Always prime before painting.
How Long Does It Take To Repair A Textured Ceiling?
Small repairs can be finished in a day, but allow 24 hours for each layer (compound, texture, paint) to dry. Large patches may take several days due to drying time.
Is It Better To Remove Or Repair A Textured Ceiling?
If the texture is damaged in many places, or you want a modern look, removal may be better. However, removal can be messy and costly, especially if asbestos is present. Repairing is faster and cheaper for small areas.
Bringing back the beauty of a textured ceiling doesn’t have to be overwhelming. With patience, the right tools, and careful attention to detail, most repairs are well within reach for a handy homeowner. And for those who prefer professional help, knowing the process makes you a smarter client.
Your ceiling can look like new again, blending repairs so well that only you know where the work was done.

Credit: www.youtube.com
