Repairing a porch floor is one of those home improvement tasks that looks intimidating, but with the right approach, it can be manageable even for DIY beginners. A well-kept porch floor not only boosts your home’s curb appeal but also protects the underlying structure from weather damage.
Many homeowners put off repairs, fearing high costs or complexity, but acting early is key to saving money and avoiding bigger problems. This guide will walk you through every step of repairing a porch floor, from inspection to finishing touches, with clear advice and tips that make the process easier and less stressful.
You’ll learn how to spot damage, choose the right materials, and carry out repairs that last. Whether your porch is wood, composite, or concrete, the methods here cover most porch types. We’ll also talk about common mistakes, tools you really need, and how to avoid surprises along the way.
Even if you’ve never repaired a floor before, you’ll leave with the confidence to tackle your porch project safely and efficiently.
Understanding Porch Floor Damage
Before you start repairs, it’s important to know exactly what’s wrong with your porch floor. Most porches are exposed to the elements, so problems can develop over time. The most common issues include:
- Rotting wood: Caused by water soaking into the boards and not drying out.
- Loose or cracked boards: Often from heavy foot traffic, age, or poor installation.
- Insect damage: Termites or carpenter ants can hollow out wood from the inside.
- Peeling paint or finish: Shows moisture is getting under the surface.
- Sagging or uneven areas: May mean there’s a structural issue below.
It’s easy to overlook early signs of damage. For example, a slightly bouncy board might not seem urgent, but it can signal hidden rot. A common beginner mistake is repairing only what’s visible—always check underneath for deeper problems.
How To Inspect Your Porch Floor
- Walk Across the Floor: Feel for soft spots, sagging, or squeaks.
- Look Closely at Each Board: Check for cracks, holes, or splinters.
- Probe with a Screwdriver: Gently press into questionable boards—if it sinks in, the wood may be rotten.
- Check Supports and Joists: Use a flashlight to inspect under the porch if possible.
- Look for Signs of Insects: Small holes or sawdust can mean pests are present.
Never assume the problem is only on the surface. Water can travel along wood grain and cause hidden damage several feet away.
Gathering Materials And Tools
The right tools make porch floor repair much easier. You don’t need a contractor’s toolbox, but certain items are essential for safety and efficiency.
Basic Tools
- Pry bar: To lift old boards.
- Hammer and nails or drill and screws.
- Measuring tape and carpenter’s square.
- Saw: Circular saw for straight cuts, or jigsaw for curves.
- Safety gear: Gloves, eye protection, and dust mask.
- Screwdriver: For probing and tightening.
- Caulking gun and outdoor wood filler.
Materials
- Replacement boards: Match the size and type of your current floor.
- Joist hangers or brackets if you need to reinforce structure.
- Exterior-grade screws or nails: Galvanized or coated to resist rust.
- Primer and paint or stain: For weather protection.
- Sealant or waterproofing: Essential for wood floors.
- Concrete patch (for concrete porches).
Extras That Help
- Decking spacers: Ensure even gaps between boards.
- Moisture meter: Check wood moisture before sealing.
- Level: To prevent uneven repairs.
Don’t forget to measure your porch before buying materials. Always get 10-15% more than you think you need—small boards often split during removal or cutting.
Choosing The Right Replacement Materials
Not all porch floors are the same. Using the wrong material can make your repair fail much sooner than expected. Here’s a quick guide comparing common porch flooring options:
| Material | Durability | Maintenance | Cost |
|---|---|---|---|
| Pressure-treated wood | 10-15 years | Annual sealing/painting | Low to moderate |
| Cedar/Redwood | 15-20 years | Staining every 2-3 years | Moderate to high |
| Composite decking | 25+ years | Minimal | High |
| Concrete | 30+ years | Crack repairs as needed | Moderate |
Pressure-treated wood is most common and affordable for repairs. Composite boards cost more but need less care. Always match the replacement material with what’s already on your porch—mixing wood and composite rarely looks good and can cause movement issues.
What To Avoid
- Softwoods like pine (not pressure-treated) rot quickly.
- Untreated or indoor wood is not suitable for porches.
- Cheap fasteners (non-galvanized) will rust and stain your floor.
A non-obvious tip: for small areas, local lumber yards often have “shorts” or off-cuts at a discount. These can be perfect for patching small sections.
Preparing For Porch Floor Repair
A successful repair starts with good preparation. This saves time, reduces mistakes, and makes the job safer.
Safety First
Porch repairs can expose you to dust, mold, splinters, and nails. Always wear work gloves, eye protection, and a dust mask. If you find mold or a large area of rot, consider extra protection or call a professional.
Clear The Area
- Remove all furniture, rugs, and planters from the porch.
- Sweep or vacuum dirt and debris.
- If the porch is painted, use a scraper to remove loose paint around the repair area.
Set Up Your Work Zone
- Keep tools and materials close by.
- If working above ground, use a sturdy ladder and never overreach.
- Mark damaged boards with chalk or tape.
A common mistake is starting work before you have everything you need—this leads to delays and rushed decisions.
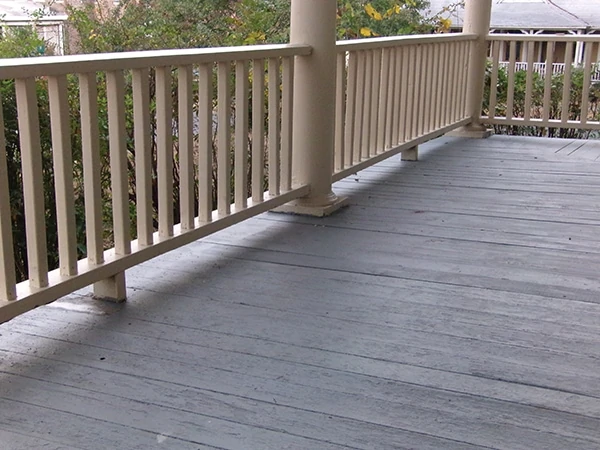
Credit: extremehowto.com
Removing Damaged Porch Boards
Taking out old boards is sometimes the hardest part, especially on older porches. Here’s how to do it without causing extra damage:
- Locate All Fasteners: Find nails or screws holding the board. If they’re rusted, cut them with a reciprocating saw blade.
- Pry Up Slowly: Insert the pry bar under the board, starting at one end. Lift gently to avoid cracking nearby boards.
- Cut Boards if Needed: If a board is stuck, use a circular saw set to the board’s thickness and make a plunge cut. This prevents damage to joists below.
- Check Joists: Once boards are up, inspect joists for rot or insect damage. Probe with a screwdriver and look for discoloration or softness.
- Clean the Area: Remove all old nails, screws, and debris.
If you find extensive rot in the joists, repairs may be more complex. Do not cover over rotten supports—it will only fail again.
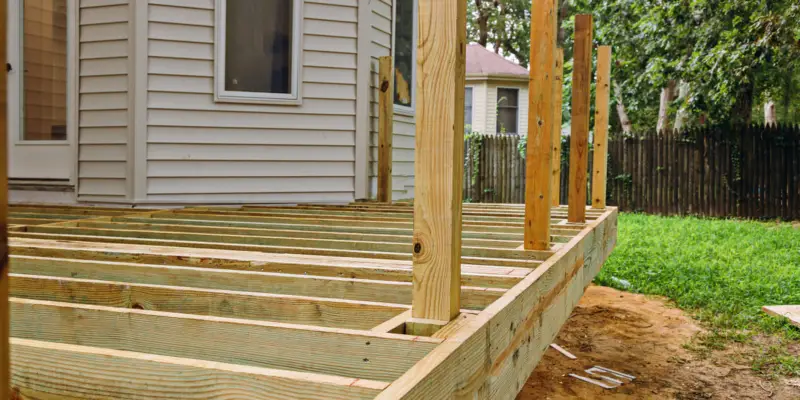
Repairing Or Replacing Porch Floor Joists
If the support joists under your porch boards are damaged, you must address this before laying new boards. Ignoring weak joists is a top reason porch repairs fail early.
Steps To Repair Joists
- Assess the Damage: Is it surface-level or deep? Small cracks can be patched, but deep rot means replacement.
- Sistering a Joist: For partial damage, add a new board (same size) beside the old joist. Attach it firmly using bolts or screws and construction adhesive.
- Replace Entire Joist: If more than half the joist is rotten, remove and replace with new, pressure-treated lumber.
- Install Joist Hangers: Use metal hangers for extra support, especially if the old ones are rusted.
- Check for Level: Make sure all joists are even before installing new boards.
Never use untreated wood for structural supports. Always secure new joists with galvanized hardware.
Installing Replacement Porch Boards
With your porch structure solid, you can install the new flooring boards.
Board Installation Steps
- Measure and Cut: Cut boards to fit, leaving a small gap (about 1/8 inch) between boards for drainage.
- Seal All Sides: Before installing, seal the ends and sides of wood boards with primer or wood preservative. This extends their life.
- Lay Boards in Place: Check for alignment and adjust as needed. Use spacers for even gaps.
- Attach Boards: Use galvanized screws or nails. Start at one end and work across. Screws hold better and are easier to remove for future repairs.
- Countersink Fasteners: Set screw or nail heads slightly below the surface to avoid tripping or water pooling.
- Check for Level: As you go, use a level to keep the floor even.
If you’re replacing only part of a board, cut new and old ends at a 45-degree angle (“scarf joint”) for a neater look and stronger join.
Pro Tips
- For composite boards, use manufacturer-recommended fasteners.
- For tongue-and-groove porch floors, nail at an angle through the tongue.
- Avoid driving nails too close to board ends—they can split.
Filling Gaps, Cracks, And Holes
Not all porch floor repairs need new boards. Small cracks and holes can often be filled, especially on painted or stained porches.
How To Fill Minor Damage
- Clean the Area: Remove all dirt and loose paint.
- Choose the Right Filler: Use exterior-grade wood filler for wood, or concrete patch for concrete floors.
- Apply Filler: Press into cracks with a putty knife. Slightly overfill to allow for shrinkage.
- Let Dry: Follow manufacturer’s drying times—outdoor fillers often need several hours.
- Sand Smooth: After drying, sand flush with the surrounding surface.
- Prime and Paint: Seal the repair with primer and matching paint.
For gaps between boards, use a flexible exterior caulk to keep out water. Never use interior spackle or wood putty—they won’t last outdoors.

Credit: thecraftsmanblog.com
Repairing A Concrete Porch Floor
Concrete porch floors develop different problems from wood. The most common issues are cracks and surface spalling (flaking). Here’s how to fix them:
Fixing Cracks
- Clean Out the Crack: Use a wire brush and vacuum.
- Widen Slightly: V-shaped cracks hold patch better.
- Dampen the Area: Lightly spray with water to help the patch bond.
- Apply Concrete Patch: Use a trowel to fill the crack, pressing firmly.
- Smooth Surface: Feather edges with the trowel.
- Cure Properly: Cover with plastic if needed and keep moist for 24-48 hours.
Dealing With Surface Spalling
- Remove loose concrete with a chisel.
- Use a resurfacer product for large areas.
- Apply in thin layers for best results.
Never patch concrete in freezing weather—it won’t cure correctly.
Sanding, Priming, And Painting Or Staining
Once repairs are complete, the finish is just as important as the structure. Sealing your porch protects it from rain, sun, and foot traffic.
Sanding
- Use a belt sander or pole sander for large areas.
- Sand with the wood grain.
- Remove all dust before painting or staining.
Priming
- Use an exterior primer, especially on wood.
- Apply to all exposed ends and under boards if possible.
Painting Or Staining
- Choose a paint or stain made for porches and decks.
- Apply two thin coats, allowing drying between each.
- Use a brush for cracks and a roller for large areas.
If your porch gets a lot of sun, consider a UV-resistant finish—it lasts longer and keeps colors bright.
Sealing And Waterproofing
Proper sealing is often skipped by beginners but is critical for porch longevity.
- For wood, use a clear or tinted sealer after paint or stain dries.
- For concrete, use a penetrating concrete sealer.
- Reapply every 1-3 years, depending on weather and wear.
Always check the weather before sealing—choose a dry, mild day for best results.
Cost Comparison And When To Call A Professional
Many homeowners wonder if DIY porch floor repair is worth the effort. Here’s a comparison of typical costs:
| Repair Type | DIY Cost (approx.) | Professional Cost (approx.) | Difficulty |
|---|---|---|---|
| Replace 1-2 boards | $25-$75 | $150-$300 | Easy |
| Replace joist | $50-$150 | $300-$600 | Moderate |
| Fill cracks/holes | $10-$40 | $100-$200 | Easy |
| Concrete patch | $20-$60 | $200-$400 | Moderate |
| Full porch floor replacement | $250-$1,000+ | $2,000-$5,000+ | Hard |
If your porch is severely damaged, has complex structure, or you find mold or termites, calling a pro is wise. For most cosmetic or surface repairs, DIY saves money and is very doable.
Tips For A Long-lasting Porch Floor
Proper repairs are just the start. To keep your porch floor in good shape:
- Sweep debris weekly to prevent moisture traps.
- Reseal or repaint every few years.
- Address puddles or standing water quickly.
- Use door mats to reduce wear in high-traffic areas.
- Inspect every spring and fall for early signs of damage.
A non-obvious insight: keep nearby shrubs and plants trimmed away from the porch. Plants hold moisture against wood and invite insects.
Common Mistakes To Avoid
Even experienced DIYers sometimes make errors that shorten a porch’s lifespan. Watch out for these:
- Using interior wood or fasteners: They won’t survive outdoors.
- Skipping sealing the board ends: Water enters here first.
- Nailing through old paint: Scrape and prime first for a better bond.
- Ignoring drainage: Always keep small gaps between boards.
- Painting over damp wood: Wait until wood is completely dry.
Rushing the process usually leads to more repairs later. Take your time and do each step fully.
When To Consider A Full Porch Floor Replacement
Sometimes, repairs aren’t enough. Signs you may need a complete replacement:
- More than 30% of boards are rotten or cracked.
- Joists and supports are soft or sagging.
- Insect damage is widespread.
- The porch feels unsafe or unstable.
A full replacement is a bigger job but gives you a safe, fresh start. If you’re unsure, get a professional inspection.
Frequently Asked Questions
How Do I Know If My Porch Floor Joists Need Replacing?
Check for soft spots, sagging, or visible rot. Use a screwdriver to probe the wood. If the tool sinks in easily or the joist feels spongy, it should be replaced. Also, look for rusted fasteners or separated joints—both can weaken the structure.
Can I Patch A Porch Floor Instead Of Replacing Boards?
Yes, small cracks or holes can often be filled with exterior wood filler or caulk. However, if the board is soft, bouncy, or has deep cracks, replacement is better. Patching is best for minor surface flaws.
What’s The Best Paint Or Stain For A Porch Floor?
Use a porch and floor enamel or a high-quality deck stain. Both are designed for foot traffic and outdoor weather. Look for products with UV protection and mildew resistance. Always follow the manufacturer’s instructions for preparation and application.
How Long Does A Porch Floor Repair Last?
Most repairs last 5-15 years, depending on the materials used, exposure to weather, and how well the porch is maintained. Using pressure-treated wood, sealing all edges, and regular upkeep will extend repair life.
Where Can I Find More Information On Porch Repairs?
For more detailed guides and expert advice, check the This Old House website at This Old House. They offer in-depth tutorials, videos, and maintenance tips for all types of porches.
Repairing a porch floor is a project that pays off in safety, beauty, and home value. By following these steps and tips, you can tackle repairs with confidence and avoid common pitfalls. Remember: the best repair is the one you do before problems get out of hand. Take your time, use quality materials, and your porch floor will look good and serve you well for years to come.
Credit: www.mrhandyman.com