Refinishing a front door can transform the look of your home. Many people think the door must be removed to do a good job, but that’s not always true. If your door is still in good shape and you want to avoid the hassle of taking it off its hinges, you can refinish it in place.
This method saves time, reduces risks of damage, and lets you keep your home secure during the project. However, refinishing a door while it’s still hanging requires planning, patience, and the right approach.
This guide walks you through every step, from preparation to finishing touches. You’ll learn about tools, materials, techniques, and common mistakes to avoid. Even if you have never done a project like this before, you’ll find clear instructions here. By the end, you’ll know exactly how to refinish your front door without removing it and get results that look professional.
Why Refinish Your Front Door In Place?
Your front door is the first thing people see. Over time, sun, rain, and wind can make it look worn or faded. Refinishing gives it a fresh look and protects the wood or metal underneath. Doing this without removing the door has some key benefits:
- Security: Your home stays locked and secure.
- Convenience: No need to struggle with heavy doors or special tools.
- Less Risk: No risk of damaging hinges, frames, or hardware during removal.
However, it also means you must work carefully to protect the area around the door and manage drips or dust.
Is Your Door A Good Candidate?
Not every door is suitable for in-place refinishing. Before you start, check for these signs:
- The door is structurally sound (no deep cracks, rot, or warping).
- Hinges and frame are in good shape.
- You only want to refinish the exterior side (or you’re willing to do both sides separately).
- The weather is dry and mild—avoid days with rain or high humidity.
If your door is very damaged, warped, or needs major repairs, removing it might still be best. For most solid wood, fiberglass, or metal doors with surface wear, refinishing in place works well.

Credit: www.youtube.com
Gathering Tools And Materials
Having everything ready before you start makes the job easier and less stressful. Here’s what you’ll need:
Basic Tools:
- Screwdrivers
- Painter’s tape
- Drop cloths or plastic sheeting
- Sandpaper (various grits: 80, 120, 220)
- Sanding block or detail sander
- Putty knife
- Small and medium paint brushes
- High-density foam roller
- Clean rags or tack cloths
- Bucket of warm water and mild soap
Materials:
- Wood filler or exterior-grade putty (for wood doors)
- Quality exterior stain or paint
- Exterior wood sealer, polyurethane, or spar varnish (for wood)
- Primer (for metal or if changing color)
- Mineral spirits or denatured alcohol (for cleaning)
- Gloves and safety glasses
- Respirator or dust mask (for sanding)
- New weatherstripping (optional)
Extra for Metal Doors:
- Rust inhibitor or converter
- Exterior metal paint
Pro Tip: Quality matters. Cheap brushes or finishes can leave marks or wear out faster. Choose products made for exterior doors, as they stand up to weather better.
Preparation: Protecting Your Home And Work Area
Good preparation is key to a clean, lasting finish. Here’s how to get your space ready:
- Clear the Area: Move furniture, rugs, or decorations near the door. Sweep or vacuum the entryway to remove dirt.
- Lay Drop Cloths: Cover floors inside and outside to catch drips or dust.
- Mask Surfaces: Use painter’s tape to protect hinges, door handles, glass panels, locks, and edges you don’t want to paint.
- Remove Hardware: If possible, remove door handles, locks, mail slots, or kick plates. If you can’t, cover them well with tape and plastic.
- Weather Control: Plan to work on a dry, mild day. Direct sunlight or wind can cause finish to dry too fast, leading to bubbles or brush marks.
Non-Obvious Insight: Protecting the door frame is just as important as protecting the door itself. Paint and stain can easily drip or splatter onto the frame, making cleanup difficult.
Cleaning And Surface Preparation
A clean surface helps new finish stick and last longer. Many beginners rush this step or skip it, but it’s critical for success.
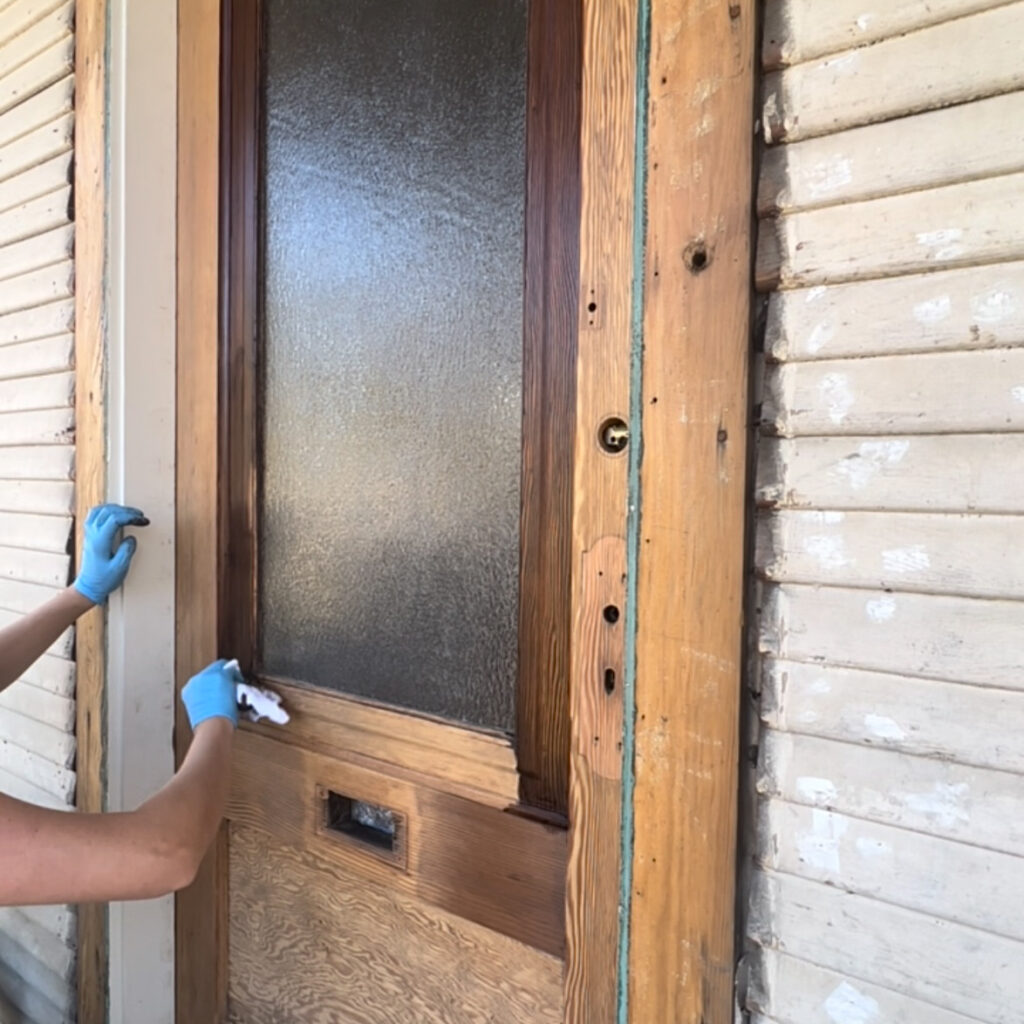
Cleaning The Door
- Mix warm water with mild soap in a bucket.
- Wipe down the door with a sponge or cloth to remove dirt, grease, and old polish.
- Rinse with clean water and let dry completely.
Tip: For tough stains or mold, use a mixture of vinegar and water or a small amount of trisodium phosphate (TSP). Always rinse well afterward.
Removing Old Finish
- For wood doors: Lightly sand the surface with 80-120 grit sandpaper to remove peeling finish and smooth rough spots.
- For metal doors: Use a wire brush or sanding block to remove rust and flaky paint. Wipe down with mineral spirits.
- For fiberglass doors: Sand gently with 220 grit paper. Avoid pressing too hard, as you can damage the surface.
Vacuum or wipe with a tack cloth to remove all dust before moving to the next step.
Non-Obvious Insight: Dust between sanding steps is a common cause of rough finishes. Tack cloths pick up fine dust better than regular rags.
Repairing Damage
Small dents, cracks, or holes can ruin your final result if not fixed early.
- Inspect the door closely. Look for small cracks, nail holes, or chipped areas.
- For wood doors, use exterior-grade wood filler. Apply with a putty knife, press into the damage, and smooth flat. Let it dry completely.
- For metal doors, use a rust converter on any rusty spots, then fill dents with an exterior auto-body filler.
- Sand filled areas smooth with 220 grit paper.
Tip: Allow all repairs to cure fully before sanding or painting. Rushing can lead to shrinking or cracking later.
Sanding: Getting A Smooth Surface
Sanding prepares the door for stain or paint and helps the new finish bond.
- Start with 120 grit sandpaper, moving to finer 220 grit for a super-smooth surface.
- Always sand with the grain on wood doors.
- For panels or grooves, use a sanding sponge or folded paper.
- Wipe clean with a tack cloth after each sanding.
Data Point: Smoother surfaces absorb less finish, so if you want a deeper color, stop at 120 grit. For lighter finishes or topcoats, go to 220 grit.
Choosing The Right Finish
The best product depends on your door type and your climate.
For Wood Doors
- Stain: Brings out natural wood grain, available in many shades.
- Paint: Hides wood grain, allows any color.
- Clear Sealer: Protects wood without changing its color.
If your door faces strong sun or rain, choose spar varnish or marine polyurethane. These flex with weather and last longer.
For Metal Doors
- Exterior Paint: Use a primer if switching colors or painting over bare metal. Choose paint made for metal and exterior use.
- Rust-Inhibiting Primer: Essential for older doors.
For Fiberglass Doors
- Use products labeled for fiberglass. Many stains and paints now work on these doors, but always check the label.
Comparison Table: Types of Finishes for Different Door Materials
| Door Material | Best Finish Type | Key Benefits |
|---|---|---|
| Wood | Stain + Sealer | Enhances grain, protects from weather |
| Wood | Exterior Paint | Wide color choice, covers imperfections |
| Metal | Primer + Paint | Rust prevention, durable color |
| Fiberglass | Specialty Stain or Paint | Adheres well, resists peeling |
Applying The Finish: Step-by-step
Once your door is clean, smooth, and repaired, you’re ready to apply your chosen finish. The process is similar for stain or paint, but with some key differences.
Staining A Wood Door
- Stir the stain well (never shake, as bubbles can form).
- Using a brush or rag, apply stain in the direction of the wood grain.
- Work in small sections to avoid lap marks.
- Wipe off excess stain with a clean cloth after 5-10 minutes, depending on desired darkness.
- Let the stain dry as per the manufacturer’s instructions (usually several hours).
Apply a second coat if a deeper color is needed.
Non-Obvious Insight: Edges and panel trim soak up stain faster than flat surfaces. Apply stain to these areas first to avoid dark borders.
Sealing A Stained Door
Once the stain is fully dry, it’s time to seal.
- Lightly sand with 220 grit paper to remove raised grain.
- Wipe clean with a tack cloth.
- Apply a thin, even coat of polyurethane or spar varnish with a brush or foam roller.
- Allow to dry (usually 4-6 hours), then sand lightly and repeat for 2-3 coats.
Tip: Don’t rush coats. Thin, multiple layers are stronger than one thick coat.
Painting A Wood Or Metal Door
- Apply primer if needed (new wood, bare metal, or color change).
- Let primer dry completely.
- Sand lightly and wipe clean.
- Use a brush for panels and a foam roller for flat areas.
- Apply paint in thin, even coats, letting each coat dry before the next.
- Most doors need 2-3 coats for full coverage.
Pro Tip: Remove tape while the final coat is still slightly wet for cleaner lines.
Dealing With Weatherstripping And Door Edges
Many people forget about the edges and weatherstripping, which can lead to sticking doors or peeling finish.
- Only paint or stain the edges that are visible when the door is closed.
- Avoid heavy coats on the latch or hinge side, as thick finish can cause the door to stick.
- If the weatherstripping is worn or damaged, replace it once the finish is dry.
Comparison Table: Drying Times for Common Door Finishes
| Finish Type | Touch Dry Time | Recoat Time | Fully Cured |
|---|---|---|---|
| Oil-Based Stain | 2-4 hours | 6-8 hours | 48-72 hours |
| Water-Based Paint | 1 hour | 2-4 hours | 7 days |
| Polyurethane Sealer | 2 hours | 4-6 hours | 24-48 hours |
Credit: greyandavery.com
Cleaning Up And Final Touches
When the final coat is dry, it’s time to put everything back together.
- Remove all painter’s tape slowly to avoid pulling up fresh finish.
- Reinstall hardware (handles, locks, kick plates).
- Touch up any small missed spots with a small brush.
- Clean up your work area and dispose of used rags safely (oily rags can catch fire—store in water if not discarding immediately).
Let the door cure fully before closing it for long periods. This prevents sticking or marking the new finish.
Non-Obvious Insight: For the first week, avoid hanging decorations or using strong cleaners on the door.
Preventing Common Problems
Many DIY refinishing projects fail because of small mistakes. Here’s how to avoid them:
- Don’t work in high humidity or direct sun—finish can bubble or dry unevenly.
- Always sand between coats for smoother results.
- Use high-quality brushes and rollers to avoid marks.
- Keep the door slightly open while drying to prevent sticking.
- Never skip cleaning or dusting steps.
Maintenance Tips For A Long-lasting Finish
A well-done refinish job should last for years, but regular care keeps your door looking fresh.
- Clean the door every few months with mild soap and water.
- Touch up scratches or chips as soon as you see them.
- Apply a fresh topcoat every 2-3 years if the door is exposed to harsh sun or rain.
- Lubricate hinges and locks to prevent rust and squeaks.
Pro Tip: Consider a UV-blocking sealer if your door faces south or west, as sunlight fades color quickly.
When To Call A Professional
Sometimes, the damage is more than surface deep. If you see any of these signs, it might be time to call in an expert:
- The door has deep cracks, rot, or warping.
- There are signs of pest damage or mold.
- You want a specialty finish (like faux wood grain or custom colors).
- You’re not comfortable working with chemicals or power tools.
Professionals have tools and experience to deal with tough jobs quickly and safely.
Credit: www.youtube.com
Cost And Time Estimates
Refinishing a front door yourself is much cheaper than hiring a pro or replacing the door. Here’s a rough estimate:
- DIY Supplies: $50–$150, depending on quality and size.
- Professional Refinishing: $250–$600.
- New Door (installed): $600–$3,000+.
Time Required:
- Total working time: 6–8 hours over 1–3 days (to allow for drying between coats).
- Door remains usable (can be closed at night if finish is dry to touch).
Data Point: According to the U.S. Department of Energy, a well-maintained front door can improve your home’s energy efficiency and curb appeal, potentially adding value when you sell.
Real-world Example: Step-by-step Timeline
Here’s a sample schedule for refinishing a door over a weekend:
Day 1 (Morning): Prep area, remove hardware, clean and sand the door.
Day 1 (Afternoon): Apply first coat of stain or primer. Let dry.
Day 1 (Evening): Lightly sand, apply second coat (if needed). Let dry overnight.
Day 2 (Morning): Sand lightly, apply first coat of sealer or paint. Let dry.
Day 2 (Afternoon): Apply final topcoat. Remove tape, reinstall hardware.
Day 2 (Evening): Door is dry to touch, can be closed gently.
This timeline allows for drying and avoids working in the hottest part of the day.
Frequently Asked Questions
How Long Does It Take To Refinish A Front Door Without Removing It?
Most DIYers can finish the project in two days. This allows for cleaning, sanding, two coats of stain or paint, and drying time. Weather and finish type can speed up or slow down the process.
Can I Refinish A Door In Place During Winter Or Rainy Season?
It’s best to avoid wet or cold weather. Humidity and low temperatures can prevent the finish from drying properly, leading to sticky or streaky results. Aim for mild, dry days for best results.
What If My Door Sticks After Refinishing?
If the door sticks, it may be from too-thick layers of finish on the edges. Lightly sand the sticking area and touch up with a thin coat. Make sure to let the door dry fully before closing tightly.
Is It Safe To Use Oil-based Products Indoors?
Always work in a well-ventilated area. Oil-based stains and sealers release strong fumes. Open windows and use a respirator or mask. Follow all safety instructions on the product label.
Where Can I Find More Tips On Exterior Door Maintenance?
You can find more advice on the Family Handyman website, which offers detailed project guides and maintenance tips.
Refinishing your front door without removing it is a rewarding project that boosts your home’s appearance and protects your investment. With careful preparation, quality materials, and attention to detail, you can achieve a professional look—no heavy lifting required. If you follow these steps and tips, your door will look new again and stay beautiful for years.