Measuring for inset cabinet doors is a skill that can transform the look and function of your kitchen, bathroom, or any cabinetry project. Many people assume that buying inset doors is as easy as picking a size and placing an order, but the reality is more complex.
If you measure incorrectly, the doors may not fit, they may bind, or you could end up with unsightly gaps. This guide will walk you through every step and detail of measuring for inset cabinet doors, helping you avoid common mistakes and achieve a beautiful, professional finish.
Inset cabinet doors sit flush with the cabinet frame, unlike overlay doors that cover the frame. This style creates a clean, tailored appearance, but it demands precision. Even a difference of 1/16 inch can cause problems. Whether you are a seasoned woodworker or a homeowner doing a DIY project, understanding how to measure for inset doors will save you time, money, and frustration.
You will learn exactly what tools to use, what to measure, how to account for clearances, and even how to handle tricky situations like out-of-square cabinets. By the end, you’ll be equipped to order or build perfectly fitting inset doors with confidence.
Understanding Inset Cabinet Doors
Inset cabinet doors are designed to fit inside the cabinet frame opening, sitting flush with the face frame rather than overlapping it. This design is popular in both traditional and modern cabinetry because it offers a smooth, clean look. However, it also means that the door edges must align perfectly with the frame, so accurate measurements are crucial.
Inset doors require more precise hinges and installation techniques compared to overlay doors. Common hardware for inset doors includes butt hinges, European cup hinges, and knife hinges. The choice of hinge affects the gap (also called the “reveal”) and needs to be considered when measuring.
Most inset doors require a small gap around the edges to allow the door to open and close freely, even as temperature and humidity cause the wood to expand and contract. This gap is typically 1/16 inch (about 1.6 mm) on each side, but it can vary depending on the hinge type and wood species.
Essential Tools And Materials
To measure for inset cabinet doors accurately, you need the right tools. Inaccurate or worn tools can lead to measurement errors, so always double-check your equipment before starting.
- Tape Measure: A high-quality, rigid tape measure with clear markings in both inches and millimeters.
- Steel Ruler or Straight Edge: For short measurements and checking if the cabinet is out of square.
- Carpenter’s Square: To check for squareness at the cabinet corners.
- Pencil and Notepad: For recording measurements and making notes.
- Calipers (optional): For precise measurements, especially for reveals and gaps.
- Level: To ensure your measurements reflect actual cabinet positioning.
- Masking Tape: Mark cabinet frames or write temporary notes.
- Camera or Smartphone: Take photos of your measurements for reference.
Always start with a clean cabinet. Remove existing doors and hardware, and make sure the cabinet frame is free of dirt, debris, and old caulk.
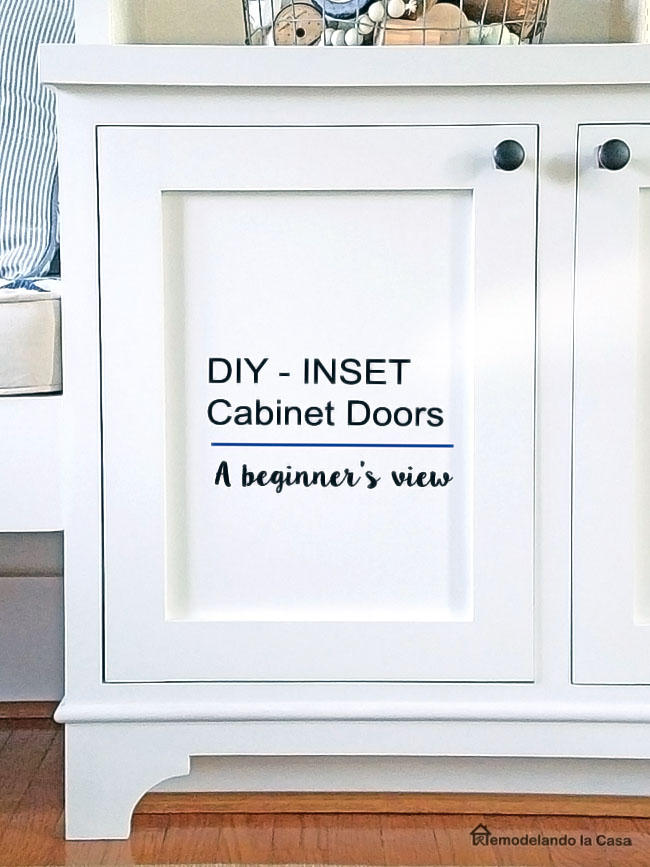
Credit: www.remodelandolacasa.com
Measuring Cabinet Openings: Step-by-step
The heart of the process is measuring the cabinet openings where the inset doors will go. Accuracy here is critical. Follow these steps for the best results:
1. Measure The Width And Height
- Start at the inside edge of the left frame and measure to the inside edge of the right frame for width.
- Measure at three points: Top, middle, and bottom. Cabinets are often not perfectly square, so take all three measurements and record the smallest one.
- For height, measure from the inside top of the opening to the inside bottom at the left, center, and right. Again, use the smallest measurement.
2. Check For Squareness
Use a carpenter’s square to check all four corners of each opening. If the corners are not 90 degrees, you may need to adjust your measurements or plan for slight scribing of the doors during installation.
3. Record All Measurements
Write down each measurement clearly, marking which opening and which point (top, middle, bottom or left, center, right) it refers to. Photograph your notes with the cabinet if needed.
4. Repeat For Every Opening
Never assume that all openings are the same size, even on factory cabinets. Measure each opening individually, especially if you are working with older or custom cabinetry.
Calculating Inset Door Sizes
Now that you have your cabinet opening measurements, you need to calculate the actual door sizes. The door must be slightly smaller than the opening to allow for movement and hardware. This is where many beginners make mistakes.
Standard Reveal/gaps
Most inset cabinet doors require a 1/16 inch reveal (gap) on each side. For double doors in the same opening, you must also account for the gap between the two doors.
Single Door Calculation
- Door Width = Opening Width – (2 x Reveal)
- Door Height = Opening Height – (2 x Reveal)
Example: For a 20″ wide by 30″ high opening with a 1/16″ reveal,
- Door Width = 20″ – 1/8″ = 19-7/8″
- Door Height = 30″ – 1/8″ = 29-7/8″
Double Door Calculation
- Each Door Width = (Opening Width – (3 x Reveal)) ÷ 2
- Door Height = Opening Height – (2 x Reveal)
Example: For a 20″ wide opening,
- Each Door Width = (20″ – 3/16″) ÷ 2 = 9-29/32″
Custom Reveals
Some hinges or design preferences require a larger or smaller reveal. Always check the hinge manufacturer’s specifications. If you want a 3/32″ reveal, update your calculation accordingly.
Compensating For Out-of-square Openings
If your cabinet opening is not square or varies in size, use the smallest measurement for your door. You may need to slightly scribe (trim) the door during installation for a perfect fit.
Allowing For Wood Movement
Wood doors expand and contract with humidity. For solid wood doors, never reduce the reveal below 1/16″. For MDF or plywood, you may use slightly smaller gaps, but always allow for some movement.
Measuring For Multiple Door Types
Not all doors are the same. Here’s how to handle different styles:
Single Inset Doors
These are straightforward—just follow the calculation above. Always check if the frame is perfectly straight.
Double Inset Doors
When two doors share an opening (like in a pantry), you must calculate the center reveal as well as the outside reveals.
Glass Panel Inset Doors
Measure the same as for solid doors, but ensure the door thickness can support the glass and hinges.
Drawer Fronts
Inset drawer fronts use the same reveal calculations as doors. However, check that the drawer box does not interfere with the frame or hardware.
Handling Special Cabinet Features
Some cabinets have design features that require extra attention when measuring for inset doors.
Face Frames Vs. Frameless Cabinets
Most inset doors are installed in face frame cabinets. The face frame provides a solid structure for the door to sit flush. For frameless cabinets (common in European kitchens), measuring is slightly different, and you must use specialized inset hardware.
Beaded Face Frames
Beaded frames have a groove or molding detail. Measure from the inside edge of the bead, not the outer frame.
Appliance Panels
If you are fitting an inset door to an appliance (like a refrigerator), check the manufacturer’s requirements for reveals and mounting.
Measuring For Hinges And Hardware
Hinges determine how the door operates and how much gap is needed. There are three main types:
Butt Hinges
Traditional, visible when the door is open. Require precise mortising.
European Cup Hinges
Hidden when the door is closed, adjustable, and require a 35 mm hole in the door.
Knife Hinges
Minimal and mostly hidden, often used in high-end cabinetry.
Always check the overlay (how much the door covers the frame) specified by the hinge. For inset doors, this is typically zero, but some hinges require a small lip.
Comparing Inset And Overlay Doors
Understanding how measuring for inset doors differs from overlay doors helps avoid confusion.
| Feature | Inset Doors | Overlay Doors |
|---|---|---|
| Door Position | Flush with frame | Overlaps frame |
| Measuring Method | Subtract reveal from opening | Add overlay to opening |
| Required Precision | Very high | Moderate |
| Common Reveal Size | 1/16″ | 1/2″ to 1-1/4″ |
Common Measuring Mistakes To Avoid
Many beginners make the same errors when measuring for inset cabinet doors. Here are some to watch out for:
- Assuming All Openings Are Square: Most cabinets are not perfectly square, especially older ones.
- Using Only One Measurement: Always measure at multiple points—top, middle, and bottom.
- Ignoring Hardware Requirements: Different hinges need different reveals.
- Not Accounting for Wood Movement: Especially important for solid wood doors.
- Measuring Over Existing Doors: Always measure the actual cabinet opening, not the old door size.
- Forgetting the Center Reveal for Double Doors: This can lead to doors that bind or have large gaps.
Advanced Tips For Perfect Inset Door Measurements
Even experienced cabinetmakers can benefit from a few advanced strategies:
Scribing For An Exact Fit
If your cabinet is out of square, consider ordering your door slightly oversized and then scribing it to fit perfectly. Scribing is the process of trimming the door edge to match the irregular shape of the opening.
Using Shims For Face Frame Alignment
If the face frame is not perfectly flush, use thin shims behind the hinges to adjust the door position during installation.
Test Fitting With Cardboard Or Mdf
Before ordering expensive doors, cut a test panel from cardboard or thin MDF to your calculated size. Place it in the opening to check the fit and make adjustments before the final order.
Document Everything
Take photos of your measurements, cabinet openings, and hardware. This record can save you from confusion or mistakes if questions come up during installation.
Double-check Manufacturer Specs
If you are using specialty hinges or hardware, always verify the required clearances with the manufacturer. Sometimes, they recommend different reveals than the standard 1/16 inch.
Real-world Example: Measuring A Kitchen Cabinet
Let’s walk through a detailed example to tie everything together.
Imagine you have a kitchen cabinet with a single door opening. The inside width at the top is 15-1/16″, in the center it’s 15″, and at the bottom it’s 15-1/8″. The height is 28″ on the left, 27-15/16″ in the center, and 28-1/16″ on the right.
- Record the Measurements:
- Widths: 15-1/16″, 15″, 15-1/8″
- Heights: 28″, 27-15/16″, 28-1/16″
- Choose the Smallest Measurement:
- Width: 15″
- Height: 27-15/16″
- Subtract Reveals (1/16″ per side = 1/8″ total):
- Door width: 15″ – 1/8″ = 14-7/8″
- Door height: 27-15/16″ – 1/8″ = 27-13/16″
- Double-Check for Hardware Requirements:
- If using standard butt hinges, these reveals are appropriate.
- If using a special hinge, verify with the manufacturer.
- Consider Test Fitting:
- Cut a test panel to 14-7/8″ x 27-13/16″ and check fit.
By following these steps, you can be confident your inset door will fit perfectly.
Measuring For Large Or Full-height Doors
Large doors, like pantry or tall cabinet doors, present special challenges. They can warp more easily and are affected more by changes in humidity. For these doors:
- Use a slightly larger reveal, such as 3/32″, to prevent binding.
- Consider adding a center hinge for support.
- Ensure the cabinet frame is reinforced to handle the door weight.
Working With Professional Door Shops
If you plan to order doors from a door manufacturer or cabinet shop, they may have their own measuring forms. Always ask for their measuring guidelines, as they may require measurements in decimals rather than fractions, or have specific rules for reveals.
Some shops offer measuring jigs or templates to help you get accurate results. Always confirm whether you are providing the opening size or the finished door size.
Measuring For Special Applications
Some situations require custom measuring techniques:
Corner Cabinets
Corner cabinets may use angled or pie-cut doors. Measure from the hinge location to the far edge, accounting for both reveals and hinges.
Inset Drawer Banks
Measure each drawer opening individually. If using a stack of drawers, check that all reveals are consistent from top to bottom.
Decorative Mullions
If your door will have decorative mullions or glass, ensure the frame thickness supports the design and the glass weight.

Credit: www.youtube.com
Comparing Wood Species And Door Stability
The choice of wood affects how much the door will move with humidity. Here’s a quick comparison:
| Wood Species | Stability (less movement is better) | Best Reveal Size |
|---|---|---|
| Maple | High | 1/16″ |
| Oak | Medium | 1/16″ – 3/32″ |
| Cherry | Low (moves more) | 3/32″ |
| MDF/Plywood | Very High | 1/16″ |
Key Insights Most Beginners Miss
- Cabinet Openings Change Over Time: Wood cabinets can shift with house settling or humidity. Always measure just before ordering, not weeks in advance.
- Reveals Are Not Optional: Even if you want a tight, modern look, a reveal is essential to prevent rubbing and binding.
- Hinge Types Matter: Some hinges require more gap or even a stepped door edge. Skipping this research can lead to expensive mistakes.
- Face Frame Thickness Affects Hinge Choice: Thicker face frames may need special screws or deeper hinge mortises.
Final Pre-order Checklist
Before placing your order or starting to build, go through this checklist:
- All openings measured at three points (width and height)
- Smallest measurement used for each dimension
- Squareness checked with a carpenter’s square
- Reveal size confirmed (1/16″, 3/32″, etc.)
- Hinge and hardware requirements double-checked
- Special features (beads, glass, appliance panels) noted
- Test fit with mock-up if possible
- All measurements recorded and photographed
Installation: Brief Overview
While this guide focuses on measuring, remember that accurate measurement is only the first step. Installation also requires patience and skill. Use shims and adjust hinges for a perfect fit. Don’t force a door that feels tight—recheck your measurements and trim as needed.
If you are not comfortable with installation, consider hiring a professional installer. Even the best-measured door can be ruined by poor installation.

Credit: christinenickersondesign.com
More Resources
For in-depth hinge specifications and cabinetry standards, the Cabinet Makers Association and woodworking forums offer valuable advice. You can also find hinge compatibility charts and installation guides at Rockler’s cabinet hardware guide.
Frequently Asked Questions
What Is The Standard Gap For Inset Cabinet Doors?
The most common gap, or reveal, for inset doors is 1/16 inch on all sides. However, always check your hinge manufacturer’s recommendation, as some require a slightly larger or smaller gap.
How Can I Fix A Cabinet Opening That Is Not Square?
If your cabinet is out of square, use the smallest measured width and height for your door size. During installation, you may need to scribe (trim) the door edges so it fits the opening perfectly.
Can I Reuse My Old Inset Doors If I Repaint My Cabinets?
If the cabinet structure has not changed, you can often reuse old doors. However, always recheck the fit, as wood can shift over time. Repainting may also add thickness, so check that the doors still open and close smoothly.
Do I Need Special Hinges For Inset Doors?
Yes, inset doors require special hinges that allow the door to sit flush with the frame. Common types are butt hinges, European cup hinges, and knife hinges. Always choose hardware designed for inset applications.
Should I Measure The Cabinet Opening Or The Old Door?
Always measure the cabinet opening itself, not the old door. Old doors may have warped, shrunk, or expanded, and may not reflect the current opening size accurately.
Measuring for inset cabinet doors demands careful attention and patience, but the result is a sleek, tailored look that can elevate your space. By following the steps in this guide, using the right tools, and avoiding common mistakes, you can achieve a perfect fit every time.
Whether you are ordering new doors or building your own, the effort you invest in measuring will pay off in a stunning finished product.