When you think about insulating your home, the attic is often the first place that comes to mind. But what if your house has no attic, or the ceiling is a flat surface with no access above? Many homes—especially those with flat roofs, cathedral ceilings, or older designs—face this challenge.
Yet, proper ceiling insulation is still critical to keep energy bills low and indoor comfort high. Let’s look at how to insulate a ceiling without an attic, what materials and methods work best, common mistakes to avoid, and practical tips that even experienced DIYers may overlook.
Why Insulating Ceilings Without An Attic Matters
A well-insulated ceiling can make a dramatic difference in your home’s energy efficiency. In the summer, heat from the roof radiates down, making rooms uncomfortable and forcing air conditioners to work harder. In winter, warm air rises and escapes through the ceiling, costing you money. Ceiling insulation can reduce heating and cooling costs by 15–25% according to the U.S. Department of Energy.
Homes without attics often have:
- Flat roofs
- Cathedral or vaulted ceilings
- Finished spaces above ceilings
- Limited access to roof cavities
This means traditional attic insulation methods (like rolling out batts) won’t work. Instead, special techniques and materials are needed to create an effective thermal barrier.
Understanding Your Ceiling Structure
Before you start, it’s critical to know what you’re working with. Not all ceilings are the same, and the right approach depends on your home’s construction.
- Flat Roofs: These usually have a small cavity between the ceiling and roof deck. Sometimes, this space is just a few inches.
- Cathedral Ceilings: These ceilings slope with the roof and often have rafters visible or hidden behind drywall. The space between drywall and roof is usually tight.
- Drop Ceilings: Common in basements or additions, these have removable tiles with space above.
- Plaster or Drywall Ceilings: Most homes have one of these, but access above may be limited if there’s no attic.
Key Insight: Many homeowners miss the step of checking for electrical wiring, plumbing, or HVAC ducts within the ceiling. Plan for these before choosing a method, as you may need special insulation or fire-resistant barriers.
Best Insulation Materials For Ceilings Without Attics
Not every insulation type works for all ceiling situations. Here’s a breakdown of the most effective options, including their strengths and limitations.
| Insulation Type | R-Value per Inch | Best For | Pros | Cons |
|---|---|---|---|---|
| Spray Foam | ~6.5 | Tight, inaccessible spaces | Air-sealing, high R-value, moisture barrier | Expensive, professional install |
| Blown-In Cellulose | ~3.7 | Ceilings with cavities | Eco-friendly, fills gaps | Settling over time |
| Rigid Foam Board | ~5.0 | Surface application | High R-value, moisture resistant | Reduces ceiling height |
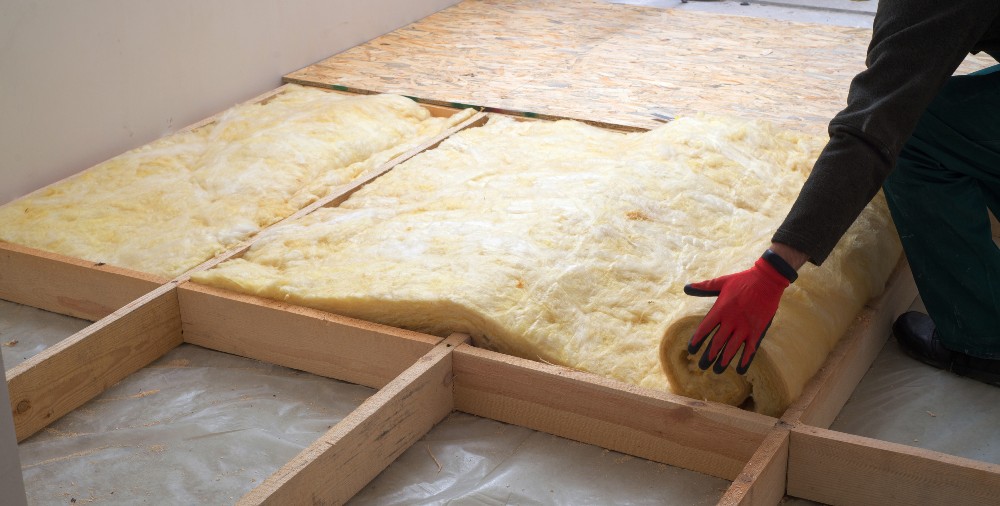
| Mineral Wool Batts | ~4.0 | Accessible joist spaces | Fire-resistant, soundproofing | Needs access, can be itchy |
Non-obvious insight: Many people overlook the importance of a vapor barrier with insulation. In humid climates, this can prevent mold and rot.
Methods To Insulate Ceilings Without An Attic
There are several ways to approach this project. The right method depends on your ceiling type, your budget, and whether you want to DIY or hire a professional.
1. Blown-in Insulation From Below
For ceilings with a cavity (like flat roofs or cathedral ceilings), you can install blown-in cellulose or fiberglass insulation without attic access.
How it works:
- Small holes (about 2–3 inches in diameter) are drilled in the ceiling between each set of joists.
- A blowing machine sends loose insulation into the cavity until it’s full.
- Holes are patched and repainted.
Advantages:
- Minimal disruption to the ceiling’s appearance.
- Fills gaps and odd-shaped spaces.
Considerations:
- Must locate joists to avoid wires or pipes.
- Needs proper air sealing to prevent leaks.
Pro Tip: Mark each hole location so you can patch seamlessly. Use a stud finder to avoid hitting wires or plumbing.
2. Dense-pack Cellulose Insulation
Similar to blown-in, but the cellulose is packed more tightly to prevent settling. This method is excellent for older homes with irregular cavities and is usually done by professionals.
Steps:
- Holes are drilled as above.
- A special blower forces cellulose at higher pressure.
- Cavity is checked to ensure it’s completely filled.
Why it matters: Dense-pack methods reduce air leakage, which is a major source of heat loss.
3. Spray Foam Insulation
Spray foam is ideal for ceilings with difficult access or odd shapes. It expands to fill cavities, seals air leaks, and provides a high R-value.
Procedure:
- Small access points are cut in the ceiling.
- A hose sprays liquid foam that expands and hardens.
- Holes are patched after the foam cures.
Benefits:
- Superior air sealing—no drafts.
- Acts as a moisture barrier.
- Prevents pest entry.
Downsides:
- Expensive compared to other methods.
- Must be installed by trained professionals.
- Can trap moisture if not installed correctly.
4. Rigid Foam Board Below The Ceiling
When there’s no cavity, or you want to boost insulation, rigid foam boards are attached directly to the ceiling’s surface.
How to do it:
- Ceiling surface is cleaned and prepared.
- Boards are cut to fit and secured with adhesive or fasteners.
- Joints are sealed with special tape or spray foam.
- Boards can be covered with drywall for a finished look.
Advantages:
- High R-value with thin layers.
- Moisture and mold-resistant.
Considerations:
- Reduces ceiling height by 1–2 inches.
- May require moving light fixtures or smoke alarms.
5. Adding A Drop Ceiling With Insulation
For basements or rooms with some extra height, you can install a drop ceiling and lay batts or rigid boards above the tiles.
Process:
- A metal grid is hung below the existing ceiling.
- Insulation is laid above the tiles.
- Easy access for future repairs.
Notable point: This method is less common for living rooms or bedrooms but works well in basements and utility spaces.
6. Insulating During Renovation
If you’re planning a major remodel, this is the ideal time to add insulation.
- Remove drywall or plaster to expose the ceiling cavity.
- Install batts, spray foam, or blown-in insulation.
- Add a vapor barrier if needed.
- Reinstall drywall and finish.
Non-obvious benefit: You can also add soundproofing at this stage, which is harder to do after.
Choosing The Right Insulation Method
With several options available, how do you decide what’s best for your ceiling?
| Ceiling Type | Best Insulation Method | DIY Friendly? | Cost Estimate (per sq ft) |
|---|---|---|---|
| Flat Roof | Blown-in or spray foam | Partial | $2–$5 |
| Cathedral Ceiling | Dense-pack cellulose or spray foam | No | $3–$7 |
| Drop Ceiling | Mineral wool or foam board | Yes | $1.50–$3 |
| Surface Application | Rigid foam board | Yes | $2–$4 |
Key advice: Always consider the space you have, your budget, and whether you’re comfortable with a DIY project. For best results—especially with spray foam—hire a professional.
Step-by-step Guide: How To Insulate A Ceiling Without Attic Access
Let’s walk through a typical process using blown-in cellulose, as this is one of the most common and cost-effective methods.
Step 1: Plan And Measure
- Measure your ceiling area to estimate how much material you need.
- Use a stud finder to locate joists, wires, and pipes.
Step 2: Gather Materials And Tools
- Blown-in insulation (cellulose or fiberglass)
- Blower machine (rental stores often provide these)
- Drill and hole saw bit (2–3 inches)
- Plastic sheeting or drop cloths
- Patch material (drywall plugs, joint compound, paint)
- Safety gear (mask, goggles, gloves)
Step 3: Drill Access Holes
- Mark holes between each joist, spacing them 16–24 inches apart.
- Drill carefully to avoid wires or pipes.
- Place drop cloths to catch dust.
Step 4: Blow In Insulation
- Insert the blower hose into each hole.
- Fill cavity until resistance is felt (cavity is full).
- Move to next hole.
Step 5: Patch And Finish
- Plug each hole with a drywall patch or wood plug.
- Apply joint compound, sand, and repaint to match ceiling.
Pro tip: If your ceiling has old paint, test for lead before drilling. Use a HEPA vacuum to clean up dust.
Credit: www.atozroofingdenver.com
Important Considerations For Moisture And Ventilation
Moisture is a hidden enemy for ceilings. If you insulate without considering ventilation, you may trap moisture and cause mold or rot.
- Flat roofs often lack ventilation. It’s important to use insulation that resists moisture (like spray foam or rigid foam).
- Vapor barriers are sometimes needed below the insulation layer, especially in humid climates.
- Check for leaks before installing insulation. Any roof leaks must be fixed first.
Expert insight: Many DIYers forget to check for bathroom or kitchen vents that exit through the ceiling. These need special insulation to avoid condensation around the vent.
Soundproofing: An Extra Benefit
Insulating your ceiling is also a chance to reduce noise from above. Mineral wool batts are especially good for soundproofing. If you’re using blown-in or spray foam, you’ll also get a noticeable sound barrier.
Tip: For home offices or bedrooms, consider combining insulation types—mineral wool for sound, then foam board for thermal performance.
Common Mistakes To Avoid
Many insulation projects fail because of avoidable errors. Here’s what to watch out for:
- Blocking Recessed Lights: Standard recessed lights may overheat if covered with insulation. Use insulation-contact (IC) rated fixtures or install barriers.
- Ignoring Air Leaks: Insulation alone won’t stop drafts. Seal cracks around fixtures and ceiling edges first.
- Underestimating Material Needs: It’s better to buy a little extra insulation than run out halfway.
- Skipping Safety Gear: Insulation can irritate skin and lungs. Always wear gloves, a mask, and goggles.
- Not Checking Codes: Building codes may require permits or inspections—especially for spray foam.
Non-obvious insight: Some ceilings have old insulation that contains asbestos. If your home was built before 1980, have it tested before disturbing the ceiling.
Professional Vs Diy: When To Call In Experts
While many insulation projects can be DIY, some are best left to professionals:
- Spray foam—requires special equipment and safety measures.
- Dense-pack cellulose—needs a powerful blower and experience.
- Ceilings with electrical/plumbing obstacles—pros can navigate these safely.
If you’re unsure, get quotes from insulation contractors. They can spot issues (like moisture or structural problems) that you might miss.
Energy Savings And Payback Period
Proper ceiling insulation can lead to major savings. The U.S. Department of Energy estimates that adding insulation in the right places can cut heating and cooling bills by up to 20%. The payback period—how long it takes for the insulation to pay for itself—is often 2–5 years, depending on climate and local energy costs.
Sample calculation:
- Insulation project cost: $2,000
- Annual energy savings: $400
- Payback period: 5 years
After that, the savings continue year after year.
Real-world Example
A homeowner in Chicago with a flat-roofed house added blown-in cellulose to their living room ceiling. Before insulation, winter heating bills averaged $250/month. After insulating, bills dropped to $190/month—a 24% reduction. The project cost $1,600 and paid for itself in just over three years.

Credit: www.insulationmarketplace.com
Maintenance And Inspection Tips
Insulation isn’t a “set it and forget it” project. Check your ceiling every few years for:
- Sagging or cracks—may indicate settling or moisture problems.
- Discoloration or stains—signs of leaks.
- Drafts or uneven temperatures—could mean gaps in insulation.
If you notice issues, address them quickly to keep your insulation effective.
Environmental Considerations
Many homeowners want to use eco-friendly insulation. Blown-in cellulose is made from recycled paper, while mineral wool uses natural stone. Spray foam, though energy-efficient, uses chemicals that may not be ideal for green homes.
Tip: Check for products with low VOCs (volatile organic compounds) and sustainable sourcing.

Credit: www.reddit.com
Cost Breakdown: Insulating A Ceiling Without An Attic
Costs vary by method and material. Here’s a rough guide:
- Blown-in cellulose: $1.50–$2.50 per sq ft (DIY), $2–$3.50 (pro)
- Spray foam: $3–$7 per sq ft (pro only)
- Rigid foam board: $2–$4 per sq ft (DIY or pro)
- Mineral wool batts: $1.50–$3 per sq ft (DIY)
Additional costs: Finishing (patching holes, repainting), tool rental, safety gear.
Money-saving tip: Some states offer rebates or tax credits for energy-efficient insulation. Check the U.S. Department of Energy for programs in your area.
Key Takeaways
- Insulating a ceiling without an attic is possible with the right materials and techniques.
- Choose insulation based on your ceiling type, climate, and budget.
- Always check for moisture and air leaks before starting.
- Professional installation is best for spray foam or complex jobs.
- Regular inspection keeps insulation working for years.
By following these guidelines, you can make your home more comfortable, energy-efficient, and quiet—even without an attic.
Frequently Asked Questions
What Is The Best Insulation For A Ceiling With No Attic?
The best insulation depends on your ceiling type. For flat or cathedral ceilings, blown-in cellulose or spray foam works well because they fill tight cavities. For ceilings with no cavity, rigid foam board attached from below is effective.
Can You Insulate A Ceiling From Below Without Removing Drywall?
Yes, you can. The most common way is to drill small holes and blow in loose-fill insulation, then patch the holes. Spray foam can also be injected through holes. For added insulation, rigid foam boards can be attached directly under the drywall.
How Thick Should Ceiling Insulation Be?
Thickness depends on the insulation type and your climate. The Department of Energy recommends R-30 to R-60 for ceilings. For example, blown-in cellulose may need 8–14 inches to reach this rating, while spray foam or rigid boards require less due to higher R-value per inch.
Is It Worth Insulating A Ceiling Without An Attic?
Absolutely. Even without attic space, ceiling insulation can lower energy bills, make your home more comfortable, and prevent noise transfer. Payback usually happens within a few years thanks to energy savings.
Do I Need A Vapor Barrier When Insulating A Ceiling?
In many cases, yes—especially in humid climates. A vapor barrier helps prevent moisture from entering the insulation and causing mold or rot. Some insulation types, like closed-cell spray foam or foil-faced rigid boards, act as vapor barriers themselves.
With these steps and insights, you can insulate your ceiling with confidence, improve your home’s efficiency, and avoid common pitfalls—even when there’s no attic above.