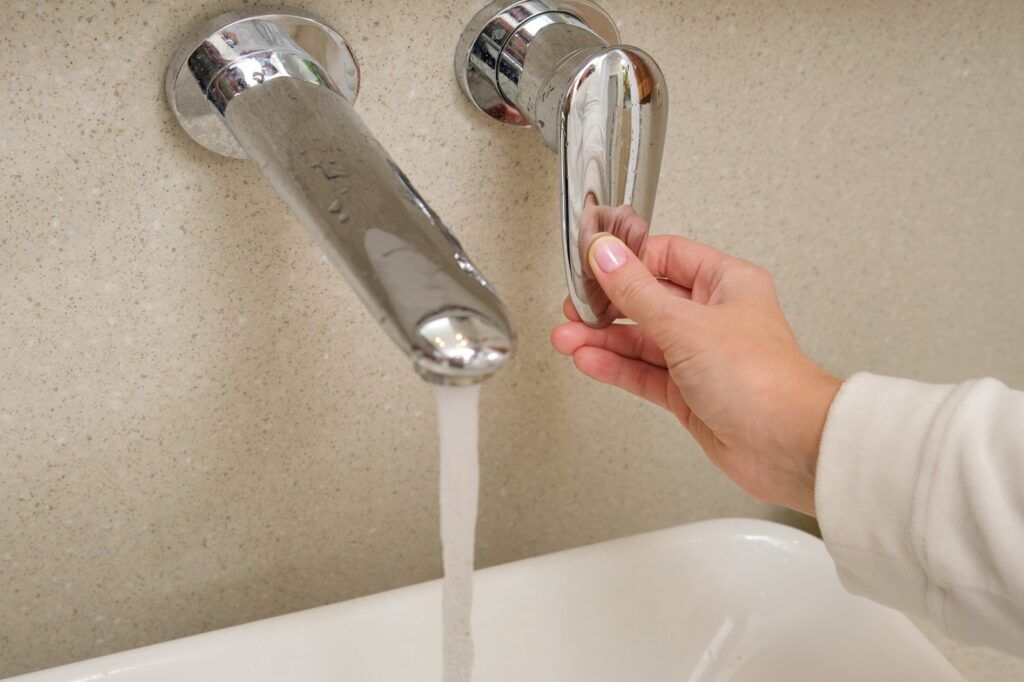
A spinning faucet handle can turn a simple task—washing your hands or filling a pot—into a daily frustration. Maybe you twist the handle to turn on the water, but it just spins in place, refusing to grip. Or perhaps it works, but feels wobbly and unreliable.
Most people think fixing this problem is a job for a plumber, but in reality, a spinning faucet handle is often a straightforward DIY repair. With a little know-how, some basic tools, and careful attention to detail, you can restore your faucet’s function and avoid the cost and hassle of hiring a professional.
This guide walks you through everything you need to know about fixing a spinning faucet handle. You’ll learn what causes this problem, how to properly diagnose it, and the step-by-step process for fixing different faucet types. Along the way, you’ll get practical tips, see real-world examples, and find answers to common questions.
By the end, you’ll have the confidence to tackle this repair yourself—and the knowledge to prevent it from happening again.
Why Faucet Handles Spin: Understanding The Problem
A faucet handle should turn smoothly and stop firmly at the “on” and “off” positions. When it spins loosely, something inside is not working as it should. Understanding the root cause is essential before you start taking anything apart.
Common Causes
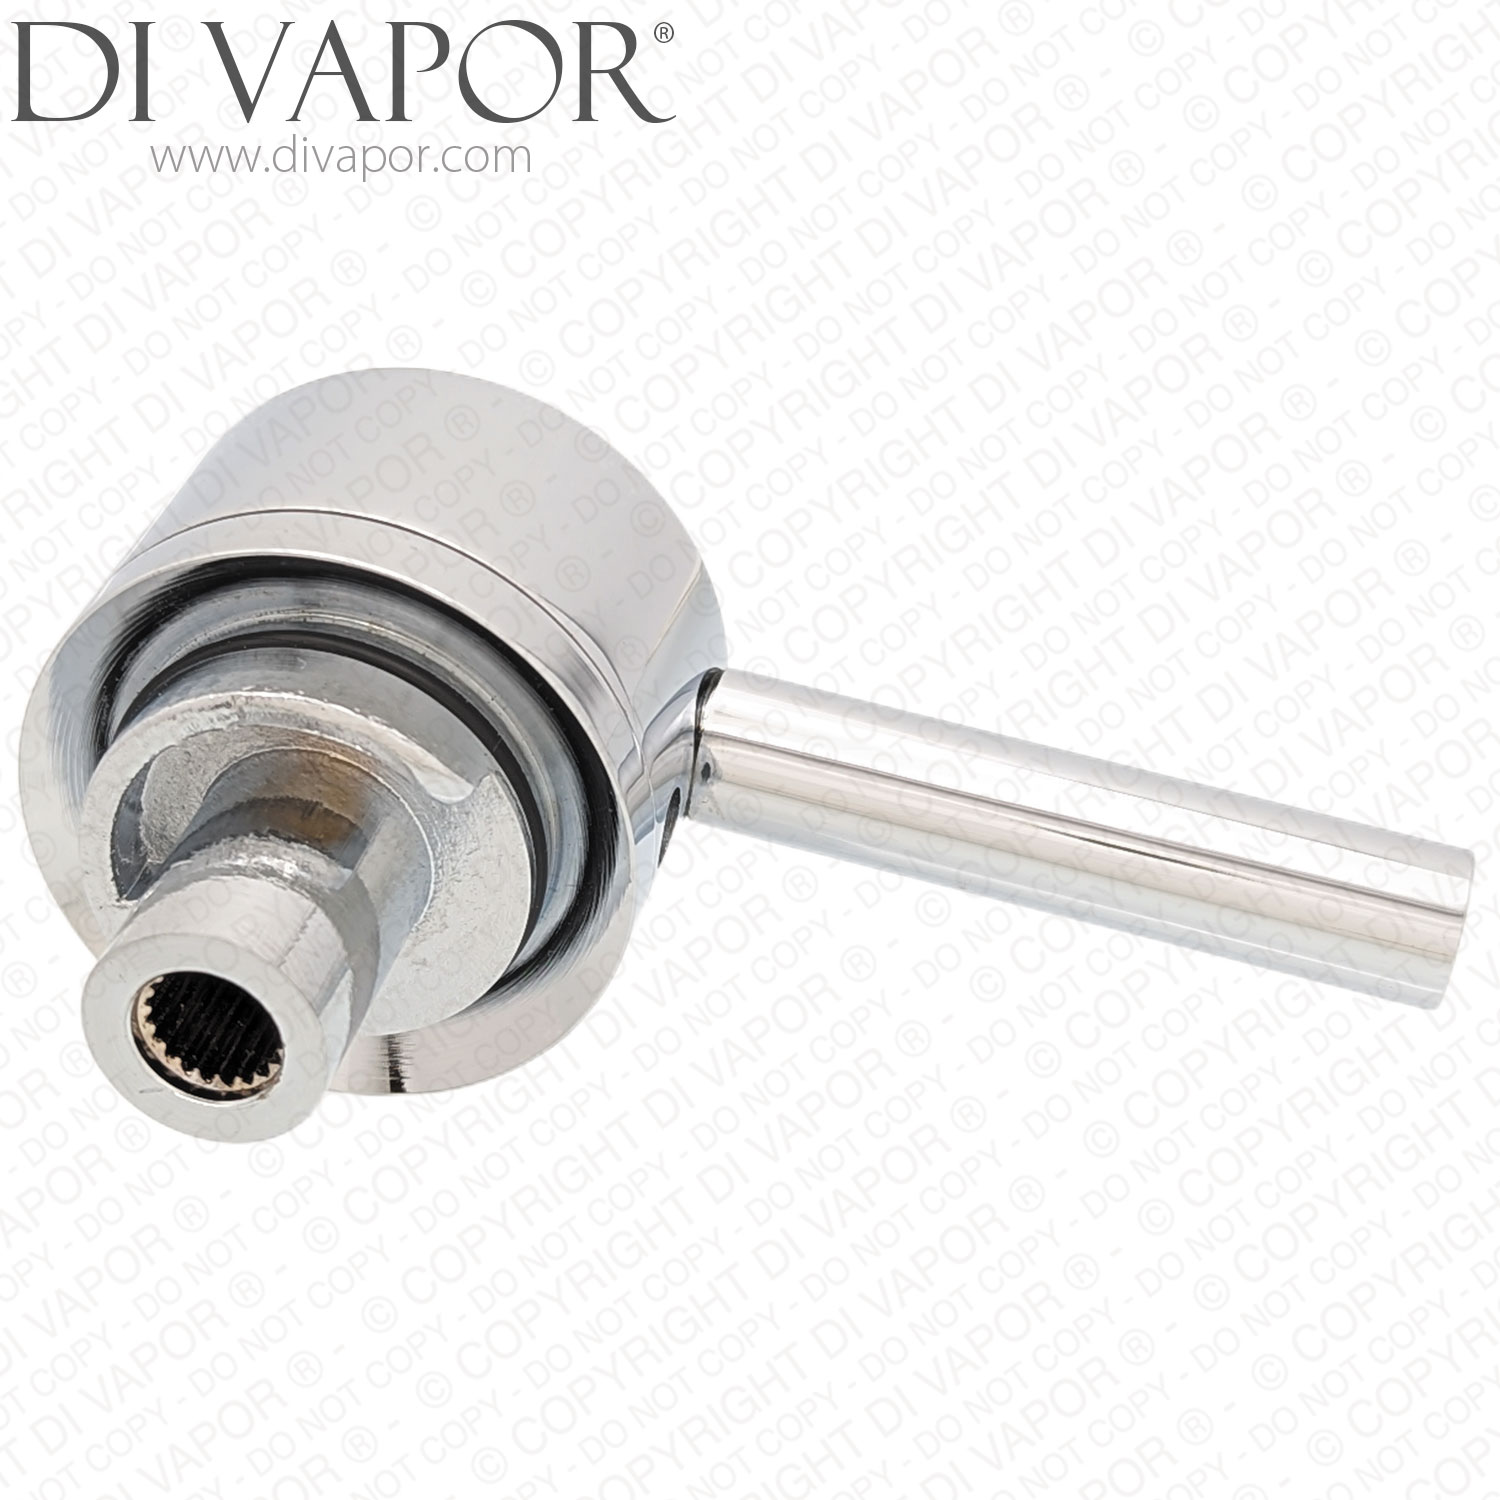
- Stripped faucet stem or cartridge: This is the most frequent reason for a spinning handle. The stem or cartridge inside the faucet is responsible for controlling water flow. Over time, its splines (small ridges) can wear down, making the handle lose its grip.
- Loose handle screw: The screw that holds the handle to the stem may have loosened, especially with regular use.
- Worn handle: The inside of the handle itself can become stripped, especially if it’s made of soft metal or plastic.
- Broken faucet parts: Internal parts like washers or retaining nuts can fail, causing the handle to lose its connection.
- Corrosion or mineral buildup: Hard water can create buildup that wears parts or prevents them from fitting together tightly.
Types Of Faucets Most Affected
Some faucet designs are more likely to develop this problem:
- Compression faucets (two handles, older homes)
- Cartridge faucets (single or double handle, most modern homes)
- Ball faucets (common in kitchens)
- Ceramic disc faucets (modern, higher-end models)
Knowing your faucet type helps you choose the right repair method.
Tools And Materials You’ll Need
Before you begin, gather the right tools. Using proper tools makes the job smoother and prevents damage to your faucet.
Here’s a list of common tools and materials:
- Phillips and flathead screwdrivers: For removing handle screws and decorative caps.
- Allen wrench (hex key): Some handles use a hex screw.
- Adjustable wrench or channel-lock pliers: For loosening nuts and stems.
- Penetrating oil: Helps loosen stuck screws (WD-40 or similar).
- Replacement faucet stem or cartridge: If the old one is stripped.
- Handle puller: Useful if the handle is stuck.
- Plumber’s grease: Lubricates moving parts.
- White vinegar: For cleaning mineral deposits.
- Rag or towel: To protect surfaces and soak up drips.
- Basin wrench: Sometimes needed for hard-to-reach nuts.
- Small container: To keep screws and small parts.
Pro tip: Always turn off your water supply before you start. This prevents leaks and accidental flooding.
Step 1: Diagnosing The Spinning Handle
Before you remove anything, take a close look at the handle’s movement and feel. This will help you pinpoint the source of the problem.
How To Diagnose
- Try moving the handle gently: Does it spin endlessly, or does it stop but feel loose?
- Check for water leaks: Leaks around the base may suggest a damaged stem or cartridge.
- Listen for grinding or scraping: This can mean worn internal parts.
- Remove decorative cap: Use a flathead screwdriver to pop off the cap and inspect the screw inside. Is it loose or stripped?
Table: Common Symptoms And Causes
| Symptom | Most Likely Cause | Repair Needed |
|---|---|---|
| Handle spins 360° with no water flow | Stripped stem/cartridge | Replace stem/cartridge |
| Handle feels loose, but still works | Loose handle screw | Tighten or replace screw |
| Handle pops off or wobbles | Worn handle or mounting | Replace handle |
| Difficulty turning, grinding noise | Corrosion or buildup | Clean and lubricate parts |
If you’re still unsure, take a clear photo of your faucet and compare it to images online, or bring it to a hardware store for help.
Step 2: Removing The Faucet Handle
Most repairs start with removing the handle. Take your time—forcing parts can cause damage.
Removing The Handle: Step-by-step
- Turn off the water supply: Look under the sink for the shutoff valves. Turn them clockwise until tight.
- Close the drain: Use the sink stopper or a rag. This prevents small parts from falling down the drain.
- Pry off the decorative cap: Use a flathead screwdriver. Some caps are threaded—unscrew them gently.
- Locate the handle screw: It may be visible or hidden under the cap.
- Remove the screw: Use a Phillips, flathead, or Allen wrench as needed. Set the screw aside safely.
- Pull off the handle: If it’s stuck, wiggle gently. For stubborn handles, use a handle puller.
Non-obvious tip: Take a quick photo of each step. This makes reassembly much easier later, especially if you forget how parts fit together.
Credit: www.quadernidaltritempi.eu
Step 3: Inspecting And Fixing The Faulty Part
With the handle off, you can see the stem or cartridge. This is where most problems are found.
What To Look For
- Stripped splines: The grooves or ridges on the stem/cartridge should be sharp and even. If they look rounded or worn down, they won’t grip the handle.
- Damaged handle: Check the inside of the handle for wear. If the grooves are gone, replace the handle.
- Loose or missing screw: Sometimes, the only issue is a missing or stripped screw.
- Corrosion or buildup: White or green deposits suggest mineral buildup, which can make parts stick or slip.
Table: When To Repair Vs. Replace
| Condition | Repair | Replace |
|---|---|---|
| Stem splines slightly worn | Try tightening screw, use plumber’s tape for grip | If loose, replace stem |
| Handle cracked | – | Replace handle |
| Heavy corrosion | Clean with vinegar, lubricate | Replace if parts still don’t fit tightly |
| Loose mounting nut | Tighten nut | – |
If you’re unsure, many hardware stores will help you identify the part if you bring it in.
Step 4: Repairing Or Replacing The Faulty Part
The next step depends on what you found during inspection.
Fixing A Loose Handle Screw
If the screw is loose but not stripped, simply tighten it with the correct screwdriver or Allen wrench. If it’s missing or stripped, bring the old screw to a hardware store and match it. Avoid overtightening—this can crack the handle.
Repairing A Stripped Faucet Stem Or Cartridge
If the stem or cartridge is stripped, it usually needs to be replaced. Here’s how:
- Locate the retaining nut: This holds the stem or cartridge in place.
- Loosen and remove the nut: Use an adjustable wrench. Turn counterclockwise.
- Gently pull out the stem or cartridge: Wiggle it free. If stuck, use a little penetrating oil and wait a few minutes.
- Compare the old part to the new one: Make sure they match exactly in length, diameter, and style.
- Clean the inside of the faucet body: Remove any debris or buildup with vinegar and a rag.
- Insert the new stem or cartridge: Push it firmly into place.
- Reinstall the retaining nut: Hand-tighten, then snug up with a wrench.
- Test the fit: The stem should turn smoothly and stop at the correct positions.
Experience-based tip: Some cartridge faucets have a small clip that holds the cartridge in place. Don’t lose this tiny clip—it’s essential for proper operation.
Dealing With A Worn Handle
If the handle itself is stripped, replace it with one that matches the style and size. Bring the old handle to the store for an exact match. Handles are usually sold separately for common faucet brands.
Cleaning Corrosion Or Mineral Buildup
If you see white or green deposits, soak the affected parts in white vinegar for 30–60 minutes. Scrub gently with a toothbrush, then rinse and dry. Lubricate moving parts with plumber’s grease before reassembly.
Step 5: Reassembling The Faucet
Once you’ve repaired or replaced the faulty part, put the faucet back together.
- Slide the handle onto the stem/cartridge: Align the splines carefully.
- Insert and tighten the screw: Use the proper screwdriver or Allen wrench.
- Replace the decorative cap: Press or screw it into place.
- Open the water supply valves: Turn counterclockwise under the sink.
- Test the handle: Turn it on and off. It should feel solid and stop firmly.
Non-obvious insight: Turn on the faucet slowly at first. Sudden pressure can reveal leaks you might have missed.
Step 6: Special Cases—repairing Different Faucet Types
Not all faucets are built the same way. Here’s how to handle the most common types.
Compression Faucets
These use a stem with a washer that presses down to stop water. If the handle spins, the stem is likely stripped.
Repair steps:
- Remove the handle and retaining nut.
- Unscrew and replace the stem.
- Replace the washer if worn.
- Reassemble and test.
Cartridge Faucets
Cartridge faucets use a plastic or brass cartridge inside. If the handle spins, replace the cartridge.
Repair steps:
- Remove the handle.
- Pull out the retaining clip (if present).
- Pull out and replace the cartridge.
- Reassemble.
Ball Faucets
These are common in kitchens, using a rotating ball. If the handle spins, the ball or the cam may be worn.
Repair steps:
- Remove the handle.
- Take out the cap and adjusting ring.
- Replace the ball, springs, and seals as a set.
- Reassemble.
Ceramic Disc Faucets
These use two ceramic discs. If the handle spins, the disc or mounting screw may be worn.
Repair steps:
- Remove the handle.
- Lift out the ceramic cartridge.
- Replace if needed.
Preventing Spinning Faucet Handles In The Future
Once you’ve fixed your faucet, you can help prevent the problem from returning.
- Don’t overtighten handles: Turning the handle too hard wears out the stem and handle.
- Clean regularly: Mineral buildup can be slowed by wiping handles and faucets with vinegar monthly.
- Fix drips quickly: A dripping faucet wears out internal parts faster.
- Use plumber’s grease: Lubricate moving parts when you notice stiffness.
- Upgrade to quality parts: Cheap replacement parts wear out faster. Choose reputable brands when possible.
Non-obvious tip: If you have very hard water, consider installing a water softener. This reduces mineral buildup inside your faucets.
When To Call A Plumber
Most spinning faucet handle repairs are DIY-friendly. But if you encounter any of these issues, professional help may be best:
- The faucet body is cracked or leaking
- You cannot remove a stuck handle even with a handle puller
- The faucet is an old or rare design with no replacement parts available
- You’re uncomfortable working with plumbing
A plumber can often complete the repair in less than an hour, but expect to pay $75–$200 depending on your location and faucet type.

Credit: www.youtube.com
Cost Comparison: Diy Vs. Professional Repair
Here’s a look at typical costs for fixing a spinning faucet handle:
| Repair Method | Materials/Parts | Tools Needed | Estimated Cost |
|---|---|---|---|
| DIY (tighten screw/replace handle) | Screw or handle ($2–$15) | Screwdriver, Allen wrench | $2–$20 |
| DIY (replace stem/cartridge) | Stem/cartridge ($10–$40) | Wrench, pliers, screwdriver | $10–$50 |
| Professional plumber | Parts plus labor | Plumber’s tools | $75–$200 |
DIY repairs save money and are usually quick if you have the right parts.
Extra Tips And Common Pitfalls
- Don’t force parts: Forcing a stuck handle or nut can break the faucet or damage the sink.
- Keep track of small parts: Use a small container or tray to hold screws, washers, and clips.
- Check for leaks: After repair, run water and check under the sink for drips.
- Test before full reassembly: If possible, test the faucet with the handle loosely attached before finishing.
- Take your time: Rushing leads to mistakes and broken parts.
Real-world Example
A homeowner in Dallas noticed their kitchen faucet handle spinning freely. After reading instructions, they:
- Turned off the water supply.
- Removed the handle and found the cartridge splines were worn.
- Took the cartridge to a hardware store, matched it, and bought a replacement for $18.
- Cleaned the area, lubricated the new cartridge, and reassembled.
- The faucet was fixed in under 30 minutes, saving an estimated $120 plumber fee.
Beginner insight: Many people think all faucet handles are the same, but even two similar-looking faucets can have different internal parts. Always compare old and new parts carefully before installing.
Where To Find Replacement Parts
- Hardware stores: Bring your old part for an exact match.
- Online: Use the faucet’s brand and model number.
- Plumbing supply stores: Good for hard-to-find or high-end parts.
To identify your faucet model, look for a brand name on the faucet or under the sink, or check the owner’s manual if available.
For more on faucet types and repair techniques, check resources like Family Handyman.
Credit: www.waldmanplumbing.com
Frequently Asked Questions
What Causes A Faucet Handle To Spin And Not Turn Off The Water?
The most common cause is a stripped stem or cartridge. This means the grooves that let the handle grip and turn the water on/off are worn out. Sometimes, a loose screw or a broken handle can also cause spinning.
Can I Fix A Spinning Faucet Handle Without Replacing Parts?
Yes, if the problem is a loose handle screw or minor buildup, you can often fix it by tightening the screw or cleaning with vinegar. But if the stem or cartridge is stripped, replacement is the only long-term solution.
How Do I Know Which Replacement Part To Buy?
Remove the old part and bring it to the hardware store. Compare size, shape, and spline count. Many stores have charts or guides to help you match faucet stems and cartridges. If shopping online, use the faucet’s brand and model number.
Is It Safe To Use My Faucet If The Handle Is Spinning?
It’s not recommended. A spinning handle can fail suddenly and cause leaks or flooding. It also makes it hard to control water flow and can waste water. Fix the issue as soon as possible.
How Long Does It Take To Fix A Spinning Faucet Handle?
Most repairs take 15–45 minutes if you have the right tools and parts. If the handle is stuck or you need to hunt for parts, it may take longer. Preparing in advance makes the job smoother.
Fixing a spinning faucet handle is a rewarding DIY project that restores convenience and control to your kitchen or bathroom. With the right approach and careful attention, you can solve the problem confidently and keep your faucet working for years to come.