Fixing a mobile home ceiling might sound like a big job, but with the right approach, anyone can do it. Many owners face ceiling problems, from water stains to sagging panels. These issues not only look bad but can also lead to bigger troubles, like mold or even structural damage.
Acting quickly is important, but you don’t need to spend a fortune or hire a pro for every repair.
Mobile home ceilings are different from those in regular houses. They often use lighter materials and have unique support systems. This means repairs need a special touch. Whether you’re dealing with a small crack, water damage, or a sagging section, knowing what to do saves time and money.
This guide will walk you through everything: why these problems happen, how to check for damage, the tools and supplies you need, and step-by-step repair methods. You’ll also learn how to avoid common mistakes and keep your ceiling looking good for years. By the end, you’ll feel confident handling most ceiling issues in your mobile home.
Understanding Mobile Home Ceilings
Mobile home ceilings are not the same as those in site-built homes. They’re designed to be lightweight and cost-effective, but that sometimes makes them more vulnerable to damage. Most ceilings in older mobile homes use materials like gypsum panels, fiberboard, or vinyl-coated tiles. Newer models might use drywall or advanced paneling.
Some ceilings are flat, while others are “cathedral” style, sloping upward in the middle. The structure underneath (called the trusses) also differs from regular homes. These factors affect how you repair or replace damaged areas.
Common Ceiling Materials
- Gypsum board (thin drywall)
- Ceiling tiles (often 16” x 48” panels)
- Vinyl-covered gypsum (easy to clean, common in kitchens/bathrooms)
- Fiberboard (used in very old homes)
Each material reacts differently to water, humidity, and impact. For example, gypsum sags after water damage, while vinyl tiles might crack but not absorb much moisture.
Why Do Ceilings Get Damaged?
Mobile home ceilings often face problems from:
- Roof leaks (often from poor seals or old roof panels)
- Condensation (especially in humid climates)
- Structural settling (causing cracks or gaps)
- Poor ventilation (traps moisture, leading to mold)
- Physical impact (from moving furniture or repairs above the ceiling)
Sometimes, what looks like a small stain is a sign of bigger trouble above, so always check carefully.
Assessing The Damage
Before you start any repair, it’s important to know exactly what’s wrong. Fixing only the surface won’t help if the cause is still there. Here’s how to check your ceiling:
- Look for stains: Water marks, dark spots, or streaks often mean a roof leak or condensation problem.
- Check for sagging: Press gently on any soft spots. If the panel moves, it may need reinforcement or replacement.
- Inspect for cracks or holes: Even small cracks can grow, especially if the ceiling flexes.
- Smell for mold: A musty odor often means moisture is trapped inside.
- Examine seams and joints: Gaps at panel edges can indicate shifting or moisture damage.
When To Call A Professional
Some situations are too complex or risky for a DIY fix:
- Large sections (over 25% of the ceiling) are sagging or collapsing
- Active leaks that haven’t been stopped
- Suspected mold covering more than a few square feet
- Electrical damage in ceiling fixtures
In these cases, bring in a licensed contractor or specialist to avoid health and safety risks.
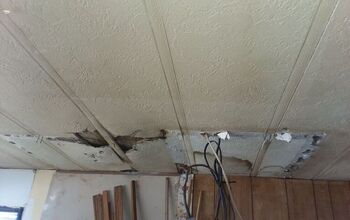
Credit: www.hometalk.com
Tools And Materials You’ll Need
Having the right tools and supplies makes repair much easier and safer. Here’s a quick reference for the most common ceiling fixes:
| Tool/Supply | Purpose | Tip for Beginners |
|---|---|---|
| Utility knife | Cutting panels, trimming edges | Use sharp blades for clean cuts |
| Drywall saw | Cutting out damaged sections | Work slowly to avoid jagged edges |
| Measuring tape | Measuring replacement panels | Double-check before cutting |
| Drill or screwdriver | Securing panels | Use the correct screw length |
| Drywall screws | Attaching panels to ceiling joists | Don’t overtighten |
| Joint compound | Smoothing seams | Apply in thin layers |
| Putty knife | Spreading compound | Clean between uses |
| Paint and primer | Finishing the repair | Use stain-blocking primer for water spots |
| Protective gear | Safety goggles, mask, gloves | Always wear during demolition |
If you’re replacing panels, buy extra material in case of mistakes or future repairs.
Fixing Stains And Minor Surface Damage
Water stains and small dents are the most common ceiling problems in mobile homes. If the ceiling is still solid, you can repair these quickly.
Step 1: Fix The Source Of Moisture
Never paint over a water stain without stopping the leak or condensation issue first. Check the roof, plumbing, or HVAC units above the spot. Use caulk or roofing tape to seal leaks if you find them.
Step 2: Clean And Prep The Area
Gently clean the stained area with a sponge and mild detergent. Let it dry completely.
Step 3: Apply Stain-blocking Primer
Use a stain-blocking primer (like Kilz or Zinsser) over the spot. This keeps the stain from bleeding through new paint.
Step 4: Paint The Ceiling
After the primer dries, paint the area with ceiling paint. For best results, repaint the whole panel or section for a uniform finish.
Non-obvious Tip
If your ceiling is made of vinyl-coated gypsum, regular paint may not stick well. Lightly sand the area first and use a primer made for glossy surfaces.
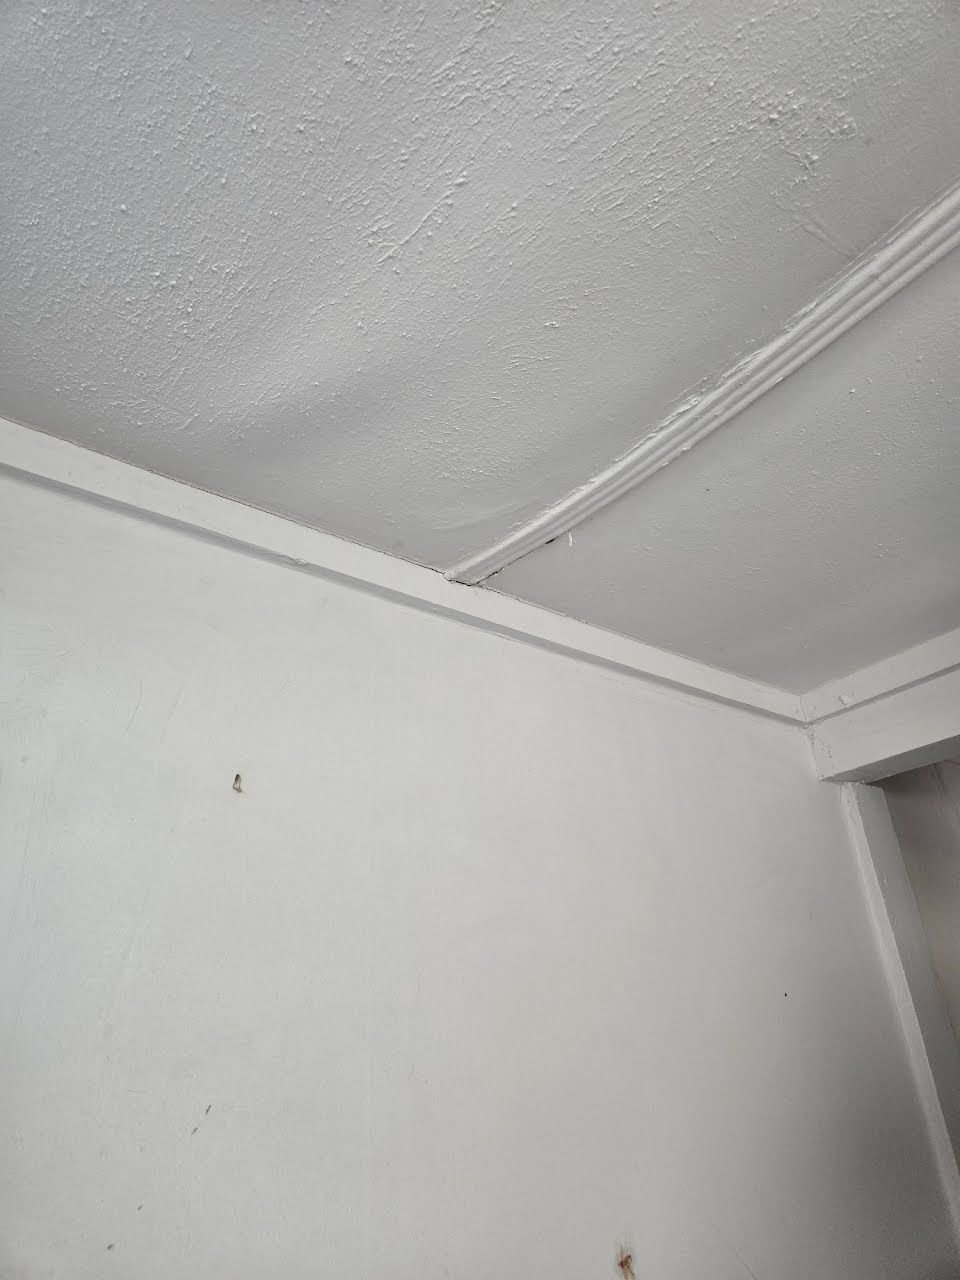
Credit: www.doityourself.com
Repairing Small Cracks And Holes
Cracks and small holes often appear where panels meet or after impact. They usually don’t mean serious damage but should be fixed before they get worse.
Step 1: Widen And Clean The Crack
Use a utility knife to slightly widen cracks. This helps the filler stick better. Brush out any dust.
Step 2: Apply Joint Compound
With a putty knife, fill the crack or hole with joint compound. For holes over 1/2 inch, use a patch or tape.
Step 3: Sand And Repeat
Let the compound dry, then sand lightly. You may need 2-3 coats for a smooth finish.
Step 4: Prime And Paint
Prime before painting, especially for repaired areas. This ensures the patch blends with the rest of the ceiling.
Non-obvious Tip
Don’t rush the drying time between compound layers. Humid conditions in mobile homes can slow drying, leading to cracks later.
Fixing Sagging Ceiling Panels
A sagging ceiling is a bigger problem. It usually means the panel is waterlogged, the fasteners have failed, or the panel is too heavy for the supports. If the panel feels spongy or bows downward, it’s time to act.
Step 1: Locate The Joists
Use a stud finder or tap gently to find the ceiling joists (the wood or metal supports above the panels). Joists are usually 16” or 24” apart.
Step 2: Reinforce With Screws
Drive new drywall screws through the sagging panel into the joists. Space the screws every 8–12 inches for best support.
Step 3: Add Furring Strips (if Needed)
If the panel is badly bowed or the joists are too far apart, attach furring strips (1” x 2” wood slats) across the joists. Then screw the panel to these strips.
Step 4: Patch The Screw Heads
Cover the screw heads with joint compound. Sand smooth when dry, then paint.
Step 5: Replace Severely Damaged Panels
If the panel is soft or moldy, cut it out and replace it (see next section).
Non-obvious Tip
When reinforcing, use coarse-thread drywall screws for better grip in older joists. Fine-thread screws may strip out of soft wood.
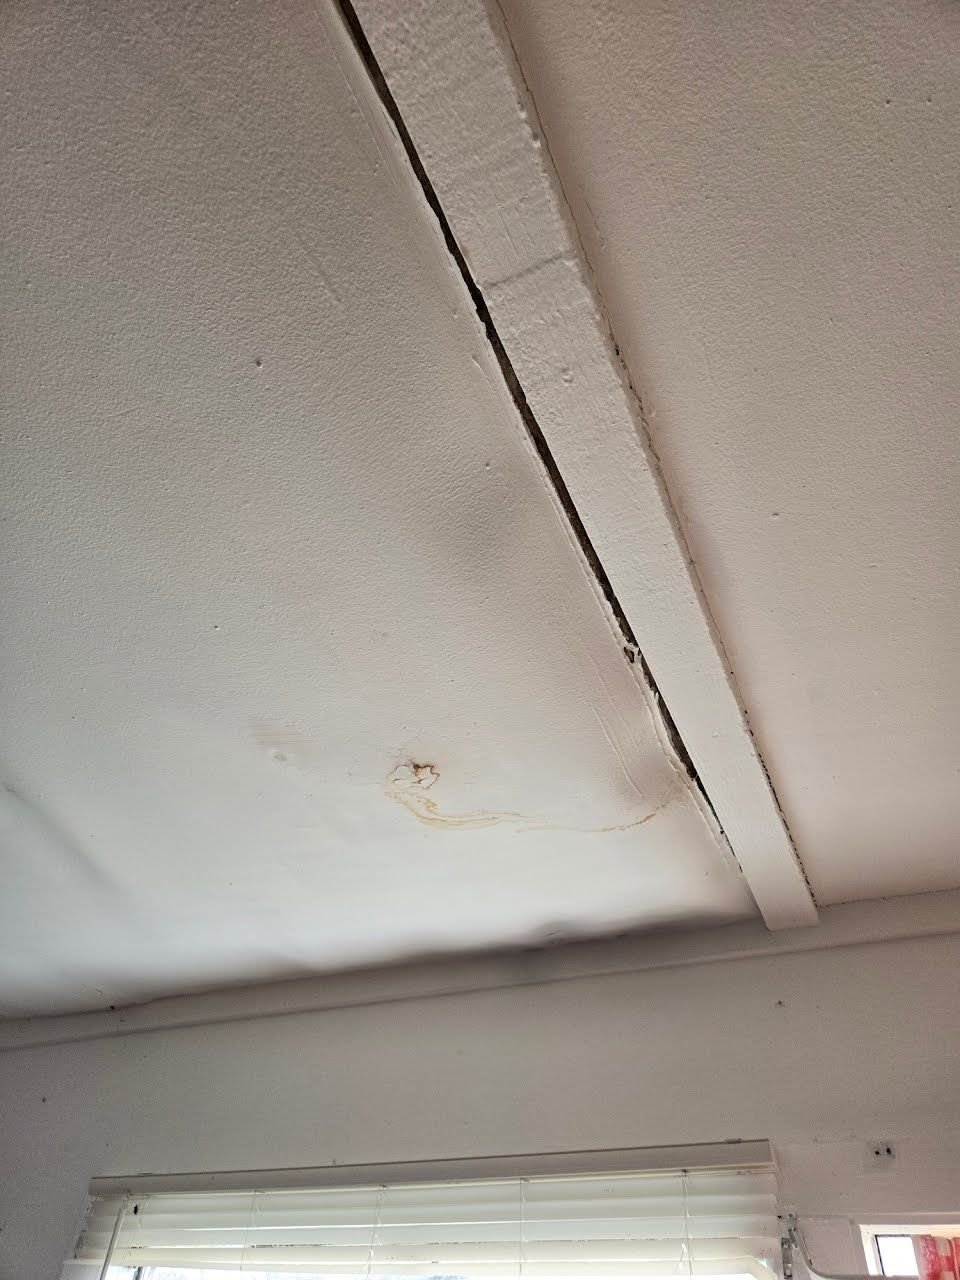
Credit: www.doityourself.com
Replacing Damaged Ceiling Panels
Sometimes, the only solution is to replace the panel. This process is more involved but can restore your ceiling to like-new condition.
Step 1: Measure And Mark
Measure the damaged area and mark a rectangle that includes all affected spots. Try to cut along joist lines for extra support.
Step 2: Cut Out The Damaged Panel
Use a drywall saw or utility knife to cut out the section. Wear goggles and a dust mask.
Step 3: Check For Moisture Or Mold
Inspect the space above the ceiling. If you see wet insulation, remove and replace it. Let the area dry before continuing.
Step 4: Cut And Fit The Replacement Panel
Cut a new piece of ceiling material to size. Test-fit before securing.
Step 5: Secure The Panel
Screw the new panel into the joists. Make sure it’s flush with the surrounding ceiling.
Step 6: Tape And Mud The Seams
Apply joint tape over the seams, then cover with joint compound. Let dry, sand, and repeat as needed.
Step 7: Prime And Paint
Finish with primer and paint to match the rest of the ceiling.
Non-obvious Tip
If matching the original panel texture is difficult, consider adding a ceiling texture spray to blend the new panel with the old.
Dealing With Ceiling Tiles
Many mobile homes use ceiling tiles instead of full panels. These are easier to replace but can be tricky to match if the style is old.
Step 1: Remove The Damaged Tile
Gently pry out the damaged tile. If it’s glued, cut around the edges with a utility knife.
Step 2: Prepare The Area
Clean any adhesive from the frame or ceiling grid.
Step 3: Cut And Install The New Tile
If you can’t find a matching tile, buy a plain white tile and cut to fit. Install using adhesive or the existing fasteners.
Step 4: Paint For A Match
Paint the new tile to match the ceiling. Sometimes repainting the whole ceiling is the best way to get a uniform look.
Non-obvious Tip
When you can’t find a matching tile, use a decorative ceiling medallion or pattern to create a feature instead of trying to hide the patch.
Insulating And Ventilating For Long-term Success
One of the biggest hidden problems in mobile home ceilings is poor insulation or ventilation. Without these, repairs won’t last, and problems will return.
Improving Insulation
Many older mobile homes have thin insulation above the ceiling. If you’re opening the ceiling, add or upgrade insulation batts. Use faced fiberglass or foam board for best results.
Adding Ventilation
If you notice moisture or mold, consider adding a ceiling vent or improving airflow in the attic. Proper ventilation prevents condensation and extends the life of your ceiling.
Upgrading Ceiling Finish
If you’re doing major repairs, it might be worth upgrading to a drywall ceiling. This gives a more modern look and is easier to repair in the future.
Common Mistakes To Avoid
Many DIY repairs fail because of simple errors. Here are some to watch out for:
- Ignoring the source of moisture: Always find and fix leaks before repairing the ceiling.
- Using the wrong materials: Match new panels or tiles as closely as possible.
- Overloading the ceiling: Heavy materials or too many layers can cause sagging.
- Skipping primer: Paint alone won’t block stains.
- Rushing the process: Allow each layer (compound, primer, paint) to dry fully.
Cost Comparison: Diy Vs Professional Repair
Repairing a mobile home ceiling yourself saves money, but sometimes hiring a pro is the better choice. Here’s a comparison:
| Repair Type | DIY Cost (Approx.) | Pro Cost (Approx.) | Time Needed |
|---|---|---|---|
| Small stain or crack | $20 – $50 | $100 – $200 | 1–2 hours |
| Sagging panel | $30 – $80 | $200 – $400 | 2–4 hours |
| Panel replacement | $50 – $150 | $300 – $800 | 3–6 hours |
| Ceiling tile replacement | $30 – $100 | $150 – $400 | 1–3 hours |
| Full ceiling replacement | $300 – $1,000 | $2,000 – $5,000 | 2–3 days |
Keep in mind that pros often have access to better tools and can finish faster, but for many repairs, DIY is safe and effective.
Preventing Future Ceiling Problems
Good repairs are just the start. Preventing damage saves money and stress in the long run.
Regular Roof Checks
Inspect your roof at least twice a year. Check for loose seals, cracked panels, and debris. Reseal as needed, especially around vents and chimneys.
Control Humidity
Use exhaust fans in kitchens and bathrooms. A dehumidifier can help in humid climates. Keep air vents clear.
Fix Leaks Promptly
If you see a new stain or drip, act fast. The longer water sits, the more damage it causes.
Don’t Ignore Small Issues
A minor crack or stain can become a big problem if left alone. Regular touch-ups keep your ceiling strong.
Use Quality Materials
Buy the best panels, paint, and hardware you can afford. Cheap materials may fail quickly in a mobile home environment.
When To Consider A Full Ceiling Upgrade
Sometimes, patching isn’t enough. If your ceiling is very old, has multiple repairs, or uses outdated materials, a full upgrade may be the best choice.
- Drywall ceilings give a modern look and are more durable.
- Drop ceilings allow easy access to wires and pipes.
- Vinyl panels are water-resistant and easy to clean.
A full replacement costs more upfront but can add value and comfort to your home.
Key Differences: Mobile Home Vs Site-built Ceilings
Understanding these differences helps you choose the right repair method.
| Feature | Mobile Home Ceiling | Site-Built Ceiling |
|---|---|---|
| Weight | Lighter materials | Heavier drywall or plaster |
| Support structure | Wider truss spacing | Closer joists |
| Common problems | Sagging, water stains | Cracks, settling |
| Repair approach | Panel/tile replacement | Patching, mudding |
| Upgrade options | Lightweight panels, drop ceilings | Thicker drywall, decorative plaster |
This highlights why using mobile home-specific materials and methods is so important.
Safety Tips For Ceiling Repairs
- Always turn off power at the breaker before working near lights or fans.
- Wear a dust mask and goggles during demolition and sanding.
- Use a sturdy ladder on flat ground. Never stand on furniture.
- Work with a partner if removing large panels.
- Dispose of moldy or wet materials in sealed bags to prevent spreading spores.
Ignoring safety can lead to injuries or further damage.
Resources For Finding Replacement Materials
Finding matching panels or tiles for older mobile homes can be tough. Here’s where to look:
- Mobile home supply stores: Many have online catalogs with ceiling materials.
- Home improvement chains: Some carry compatible drywall or vinyl panels.
- Recycling centers and Habitat for Humanity ReStores: Great for older tiles.
- Manufacturer websites: If you know your home’s make and model, check for parts.
If you’re stuck, bring a sample to the store for help matching.
For more on mobile home construction and materials, you can check the Wikipedia page on mobile homes.
Frequently Asked Questions
What Causes Water Stains On A Mobile Home Ceiling?
Water stains usually come from roof leaks or plumbing problems above the ceiling. Sometimes, poor ventilation causes condensation, leading to stains or even mold. Always fix the leak first before repairing the ceiling.
Can I Use Regular Drywall For Ceiling Repairs?
You can use regular drywall for ceiling repairs, but choose a lighter weight (like 1/2 inch). Make sure your ceiling structure can support the weight. For large sections, consider using materials designed for mobile homes.
How Do I Match Old Ceiling Tiles?
Matching old tiles can be tricky. Take a sample to a mobile home supply store, or search online. If you can’t find an exact match, use a plain white tile and paint the entire ceiling for a uniform look.
Is It Safe To Repair A Ceiling With Mold?
Small patches of mold (less than 10 square feet) can be removed with protective gear. For large areas, or if you have allergies, hire a professional. Always fix the moisture problem first to prevent mold from coming back.
How Long Does A Typical Ceiling Repair Take?
A typical repair (like fixing a crack or replacing a tile) takes 1–2 hours. Bigger jobs, like replacing a whole panel, may take 3–6 hours or more, especially if you need to wait for materials to dry between steps.
Fixing a mobile home ceiling might look difficult, but with the right knowledge and tools, it’s a task most owners can handle. Careful assessment, quality materials, and attention to detail make all the difference. Start small, learn as you go, and your ceiling will look great for years to come.