A dripping kitchen faucet can be annoying. The sound of water droplets hitting the sink is distracting. Even worse, it wastes water and raises your utility bills. Fixing a leaky kitchen faucet is not just good for your peace of mind—it’s also great for the environment.
The good news? You don’t need to be a plumbing expert to solve this problem. With a bit of patience and the right steps, most people can repair a leaky faucet in a single afternoon.
Many homeowners think calling a plumber is the only option. In reality, most kitchen faucet leaks are caused by worn-out parts or simple issues. With some basic tools and a careful approach, you can often fix the leak yourself, save money, and learn a useful skill.
This guide will walk you through every step, from understanding the type of faucet you have to reassembling it and checking for future leaks. You’ll also find practical tips, common mistakes to avoid, and advice for when it’s time to call a professional.
Why Kitchen Faucets Leak
Understanding the reasons behind a leaky kitchen faucet helps you fix the problem faster. Leaks often start small, but if ignored, they can cause water damage, mold growth, or expensive repairs.
The most common causes of a leaky kitchen faucet are:
- Worn-out washers – These rubber or silicone pieces create a seal to stop water flow. Over time, they can harden, crack, or flatten, leading to drips.
- Damaged cartridges – Cartridge faucets use a moving part called a cartridge. If it wears out, water can seep through.
- Faulty O-rings – O-rings seal moving parts like the faucet handle. When O-rings wear out or break, leaks often happen around the handle base.
- Corroded valve seat – The valve seat connects the faucet to the spout. Corrosion from minerals in water can create gaps for water to leak.
- Loose or damaged parts – Screws, nuts, or other components can loosen with time, allowing leaks.
Ignoring these causes does not make them go away. In fact, a slow drip can waste over 3,000 gallons of water a year, according to the EPA. That’s enough for over 180 showers!
Identifying Your Faucet Type
Before you pick up a wrench, identify the type of kitchen faucet you have. There are four main types, and each has a different repair process:
| Faucet Type | Main Feature | Common Leak Location |
|---|---|---|
| Compression | Two handles (hot/cold) | Spout tip or handle base |
| Ball | Single handle with rotating ball | Spout or handle |
| Cartridge | Single or double handle, smooth motion | Spout or handle |
| Ceramic Disc | Single lever, wide body | Spout base |
- Compression faucets are the oldest type and use rubber washers.
- Ball faucets are often found in older homes, especially with Delta brand models.
- Cartridge faucets are common and repair-friendly.
- Ceramic disc faucets are newer, durable, and found in modern kitchens.
How to check your faucet type:
Turn off the water supply and remove the handle. If you see a rubber washer, it’s a compression faucet. If you spot a ball, it’s a ball faucet. Cartridges are usually plastic or brass cylinders. Ceramic discs look like flat cylinders.
Knowing your faucet type will help you buy the correct replacement parts and avoid frustration.
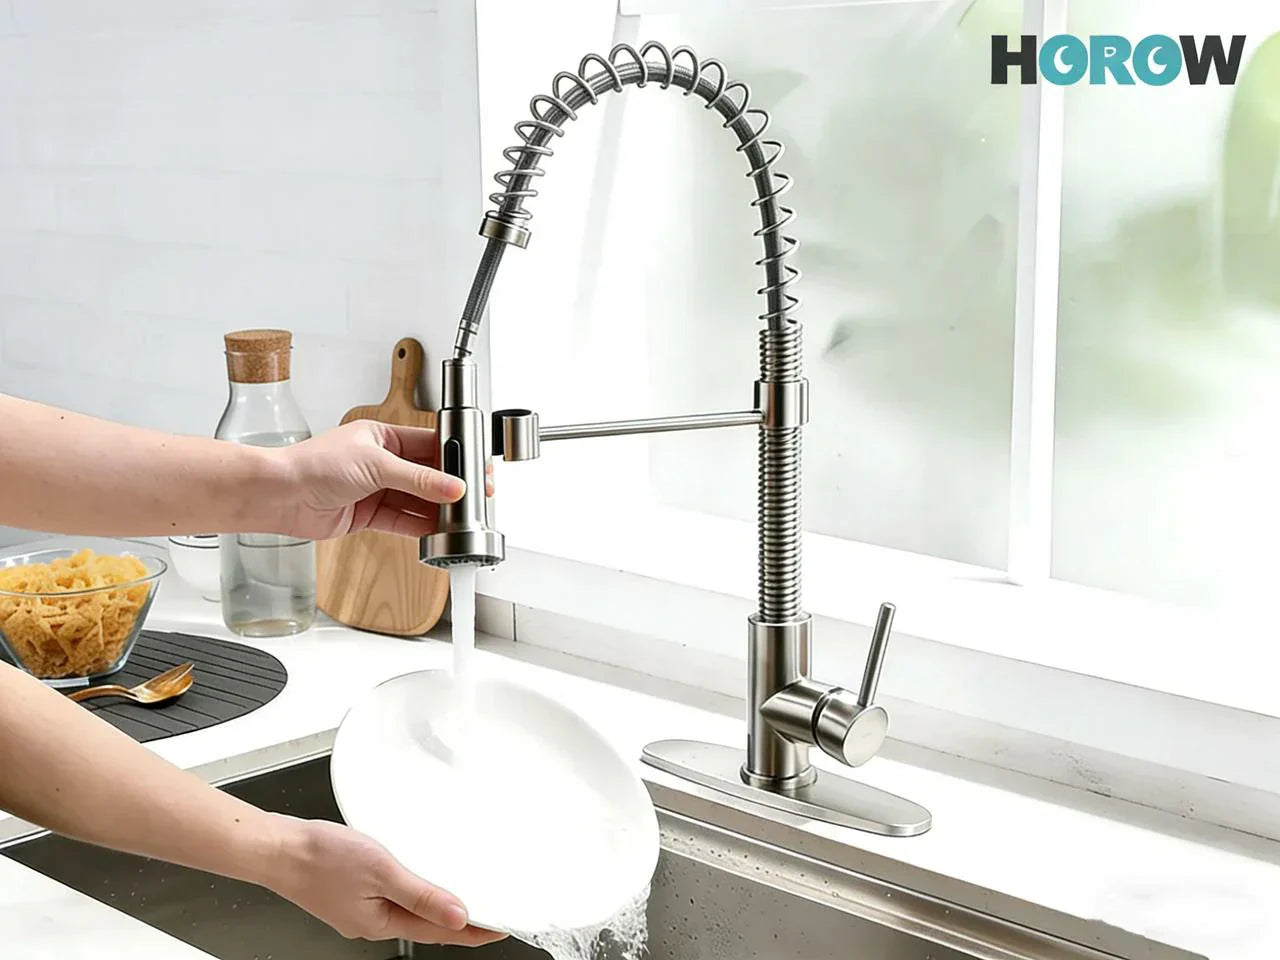
Credit: horow.com
Essential Tools And Materials
Gathering the right tools before you start saves time and stress. Here’s what you’ll likely need:
- Adjustable wrench – For loosening and tightening nuts.
- Phillips and flathead screwdrivers – For handle and screw removal.
- Allen wrench (hex key) – Often needed for set screws.
- Pliers – Helpful for gripping and pulling.
- Needle-nose pliers – For removing small parts.
- Plumber’s grease – Lubricates moving parts and O-rings.
- Replacement washers, O-rings, or cartridges – Match to your faucet type.
- White vinegar or limescale remover – Cleans hard water deposits.
- Small bowl or container – Holds screws and small parts.
- Old towel or rag – Protects your sink and catches drips.
- Flashlight – Useful for dark spaces under the sink.
For some repairs, you might need a seat wrench (for valve seats) or specialty tools (for certain brands). Take a photo of your faucet and any removed parts to help you get the right replacements at the hardware store.
Preparing For The Repair
Preparation is as important as the repair itself. Rushing leads to mistakes, lost parts, or even new leaks. Here’s how to set yourself up for success:
- Turn off the water supply: Look under your sink for two shut-off valves—one for hot, one for cold. Turn them clockwise until tight. If you don’t see them, you may need to turn off your home’s main water supply.
- Plug the drain: Use a sink stopper or a rag. This prevents screws and small pieces from falling down the drain.
- Clear the area: Remove any cleaning products, sponges, or items under and around the sink. You’ll need space to work.
- Lay out your tools: Arrange everything within arm’s reach.
- Take photos: Snap pictures at each stage as you take the faucet apart. This helps you remember how everything fits together.
A common mistake is forgetting to turn off the water. Even a small amount of leftover pressure can cause a mess. Double-check before you start.
Step-by-step Guide: How To Fix A Leaky Kitchen Faucet
Now, let’s get hands-on. The repair steps depend on your faucet type, but the process follows a general path: disassembly, inspection, replacement, and reassembly.
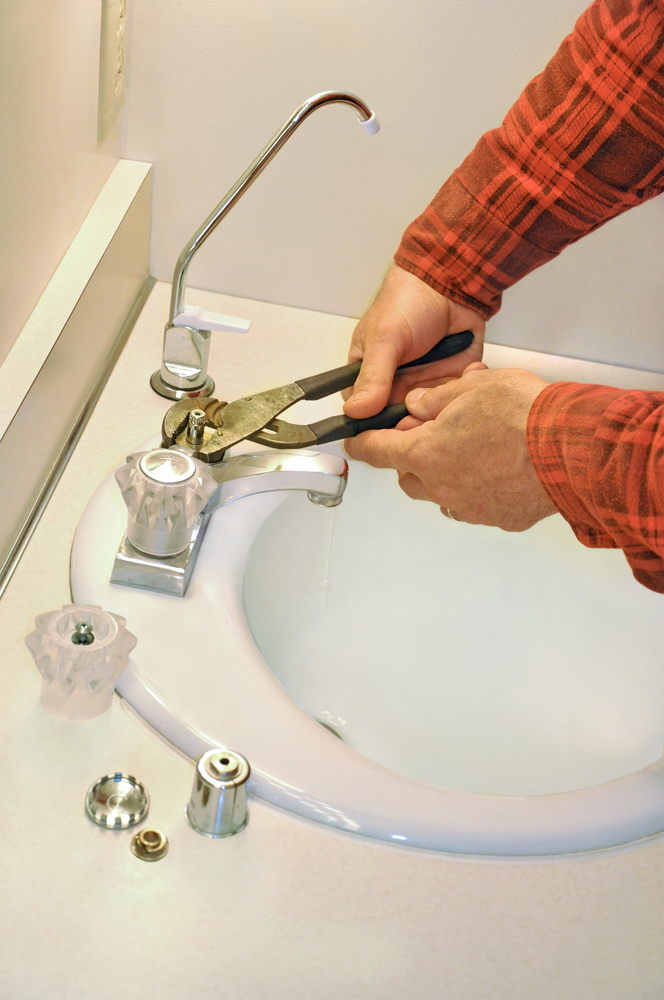
Step 1: Remove The Faucet Handle
- Use a screwdriver or Allen wrench to remove the handle screw.
- Some handles have decorative caps hiding the screw—pry these off gently with a flathead screwdriver.
- Pull the handle off. If it’s stuck, wiggle it gently or use a handle puller tool.
Tip: Keep all screws and small pieces in a bowl. Losing a screw can stop your repair in its tracks.
Step 2: Inspect And Remove Internal Parts
- For compression faucets, remove the packing nut with a wrench, then unscrew and remove the stem.
- For ball faucets, you’ll find a cap and collar under the handle. Loosen with pliers (protect chrome with a cloth). Remove the cam, ball, and seals.
- For cartridge faucets, pull out the retaining clip or nut, then slide out the cartridge. Some may need gentle prying.
- For ceramic disc faucets, remove the mounting screws and lift out the disc cylinder.
Note: Identify all washers, O-rings, and seals as you go.
Step 3: Check For Wear And Damage
Examine each part for signs of wear:
- Washers: Look for cracks, flattening, or hardening.
- O-rings: Check for brittleness or tears.
- Cartridges or discs: Look for mineral buildup, corrosion, or cracks.
- Valve seat: Shine a flashlight inside the faucet body. If you see pits or grooves, the seat may need cleaning or replacement.
Hard water deposits are a common cause of leaks. If you see white or green buildup, soak parts in vinegar for 10–20 minutes.
Step 4: Replace Faulty Parts
Take old parts to your hardware store to match replacements. Don’t guess; even small differences can cause leaks to continue.
- For washers and O-rings, replace with identical sizes.
- For cartridges, buy the same model. Bring your old cartridge or check the faucet brand and model.
- For ceramic discs, replacement is less common but possible.
Apply plumber’s grease to new O-rings and moving parts. This prevents drying and makes future repairs easier.
Step 5: Reassemble The Faucet
- Insert new or cleaned parts in the reverse order of removal.
- Tighten screws and nuts just enough—don’t overtighten, which can crack or strip threads.
- Replace the handle and any decorative caps.
Step 6: Test Your Repair
- Remove the drain plug or rag.
- Turn water supply valves back on slowly.
- Open the faucet and let water flow for a minute. Check for leaks at the spout and around the base and handle.
- If everything is dry, you’ve fixed the leak. If you see drips, double-check that parts are seated correctly and screws are tight.
Pro tip: If water spits or “bursts” at first, it’s likely air in the line. This is normal after faucet repairs.
Special Cases: Fixing Different Faucet Types
Not all leaks are the same. Here’s what’s unique about each type:
Compression Faucets
These are easy to repair with new washers and O-rings. Use a seat wrench if the valve seat is damaged. Replacing the seat is rare but sometimes needed for old fixtures.
Ball Faucets
Ball faucets have more parts—springs, cams, and seals. Many hardware stores sell repair kits with all the necessary pieces. Make sure to get the right kit for your faucet brand.
Cartridge Faucets
Most cartridge leaks are solved by replacing the cartridge. Be sure to install the new one in the same direction as the old. Some cartridges have a specific orientation.
Ceramic Disc Faucets
These are durable but sensitive to debris. Clean all parts thoroughly before reassembly. If the disc is cracked, replace it. Handle gently—ceramic is strong but brittle.
Credit: wallsidewindows.com
Common Mistakes To Avoid
Even experienced DIYers make errors. Here are pitfalls to watch for:
- Forgetting to turn off water – Leads to flooding and mess.
- Mixing up parts – Always keep small parts organized.
- Using wrong replacement parts – Even a small size difference causes leaks.
- Over-tightening – Cracks parts or strips threads.
- Skipping cleaning – Old debris can cause new leaks.
- Ignoring the valve seat – If the seat is rough or pitted, leaks can return.
- Rushing the process – Take photos and go step by step.
A practical trick: Lay parts on a towel in the order you remove them. This makes reassembly much easier.
When To Call A Professional
Most faucet leaks are DIY-friendly. But some situations call for a plumber:
- Water leaks under the sink – May signal a supply line issue, not the faucet.
- Corroded or stuck parts – Forcing them can cause costly damage.
- Leaking persists after repairs – Could mean a deeper problem.
- Low water pressure or strange noises – Might be an issue with pipes, not the faucet.
If you feel unsure at any point, don’t risk it. Professional plumbers have the right tools and experience to fix complex problems safely.
How To Prevent Future Faucet Leaks
Fixing a leaky faucet is satisfying, but prevention is better. Here’s how to keep your kitchen faucet in top shape:
- Clean regularly – Wipe faucet and handles to prevent mineral buildup.
- Fix drips early – A small leak often means a cheap repair.
- Check water pressure – High pressure (above 80 psi) wears out faucet parts faster.
- Use faucet gently – Don’t force handles or levers.
- Install a water softener if you have hard water—this extends faucet life.
- Replace O-rings and washers every few years as preventative maintenance.
Small habits make a big difference in faucet longevity.
Comparing Faucet Repair Costs
Understanding the cost difference between DIY and professional repair helps you make smart choices.
| Repair Method | Typical Cost Range | Details |
|---|---|---|
| DIY (parts only) | $5 – $30 | Washers, O-rings, cartridges, grease |
| Professional repair | $100 – $200 | Labor, parts, service call fee |
| Faucet replacement | $75 – $400+ | New faucet, possible installation cost |
DIY repair is usually much cheaper, especially for simple leaks. If your faucet is very old or leaking in multiple places, replacement may be more cost-effective.
How To Choose The Right Replacement Parts
Selecting the correct replacement parts is essential for a lasting fix. Here’s what to look for:
- Brand and model: Check your faucet’s brand (Delta, Moen, Kohler, etc.) And model number, often found on the base or underneath.
- Part number: Take the old part to the store or reference the manual.
- Material: Choose high-quality rubber or silicone for washers and O-rings. Brass or stainless steel for cartridges lasts longer than plastic.
- Fit: Even a small difference in size or shape prevents a tight seal.
Some hardware stores have faucet repair centers where staff help you find exact matches. If you can’t find a part locally, check the manufacturer’s website.
Real-world Examples And Case Studies
Example 1: Slow Drip, Easy Fix
Maria noticed a slow drip from her kitchen faucet. She turned off the water, removed the handle, and saw a flattened rubber washer. After replacing it for $2, the leak stopped. She saved over $100 in plumber fees.
Example 2: Persistent Leak Around Handle
John’s faucet leaked around the base. He replaced the O-ring, but the leak returned. After cleaning heavy mineral deposits from the valve seat with vinegar, he reassembled the faucet. The leak stopped for good.
Example 3: Cartridge Replacement Gone Wrong
Lisa installed a new cartridge but used the wrong size. The leak continued. After bringing both the old and new cartridges to the store, she found a perfect match. The lesson: Always compare parts carefully.

Credit: www.youtube.com
Environmental Impact Of Faucet Leaks
Leaky faucets waste more than just money—they waste resources. The EPA estimates that household leaks can waste nearly 1 trillion gallons of water annually in the US. Fixing leaks is one of the simplest ways to conserve water.
If your faucet drips once per second, you could waste over 3,000 gallons per year. That’s enough to fill a small swimming pool. By fixing leaks, you help the planet and your wallet.
For more information on water conservation, visit the EPA WaterSense website.
Frequently Asked Questions
How Do I Know What Type Of Kitchen Faucet I Have?
Look at the handle and how it moves. Compression faucets have two handles. Ball and cartridge faucets usually have one handle. Remove the handle—compression types use washers, ball types have a ball, cartridge types use a plastic or brass cylinder, and ceramic disc faucets have flat discs.
Can I Fix A Leaky Faucet Without Turning Off The Water?
No. Always turn off the water supply before starting. Leaving it on can cause water to spray everywhere, damage your kitchen, and make repair much harder.
Why Does My Faucet Still Leak After Replacing The Washer?
There may be other issues. The valve seat could be corroded, or the replacement washer might not fit perfectly. Check all seals, clean away mineral deposits, and inspect the valve seat for pits or grooves.
How Often Should Faucet Washers And O-rings Be Replaced?
For most homes, every 3–5 years is a good rule. If you have hard water, check them more often. Replacing these parts early prevents leaks and extends faucet life.
Is It Better To Repair Or Replace An Old Kitchen Faucet?
If the faucet is leaking in multiple places, parts are hard to find, or it’s over 15 years old, replacement may be best. For simple leaks and newer faucets, repair is usually cheaper and faster.
Fixing a leaky kitchen faucet is a skill every homeowner should know. With patience and the right steps, you can solve most leaks in an afternoon. Always take your time, use the proper parts, and don’t hesitate to call a professional if you feel unsure.
Remember, every drip you stop saves water, money, and helps the environment.