Basements are more than storage spaces today. Homeowners use them for family rooms, gyms, offices, and even bedrooms. But concrete floors in basements are often cold, rough, and unfinished. If you want your basement to feel comfortable and look good, finishing the concrete floor is the first step. Many people worry this job is too hard or expensive. With the right approach and a clear plan, you can turn your basement floor into a strong, stylish surface that lasts for years.
This guide covers everything you need to know to finish concrete floors in a basement. You’ll learn about preparation, materials, methods, and practical tips. Whether your goal is a simple smooth finish or a decorative look, you’ll get clear instructions and useful advice.
By the end, you’ll understand how to make your basement floor strong, safe, and beautiful.
Understanding Basement Concrete Floors
Before you start any finishing work, it’s important to know why basement floors are different from other concrete surfaces. Basements are below ground level. This means the concrete is in contact with soil and moisture. Humidity and water vapor can move through the floor, sometimes causing problems like stains, cracks, or mold.
Many basement floors are poured with rough surfaces, not polished. Builders often leave them unfinished because they’re not visible when the house is built. Over time, rough concrete can become dusty and hard to clean. If your basement is older, you may also see cracks, uneven areas, or spots where water leaks in after rain.
Finishing a basement floor is not only about appearance. It’s about protecting the concrete, making it easier to clean, and improving safety. The right finishing steps can also help control moisture and reduce the risk of mold.
Common Challenges In Basement Concrete Floors
Basement floors have unique challenges:
- Moisture: Water can seep through the concrete from the ground. This causes stains, mold, and sometimes a musty smell.
- Cracks: Concrete may crack as the house settles or due to temperature changes.
- Uneven surface: Old floors may have dips or bumps that make it difficult to install flooring.
- Dust: Unfinished concrete produces dust that collects on surfaces and in the air.
Knowing these challenges helps you plan your finishing steps and choose the best materials.
Preparing The Basement Floor For Finishing
No matter which finish you choose, proper preparation is essential. Skipping steps here is the main reason basement floors fail later. Preparation makes the surface strong, smooth, and ready for coatings or coverings.
Steps To Prepare The Floor
- Clear the Area: Remove all furniture, boxes, and debris. Sweep the floor to get rid of dust and loose dirt.
- Check for Moisture: Tape a piece of plastic (about 2 ft x 2 ft) to the floor. Leave it for 24-48 hours. If you see water under the plastic, your floor has moisture problems. You may need a vapor barrier or waterproofing before finishing.
- Repair Cracks: Fill cracks with concrete patch or epoxy. For wide cracks, use a chisel to remove loose material before patching. Smooth the patched area with a trowel.
- Level the Surface: If your floor is uneven, use a self-leveling compound. Mix and pour it over low spots, then spread with a trowel or squeegee. Allow it to dry completely.
- Clean Thoroughly: After repairs, sweep and vacuum again. For best results, mop with a mild cleaner and let the floor dry fully.
Practical Tips
- Use a shop vacuum to remove fine dust after sweeping.
- Avoid using strong acid cleaners; they can damage the concrete.
- If your basement has a history of flooding, consult a professional before finishing the floor.
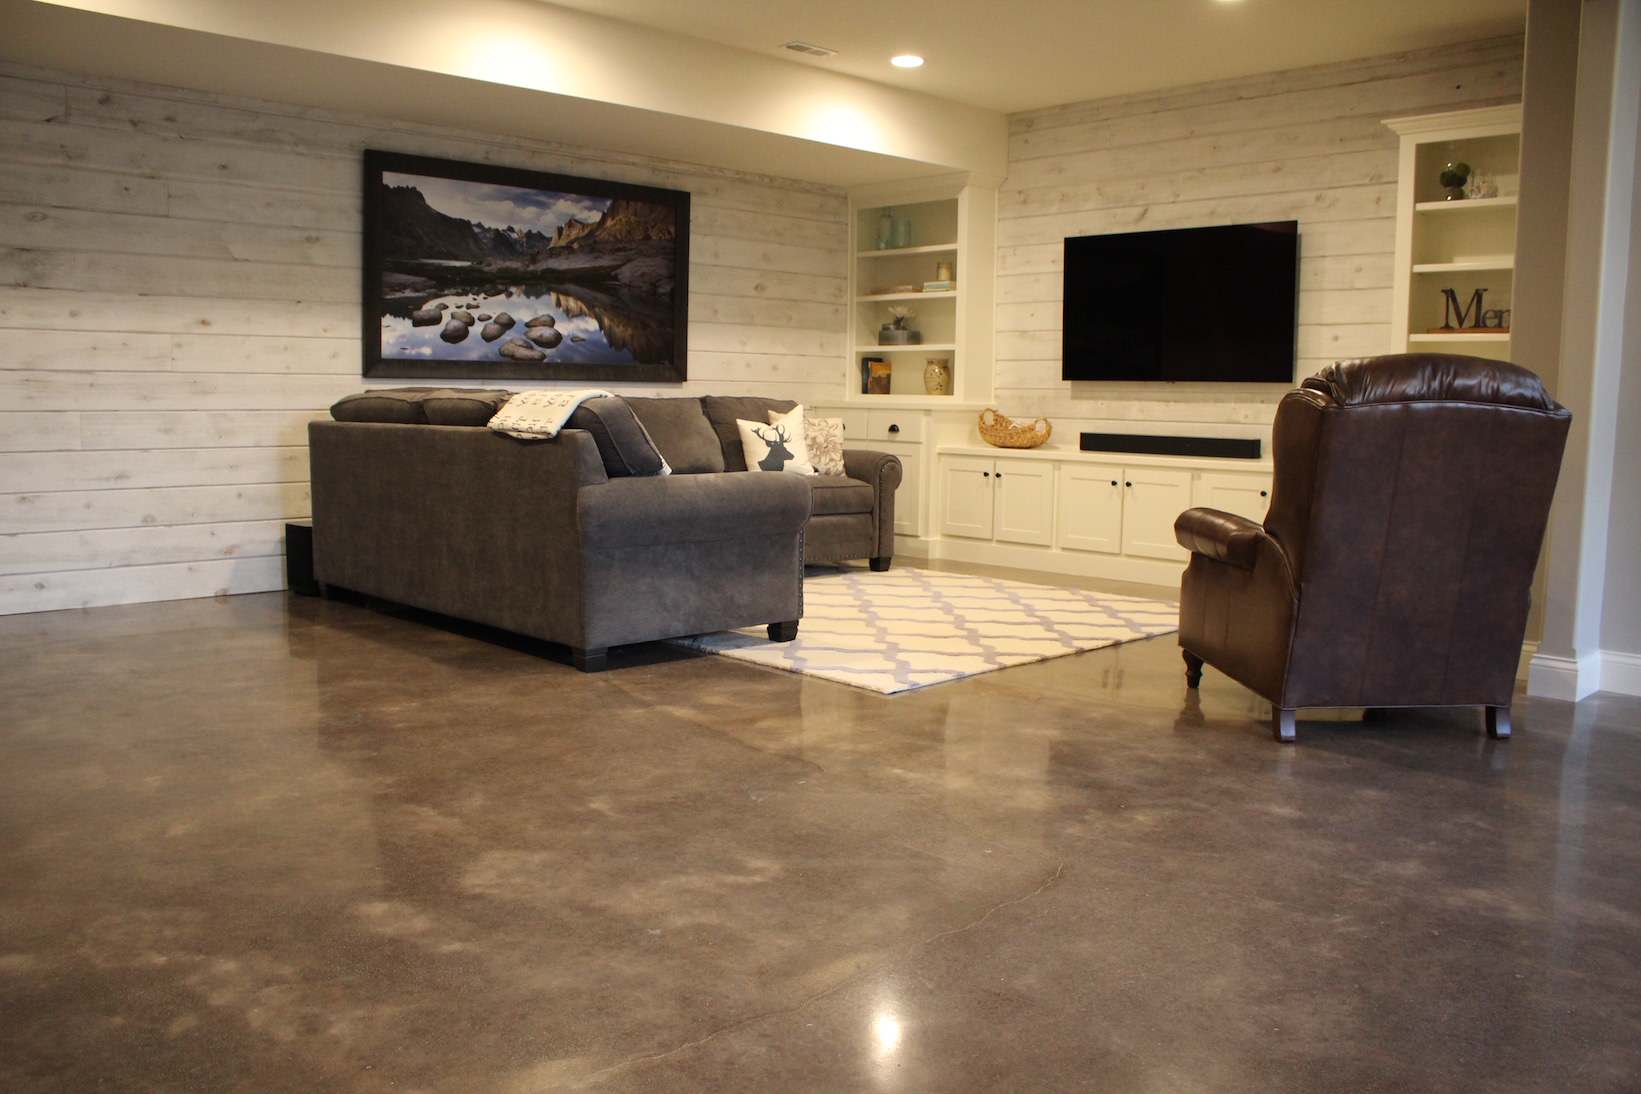
Credit: www.houzz.com
Choosing The Right Finish For Basement Concrete Floors
There are several ways to finish a basement concrete floor. Your choice depends on budget, style, and how you plan to use the space. The main options are:
- Concrete Sealers
- Epoxy Coatings
- Stained Concrete
- Polished Concrete
- Painted Concrete
- Overlay Systems
- Floor Coverings (like vinyl, tile, carpet)
Each method has its own benefits, drawbacks, and steps.
Comparing Basement Floor Finishes
Here’s a comparison of common basement floor finishes:
| Finish Type | Durability | Cost (per sq. ft.) | Moisture Resistance | Appearance |
|---|---|---|---|---|
| Concrete Sealer | Medium | $0.50–$1.50 | Good | Natural, matte |
| Epoxy Coating | High | $3–$7 | Excellent | Glossy, colorful |
| Stained Concrete | Medium | $2–$4 | Good | Decorative, varied |
| Polished Concrete | High | $3–$6 | Good | Shiny, modern |
| Painted Concrete | Low–Medium | $1–$3 | Fair | Simple, color options |
| Overlay System | High | $5–$10 | Excellent | Custom, smooth |
| Floor Coverings | Varies | $2–$10 | Depends on material | Carpet, tile, vinyl |
Not every basement needs a fancy finish. Sometimes a simple sealer or paint is enough. For family rooms or offices, epoxy or overlays offer a more durable and attractive surface.
How To Apply Concrete Sealers
Concrete sealers are a popular choice for basements. They protect the surface from stains, water, and wear. Sealers come in two main types: penetrating sealers and surface sealers.
- Penetrating sealers soak into the concrete, protecting from inside.
- Surface sealers create a layer on top, blocking water and giving a shine.
Steps To Seal Basement Concrete
- Choose the Right Sealer: For basements, look for a sealer that resists moisture. Popular choices are silicate-based (penetrating) or acrylic (surface).
- Prepare the Floor: Clean and repair as described earlier.
- Apply Sealer: Use a paint roller or sprayer. Work in small sections. For penetrating sealers, let them soak and wipe off extra. For surface sealers, apply thin coats.
- Allow to Dry: Follow manufacturer’s instructions. Usually, sealers dry in 24–48 hours.
- Repeat if Needed: Some sealers need two or three coats for full protection.
Practical Insight
Many beginners use too much sealer, causing sticky spots. Always apply thin, even coats. The best sealers are almost invisible but make the floor easier to clean.
Installing Epoxy Floor Coatings
Epoxy is one of the most durable finishes for basement concrete. It creates a strong, waterproof surface that resists stains, chemicals, and scratches. Epoxy comes in two parts: resin and hardener. When mixed, they bond to the concrete and harden.
Step-by-step Epoxy Application
- Choose Epoxy Kit: Buy a kit made for concrete floors. Kits come in several colors and gloss levels.
- Prepare the Floor: Clean and repair. Use a degreaser if the floor has oil stains.
- Etch the Concrete: Some kits require etching with a mild acid to help epoxy stick. Rinse and let dry.
- Mix Epoxy: Follow instructions carefully. Mix only what you can apply in 30 minutes.
- Apply Epoxy: Use a roller or brush. Start at the farthest corner and work toward the exit.
- Add Decorative Flakes: If desired, sprinkle color flakes while epoxy is wet.
- Allow to Cure: Epoxy needs 24–48 hours to cure. Avoid walking on it until fully dry.
Common Mistakes
- Not mixing epoxy thoroughly. If you see sticky areas after curing, this is often the cause.
- Applying in humid or cold conditions. Epoxy cures best at temperatures above 60°F.
Epoxy makes basement floors look like showroom surfaces. It’s ideal for home gyms, playrooms, or workshops.
Staining Concrete Floors For A Decorative Look
Concrete stains add color and pattern to basement floors. There are two types: acid stains and water-based stains.
- Acid stains react with concrete, creating unique patterns.
- Water-based stains sit on top and offer more color choices.
How To Stain Basement Concrete
- Pick a Stain: Decide between acid or water-based. Acid stains are popular for a natural, marbled effect.
- Prepare the Floor: Clean thoroughly. Remove all grease and dust.
- Test a Small Area: Stains can be unpredictable. Test a corner before covering the whole floor.
- Apply Stain: Use a sprayer or brush. Work in sections for even coverage.
- Let Dry: Stains need several hours to dry.
- Neutralize Acid Stain: For acid stains, use baking soda and water to neutralize after drying.
- Apply Sealer: Seal the floor to protect the color and make cleaning easier.
Non-obvious Insight
Many homeowners skip sealing after staining. This leads to fading and stains from spills. Sealing is critical for basement floors, especially with acid stains.
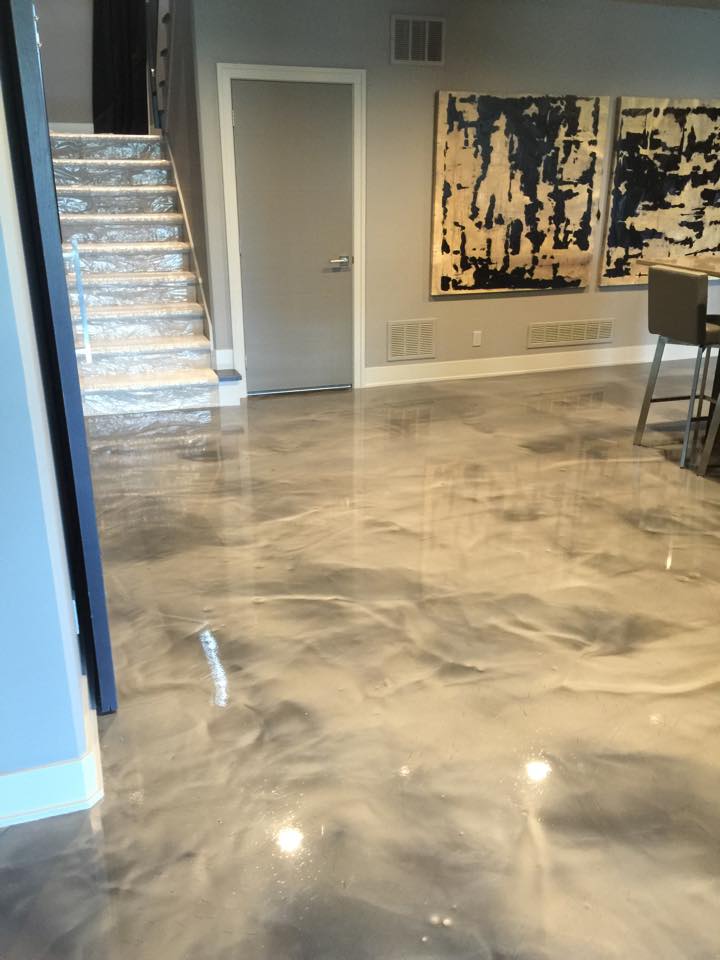
Credit: directcolors.com
Creating A Polished Concrete Floor
Polished concrete is smooth, shiny, and modern. It’s popular in commercial spaces, but works well in basements too. Polishing involves grinding the surface with special machines and then applying a densifier.
Steps To Polish Concrete
- Rent a Floor Grinder: Most hardware stores rent grinders. Choose diamond pads for basement floors.
- Start Grinding: Begin with rough pads, then switch to finer pads for smoothness.
- Apply Densifier: After grinding, apply a concrete densifier to harden the surface.
- Final Polish: Use the finest pads for a glossy finish.
- Clean Up: Vacuum dust and mop with a neutral cleaner.
Practical Tip
Polished concrete can be slippery when wet. For basements used as playrooms or gyms, consider a matte polish or add anti-slip additives.
Painting Basement Concrete Floors
Painting is a quick, affordable way to finish basement floors. Special concrete floor paints are made to handle moisture and wear.
How To Paint Concrete Floors
- Select Paint: Buy paint labeled for concrete or masonry.
- Prepare Surface: Clean, patch, and dry the floor.
- Prime the Floor: Use a concrete primer for better adhesion.
- Apply Paint: Use a roller or brush. Two thin coats work best.
- Let Dry: Wait at least 24 hours between coats.
Non-obvious Insight
Some paints include anti-slip additives. If your basement is damp, choose paints with mildew resistance.
Using Overlay Systems For A New Surface
Overlays are thin layers of new concrete or polymer spread over old floors. They fix cracks, level surfaces, and allow decorative finishes.
Steps To Install An Overlay
- Choose Overlay Material: There are cement-based and polymer-based overlays.
- Prepare Floor: Clean, repair, and prime.
- Mix Overlay: Follow instructions for water and mixing.
- Apply Overlay: Spread with a trowel or squeegee. Smooth to desired thickness.
- Let Cure: Most overlays need 24–48 hours to cure.
- Finish as Desired: Overlays can be stained, polished, or painted.
Comparison: Overlay Vs. Epoxy
| Aspect | Overlay System | Epoxy Coating |
|---|---|---|
| Thickness | 1/8″–1/2″ | 1/16″–1/8″ |
| Repair Ability | Can fix deep damage | Only covers surface |
| Finish Options | Stain, polish, paint | Glossy, flakes |
| Cost | Higher | Moderate |
Overlays are best for very damaged or uneven floors.
Installing Floor Coverings Over Concrete
Sometimes you want a warmer or softer feel in your basement. Covering the concrete with vinyl, carpet, or tile is common. Each type needs proper preparation.
Types Of Floor Coverings
- Vinyl Planks/Tiles: Waterproof, easy to install, good for basements.
- Carpet: Makes the room cozy, but not ideal for damp basements.
- Ceramic Tile: Durable, but cold underfoot.
- Engineered Wood: Looks like hardwood, but resists moisture better.
Installing Floor Coverings
- Vinyl: Clean and dry the floor. Lay planks or tiles directly. Some vinyl needs adhesive, others click together.
- Carpet: Use a vapor barrier underneath. Install carpet pad and then carpet. Avoid in damp basements.
- Tile: Apply thin-set mortar. Place tiles and let dry. Seal grout to prevent water leaks.
- Engineered Wood: Use floating installation over a vapor barrier.
Common Mistakes
- Skipping the vapor barrier. This lets moisture ruin your new floor.
- Installing carpet in damp basements. It can grow mold and smell bad.
Moisture Control And Waterproofing
Moisture is the biggest enemy of basement floors. Even if your basement seems dry, water vapor can seep up through concrete.
How To Control Moisture
- Install a Vapor Barrier: Plastic sheeting under overlays or coverings stops moisture.
- Seal Cracks and Edges: Use silicone or polyurethane caulk for gaps.
- Use Dehumidifiers: Keep basement humidity below 50%.
- Check for Leaks: Inspect the floor after rain or snowmelt.
Waterproofing Methods
If your basement has chronic moisture issues, consider professional waterproofing. Methods include:
- Interior drain systems around the edge of the floor.
- Sump pumps to remove water.
- Exterior waterproofing for foundation walls.
You can learn more about basement waterproofing at Family Handyman.
Safety And Environmental Factors
Finishing basement floors involves chemicals, dust, and heavy materials. Protect yourself and your family by following safety guidelines.
Safety Tips
- Wear gloves and masks when applying sealers, stains, or epoxy.
- Ventilate the basement during and after application.
- Keep children and pets away until the floor is dry and cured.
Environmental Considerations
- Choose low-VOC products when possible. VOCs are chemicals that can cause headaches or breathing issues.
- Dispose of leftover materials according to local rules.
Maintenance Of Finished Basement Concrete Floors
Once your basement floor is finished, regular maintenance keeps it looking good and lasting longer.
Maintenance Tips
- Clean spills quickly to prevent stains.
- Sweep or vacuum weekly to remove dust.
- Mop with mild cleaners. Avoid strong acids or bleach.
- Reseal or recoat every few years for best protection.
Maintenance Schedule Example
| Task | Frequency | Notes |
|---|---|---|
| Sweep/Vacuum | Weekly | Use soft brushes |
| Mop | Monthly | Mild cleaner only |
| Inspect for Cracks | Twice a year | Patch small cracks early |
| Reseal/Recoat | Every 3–5 years | Depends on finish type |
Non-obvious Insights For Beginners
- Many people underestimate moisture testing. Even “dry” basements can have hidden water vapor. Do the plastic sheet test before any finishing.
- Don’t skip floor leveling. Small dips may seem harmless, but they cause problems with epoxy, overlays, and tile. Self-leveling compound is affordable and saves trouble later.
- Avoid applying finishes in cold or humid weather. Most coatings cure best in temperatures above 60°F and humidity below 60%.
Credit: www.polishtheplanet.com
Frequently Asked Questions
What Is The Best Finish For Basement Concrete Floors?
The best finish depends on your needs. For durability and moisture resistance, epoxy coatings are excellent. If you want a decorative look, stained concrete or overlays work well. For a simple, affordable solution, use concrete sealers or paint.
How Do I Check For Moisture In My Basement Floor?
Tape a piece of plastic (about 2 ft x 2 ft) to the floor and leave it for 24–48 hours. If water appears under the plastic, your floor has moisture problems. You may need a vapor barrier or professional waterproofing before finishing.
Can I Install Carpet Over Concrete In My Basement?
Yes, but only if your basement is dry and you use a vapor barrier underneath. Avoid carpet in damp basements, as it can grow mold and trap odors.
How Long Does It Take To Finish A Basement Concrete Floor?
Most finishes take 2–5 days, depending on drying and curing times. For example, epoxy needs about 48 hours to cure, overlays can take 1–2 days, and paint may take 2 days for two coats.
Is It Necessary To Seal Basement Concrete Floors?
Sealing is important for protection against moisture, stains, and wear. Even if you plan to cover the floor with carpet or tile, sealing helps prevent problems like mold and water damage.
Finishing concrete floors in your basement is a smart investment. It makes the space cleaner, safer, and more comfortable. Whether you choose epoxy, stain, overlay, or simple paint, taking time to prepare and finish the floor correctly pays off for years.
With the right materials and careful steps, your basement can become a favorite part of your home.