When you bring barn wood indoors, you add a touch of history and rustic charm to your home. But old barn wood isn’t ready for indoor life right away. Without the right treatment, it can crack, shed splinters, or even bring in pests and mold. Sealing barn wood is more than just brushing on a clear coat—it’s about protecting the wood, your home, and your family. In this guide, you’ll learn how to seal barn wood for indoor use, from start to finish, with clear steps and practical advice. Whether you’re making a coffee table, a feature wall, or rustic shelving, this will help you get professional results and keep your project beautiful for years.
Why Seal Barn Wood For Indoor Use?
Barn wood has survived years, even decades, of weather outside. So why does it need sealing indoors? The answer lies in how different indoor and outdoor environments are. Inside, barn wood faces central heating, air conditioning, and low humidity, which can dry out and crack the wood. Indoor use also means closer contact with people, so splinters, old nails, or hidden pests are bigger concerns.
Sealing barn wood helps in several ways:
- Stops splinters from causing injury
- Prevents dust and old paint flakes from spreading
- Protects against pests like termites or beetles
- Reduces warping and cracking due to changes in humidity
- Keeps the look of the wood without fading or yellowing
Some people think barn wood is “already tough,” but sealing is critical for safe and lasting results indoors.
Choosing The Right Barn Wood
Not all barn wood is safe or good for inside your home. Before you start sealing, select the best boards for your project.
- Check for rot or soft spots: Press a screwdriver into the wood. If it sinks easily, the wood might be rotten and weak.
- Look for pests: Tiny holes, sawdust, or live insects are warning signs. Infested wood should not be used indoors.
- Avoid painted boards with lead paint: Many old barns used lead-based paint. If the paint is chipping or powdery, test for lead before sanding.
- Choose stable boards: Wood that is straight, not twisted or cupped, is easier to work with.
- Pick the right size and character: Think about how much “rustic” look you want. Some people love nail holes and weathered grain, others prefer smoother surfaces.
When in doubt, err on the side of safety and quality. Barn wood with too much damage may be better used for outdoor projects or as accent pieces.
Safety First: Preparing Your Workspace
Barn wood can hide surprises. Before you start, set up a safe, clean area to work.
- Wear gloves and eye protection. Old wood can have splinters, nails, and sharp edges.
- Use a mask or respirator. Sanding barn wood creates dust, which may include mold spores, old paint, or other irritants.
- Work outside or in a well-ventilated garage. This keeps the dust and fumes away from your living space.
- Keep a magnet handy. Run it over the wood to find hidden nails or screws before you start sanding.
Many beginners forget how much dust and debris comes from even small projects. Taking these steps at the start saves time and keeps you safe.
Cleaning Barn Wood: Step-by-step
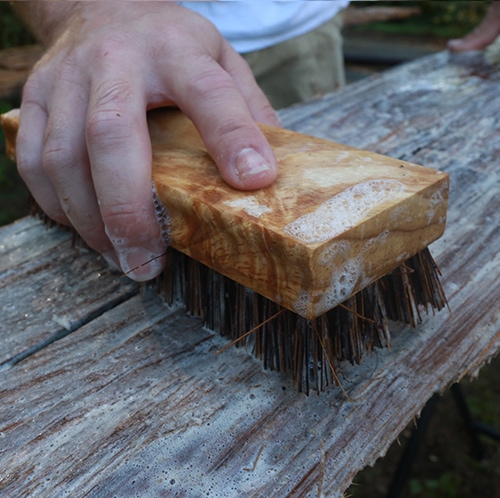
Before sealing, you must clean barn wood thoroughly. Even beautiful boards can have dirt, mold, or animal droppings.
- Dry brush first: Use a stiff-bristle brush to remove loose dirt, cobwebs, and debris.
- Vacuum the surface: A shop vacuum with a brush attachment removes more dust from cracks and grooves.
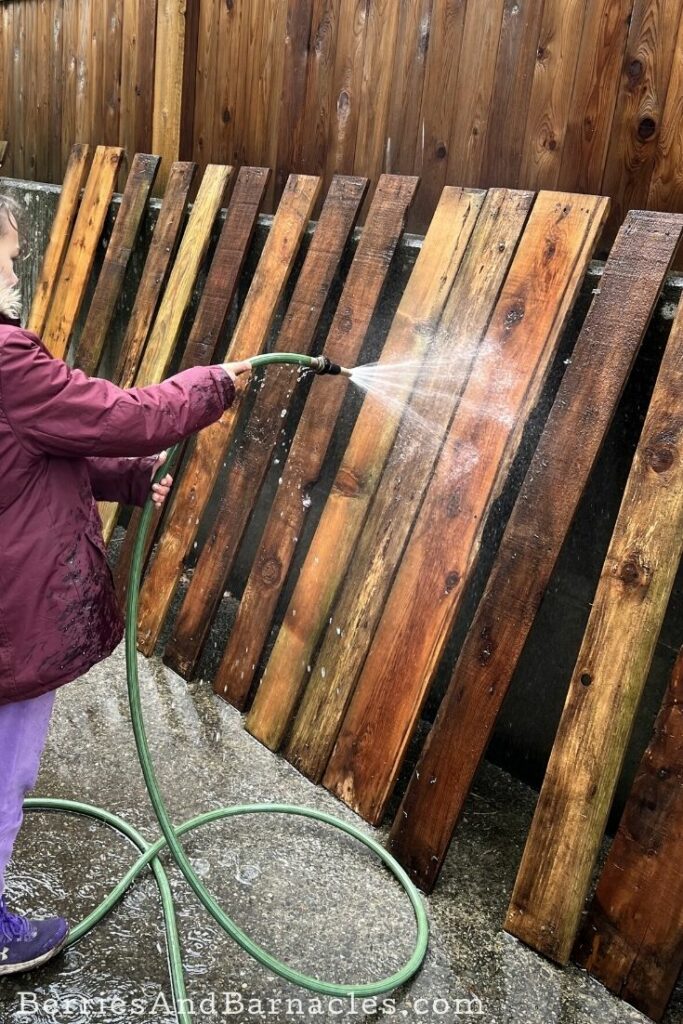
- Wash with mild soap and water: Mix a few drops of dish soap with warm water. Scrub gently with a sponge or brush. Don’t soak the wood—just dampen it.
- Rinse and dry: Wipe with a clean, damp cloth to remove soap. Let the wood dry fully—this may take 24-48 hours.
If you see mold or mildew:
- Mix one part white vinegar with three parts water.
- Wipe the affected area.
- Let it dry in sunlight if possible.
Never use bleach, as it can damage barn wood fibers. Proper cleaning gives you a better finish and helps the sealer bond well.
Credit: mountainmodernlife.com
Sanding Barn Wood For Indoor Projects
Sanding is more than just smoothing out roughness. It helps the sealer soak in and makes the wood safe for touch.
- Start with coarse grit (60-80): This removes splinters and stubborn dirt. Sand with the grain, not across it.
- Move to medium grit (120): This step evens out the surface but keeps some rustic texture.
- Finish with fine grit (180-220): This creates a smooth feel, important for surfaces you’ll touch often.
For flat surfaces, use a random-orbit sander. For grooves or detailed areas, sand by hand.
Many people skip sanding because they want to keep the “rough” look. But even a quick pass with sandpaper can make a big difference in safety and appearance.
Sanding Tips
- Always check for exposed nails or screws before sanding.
- Use a shop vacuum to remove dust between grits.
- Wear a dust mask, especially if the wood is very old or has paint.
Filling Holes And Gaps
Barn wood often has nail holes, cracks, or even small gaps. Whether you fill them depends on your project and taste.
- For tables, shelves, or benches, filling holes helps keep the surface smooth and easy to clean.
- For wall panels or beams, you might keep holes for a more rustic look.
To fill gaps:
- Use a wood filler that matches the color of your barn wood. Water-based fillers are easy to sand and clean up.
- Press the filler into holes and cracks with a putty knife.
- Let it dry fully—check the label for drying times.
- Sand smooth with fine-grit paper.
For wide cracks, try mixing sawdust from your sanding with wood glue. This gives a closer color match.
Filling is optional, but it can make a big difference in the feel and cleanliness of your finished project.
Choosing The Right Sealer For Barn Wood
Not all wood sealers are equal. The best choice depends on your project, how much protection you need, and the final look you want.
Here’s a comparison of common barn wood sealers for indoor use:
| Sealer Type | Finish | Protection Level | Best For | Odor |
|---|---|---|---|---|
| Polyurethane (water-based) | Clear, satin, semi-gloss | High | Tables, shelves, floors | Low |
| Polyurethane (oil-based) | Amber tint, glossy | Very high | High-wear surfaces | Strong |
| Wax | Matte, natural | Low to medium | Accent walls, beams | Low |
| Danish oil | Warm, low sheen | Medium | Furniture, trim | Moderate |
| Lacquer | Glossy, hard | High | Decorative pieces | Strong |
| Shellac | Amber, glossy | Medium | Antiques, picture frames | Moderate |
Water-based polyurethane is a top choice for most indoor barn wood projects. It dries clear, doesn’t yellow, and is easy to clean up. Oil-based polyurethane gives a richer color but can darken or yellow wood over time. Wax is good for surfaces that don’t get much wear, like wall panels.
Testing The Sealer
Before sealing your whole project, always test the sealer on a scrap piece or a hidden spot. Barn wood varies a lot in color and texture. Some sealers darken the wood or bring out grain patterns you didn’t notice before.
- Apply a small amount with a brush or rag.
- Let it dry fully (follow the product’s instructions).
- Check the color and shine in the same lighting as your finished project.
This step can prevent surprises and help you choose the finish you’ll love.
Applying Sealer: Step-by-step
Once you’ve picked your sealer and tested the look, it’s time to finish your barn wood. The method depends on the product, but these steps work for most sealers.
- Read the instructions. Every product is a little different.
- Stir, don’t shake. Shaking can cause bubbles in the finish.
- Apply with a brush, roller, or rag. Use a quality synthetic brush for water-based sealers, a natural-bristle brush for oil-based ones.
- Work with the grain. This helps the sealer soak in evenly.
- Thin, even coats. Two to three thin coats are better than one thick one.
- Let each coat dry fully. Follow drying times on the label—usually 2-4 hours for water-based, 8-12 hours for oil-based.
- Lightly sand between coats. Use fine sandpaper (220 grit) to remove bumps.
- Wipe off dust before the next coat.
For wax, rub on a thin layer with a soft cloth, let it dry, and buff to a soft shine.
Common Application Mistakes
- Applying too much sealer at once (causes drips and uneven finish)
- Not waiting long enough between coats
- Missing edges or end grain (these soak up more sealer)
Take your time—rushing leads to mistakes that are hard to fix later.
How Many Coats Are Needed?
The number of coats depends on the wood, the sealer, and how much wear you expect.
- Tables, benches, or high-use furniture: 3-4 coats of polyurethane or oil
- Wall panels, beams, or trim: 2 coats is often enough
- Wax: 2 thin coats, buffed between each
End grain (the cut ends of boards) soaks up more sealer. Give these areas extra attention.
Remember, barn wood is thirsty. The first coat often soaks in and disappears—this is normal.
Drying And Curing Time
Sealers are dry to the touch long before they are fully cured. Curing is when the finish reaches its final hardness and protection.
Here’s a typical timeline:
| Sealer Type | Dry to Touch | Ready for Use | Fully Cured |
|---|---|---|---|
| Water-based polyurethane | 1-2 hours | 24 hours | 7 days |
| Oil-based polyurethane | 4-6 hours | 48 hours | 14 days |
| Wax | 1 hour | 8 hours | 2-3 days |
| Danish oil | 4-8 hours | 24-48 hours | 7 days |
Don’t rush to put heavy objects on barn wood surfaces. Wait until the sealer is fully cured for best protection.
Dealing With Lead Paint And Old Stains
Some barn wood has old paint or stains that may contain lead or other toxins. These are dangerous, especially if you sand or cut the wood.
- Test for lead: Use a lead test kit from a hardware store.
- If positive: Do not sand or scrape. Consider using a chemical paint remover or encapsulate the paint with a clear sealer.
- Dispose of dust and debris safely. Don’t let children or pets near the work area.
If you are unsure, consult a professional or read more at the EPA’s lead paint resource.
Sealing For Different Indoor Uses
How you seal barn wood depends on where and how you’ll use it. Here’s how to approach common projects:
Barn Wood Accent Walls
- Choose a matte or satin sealer for a natural look.
- Two coats are enough for most walls.
- Focus on sealing splinters and dust, not wear.
Barn Wood Tables And Countertops
- Use 3-4 coats of water-based polyurethane for durability.
- Sand between coats for a glass-smooth finish.
- Avoid wax, which can stain or wear off quickly.
Shelves, Mantels, And Trim
- Danish oil or wax can highlight the grain and give a soft feel.
- For heavy-use shelves, add a topcoat of polyurethane.
Barn Wood Beams
- Use a brush to work sealer into cracks and corners.
- Wax is a good choice for beams out of reach.
Many beginners forget that high-wear surfaces need stronger protection. Accent walls or beams do not.
Maintaining Sealed Barn Wood
Sealing isn’t a one-time fix. To keep barn wood looking its best:
- Dust with a soft cloth. Avoid rough brushes or harsh cleaners.
- Wipe spills quickly. Especially on tables or counters.
- Reapply wax or oil every 1-2 years for best results.
- Check for scratches or chips. Touch up as needed.
Barn wood changes color and character with time. This is part of its charm, but regular care keeps it safe and beautiful indoors.
Non-obvious Tips For Professional Results
Many guides leave out these details, but they make a real difference:
- Seal the back and edges. Even if you only see one side, sealing all sides helps prevent warping from humidity changes indoors.
- Use a tack cloth to remove fine dust before your final coat. This avoids bumps and gives a smoother finish.
- Let wood acclimate indoors for several days before sealing. This helps it adjust to your home’s moisture level, reducing the chance of cracks later.
- Don’t rush drying between coats. Even if it feels dry, wait the full time. This is when most finishing mistakes happen.
- Label leftover sealer and store properly. You may need to touch up later; keeping the same product avoids color differences.
Troubleshooting Common Problems
Even with care, issues can pop up. Here’s how to fix them:
- Bubbles in finish: Caused by shaking the can or brushing too quickly. Sand lightly and apply a new coat.
- Cloudy or milky finish: Usually from moisture. Let the wood dry fully before resealing.
- Sticky or tacky surface: Sealer is not cured. Wait longer, or if still sticky after a week, remove with mineral spirits and try again.
- Rough spots: Sand lightly and reapply a thin coat.
If you see black or gray spots after sealing, this can mean mold or tannins in the wood. Let the wood dry and seal with a shellac-based primer before your main sealer.
Environmental And Health Considerations
Modern sealers are safer than ever, but some still release volatile organic compounds (VOCs). For indoor projects, choose water-based products with low or zero VOCs. Always:
- Read the safety data sheet (SDS) for your sealer.
- Keep windows open during and after sealing.
- Wear gloves and wash hands after finishing.
If you’re sealing barn wood for a child’s room or kitchen, look for products labeled “food safe” or “child safe” after curing.
Budgeting And Sourcing Materials
Sealing barn wood doesn’t have to be expensive. Here’s a look at typical costs:
| Item | Average Cost (USD) | How Much You Need |
|---|---|---|
| Barn wood (reclaimed) | $5–$15 per sq ft | Project size dependent |
| Water-based polyurethane (quart) | $15–$25 | 125–150 sq ft per quart |
| Sanding pads/paper | $5–$10 | Assorted grits |
| Wood filler | $6–$12 | 1 tube |
| Brushes/rollers | $5–$20 | Reusable with cleaning |
| Respirator/mask | $10–$30 | Reusable |
You can find reclaimed barn wood at specialty lumber yards, online, or sometimes through local demolition companies. Always ask about the source and age of the wood.

Credit: www.makingjoyandprettythings.com
When To Call A Professional
Some projects are better left to the experts:
- Very large installations (whole walls, floors)
- Dealing with lead paint or heavy insect damage
- When you need a flawless finish for high-value items
A professional finisher has tools and experience you may not—and can often save you money by avoiding costly mistakes.
Frequently Asked Questions
How Do I Know If My Barn Wood Has Been Treated Before?
Look for a shiny or smooth surface, a chemical smell, or areas that do not absorb water. If unsure, test with a drop of water—if it beads up, the wood may already be sealed.
Can I Use Barn Wood In A Kitchen Or Bathroom?
Yes, but you must use a high-quality, water-resistant sealer like polyurethane. Seal all sides, including the back and ends, to prevent water damage or mold.
Is It Safe To Use Barn Wood For A Dining Table?
It can be, but only if you clean, sand, and seal it properly. Choose a food-safe sealer and fill holes or cracks where food might get trapped.
How Do I Keep The Gray, Weathered Look Of Barn Wood?
Use a water-based, matte polyurethane or a clear wax. Oil-based sealers often darken the wood and remove the gray “driftwood” look.
What Should I Do If Barn Wood Continues To Shed Dust After Sealing?
Apply another thin coat of sealer, making sure to cover all sides and edges. Sometimes very dry barn wood needs extra coats to fully lock in dust.
Sealing barn wood for indoor use is a rewarding project that turns history into something you can see and touch every day. With the right preparation and products, your reclaimed wood will be safe, beautiful, and long-lasting. Take your time with each step, and you’ll enjoy the rustic character of barn wood in your home for years to come.
Credit: berriesandbarnacles.com