Making a swinging door is a rewarding project that can transform the way you move through your home or workspace. Unlike regular hinged doors, a swinging door opens in both directions, making it perfect for kitchens, cafes, workshops, or anywhere you want hands-free, easy access. Many people think installing a swinging door is complicated or requires special tools, but with the right guidance, anyone with basic DIY skills can handle it. Whether you want to add a touch of classic style or simply need a more practical doorway solution, this guide will walk you through every step, from choosing materials to final installation and adjustment. You’ll learn how to avoid common mistakes and get tips that even seasoned DIYers sometimes miss.
Understanding Swinging Doors
Before you start building, it’s important to understand what makes a swinging door unique. Unlike a standard door, which only opens one way, a swinging door is attached with special double action hinges. These allow the door to swing both in and out and return to the center position automatically. They’re sometimes called saloon doors or cafe doors.
Swinging doors are used in many places:
- Restaurants and cafes for quick access between the kitchen and dining area.
- Homes, especially between the kitchen and dining room, or laundry room entrances.
- Workshops or garages where you need to move while carrying items.
A swinging door isn’t just about convenience; it can also add a decorative element. Wood, glass, and even metal can be used, depending on your design goals.
Planning Your Swinging Door Project
Good planning makes any project easier. Here are the most important things to consider before you start building:
1. Measuring The Doorway
Accurate measuring is critical. Use a tape measure to find the width and height of the doorway. Write these numbers down. The door should be slightly smaller than the opening so it swings freely. For most interior swinging doors, subtract about ¼ inch (6 mm) from the height and width for clearance.
If your floor is uneven, measure both sides and use the smaller number to avoid the door scraping the floor.
2. Choosing The Right Door Style
Swinging doors come in several styles:
- Full-length doors: Cover the entire doorway. Good for privacy.
- Half doors (saloon style): Cover only part of the doorway. Easy to see over and walk through.
- Panel doors: Made from several panels for a classic look.
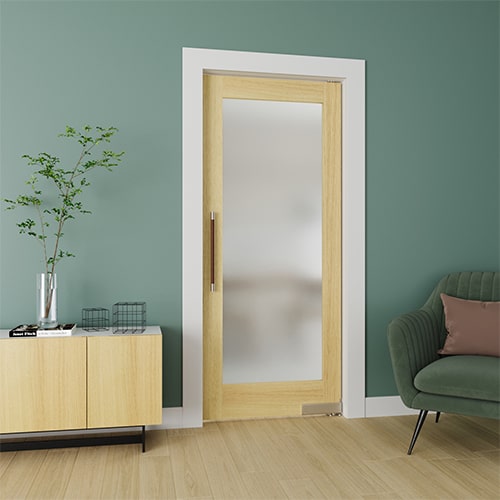
- Glass doors: Allow light to pass through.
Your choice depends on your needs. For example, a kitchen might benefit from a half door, while a utility room may need a full door for privacy.
3. Picking The Right Material
The most common materials for swinging doors are:
- Solid wood (oak, pine, maple): Durable and attractive.
- Plywood with wood veneer: More affordable, lighter.
- MDF (Medium Density Fiberboard): Smooth, easy to paint, but less durable in wet areas.
- Glass: Used for modern style, but heavier and needs strong hinges.
- Metal: Rare for home use, but very strong.
Choose material based on style, budget, and where you’ll install the door. For bathrooms and kitchens, avoid materials that can warp from moisture.
4. Deciding On Hinges
The most important hardware for a swinging door is the double action hinge. These hinges let the door move both ways and return to center. There are two main types:
- Spring-loaded double action hinges: Use springs to pull the door back to center.
- Gravity double action hinges: Use the weight of the door to return it to center.
Spring-loaded are more common for home use. Check the weight rating on the hinge to match your door. For a heavy door, buy heavier-duty hinges.
5. Finishing And Design Details
Think about the door’s finish:
- Painted: Easy to clean, any color.
- Stained: Shows wood grain.
- Clear coat: Protects natural wood.
Handles or push plates are optional. Some people add decorative trim or glass panels. Plan these details before you start building, so you have all supplies ready.
Credit: www.swingingcafedoors.com
Tools And Materials You’ll Need
Having the right tools and materials is half the battle. Here’s a list to guide you:
Tools
- Tape measure: For accurate sizing.
- Pencil and straightedge: For marking cuts.
- Circular saw or table saw: To cut the door to size.
- Drill and drill bits: For hinge and hardware installation.
- Screwdriver: Manual or power.
- Level: To make sure the door hangs straight.
- Clamps: To hold wood in place for cutting or gluing.
- Sandpaper or power sander: For smooth edges.
- Paintbrush or roller: If painting or staining.
Materials
- Door material: Wood, plywood, MDF, or glass.
- Double action hinges: 2 or 3, depending on door height.
- Screws: For hinges and any hardware.
- Wood glue: For extra strength on joints.
- Finish (paint, stain, or varnish).
- Push plates or handles (optional).
- Trim or molding (optional).
Buying quality materials will make a big difference in how your door looks and functions.
Step-by-step Guide To Building A Swinging Door
Now it’s time to build your swinging door. Work carefully, and don’t rush. Each step matters for a professional result.
Step 1: Measure And Cut The Door
Start by measuring your doorway again. Double-check your numbers. Subtract ¼ inch from both width and height for clearance.
- Mark your measurements on the door material with a pencil.
- Use a circular saw or table saw to cut the door to size.
- If making a half door, measure and cut to the correct height (usually 30–36 inches).
After cutting, check the fit by holding the door in the opening. Make sure it swings freely without touching the sides or floor.
Step 2: Sand And Prepare The Door
Smooth edges prevent splinters and help paint or stain look better.
- Use sandpaper (start with 120 grit, finish with 220 grit) or a power sander.
- Round the edges slightly for a soft look.
- Wipe away dust with a clean cloth.
If you plan to add panels, molding, or glass inserts, do this now. Cut openings for glass carefully and use wood trim to hold the glass in place.
Step 3: Install Double Action Hinges
Follow the instructions that come with your hinges, but here are the basics:
- Mark the hinge positions on the door edge. For most doors, place one hinge 7 inches from the top, one 11 inches from the bottom, and a third in the middle for tall or heavy doors.
- Mark matching spots on the door frame.
- Use a drill to make pilot holes for the screws.
- Attach the hinges to the door first, then hold the door in the opening and screw the hinges to the frame.
Pro tip: Have a helper hold the door while you attach the hinges to the frame. This makes alignment much easier.
Step 4: Test And Adjust The Door
Once the door is mounted, test the swing both ways. The door should move smoothly and return to center.
- If the door sticks, check the alignment with a level.
- Adjust the hinges as needed. Most double action hinges have screws to increase or decrease spring tension.
- Make sure the door doesn’t hit the floor or frame.
This is a common spot where beginners run into trouble. Don’t be afraid to remove and re-mount the hinges if the fit isn’t right.
Step 5: Finishing Touches
With the door working, you can finish it:
- Fill any holes or gaps with wood filler, let dry, and sand smooth.
- Paint, stain, or varnish as desired. Let each coat dry before adding another.
- Install push plates or handles if you want. These are optional but protect the finish where hands push the door.
If you want, add trim or molding for a more decorative look. Use a miter saw for clean corners.
Step 6: Final Safety Check
Check that all screws are tight and the door swings safely. Make sure there are no sharp edges. If you have children or pets, consider adding a soft-close hinge to reduce noise and injury risk.

Credit: www.youtube.com
Common Mistakes And How To Avoid Them
Even experienced DIYers make mistakes. Here are the most frequent problems and how to prevent them:
- Incorrect measurements: Always measure twice and cut once. Mark your lines clearly.
- Choosing the wrong hinges: Not all double action hinges are the same. Check the weight rating and door thickness.
- Improper alignment: Use a level and have a helper if possible.
- Forgetting clearance: Doors need space to swing. Subtract at least ¼ inch from each side.
- Skipping the finish: Unfinished wood can warp or get dirty quickly.
- Using weak screws: Cheap screws can break. Use quality hardware, especially for heavy doors.
Non-obvious tip: Many beginners don’t realize that the door frame may not be perfectly square. Always check with a level, and be ready to sand or shim as needed.
Another often-missed step is testing the spring tension of the hinges before final installation. Adjust them on a workbench so you don’t have to fight the door in the frame.
Pros And Cons Of Different Swinging Door Materials
To help you choose the best material, here’s a side-by-side look:
| Material | Pros | Cons | Best Use |
|---|---|---|---|
| Solid Wood | Strong, classic look, easy to finish | Heavy, can warp, expensive | Living areas, high traffic |
| Plywood | Lightweight, affordable, easy to paint | Less durable, edges need finishing | Kitchens, utility rooms |
| MDF | Very smooth, good for painting | Not water resistant, chips easily | Bedrooms, interior use |
| Glass | Modern look, lets in light | Heavy, needs strong hinges, less privacy | Offices, modern homes |
Choose based on where your door will go and your priorities: style, budget, or durability.
Comparing Double Action Hinge Types
Here’s a quick comparison of spring-loaded and gravity hinges:
| Hinge Type | How It Works | Pros | Cons | Best For |
|---|---|---|---|---|
| Spring-Loaded | Uses springs to return door to center | Adjustable tension, common, affordable | Springs may wear out, can slam | Homes, small businesses |
| Gravity | Uses door weight for self-centering | Smoother closing, less wear | More expensive, harder to install | Restaurants, heavy doors |
Non-obvious insight: Gravity hinges are quieter and last longer, but most homeowners choose spring-loaded for simplicity.
Customizing Your Swinging Door
One big advantage of making your own swinging door is the chance to customize. Here are a few ideas:
- Add glass panels: Cut openings and use decorative glass for a cafe look.
- Paint bold colors: Make the door a feature in your room.
- Install kick plates: Protect the bottom from scuffs, especially in high-traffic areas.
- Decorative trim: Add molding for a traditional style.
- Soft-close mechanism: Upgrade hinges to reduce noise.
Practical tip: If your door will be used by children, round all corners and edges for safety. For added privacy, install a full-length door with frosted glass.
Maintenance Tips For Swinging Doors
A swinging door is easy to maintain if you follow these tips:
- Lubricate hinges twice a year with silicone spray or light oil.
- Check screws every few months and tighten if needed.
- Clean the finish with mild soap and water. Avoid harsh chemicals.
- Inspect for warping or damage, especially if the door is in a humid area.
- Adjust tension on spring hinges as springs loosen over time.
If you notice squeaking, apply a drop of oil to each hinge. For sticking doors, check for sagging or swelling.
When To Call A Professional
Most people can install a basic swinging door with patience and the right tools. However, there are times when hiring a pro makes sense:
- The doorway is not level or square, and you’re unsure how to fix it.
- You want a custom glass or metal door that requires special tools.
- The door is very heavy (over 50 pounds) and needs special support.
- You want a professional finish with no visible screws or seams.
Hiring a carpenter can cost $200–$600 depending on the door and your location, but guarantees a perfect fit.

Credit: forums.sketchup.com
Environmental And Safety Considerations
Today, many people want eco-friendly projects. Here’s how to make your swinging door greener and safer:
- Choose sustainable wood (look for FSC certification).
- Use low-VOC finishes to reduce chemical exposure.
- Recycle old doors or wood when possible.
- Install child-safe hinges if young kids are present.
If you remove an old door, check for lead paint if the door is from before 1978.
Real-world Example: Kitchen Swinging Door
Imagine you want a swinging door between your kitchen and dining room. You choose a half-height solid wood door for style and visibility.
- Measure: Your opening is 32 inches wide by 80 inches high.
- Order: Buy a door slab 31 ¾ inches by 35 inches.
- Install: Use two spring-loaded double action hinges, rated for up to 40 pounds.
- Finish: Paint white to match your trim, add a kick plate.
- Result: You have a door that swings easily, closes automatically, and adds charm.
This project takes about 4–6 hours for a beginner, not including drying time for paint.
Cost Breakdown For A Diy Swinging Door
Here’s a typical budget for a DIY interior swinging door (excluding tools):
| Item | Estimated Cost (USD) |
|---|---|
| Solid wood door slab | $80–$150 |
| Double action hinges (pair) | $20–$40 |
| Screws and hardware | $10–$20 |
| Paint or stain | $10–$30 |
| Push plates/handles (optional) | $10–$25 |
Total Estimated Cost: $120–$265
Actual costs depend on size, material, and finish. Reusing materials can save money.
Frequently Asked Questions
How Do I Choose The Right Size For My Swinging Door?
Measure the width and height of your doorway. Subtract about ¼ inch from each to allow the door to swing freely. For half doors, the height is usually 30–36 inches. Always check both top and bottom measurements, especially in older homes.
Can I Convert My Regular Hinged Door To A Swinging Door?
Yes, in many cases you can. Remove the old door and hinges, fill any holes, and install double action hinges. Make sure your door is not too thick or heavy for the new hinges. Some doors may need trimming to fit.
What Is The Best Hinge For A Heavy Swinging Door?
For doors over 40 pounds, use heavy-duty spring-loaded or gravity double action hinges. Gravity hinges are smoother and last longer but cost more and are harder to install. Always check the hinge’s weight rating.
How Do I Stop A Swinging Door From Slamming?
Adjust the tension on your spring-loaded hinges using the included screws. If the door still slams, consider adding soft-close hinges or rubber bumpers. Gravity hinges are also quieter.
Where Can I Learn More About Swinging Door Hardware?
For more technical details and installation tips, visit the Wikipedia page on swing doors. This resource covers hinge types, history, and advanced installation.
Building a swinging door is a practical project that adds style and convenience. With careful planning, the right materials, and attention to detail, you can create a door that works smoothly and looks great for years. Remember to measure twice, choose quality hardware, and don’t rush your finish—your door will be the perfect addition to your space.