Finishing a basement is an exciting way to add usable space to your home. But what if your basement has a low ceiling? Many homeowners face this challenge, especially in older houses or certain regions where basements were never meant for living. Low ceilings can make a space feel cramped or dark, and they limit your design options. However, with smart planning and the right materials, you can turn even the lowest basement into a comfortable, stylish, and practical area.
This guide covers everything you need to know to finish a basement with a low ceiling. You’ll discover clever design tricks, construction tips, safety issues, and ways to avoid common mistakes. Whether you dream of a cozy family room, a home office, or a guest suite, your basement can become a highlight of your home—not a forgotten storage zone.
Understanding The Challenges Of Low Basement Ceilings
Low ceilings in basements usually mean heights under 7 feet, sometimes as little as 6 feet or even less. The International Residential Code (IRC) recommends a minimum ceiling height of 7 feet for finished basements, but many existing homes do not meet this standard. Working with a low ceiling brings several unique problems:
- Limited headroom makes the space feel smaller and less inviting.
- Lighting can be tricky, as hanging fixtures may not be possible.
- Ductwork and pipes often run below the joists, stealing more inches.
- Building codes may restrict your options for certain uses (like bedrooms).
- Resale value might be affected if the basement feels cramped.
Despite these issues, a low basement can still become a functional and attractive part of your home. The key is to plan carefully and use every inch wisely.
Planning Your Basement Layout
Before you pick up a hammer, take time to plan the best layout for your space. This is especially important in a low-ceilinged basement, where every decision has a bigger impact.
Measuring And Assessing Your Space
Start by measuring the floor-to-ceiling height in several places, including under any pipes or ducts. Note any areas where the ceiling drops lower. Draw a basic floor plan, showing:
- Locations of windows and doors
- Existing utilities (water heater, furnace, electrical panel)
- Areas with the lowest clearance
This will help you decide which areas are suitable for main living spaces, and which are better for storage or mechanical access.
Choosing The Right Rooms
Some rooms need more height than others. For example, a home gym with a treadmill or a tall piece of equipment might not work. On the other hand, a media room or a kids’ playroom can often function well with lower ceilings. Consider these ideas:
- Home office: Needs less vertical space
- Guest room: Can work if the bed is low-profile
- Laundry room: Machines are compact; height isn’t critical
- Storage area: Use the lowest spaces for storage shelves or cabinets
Zoning For Comfort
Divide your basement into zones based on ceiling height. Use the highest parts for main activities and the lowest for storage, seating, or built-ins. Avoid putting walking paths or standing work areas under the lowest sections.
Dealing With Ducts, Pipes, And Obstructions
In many basements, the biggest obstacles are ducts, pipes, and beams that hang even lower than the ceiling joists. Here’s how to handle them:
Boxing In Or Hiding Utilities
You can “box in” pipes and ducts with drywall or wood to create soffits. This makes the space look neater, but it also lowers the ceiling even more in those areas. To minimize the effect:
- Keep soffits as small and tight as possible.
- Paint them the same color as the ceiling so they blend in.
- Use recessed or linear lighting to highlight the soffit as an architectural feature.
Rerouting Or Flattening Ducts
In some cases, you can have an HVAC professional reroute ducts or replace round ducts with flatter, rectangular ones. This can save 2–4 inches in height. However, this can be expensive and may not always be possible due to system requirements.
Exposing Beams And Pipes
If you want an industrial look, consider leaving beams, pipes, or even ductwork exposed. Painting them a neutral color (like white, black, or gray) can help them disappear visually, and you’ll keep the maximum headroom.
Flooring Options For Low Basement Ceilings
Every inch counts in a low basement, so the type of flooring you choose is important. Thick layers or raised platforms will eat into precious space.
Best Choices
- Vinyl plank or tile: Thin and waterproof, ideal for basements.
- Painted concrete: Very low profile, budget-friendly, and easy to clean.
- Epoxy coatings: Durable, thin, and available in many colors.
- Low-pile carpet tiles: Adds softness without much height.
Flooring Height Comparison
Here’s a quick comparison of common basement flooring types and their typical thickness:
| Flooring Type | Thickness (inches) | Waterproof |
|---|---|---|
| Vinyl plank | 0.1–0.3 | Yes |
| Epoxy coating | 0.05–0.1 | Yes |
| Laminate | 0.3–0.5 | Some types |
| Engineered wood | 0.4–0.75 | No |
| Carpet tile | 0.25–0.5 | No |
Avoid These Mistakes
- Avoid traditional hardwood, which is too thick and sensitive to moisture.
- Skip any flooring system that requires a raised subfloor unless absolutely needed for insulation or waterproofing.
Ceiling Solutions For Low Basements
The ceiling is the biggest visual challenge in a low basement. A standard drop ceiling can steal 4–6 inches—too much when every inch matters. Here are options that help maximize headroom:
Drywall Ceilings
Installing drywall directly to the joists is the most space-saving option. It gives a clean, finished look and can be painted any color. However, it makes access to pipes or wires more difficult. Use removable access panels where needed for shut-off valves or electrical boxes.
Painted Exposed Joists
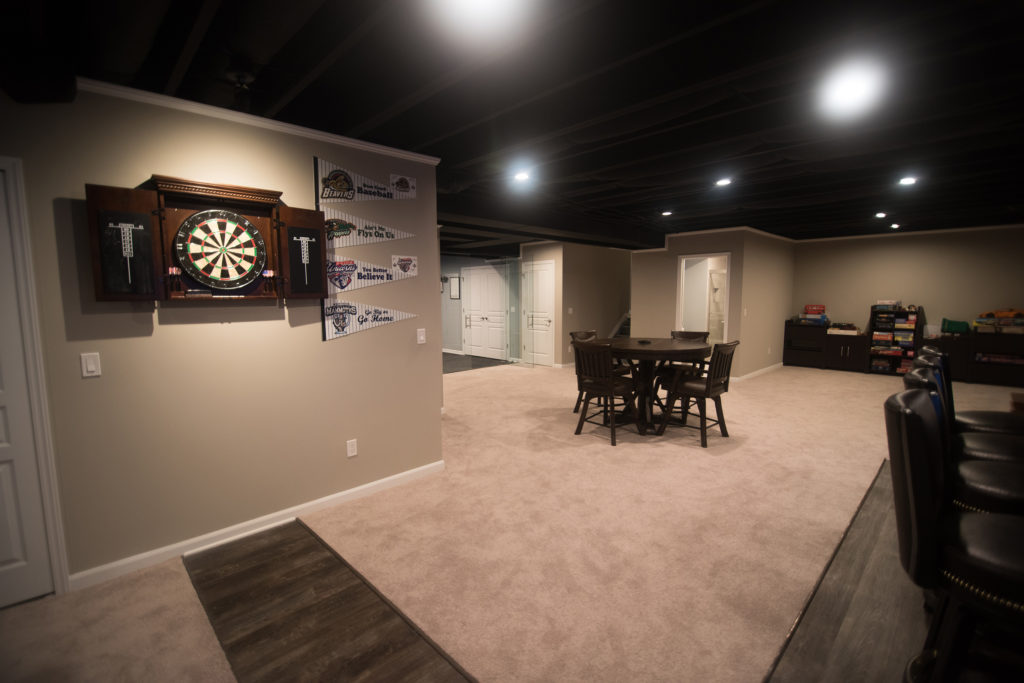
If you want to save every possible inch, consider leaving the joists exposed and simply painting everything (beams, pipes, subfloor) a single color. This can look modern and open if done neatly. It also makes future repairs easier.
Specialty Low-profile Ceiling Tiles
Some companies offer ceiling tile systems that only drop 1–2 inches from the joists—much less than standard drop ceilings. These can hide wires and pipes but may cost more.
Ceiling Height Comparison
Here’s how much height different ceiling options typically require:
| Ceiling Type | Height Lost (inches) | Removable? |
|---|---|---|
| Drywall on joists | 0.5–1 | No |
| Low-profile tiles | 1–2 | Yes |
| Standard drop ceiling | 4–6 | Yes |
| Painted exposed joists | 0 | N/A |
Two Key Tips
- Avoid dark colors on ceilings. Light shades help the room feel more open.
- Add sound insulation above drywall or tiles if you want to reduce noise from upstairs.
Lighting Strategies For Low Basements
Lighting is crucial in any basement, but especially when the ceiling is low. Avoid large fixtures that hang down. Instead, use lighting that stays close to the ceiling or can be built into architectural features.
Best Lighting Types
- LED recessed lights (can lights): These fit into the ceiling and take up little space.
- Surface-mount LED fixtures: Modern styles are thin and bright.
- Wall sconces: Add extra light without taking up ceiling space.
- LED strip lighting: Great for under shelves, stairs, or around soffits.
Lighting Placement
- Place lights near walls to bounce light and make the space feel larger.
- Use multiple small fixtures instead of one big one for even coverage.
- Consider adding dimmers to control mood and save energy.
A Non-obvious Insight
Many beginners forget that color temperature matters. Use lights in the 2700K–3500K range (“warm white” to “neutral white”) for a cozy, inviting feel. “Daylight” bulbs (above 4000K) can make basements feel harsh and cold.
Wall Finishes And Color Choices
The right wall finishes and colors can make a low basement feel more spacious and bright.
Wall Materials
- Drywall: Most common; smooth and easy to paint.
- Painted concrete: Works if walls are dry and in good shape.
- Wood paneling: Can add warmth, but use vertical lines to make the walls appear taller.
- Wainscoting: Only use low-profile styles; avoid thick moldings.
Color Tricks
- Stick with light colors—white, cream, pale gray, or soft pastels.
- Use vertical stripes or patterns to visually stretch the height.
- Paint trim and doors the same color as the wall for a seamless look.
Mirrors And Gloss
Adding a large mirror or glossy surfaces can reflect light and give an illusion of depth, making the room feel bigger than it is.
Smart Storage Solutions
Basements with low ceilings often lack space for big cabinets or tall bookshelves. But you can still add storage with creativity.
Built-in Storage
Use built-in cabinets, benches, or shelving that fits under the lowest parts of the ceiling. For example:
- Window seats with hidden storage inside
- Low shelving units along walls or under stairs
- Closets built into awkward corners
Under-stair Storage
This space is often wasted. Build drawers, shelves, or even a small closet under the stairs to use every inch.
Vertical Storage Hacks
Hang hooks or racks on the walls for bikes, coats, or tools. Magnetic strips can hold tools or kitchen items in laundry or hobby rooms.
Credit: www.finishedbasementsplus.com
Heating, Cooling, And Ventilation
Comfort is just as important as appearance. Low-ceilinged basements can be cold, stuffy, or damp if not handled well.
Heating Options
- Radiant floor heating: Thin systems can fit under vinyl or tile, adding comfort without raising the floor much.
- Baseboard heaters: Slim and easy to install.
- Mini-split heat pumps: Wall-mounted and don’t need ductwork.
Cooling And Ventilation
- Dehumidifier: Essential in most basements to prevent mold and musty smells.
- Ceiling fans: Low-profile (hugger) fans can work if the ceiling is at least 7 feet.
- Fresh air vents: Add or improve air exchange with upstairs or outside.
Energy Efficiency Tip
Seal all gaps and insulate walls and floors where possible. This keeps the basement comfortable and reduces energy costs.
Dealing With Moisture And Waterproofing
Moisture is a common problem in basements, especially older ones. Before you start any finishing work, make sure your basement is dry and safe.
Steps To Waterproof
- Check for leaks after rain. Fix cracks or holes in the walls or floor.
- Install a sump pump if your basement is prone to flooding.
- Use waterproofing paint or sealant on concrete walls.
- Improve drainage outside with gutters and proper grading.
- Install a vapor barrier behind finished walls and under flooring.
Don’t Skip This Step
Many homeowners rush to finish their basement, only to find water damage later. Take time to solve moisture issues first, or your investment could be ruined.
Meeting Building Codes And Safety Rules
Finishing a basement means following local building codes—especially for low ceilings. Here’s what to check:
Ceiling Height
- The IRC minimum is 7 feet in most cases, but some codes allow 6’8” in existing basements if remodeling, and even 6’4” for bathrooms or laundry rooms.
- If your basement is lower, you may not be able to call it a “living space” for resale, but you can still use it as a rec room or office.
Egress (escape) Windows
- Any bedroom or sleeping area must have a window big enough to climb out of in an emergency.
- Minimum opening: 5.7 square feet (about 24” high by 20” wide).
Electrical And Plumbing
- All wiring must meet code, with proper outlets, GFCI protection, and permits.
- Plumbing for bathrooms or sinks must have proper venting and drainage.
Smoke And Carbon Monoxide Detectors
- These are required in finished basements for safety.
Non-obvious Insight
If you want to add a bathroom or kitchenette, check if your main sewer line is above the basement floor. If so, you’ll need a special up-flush or ejector pump system.
Creative Design Tricks To Maximize Space
A low basement doesn’t have to feel like a cave. Here are some clever tricks designers use to make the most of the space:
Use Low-profile Furniture
- Choose sofas and chairs that sit close to the ground.
- Avoid tall bookcases or armoires that make the ceiling look lower.
- Use platform beds or futons in guest rooms.
Horizontal Lines
- Add horizontal shelves or wall trim to draw the eye across the room instead of up and down.
- Use wide, low artwork rather than tall, narrow pieces.
Open Floor Plan
- Keep the layout as open as possible. Fewer walls make the room feel bigger and less cramped.
- Use rugs or lighting to define spaces instead of full partitions.
Glass And Reflective Surfaces
- Glass tabletops, mirrored backsplashes, or shiny finishes help bounce light around and create a sense of depth.
Sliding Or Pocket Doors
- Traditional swinging doors need space to open, but sliding or pocket doors save room and add a modern touch.
Step-by-step Process: How To Finish A Low-ceiling Basement
Turning plans into reality means following the right sequence. Here’s a step-by-step overview:
- Inspect for moisture. Fix leaks, seal cracks, and waterproof as needed.
- Apply for permits. Check with your local building department.
- Demolish old materials. Remove any damaged drywall, paneling, or flooring.
- Frame walls. Use steel or wood studs, leaving room for insulation.
- Install electrical and plumbing. Add outlets, lights, and pipes before closing walls.
- Insulate and vapor barrier. Use thin, rigid foam insulation for best results.
- Close up walls and ceilings. Install drywall or chosen finishes, keeping everything as close to the structure as possible.
- Paint and finish. Use light colors and durable, washable paint.
- Install flooring. Choose thin, waterproof options like vinyl or epoxy.
- Add trim, doors, and fixtures. Install low-profile doors, baseboards, and lighting.
Example Timeline
Depending on your skills and the size of the basement, finishing a low-ceiling space usually takes 4–8 weeks for most DIYers. Professional contractors may be faster but cost more.
Common Mistakes To Avoid
Even experienced homeowners can make costly errors when finishing a low-ceiling basement. Here are the pitfalls to watch out for:
- Skipping moisture control: Never finish over a damp or leaking foundation.
- Using thick flooring or ceilings: Every inch counts—choose the thinnest options.
- Ignoring code requirements: Skipping permits or ignoring egress rules can cause legal and safety problems.
- Crowding with furniture: Too many or oversized pieces will make the space feel even smaller.
- Poor lighting: One dim bulb won’t cut it. Layer lights and use the right color temperature.
- Neglecting air quality: Poor ventilation leads to musty smells and unhealthy air.

Credit: www.finishedbasementsplus.com
Real-life Example: A Low-ceiling Basement Makeover
Let’s look at a real project. The Smith family had a 1950s home with a basement ceiling of just 6’7”. Pipes and ducts dropped as low as 6’2” in some spots. Here’s what they did:
- Removed an old drop ceiling and painted exposed joists white.
- Used thin vinyl plank flooring to keep as much height as possible.
- Built a soffit around ducts, then turned it into a feature with LED strip lighting.
- Created a home office in the highest part and a play area for their kids in the lower section.
- Added a wall of mirrors to reflect light from new recessed LED fixtures.
The result? A bright, usable space that felt much larger than before. While it couldn’t be listed as a legal bedroom, it added valuable living area and improved their daily life.
Cost Considerations And Budgeting
Finishing a basement—even a small or low one—can be a big investment. Costs vary based on size, materials, and whether you hire pros or do it yourself.
Typical Costs
- DIY basic finish: $20–$35 per square foot
- Professional finish: $50–$100 per square foot
- Extra for waterproofing: $1,000–$5,000 if major work is needed
- Low-profile lighting and specialty ceilings: May cost more than standard options
Where To Save
- Do your own demolition and painting.
- Choose budget-friendly flooring and wall finishes.
- Use open or painted ceilings instead of drop ceilings.
Where To Spend
- Hire pros for electrical, plumbing, or HVAC changes.
- Invest in moisture control and insulation.

Credit: www.reddit.com
When To Consider Raising The Ceiling
In rare cases, you might wonder if it’s possible to dig down and increase basement height. This is called “underpinning” or “benching.” It’s expensive ($50,000 or more) and requires major engineering, but it’s the only way to add real headroom if your basement is very low and you want to use it as legal living space. For most people, clever design is a better investment.
For more details on building codes and underpinning, visit Wikipedia’s Basement Guide.
Frequently Asked Questions
What Is The Minimum Ceiling Height For A Finished Basement?
Most building codes require at least 7 feet of ceiling height for a finished basement. Some allow as low as 6’8″ for remodels or 6’4″ for bathrooms. Check your local codes before starting.
Can I Use A Drop Ceiling In A Basement With Low Ceilings?
Standard drop ceilings usually need 4–6 inches, which is too much for low basements. Look for low-profile ceiling tile systems that only drop 1–2 inches, or consider drywall or exposed joists for maximum headroom.
How Do I Make A Low-ceiling Basement Feel Bigger?
Use light colors, plenty of recessed or surface-mount lighting, low-profile furniture, and mirrors or glossy finishes. Keep the layout open and avoid clutter.
Is It Worth Finishing A Basement With A Low Ceiling?
Yes, if you need more usable space and the basement is dry and safe. While it may not count as official “living space” for resale if under code height, it still adds value and functionality to your home.
What Flooring Is Best For Low-ceiling Basements?
Vinyl plank, epoxy coatings, or painted concrete are the best choices. They are thin, durable, and moisture-resistant, helping you keep as much ceiling height as possible.
Transforming a basement with a low ceiling is challenging but very rewarding. With careful planning, smart design, and attention to detail, you can create a bright, open, and comfortable space your family will love for years to come.