Building your own bookshelves with doors is more than just a DIY project. It is a way to create a piece of furniture that matches your room, keeps your books safe from dust, and gives your space a polished look.
Many people buy ready-made shelves, but making your own lets you pick the size, materials, and style that fit your needs. Even if you are not an experienced woodworker, with the right steps, you can build a sturdy and attractive bookshelf with doors.
This guide will walk you through every stage, from planning to finishing, so you can take pride in your work and enjoy your new shelves for years.
Why Build Bookshelves With Doors?
Adding doors to bookshelves is not just about looks. Doors keep books and other items clean, protect them from sunlight, and reduce clutter. If you have kids or pets, doors also keep your collections safe. Built-in doors give a finished, custom feel that open shelves cannot match. Also, you can choose glass doors to display your favorite items while still protecting them.
Building your own bookshelf with doors also lets you:
- Match your existing furniture or decor
- Add features like adjustable shelves or locks
- Save money compared to custom-built furniture
- Learn new skills and enjoy the process
A bookshelf with doors can be a showpiece in your living room, a practical storage space in your office, or a tidy place for kids’ books and toys. The options are endless when you build it yourself.
Planning Your Bookshelf With Doors
Before you pick up any tools, good planning is essential. This will save you time, money, and frustration later.
Decide Where And Why
First, decide where you want the bookshelf. Measure the height, width, and depth of the space. Think about what you will store. Will it hold only books, or do you want to add photo frames, plants, or electronics? This will affect the shelf size and spacing.
Choose A Style
There are many styles to consider:
- Traditional (solid wood, paneled doors)
- Modern (clean lines, glass doors)
- Built-in (matches walls, reaches ceiling)
- Freestanding (can be moved)
Look at pictures online or in magazines for inspiration. Think about whether you want visible hinges, handles, or a push-to-open design.
Budget And Materials
Set a realistic budget. A simple bookshelf can cost as little as $100 in materials, but larger or fancier ones (with glass, special wood, or hardware) can be $500 or more. If you are reusing wood, your costs may be lower.
Common materials:
- Plywood (strong, flat, affordable)
- MDF (Medium Density Fiberboard, smooth and cheap, but heavier)
- Solid wood (looks great but costs more)
- Glass panels (for doors)
- Hardware (hinges, handles, magnetic catches)
Make A Sketch
Draw a simple plan. Show the shelf dimensions, number of shelves, where the doors will go, and any extra features. This does not need to be fancy—graph paper works well.
A good plan avoids mistakes and helps you buy the right amount of materials.
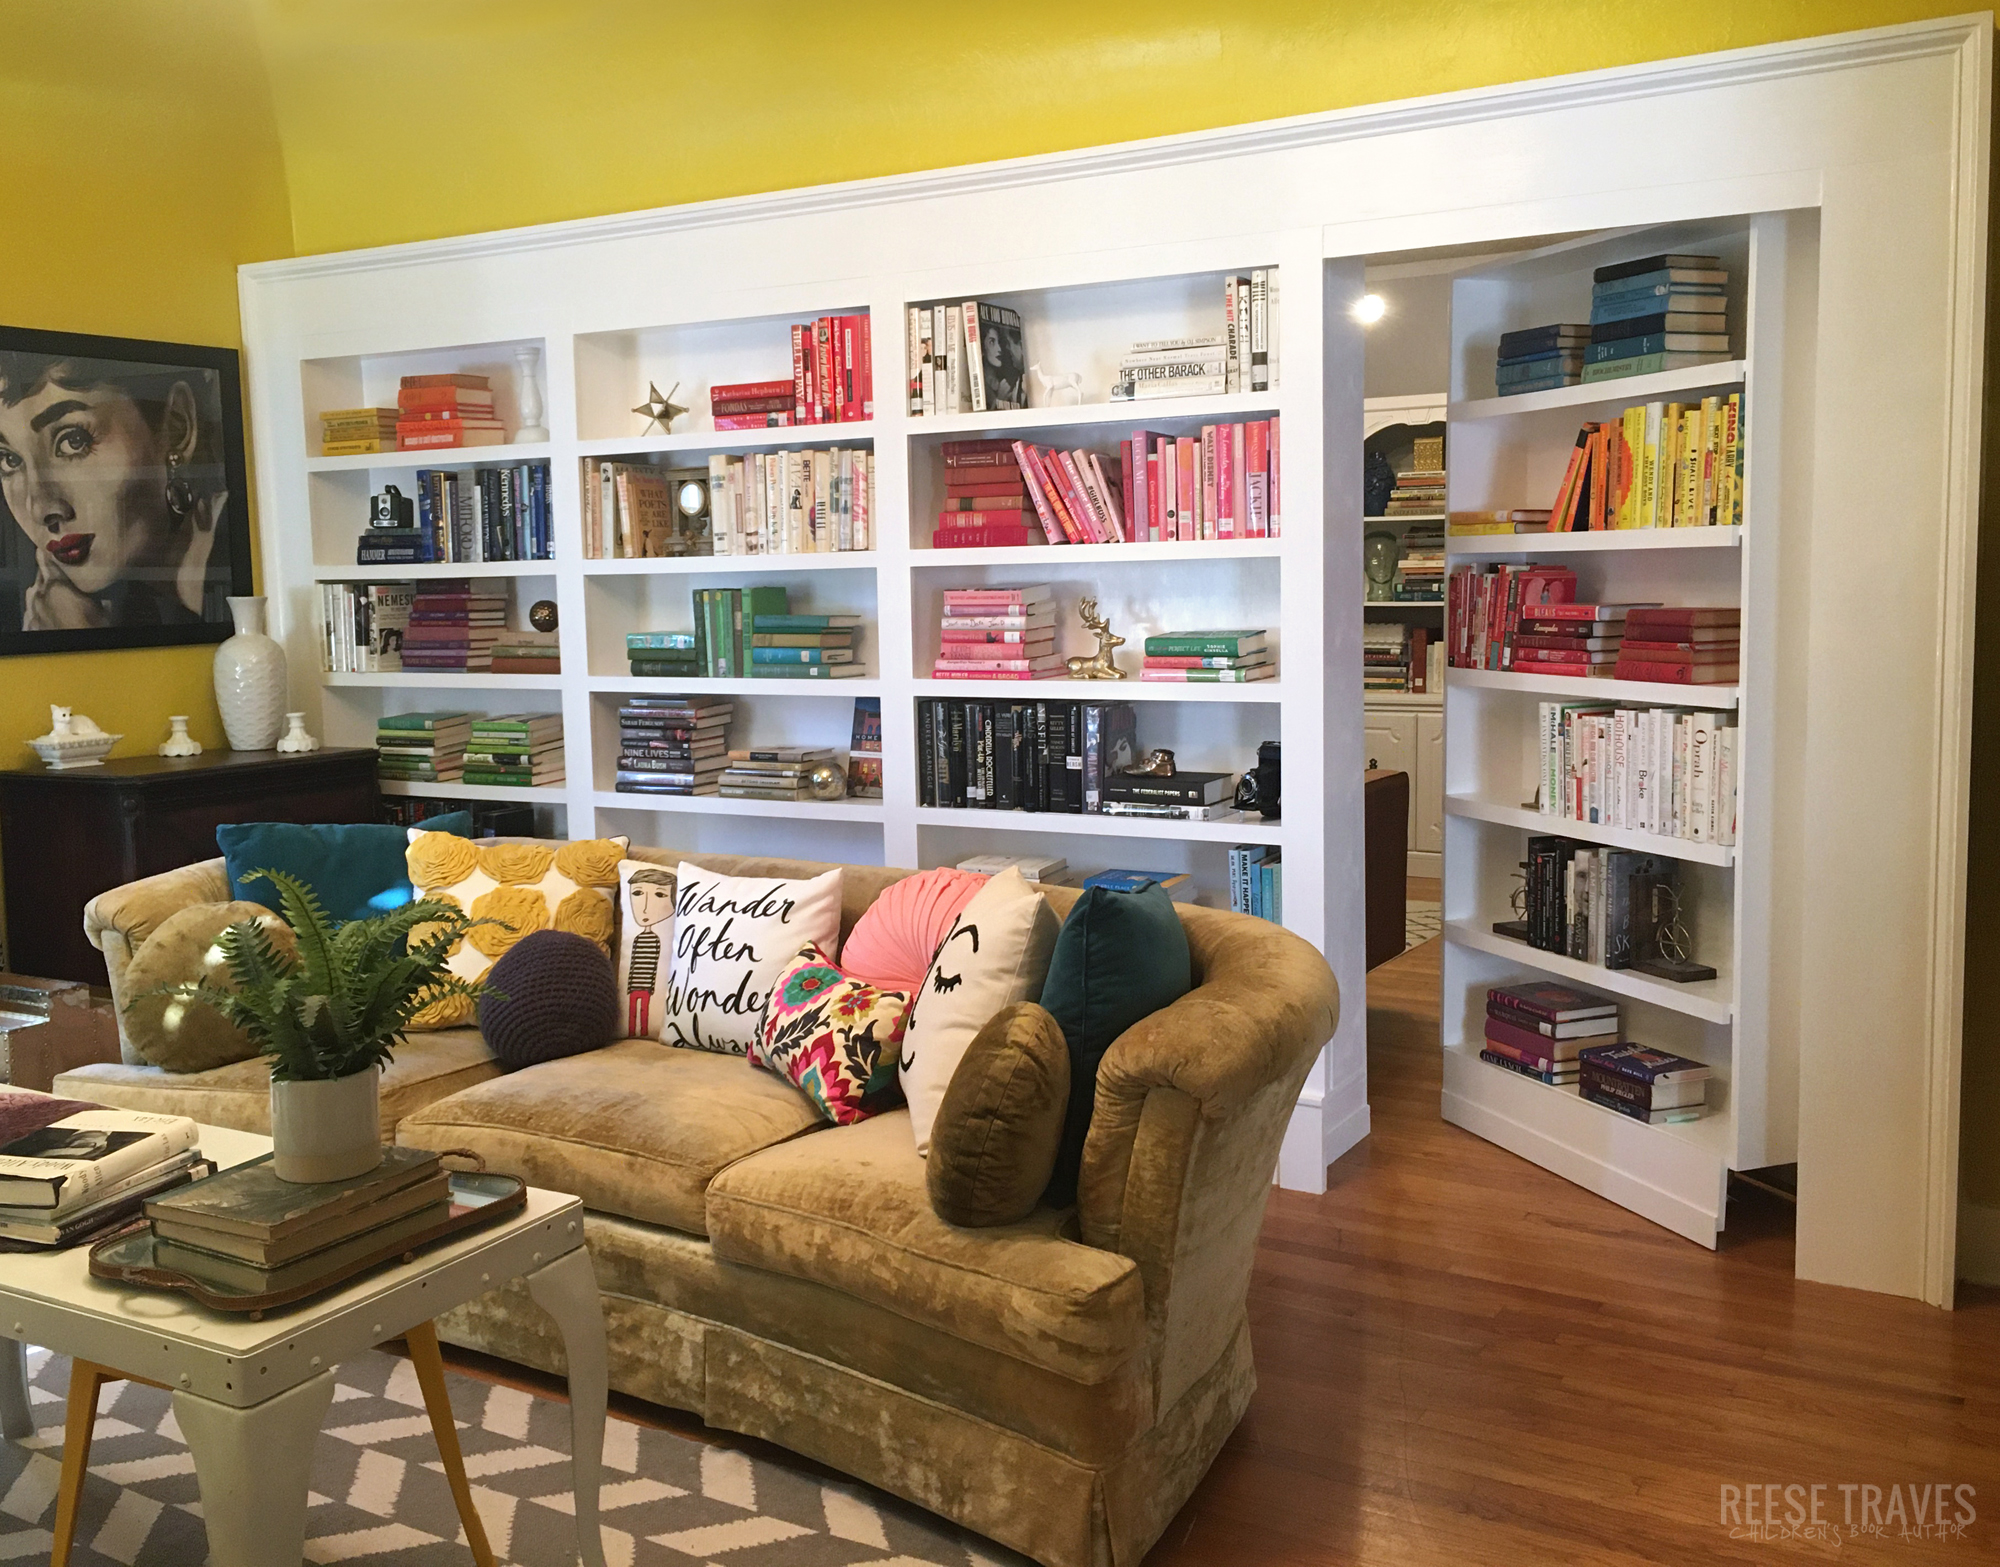
Credit: reesetraves.com
Tools And Materials You Will Need
Having the right tools makes the job easier and your bookshelf stronger.
Essential Tools
- Tape measure and pencil
- Circular saw or table saw (for cutting large panels)
- Power drill and bits
- Screwdriver
- Clamps
- Level
- Square (to check corners)
- Hammer and nails (for backing)
- Sandpaper or a sander
- Paintbrush or roller (for finishing)
Materials
- Plywood or solid wood panels for the frame and shelves
- Thinner plywood or MDF for the backing
- Wood glue
- Wood screws (1¼” and 2″)
- Door hinges (2-3 per door)
- Handles or knobs
- Magnetic catches or latches
- Paint, stain, or clear finish
- Glass panels (optional, for doors)
- Shelf pins (if shelves are adjustable)
- Edge banding (optional, for a clean look on plywood)
Safety Gear
Always wear:
- Safety glasses
- Dust mask
- Hearing protection (when cutting)
How To Build Bookshelves With Doors: Step-by-step
This section covers the full process, from building the bookshelf to adding doors.
Step 1: Cut The Wood
Use your plan as a guide. Cut all the main pieces:
- Sides (vertical pieces)
- Top and bottom (horizontal pieces)
- Shelves (number depends on your needs)
- Back panel
- Door panels
Cut with care. If using plywood, keep the “good” side facing up when cutting. Mark each piece so you don’t mix them up.
Common Beginner Mistake:
Cutting the wood before double-checking measurements. Always measure twice, cut once.
Step 2: Drill Shelf Pin Holes (optional)
If you want adjustable shelves, drill a row of holes inside each side panel. Use a shelf pin jig or a scrap of wood as a guide to keep holes straight and evenly spaced. Usually, holes are 1¼” apart and start 2″ from the bottom.
Step 3: Assemble The Bookshelf Box
Lay the two side panels flat. Attach the top and bottom panels between them using wood glue and screws. Make sure the corners are square. Clamp the pieces while you drill to keep them steady.
For extra strength, add a center divider if your shelf is wide.
Example
If your bookshelf is 72″ tall, 36″ wide, and 12″ deep:
- Sides: 72″ x 12″
- Top/Bottom: 34½” x 12″ (subtract the thickness of both sides from the total width)
Step 4: Attach The Shelves
Decide the spacing of your shelves—usually 10″-12″ apart for books. For fixed shelves, mark the positions and screw through the side into each shelf. For adjustable shelves, rest them on shelf pins.
Don’t forget to leave room at the bottom for the door to swing open.
Step 5: Add The Back Panel
Lay the bookshelf face down. Attach the back panel using nails or short screws every 6-8 inches. The back adds strength and keeps the bookshelf square.
If you want to run cables or wires inside, cut holes in the back panel before attaching.
Step 6: Prepare And Attach The Doors
There are many ways to build doors, but here are two common types:
- Simple slab doors: Cut plywood or MDF to size. Sand the edges smooth.
- Frame-and-panel doors: Build a frame from narrow wood strips, then attach a flat panel inside. This looks fancier but takes more work.
If you want glass doors, build a frame and set the glass inside with silicone or rubber gasket.
Sizing The Doors
Each door should be slightly smaller than the opening, leaving a 1/8″ gap on all sides so the doors do not rub.
Attaching Hinges
Mark and attach the hinges to the doors first, then screw them onto the bookshelf. Use a level so the doors hang straight. Most doors need two hinges; tall or heavy doors may need three.
Step 7: Attach Handles And Catches
Screw handles or knobs onto the doors. If you want the doors to stay shut, add magnetic catches or latches inside. Test that the doors open and close smoothly.
Step 8: Sanding And Finishing
Sand all surfaces with fine sandpaper (at least 180 grit). Wipe off the dust. Apply your chosen finish—paint, stain, or clear coat. Let each coat dry and sand lightly between coats for a smooth feel.
If using edge banding (for plywood), iron it on before finishing for a professional look.
Step 9: Install The Bookshelf
Move the bookshelf to its final spot. If it is tall or top-heavy, anchor it to the wall with brackets for safety, especially in homes with children.

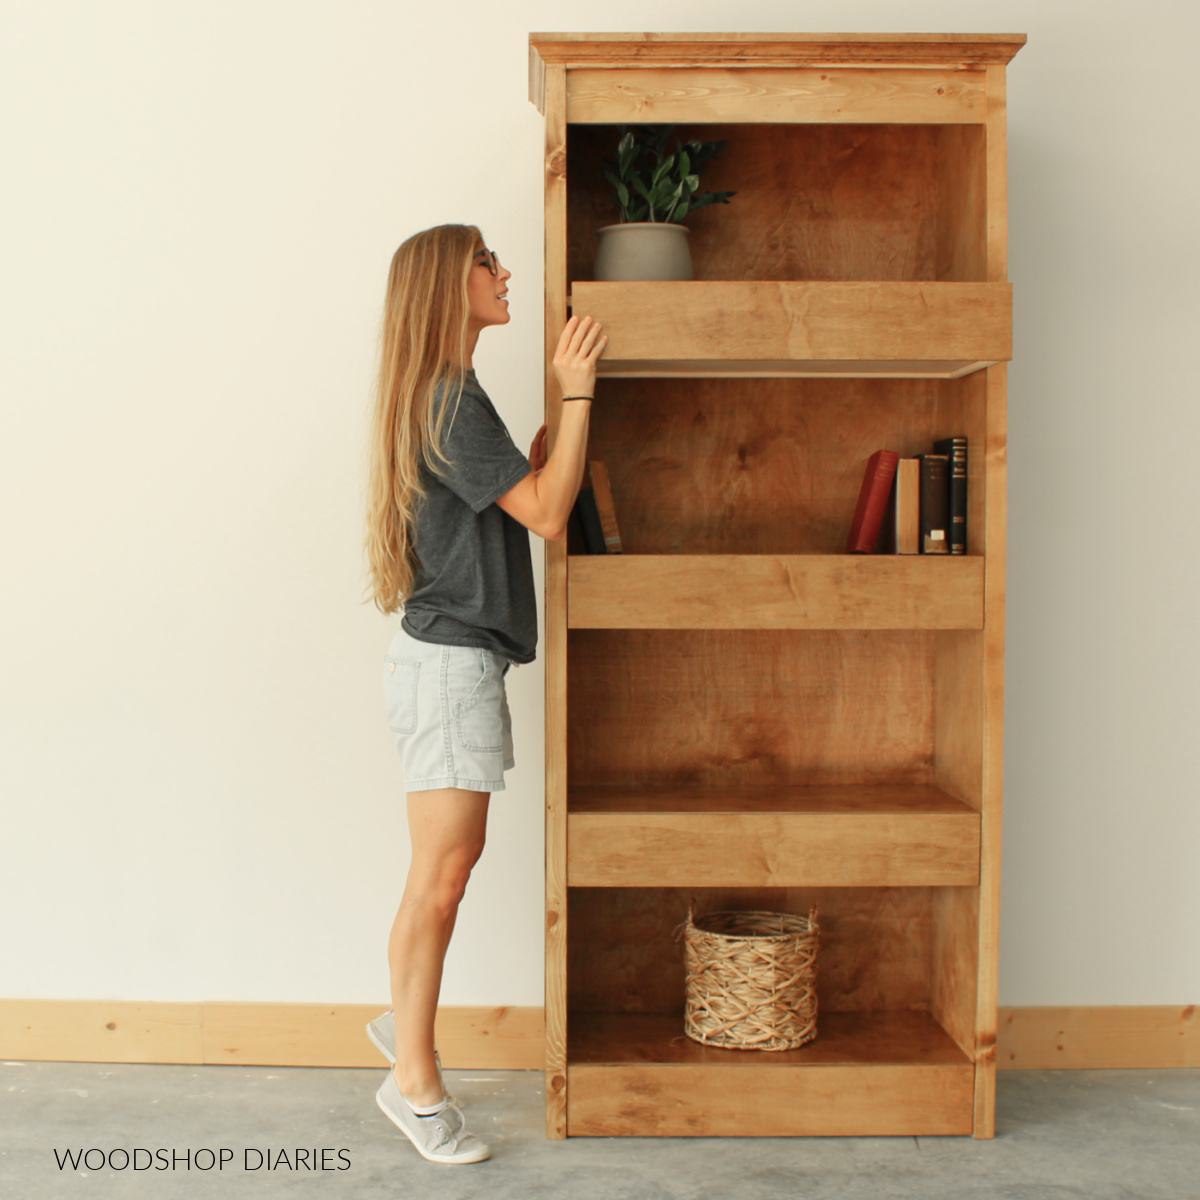
Credit: www.youtube.com
Customization Ideas
A homemade bookshelf does not have to be basic. Here are ways to make yours unique:
- Adjustable shelves for different book sizes
- Glass doors for display items
- Built-in lighting (LED strips inside)
- Crown molding for a classic look
- Painted interiors for a pop of color
- Soft-close hinges for quiet doors
- Locks for private items
Adding these features is easier during the building process, so plan ahead.
Comparing Bookshelf Materials
Choosing the right material makes a difference in price, durability, and appearance. Here is a comparison of common bookshelf materials:
| Material | Pros | Cons | Cost (per 4×8 sheet) |
|---|---|---|---|
| Plywood | Strong, lightweight, easy to paint | Edges can splinter, needs edge banding | $50 – $80 |
| MDF | Very smooth, cheap, easy to cut | Heavy, absorbs water, needs sealing | $40 – $60 |
| Solid Wood | Beautiful, durable, can be refinished | Expensive, can warp, more work to finish | $100 – $200 |
| Particleboard | Very cheap, easy to find | Weak, chips easily, not for heavy books | $20 – $35 |
Credit: www.woodshopdiaries.com
Choosing The Right Doors For Your Bookshelf
Not all doors are the same. The right choice depends on your goals.
| Door Type | Main Features | Best For | Estimated Cost (per pair) |
|---|---|---|---|
| Slab (Flat Panel) | Simple, easy to make, modern look | Budget projects, beginners | $20 – $40 |
| Frame-and-Panel | Classic style, strong, can add glass | Traditional rooms, custom builds | $40 – $90 |
| Glass Panel | Show off items, keeps dust out | Display shelves, light feel | $60 – $130 |
| Louvered | Air flow, unique look | Media storage, humid places | $50 – $100 |
If you are new to woodworking, slab doors are easiest. If you want to display collectibles, consider glass.
Common Mistakes And How To Avoid Them
Many beginners make the same errors when building bookshelves with doors. Here is how to avoid them:
- Not measuring the space correctly: Always measure the spot where the bookshelf will go. Allow for baseboards and uneven walls.
- Forgetting door swing space: Doors need extra room to open fully. Plan for nearby furniture and walls.
- Using the wrong screws: Long screws can poke through; short screws may not hold. Use the right size for your wood thickness.
- Skipping sanding or finishing: Unfinished wood will collect dirt and may warp. Sand and seal for a smooth, long-lasting surface.
- Not anchoring tall shelves: Tall bookshelves can tip over. Always anchor to a wall for safety.
A non-obvious insight: When making multiple bookshelves, cut all like pieces together for identical size and appearance. Also, finish the doors before attaching them—it is much easier to paint or stain them flat.
Real-life Example: Building A Simple Bookshelf With Doors
Let’s walk through a basic example to see how it comes together.
- Goal: A 5-shelf, 2-door unit for a home office, 72″ high x 36″ wide x 12″ deep.
- Material: ¾” plywood, slab doors, painted white.
Steps:
- Cut Parts: Sides (2), top/bottom (2), shelves (5), back (1), doors (2).
- Drill Shelf Holes: For adjustable shelves, drill inside sides.
- Assemble Box: Attach top and bottom between sides with screws.
- Add Shelves: Fix or rest on pins.
- Attach Back: Nail on ¼” plywood back.
- Make Doors: Cut to fit, sand edges.
- Attach Hinges: Screw to doors, then to shelf.
- Add Handles and Catches: For easy use.
- Finish: Sand, prime, then paint all surfaces.
- Install: Move to office, anchor to wall.
Total cost: About $140 for materials, 1-2 days of work.
Maintenance And Care Tips
A bookshelf with doors is easy to keep clean and strong with simple care:
- Dust regularly: Use a soft cloth to avoid scratches.
- Check hinges: Tighten loose screws every 6 months.
- Avoid overload: Too many heavy books can bow shelves. Spread out weight evenly.
- Clean glass: For glass doors, use a non-ammonia glass cleaner.
- Watch for moisture: Keep away from leaks and high humidity to prevent warping.
If you notice sagging shelves, add extra shelf supports or flip the shelf over every few months.
When To Call A Professional
Some projects are too big or complex for DIY. Call a pro if:
- You want built-in shelves that go floor to ceiling
- The shelf must fit around a fireplace, window, or odd-shaped wall
- You have no tools or woodworking experience
- You want high-end materials or detailed trim
A skilled carpenter can make your vision real, but at a much higher cost (often $1000+ for custom units).
Bookshelf With Doors Vs. Open Shelving
Many people ask if doors are worth the extra work. Here is a quick comparison:
| Feature | With Doors | Open Shelving |
|---|---|---|
| Protection from dust | Excellent | Poor |
| Display options | Can use glass | Full display |
| Looks neater | Yes | No |
| Easy access | Slightly less | Very easy |
| Build difficulty | Harder | Easier |
| Cost | Higher | Lower |
Doors are great for keeping things tidy and protected, but open shelves are easier and cheaper.
Environmentally Friendly Choices
If you want a green bookshelf, use:
- FSC-certified wood (from managed forests)
- Low-VOC paints and finishes (safer for indoor air)
- Reclaimed wood (reused lumber)
These choices are better for your home and the planet. For more on certified wood, see the Forest Stewardship Council.
Troubleshooting: Problems And Solutions
Doors Don’t Line Up
- Problem: Gaps between doors or uneven.
- Solution: Loosen hinge screws, adjust, and tighten again. Use a level.
Doors Rub Or Won’t Close
- Problem: Doors are too tight.
- Solution: Sand edges gently. Check for screws sticking out.
Shelves Bow In The Middle
- Problem: Too much weight or long shelf.
- Solution: Add a center support or use thicker wood.
Paint Peels Or Scratches
- Problem: Poor surface prep.
- Solution: Sand and clean before painting. Use quality paint.
Frequently Asked Questions
How Thick Should Shelves Be For A Bookshelf With Doors?
For most bookshelves, ¾” thick plywood or solid wood is best. If your shelves are longer than 36″, consider 1″ thick wood or add supports to prevent sagging.
Can I Use Glass For The Doors?
Yes, glass doors are popular for display shelves. Use tempered glass for safety, and set it into a wood frame. Make sure the hinges are strong enough for the extra weight.
What Is The Best Finish For Bookshelves?
A clear polyurethane finish is durable and protects wood from scratches. For painted shelves, use a water-based enamel for a smooth, hard surface. Always sand between coats for a pro look.
How Do I Make Sure The Doors Close Evenly?
Install the bookshelf on a level floor. Use a level when attaching doors and adjust the hinges as needed. Magnetic catches help keep doors closed and even.
How Much Does It Cost To Build A Bookshelf With Doors?
A simple DIY bookshelf with doors can cost $100–$300 for basic materials. Custom features, solid wood, or glass can raise the price. Hiring a carpenter can cost $1000 or more.
Building your own bookshelf with doors is a project that brings both function and beauty to your home. It lets you control the look, size, and features, and offers a sense of pride every time you use it. With careful planning, the right materials, and attention to detail, you can create a piece that lasts for years.
Whether you want a simple bookshelf for your office or a showpiece for your living room, the steps above can guide you from start to finish. If you take your time and learn from each stage, your new bookshelf will be both useful and something you are proud to show off.